Master Professional Fabric Cutting: From Basic Scissors to Laser Technology
Cutting fabric accurately can make or break any sewing project. Taking time to prepare your material, choosing proper tools, and cutting along the correct lines and grain sets you up for smooth sewing and a polished finish. Getting the basics right saves time, fabric, and a lot of frustration.
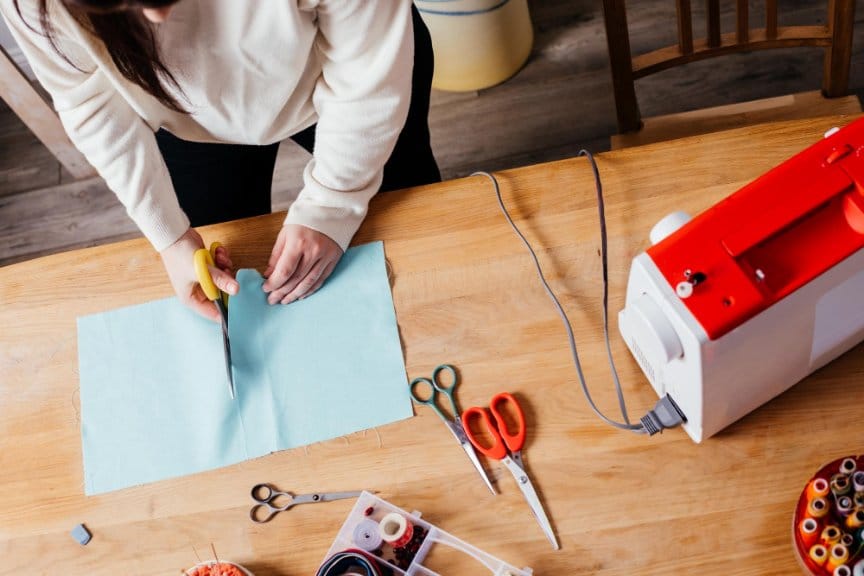
Start with clean, pressed fabric and use sharp scissors or a rotary cutter, making sure every line and measurement is accurate. Careful layout, steady hands, and the right technique all help avoid mistakes and wasted material. The right approach at this stage gives your sewing projects a professional look.
Table of Contents
Key Takeaways
- Press and prepare fabric before cutting
- Use accurate measuring and marking techniques
- Pick the best tools and methods for clean, precise cuts
Interactive Tools Available: Enhance your cutting skills with our comprehensive fabric cutting tools including a fabric type selector, cutting calculator, and troubleshooting guides.
Understanding Fabric and Its Structure
When cutting fabric for sewing, pay close attention to its type, direction, and edges. Knowing how the threads run and how the fabric is made helps handle it without mistakes or waste.
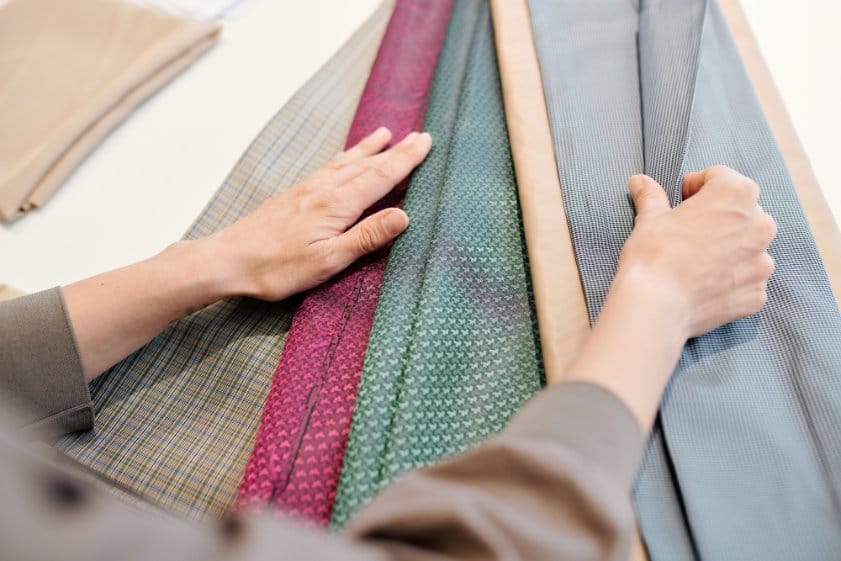
Types of Fabric and Their Characteristics
Fabric comes in two main types: woven and knit.
- Woven fabrics are made by weaving warp (vertical) and weft (horizontal) threads together. These can feel crisp or soft, and they fray at the edges. Common woven fabrics include cotton, linen, and denim.
- Knit fabrics are made by looping yarn. They stretch more than woven fabrics. T-shirts and leggings are usually made from stretchy fabrics like knits.
Always check the fabric’s thickness and if it has a pattern or nap (like velvet). Specialty fabrics, such as satin or chiffon, need extra care because they can slip or snag.
Not sure which cutting approach to use for your specific fabric? Our Fabric Type Selector Tool provides personalized cutting advice for cotton, silk, velvet, knits, and more.
Identifying Warp, Weft, and Bias
Look for the direction of the threads before cutting.
- Warp threads run parallel to the selvage edge and are usually stronger.
- Weft threads run across from side to side, at a right angle to the warp.
The bias is any diagonal direction at a 45-degree angle to the warp and weft. Cutting on the bias makes fabric stretch more, which is useful for curved seams or flowing garments. Cutting on the wrong thread direction can change the way the finished piece fits or hangs.
What is cutting fabric at a 45-degree angle called?
Cutting fabric at a 45-degree angle to the grain is called cutting on the “true bias.” This diagonal cut gives maximum stretch and drape, making it perfect for bias tape, curved seams, and flowing garments.
Understanding Selvage and Selvage Edge
The selvage is the tightly woven edge running down the length of the fabric.
This edge does not fray and often has little holes, a different texture, or printed information. The selvage helps identify which direction is the length of the fabric. Avoid using the selvage in the finished part of a garment as it can behave differently than the rest.
Place pattern pieces with the grain line matching up parallel to the selvage for best results.
Should You Cut Off the Selvage Edge?
Whether to cut off the selvage depends on your project:
- Remove it when: Using tight seam allowances (1/4″ or 1/2″) where the selvage would show
- Keep it when: Using larger seam allowances and need the extra stability
- Creative uses: Some sewers use selvage edges as design elements or hemming details
Can I use the selvage as a hem?
Yes! The selvage can make an excellent finished edge for casual garments. Since it doesn’t fray, it eliminates the need for traditional hemming. This works particularly well for bohemian-style skirts, casual tops, or when the selvage has attractive text or design elements.
Grain Line and Its Importance
The grain line tells the direction of the fabric’s threads.
Sewing patterns mark the grain line with a long arrow. This line needs to be lined up parallel to the selvage, which means it will follow the direction of the warp threads. Ignoring the grain line causes garments to twist, stretch, or hang poorly.
Use a ruler or tape measure to make sure the grain line on paper patterns matches the fabric’s warp direction. This keeps the finished item stable and looking its best.
How do I know which way to cut fabric?
Follow this simple guide:
- Find the selvage – this runs lengthwise with the grain
- Look for the grain line arrow on your pattern
- Match the arrow parallel to the selvage edge
- Cut lengthwise along the stronger warp threads for most garments
Preparing Your Fabric for Cutting
Getting fabric ready to cut makes a big difference in how the final project turns out. Clean, smooth, and properly aligned fabric helps cut accurately, line up patterns, and avoid common mistakes.
The Three Main Methods of Preparing Fabric Before Cutting
1. Pre-washing and Pressing
Start by pre-washing your fabric. This step helps prevent any shrinking or color bleeding later, which is important, especially for cotton or linen. Wash fabrics according to their care label and let them dry fully before moving forward.
Once dry, lay the fabric flat and use a steam iron to remove all creases and wrinkles. Smooth fabric is easier to cut straight and measure evenly. Using plenty of steam helps work out tough creases.
For very delicate fabrics, lower the iron heat or place a pressing cloth over it. Ironing before cutting gives a better finish and keeps edges from stretching or distorting.
Do you wash fabric before or after cutting?
Always wash fabric before cutting for these reasons:
- Prevents shrinkage after your project is complete
- Removes sizing and chemicals that can affect cutting
- Allows adjustment for any changes in texture or drape
2. Aligning the Fabric and Removing Distortions
Proper alignment helps cut shapes that match up when sewn. First check the selvage – the tightly woven edge on both long sides of the fabric. Line up the selvages so the fabric lies flat and smooth, with no twists or bumps.
If the fabric is off-grain or distorted, gently pull opposite corners or run your hand diagonally across the fabric to realign the threads. Getting the fabric back “on grain” makes it easier for patterns and seams to come out right.
Here’s a quick checklist to follow:
- Straighten the selvages
- Feel for any puckering or stretching
- Adjust until the weave runs square across the fabric
- Make sure there’s no excess tightness or waves
3. Folding: Lengthwise and Crosswise
Folding the fabric helps save space and makes it easier to place patterns. Most often use the lengthwise fold, where the two selvage edges come together. This fold follows the direction of the fabric grain, which is best for most garment patterns.
Sometimes, use a crosswise fold by bringing the raw cut edges together instead. This can help for specific pattern pieces or very wide fabric. Always double-check the fold is smooth and even so layers match up when cutting.
When folding, check alignment by making sure the selvages or cut edges are perfectly even. This keeps cuts accurate and shapes the same on both sides. A careful fold means less fabric shifting while cutting.
Choosing and Setting Up Cutting Tools
Setting up the right equipment before cutting fabric helps get straight, accurate lines and avoid mistakes. The type of tools, work surface, and markings all affect the outcome and make the process faster and easier.
How to Use a Fabric Cutter for Beginners
Rotary Cutters
For straight lines and quick work, rely on a rotary cutter with a sharp blade. It’s ideal for quilting and larger fabric pieces. Use a quilting ruler alongside it to keep lines even.
Do you push or pull a rotary cutter?
Always push a rotary cutter away from your body. Pulling the cutter toward yourself increases the risk of injury if it slips. Keep the safety guard engaged when not actively cutting.
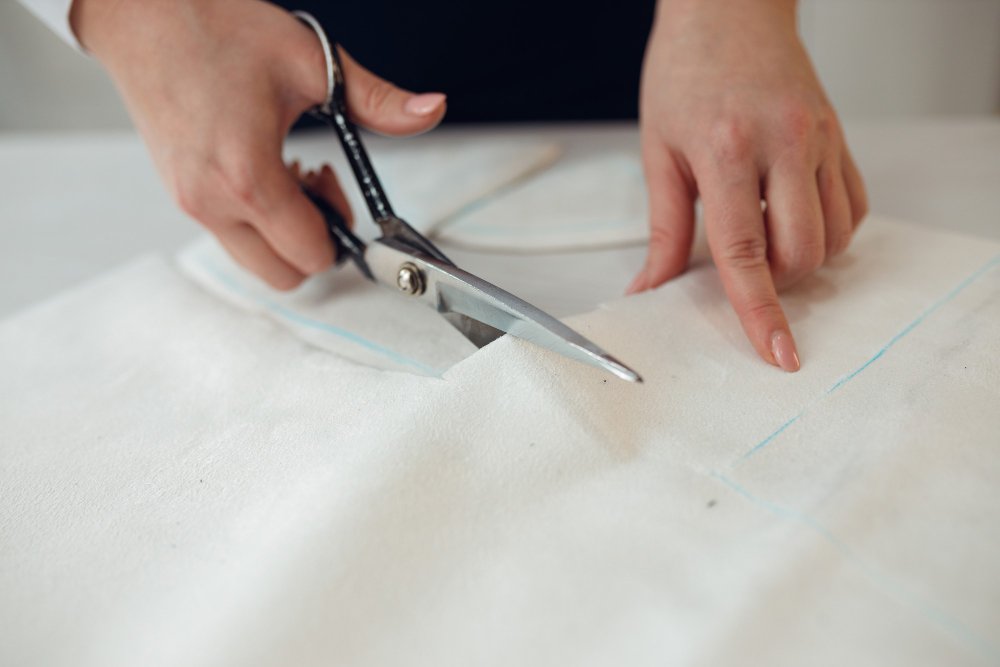
Fabric Scissors
Fabric scissors are best for detailed cutting. Keep a dedicated pair that only cuts fabric, since paper or other materials dull the blades. Sharp, bent-handled shears give better control when cutting curves and working through thick fabric.
Is there a right and wrong side to a rotary blade?
Yes! Rotary blades have a slight bevel. The flat side goes against the ruler for accurate cuts, while the beveled side faces the waste fabric. Most blades have markings to show correct orientation.
When trimming small areas or cutting out notches, switch to smaller embroidery scissors. Check tools regularly and sharpen or replace blades as soon as they start catching or snagging on the fabric.
Comparison Table: Cutting Tools
| Tool | Best Use | Key Features | Beginner Tips |
|---|---|---|---|
| Rotary Cutter | Straight, long cuts | Fast, clean, sharp blades | Use with ruler, push don’t pull |
| Fabric Scissors | All-purpose, curves | Bent handle, fabric-only | Keep blades sharp, never use on paper |
| Embroidery Scissors | Fine, small cuts | Pointed tips, precise | Perfect for notches and detail work |
Professional sewing experts at Threads Magazine emphasize that investing in quality cutting tools is one of the most important decisions for any sewer. Their decades of experience working with professional seamstresses confirms that sharp, well-maintained tools are essential for achieving consistent, professional results.
💡 Pro Tip: Use our interactive troubleshooting flowchart if you’re experiencing issues with any of these cutting tools.
Cutting Mats and Tables
A self-healing cutting mat protects rotary cutter blades and keeps the tabletop free from scratches. Pick a mat that is large enough for the biggest piece of fabric you expect to cut.
The mat’s printed grid lines help line up fabric and rulers precisely. Use the grid to square corners and keep everything even.
The cutting table needs to be sturdy and at a comfortable height to prevent back and shoulder strain. Clear the area before starting and make sure the fabric can lie flat. A smooth, uncluttered space also keeps cuts clean and accurate.
Marking Tools: Chalk, Pencils, and More
To mark cutting lines or sewing guides on fabric, use tailor’s chalk or fabric pencils. Tailor’s chalk makes clear, removable marks on most fabrics. Press lightly to avoid stretching the fabric.
On darker fabrics, switch to white or light-colored pencils that are made for fabric. Avoid regular pens, as they can leave permanent marks or bleed.
For very fine, precise lines, reach for a marking pen that dissolves in water or fades over time. Always test the marking tool on a fabric scrap first to make sure it comes off completely and doesn’t damage the fabric.
Types of Marking Tools
- Tailor’s chalk: Easy to remove, great for most fabrics
- Fabric pencils: Good for dark or delicate fabrics
- Water-soluble pens: Useful for detailed or temporary marks
Laying Out Patterns and Templates
Preparing for accurate fabric cutting starts with carefully organizing pattern pieces on the fabric. Focus on aligning the grainline, maximizing fabric use, and making sure nothing shifts during the process.
Placing Sewing Patterns on Fabric
What is the first step to cutting fabric?
The first step is always pressing your fabric smooth and checking the pattern layout diagram. This ensures you understand how pieces should be arranged before making any cuts.
Begin by checking that fabric is pressed and smooth. Wrinkles can affect the way pattern pieces lay and cause mistakes in cutting.
Match pattern grainlines with the grain of the fabric by using the grainline arrows printed on the sewing patterns. This helps keep finished garments from twisting or stretching out of shape. If a piece is labeled “place on fold,” align it along the fabric’s folded edge.
To use fabric efficiently, lay out large pattern pieces first, then fill gaps with smaller ones. Keep the pattern pieces flat, and, if needed, check the layout instructions from the sewing pattern to avoid errors.
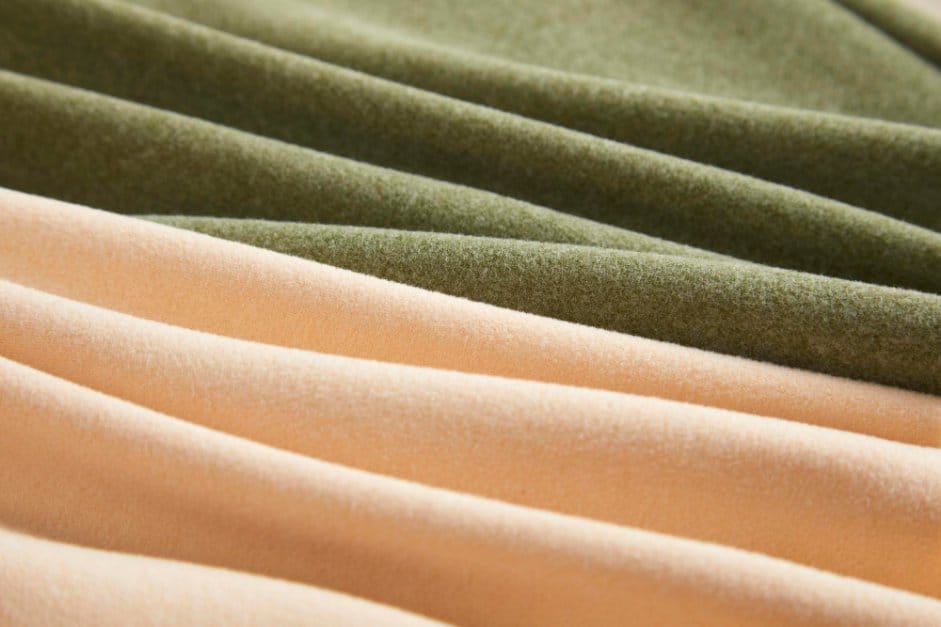
What is a nap in sewing?
A nap is the directional surface texture of fabric. Fabrics like velvet, corduroy, and fleece have a nap that feels smooth in one direction and rough in the opposite. All pattern pieces must face the same direction when cutting napped fabrics to ensure uniform color and texture.
Sometimes, use pattern weights instead of pins for delicate fabrics so pin holes won’t show. Making careful decisions at this stage helps avoid wasted fabric and ensures the final project looks as planned.
Planning Your Layout: Visualize your cutting plan with our Virtual Cutting Mat – drag and drop pattern pieces to optimize fabric usage before you cut.
Pinning and Marking Pattern Pieces
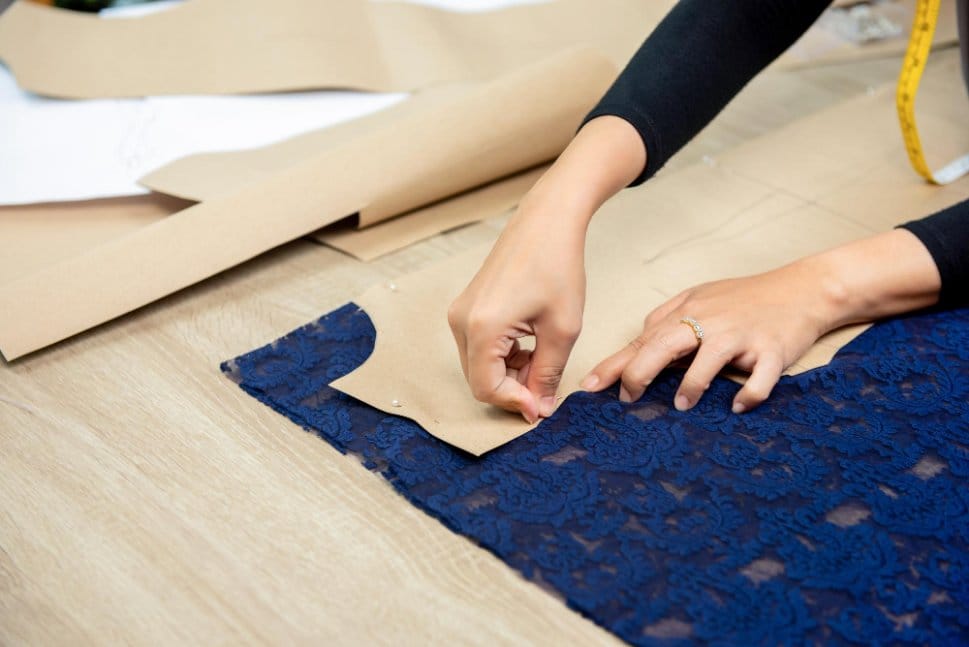
Once every pattern piece is placed, secure them to the fabric. Sharp pins work best, but for very thin or delicate fabrics sometimes pattern weights work better. Insert pins inside the seam allowance so pin holes won’t show on the finished project.
Mark details like darts, notches, and button placements directly onto the fabric while the patterns are still attached. Use tailor’s chalk, fabric markers, or tracing paper for clear marks. Make sure to mark essential points like the center front, grainlines, and fold lines.
Don’t skip any markings, as these guide during sewing and keep the pieces properly aligned. Taking time to pin and mark accurately makes assembly easier and improves the final look.
Do you cut fabric with right sides together?
This depends on your pattern:
- Symmetrical pieces: Cut with fabric folded, right sides together
- Asymmetrical pieces: Cut single layer to avoid mirror images
- Directional prints: Cut single layer to control pattern placement
Measuring and Marking for Accurate Cuts
Cutting fabric the right way starts with careful measuring and clear marking. Follow each step closely so that pieces join accurately and match the pattern.
Taking Accurate Measurements
How to cut the fabric correctly?
Always start by laying the fabric flat on a table and smoothing out any wrinkles. If the fabric has a selvage, align it straight with the edge of the cutting mat.
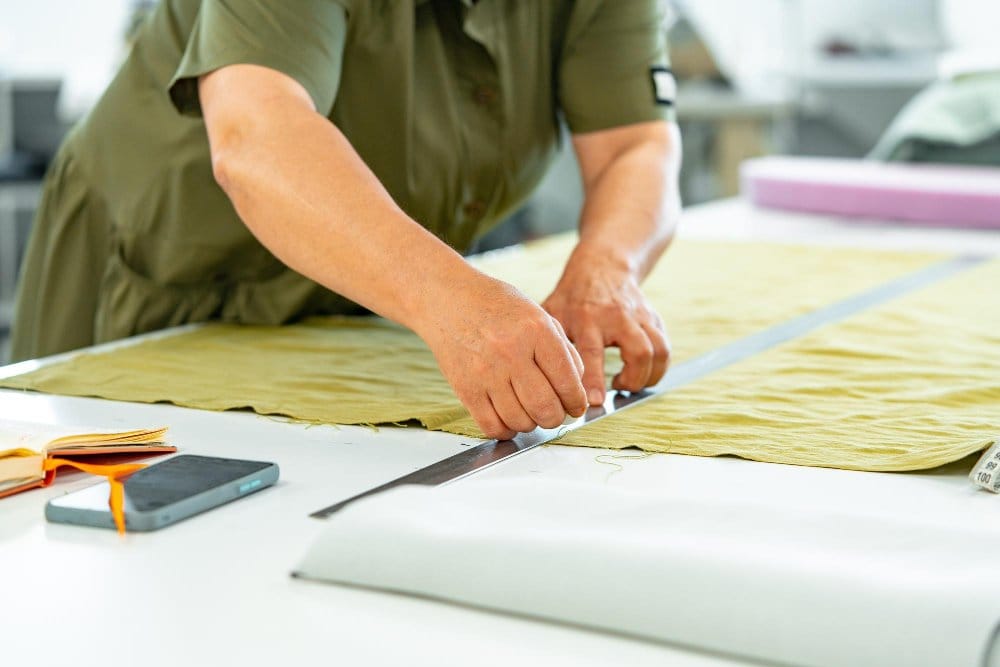
To keep cuts true, use a ruler or a measuring tape to check the length and width needed. For squares or blocks, double-check each side. Even a small measuring mistake can cause pieces not to match up later.
Here’s a list of tools for accurate measurement:
- Measuring tape: Flexible and good for longer cuts
- Clear ruler or quilting ruler: Perfect for getting right angles and straight lines
- Cutting mat with grid lines: Helps line up edges and keep measurements accurate
Never cut before being sure markings are correct. Accurate measurement at this stage keeps all blocks and squares the right size.
Marking Seam Allowance and Cut Lines
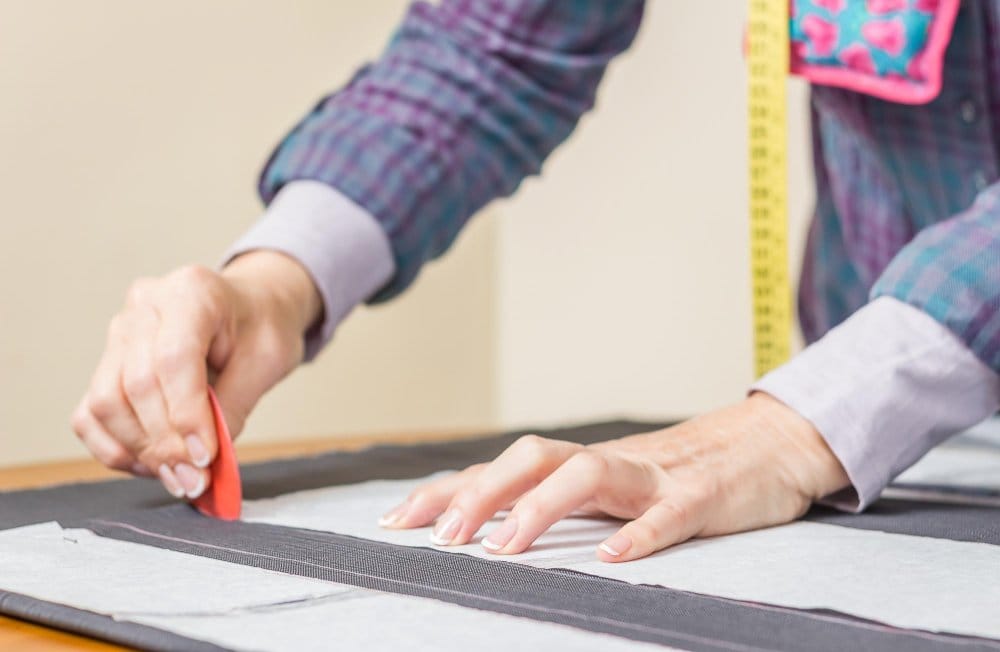
Before cutting, mark the seam allowance on each piece. Seam allowance is the extra space between the stitch line and the fabric edge, usually 1/4″ to 5/8,” depending on the pattern. Use tailor’s chalk, a washable marker, or a fabric pencil.
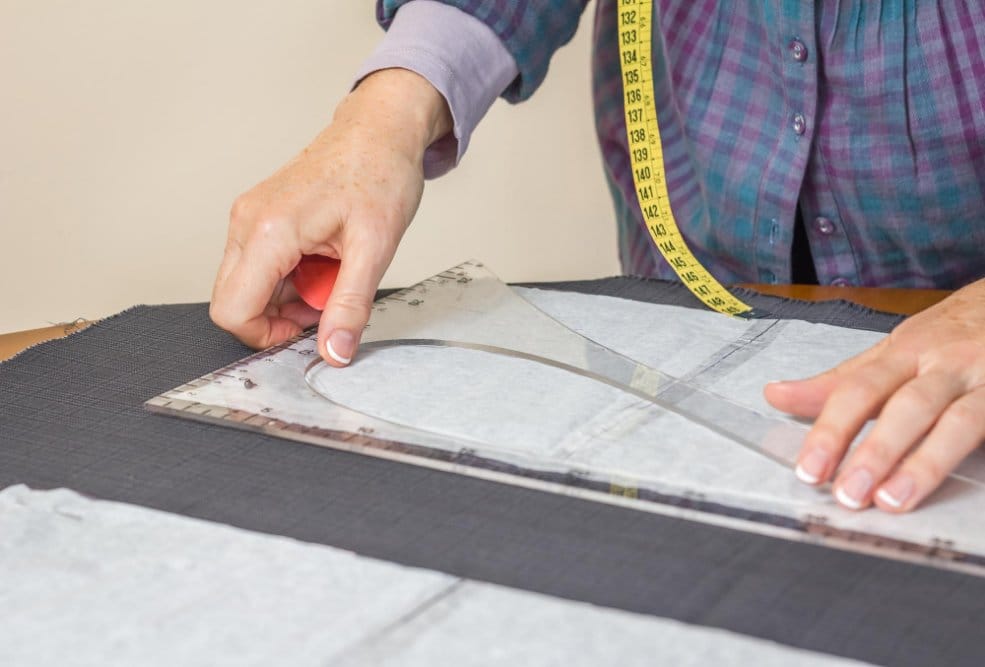
To get straight, visible marks, hold the ruler steady and draw along it. For curved pieces, use a flexible ruler or gently trace with the marking tool. On darker fabrics, use a light-colored marker so the lines are easily visible.
Label each piece if making blocks or several parts for a quilt. Marking every seam allowance and cut line precisely helps sew straight seams and match up corners later. It also stops accidentally cutting off part of the seam allowance, which could affect how the pieces fit together.
Calculate Your Requirements: Not sure how much fabric you need? Our Cutting Calculator determines yardage requirements and helps optimize your layout for maximum efficiency.
What are the rules in cutting fabric?
Essential cutting rules include:
- Always cut on grain unless the pattern specifies otherwise
- Use sharp tools – dull blades cause fraying and uneven cuts
- Mark before cutting – double-check all measurements
- Cut in long, smooth strokes – avoid choppy, short cuts
- Keep fabric flat – prevent shifting during cutting
Cutting Techniques for Different Projects

Cutting fabric is more than simply following lines – accuracy depends on how material is prepared, measured, and handled. Using the right cutting technique matters whether working with single or multiple fabric layers, making straight cuts, or shaping patterns.
What are the three main types of cutting techniques?
- Straight Cutting: Using scissors or rotary cutters to create straight lines
- Curve Cutting: Cutting along curved lines with careful scissor control
- Notch Cutting: Making small precision cuts for alignment marks
Cutting Single and Multiple Fabric Layers
When cutting a single layer, lay fabric flat and press out every crease so edges stay even. Use pattern weights or pins to keep the pattern steady and to stop the fabric from moving.
For multiple layers, stack the fabric evenly and make sure all layers are smooth. Pin through all the layers at main points, like corners and edges, to keep them from slipping. When cutting, use sharp fabric scissors or a rotary cutter for clean edges.
How many layers of fabric can you cut at once?
This depends on your tools and fabric weight:
- Scissors: Maximum 4 layers for accurate cutting
- Rotary cutter: Up to 6-8 layers of quilting cotton
- Thicker fabrics: Reduce to 2-3 layers maximum
Cutting several layers at once helps save time, but make sure each layer stays aligned so pieces are the same size. Don’t cut too many layers at once, usually no more than four, to keep accuracy and avoid fabric shifting.
Straight Line and Strip Cutting
How to cut fabric perfectly straight?
To cut straight lines or strips, first make sure the fabric grain is aligned with the ruler or the lines on the cutting mat. Smooth the fabric so there aren’t any wrinkles that can lead to crooked cuts.
Use a clear acrylic ruler to measure and mark the width of each strip. Hold the ruler steady while using a rotary cutter with a sharp blade to make clean cuts. If the project needs lots of strips, layer the fabric and cut several at once to keep strips even.
Using the mat’s marked lines helps guide cuts, especially for quilting fabrics. If using fabric scissors, keep the lower blade on the table for more control and precision.
Is it better to cut fabric with scissors or rotary cutter?
Each tool has its strengths:
| Situation | Best Tool | Why |
|---|---|---|
| Long straight cuts | Rotary cutter | Faster, more accurate on straight lines |
| Curves and details | Scissors | Better control for intricate shapes |
| Multiple layers | Rotary cutter | Cuts through more layers cleanly |
| Delicate fabrics | Scissors | More gentle, less likely to stretch |
Master the fundamentals of rotary cutting with this comprehensive tutorial that covers proper technique, safety, and achieving consistently accurate cuts:
Cutting Shapes: Blocks, Squares, and Templates
For cutting shapes like blocks or squares, use templates or pattern pieces. Place the template on the pressed fabric, pin it in place, then carefully cut around it with sharp scissors or a rotary cutter.
Trace around templates with tailor’s chalk or a washable pen when extra accuracy is wanted. Double-check that all corners are square, especially for patchwork projects.
When cutting uncommon shapes, move slowly and turn the fabric instead of the scissors for a smoother, more precise cut. Reusable templates made from cardboard or plastic are helpful for keeping shapes consistent across multiple pieces.
Before You Start Cutting: Download our printable cutting checklist to ensure you haven’t missed any crucial preparation steps.
Specialty Fabric Cutting Techniques
Different fabrics require specific cutting approaches for best results. Understanding how to handle challenging materials prevents mistakes and ensures professional-looking projects.
Cutting Velvet and Napped Fabrics
Working with Nap Direction
Velvet, corduroy, and similar fabrics have a directional nap that affects color and texture. Run your hand across the fabric – it feels smooth in one direction and rough in the other.
- Cut all pieces facing the same direction for uniform appearance
- Use “with nap” layout instructions from your pattern
- Mark the nap direction with chalk arrows before cutting
Cutting Techniques for Velvet
- Cut single layers to prevent slipping
- Use sharp scissors instead of rotary cutters
- Place tissue paper under the fabric for stability
- Avoid pressing directly on the nap
Cutting Stretch and Knit Fabrics
Managing Stretch During Cutting
Knit fabrics can distort during cutting. Here’s how to maintain their shape:
- Use pattern weights instead of pins
- Cut with fabric relaxed, not stretched
- Support the fabric’s weight while cutting
- Use sharp rotary cutters for clean edges
4-Way Stretch Considerations
- Test stretch direction before cutting
- Match stretch to pattern requirements
- Use ballpoint pins to avoid runs
- Cut in the direction of least stretch when possible
Cutting Delicate Fabrics
Silk and Chiffon
These slippery fabrics require special handling:
- Use tissue paper underneath for stability
- Try fabric stabilizer spray for better control
- Cut with very sharp scissors
- Use fine pins only in seam allowances
Different types of lace need different approaches:
- Chantilly lace: Cut between motifs when possible
- Guipure lace: More stable, cuts like regular fabric
- Beaded lace: Use small scissors, avoid cutting through beads
Modern and Industrial Cutting Methods
Beyond traditional scissors and rotary cutters, modern technology offers advanced cutting solutions for both hobbyists and professionals.
Laser Cutting for Fabrics
How Laser Cutting Works
Laser cutting uses a concentrated beam of light to cut through fabric with extreme precision. The process offers several advantages:
- Clean edges: Heat seals synthetic fabrics to prevent fraying
- Intricate designs: Can cut complex patterns impossible with traditional tools
- Speed: Much faster than manual cutting for detailed work
- Consistency: Computer-controlled for identical results
Suitable Fabrics for Laser Cutting
| Fabric Type | Laser Compatibility | Results |
|---|---|---|
| Cotton | Excellent | Clean cuts, minimal charring |
| Polyester | Excellent | Sealed edges, no fraying |
| Silk | Good | Delicate handling required |
| Wool | Fair | May char, test first |
| PVC/Vinyl | Avoid | Toxic fumes when cut |
Die Cutting Methods
Flatbed Die Cutting
Uses a hydraulic press with custom-made dies:
- Best for thick materials
- Ideal for repeated shapes
- Good for small to medium production runs
Rotary Die Cutting
Uses cylindrical dies for continuous cutting:
- Fastest method for high-volume production
- Perfect for consistent shapes
- Used in commercial garment manufacturing
Digital Cutting Systems
Computer-controlled cutting tables are becoming popular in both commercial and home settings:
- Automated pattern placement for maximum fabric efficiency
- Camera systems that follow printed guides
- Multi-tool heads that can cut, draw, and punch
- Software integration with design programs
Interactive Fabric Cutting Tools
Enhance your cutting skills with our comprehensive digital toolkit:
- Fabric Type Selector – Get personalized cutting advice for your specific fabric
- Cutting Calculator – Calculate yardage and optimize layouts
- Virtual Cutting Mat – Plan your cuts with drag-and-drop visualization
- Cutting Checklist – Printable preparation guide
- Layout Templates – Download optimized PDF patterns
- Troubleshooting Guide – Solve cutting problems step-by-step
Tips for Precision and Safety
Using the right cutting tools and caring for them well makes a big difference in fabric cutting. Being careful while handling and storing tools also helps avoid injuries and keeps blades sharp longer.
Maintaining Sharp Tools
What is the hardest fabric to cut?
Thick leather, multiple layers of denim, and heavily interfaced fabrics are among the most challenging to cut. These materials require the sharpest tools and sometimes specialized techniques.
Always make sure fabric scissors or rotary cutters are sharp before starting to cut. Dull blades can snag or tear fabric, making edges uneven and more difficult to sew later. For most projects, 8-inch fabric scissors work well because they cut smoothly without tearing.
Never use fabric scissors on paper or other materials – this dulls the blades quickly. Every few weeks, check tools and sharpen them if cuts start dragging or looking rough. Using a rotary cutter with a fresh blade also makes straight cuts simpler, especially when paired with a ruler.
Pressing the fabric with steam before cutting gives a smooth surface and makes accurate cuts easier. Cut on a flat, hard surface such as a cutting mat or table to ensure stability.
Safe Handling and Storage of Tools
How to cut fabric with scissors for beginners?
For beginners, follow these safety steps:
- Keep cutting hand relaxed – tension causes mistakes
- Support fabric with free hand – don’t let it hang and pull
- Cut in long, smooth strokes – avoid choppy movements
- Keep blades perpendicular to fabric for clean cuts
- Take breaks – tired hands make poor cuts
When not using cutting tools, always close them or retract the blade. This prevents accidental cuts. Store scissors and rotary cutters in a dedicated container or a drawer, away from where other items are grabbed.
Safety tips to follow:
- Keep tools out of reach of children and pets
- Place a guard over rotary cutters when not in use
- Do not leave tools under fabric or piles of material where they can be hard to see
Industry leaders like Singer Sewing Company recommend establishing proper cutting habits from the beginning. With over 170 years of sewing expertise, Singer’s guidance on fabric cutting fundamentals emphasizes the importance of proper fabric preparation, stating that “when cutting fabric, iron the fabric first to get any wrinkles and creases out of it, as these could cause issues when cutting.”
Always pay attention and use slow, steady motions when cutting. By using both hands properly – one holding the fabric taut and the other guiding the cutter – the risk of slips or injuries reduces. Keeping the work area tidy also means fewer chances for accidents.
Troubleshooting Common Fabric Cutting Challenges

Quick Problem Solving: Use our interactive troubleshooting flowchart to quickly diagnose and solve cutting issues with step-by-step visual guidance.
When cutting fabric, often dealing with pieces that fray or shift out of place, or finding that some cuts look jagged or too short. Learning how to handle these challenges helps keep projects accurate and clean.
Preventing Fraying and Shifting
How to make sure cut fabric doesn’t fray?
Fraying can ruin fabric edges before sewing even starts. To help, cut with sharp scissors or a rotary cutter, making sure the blade is not dull. Dull tools can make fraying worse because they don’t slice cleanly.
Handle the fabric carefully, holding it flat and smooth while cutting. Sometimes use pattern weights instead of pins to avoid shifting. Weights keep the fabric and pattern steady without distorting the fiber. If pins are needed, keep them inside the cutting line.
Which fabrics don’t fray when cut?
Several fabric types resist fraying:
- Knits: The looped structure prevents fraying
- Fleece: Synthetic construction doesn’t unravel
- Felt: Pressed fibers stay together
- Leather and vinyl: Non-woven materials
- Fused fabrics: Backing prevents fraying
Some fabrics move around a lot. For slippery materials, place tissue paper underneath to help hold things in place. After cutting, sometimes use a zigzag stitch or liquid seam sealant on the edge if fraying is still a problem.
| Tip | Purpose |
|---|---|
| Sharp scissors/rotary | Clean cuts, less fraying |
| Pattern weights | Stop fabric and pattern shifting |
| Tissue paper trick | Stabilize slippery fabrics |
| Zigzag/Seam sealant | Seal cut edges from fraying |
Fixing Inaccurate Cuts
How to get better at cutting fabric?
Improving cutting skills takes practice and attention to these key areas:
- Tool maintenance: Keep blades sharp and tools clean
- Proper setup: Use appropriate cutting surface and lighting
- Take your time: Rushing leads to mistakes
- Practice on scraps: Test techniques before cutting good fabric
- Learn from mistakes: Analyze what went wrong and adjust
Inaccurate cuts can happen if fabric and pattern alignment isn’t double-checked. Always line up the grain of the fabric with the markings on the cutting mat and make sure the ruler or pattern edges are straight.
If a cut is off, see if it can be trimmed to the correct shape without making the piece too small. Sometimes the piece has to be recut, making sure to follow the marked lines closely. To avoid mistakes, keep pattern pieces flat and use weights to hold them down.
Make sure to cut only one layer at a time for tricky shapes. When cutting on the fold, double-check that both layers are even and smooth, using clips at the edge to keep them from slipping. If a rough or jagged cut is found, even up the edge with sharp scissors before moving on.
Why is it called pinking?
Pinking gets its name from the flower called a “pink,” which has naturally serrated petal edges. Pinking shears create a similar zigzag edge that helps prevent fabric fraying.
Advanced Problem-Solving
Does it matter which direction you cut fabric?
Yes, direction matters significantly:
- With the grain: Easier cutting, stronger seams
- Against the grain: Can cause puckering and difficult handling
- Cross-grain: Good for stability but may be harder to cut smoothly
- On the bias: Creates stretch but requires careful handling
What is the most efficient way to cut fabric?
Efficiency comes from smart planning:
- Layout planning: Arrange all pieces before cutting
- Batch cutting: Cut all similar shapes together
- Tool selection: Use the right tool for each task
- Cutting order: Start with large pieces, then smaller ones
- Preparation: Have all tools ready before starting
Professional Pattern Matching and Layout
Advanced cutting techniques help create professional-looking garments and maximize fabric use.
Matching Stripes and Plaids
Working with patterned fabrics requires extra planning:
Stripe Matching Techniques
- Match stripes at major seam lines
- Use the “dominant stripe” as your guide
- Cut single layers for better control
- Add extra fabric for matching adjustments
Plaid Matching Strategies
- Identify the repeat pattern size
- Plan piece placement on the most prominent lines
- Consider pattern direction for asymmetrical plaids
- Test pattern matching on fabric scraps first
Directional Prints and One-Way Layouts
Some fabrics have clear directional elements:
- Animal prints with heads pointing one way
- Floral designs with stems going up
- Geometric patterns with obvious top/bottom
- Text or logos that read correctly
Layout Rules for Directional Fabrics:
- All pattern pieces must face the same direction
- Requires more fabric than standard layouts
- Plan carefully to avoid running short
- Consider the final garment’s appearance
Large-Scale Pattern Repeats
Working with oversized motifs:
- Plan placement of focal design elements
- Avoid cutting through important motifs
- Consider how patterns will align when worn
- Use single-layer cutting for control
Get Professional Templates: Download optimized pattern layout templates for common sewing projects to maximize fabric efficiency and minimize waste.
Storing and Organizing Cut Fabric for Sewing
After cutting fabric for a project, make sure each piece is easy to find and stays in good condition. Taking time to keep pieces labeled, clean, and organized helps prevent confusion and damage later during sewing.
Labeling and Sorting Pattern Pieces
Label each cut pattern piece right after cutting, using small sticky notes or masking tape with the piece name and fabric side. For example, write “Front Bodice – Right Side” to avoid mix-ups. If working with many pieces, use a chart or table to track quantities and which fabric is used for each pattern part.
| Pattern Piece | Quantity | Fabric Type | Notes |
|---|---|---|---|
| Front Bodice | 2 | Main | Cut on fold |
| Sleeve | 2 | Main | |
| Collar | 1 | Contrast | Interface |
Sort pieces by garment section and keep them together using large resealable bags, file folders, or labeled envelopes. This makes it easy to grab what’s needed when starting to sew. Storing leftover yardage for matching or patching also helps if extra pieces are needed later.
Keeping Cut Fabric Clean and Flat
To keep cut fabric flat, lay pieces on a clean surface or stack them between sheets of tissue or muslin. This stops creasing and keeps pieces smooth until sewing. Never fold cut pieces tightly to avoid unwanted lines or stretching.
Store fabric in a dry, dust-free place away from direct sunlight. Folders with pattern bars or wide hangers keep larger pieces flat and wrinkle-free. If there are several projects, use separate containers or shelf spaces to stop parts from different patterns mixing together. Clean hands and surfaces are key to prevent stains or lint ending up on the fabric.
Learn professional techniques for preserving your patterns while cutting multiple sizes:
Frequently Asked Questions
What is the correct procedure for cutting fabric?
The correct cutting procedure follows these steps:
1. Pre-wash and press the fabric
2. Check pattern layout instructions
3. Align fabric grain with cutting mat
4. Place and pin patterns according to layout
5. Mark all notches and construction details
6. Cut with sharp tools in smooth strokes
7. Transfer markings before removing patterns
What fabric cannot be cut?
Very few fabrics are impossible to cut, but some require special handling:
• PVC and vinyl: Can be cut but release toxic fumes with laser cutting
• Very thick leather: May need industrial tools
• Metal mesh fabrics: Require wire cutters
• Glass fiber: Needs protective equipment and special tools
How to cut for beginners?
Beginners should start with these fundamentals:
1. Choose stable fabrics like quilting cotton
2. Use sharp, dedicated fabric scissors
3. Start with simple, straight cuts
4. Practice on scraps first
5. Take your time – accuracy beats speed
6. Keep tools organized and within reach
Do you push or pull a rotary cutter?
Always push a rotary cutter away from your body. Pulling increases injury risk if the cutter slips. Keep the safety lock engaged when not cutting and replace dull blades promptly.
How to cut fabric straight for beginners?
Follow these beginner-friendly steps:
1. Use a cutting mat with grid lines
2. Align fabric with the mat’s guides
3. Use a clear ruler for measuring
4. Cut in long, smooth strokes
5. Keep fabric flat and supported
6. Practice on scraps to build confidence
What are the different types of fabric cutting?
Main cutting types include:
1. Straight cutting: Basic scissor or rotary cutting
2. Curve cutting: Following rounded pattern lines
3. Bias cutting: Cutting at 45-degree angles
4. Notch cutting: Small precision cuts for marking
5. Laser cutting: Computer-controlled beam cutting
6. Die cutting: Industrial press cutting
Advanced Cutting Tips and Professional Techniques
Working with Difficult Fabrics
Cutting Leather and Suede
Leather requires different techniques:
- Use a rotary cutter with a fresh blade
- Avoid pins – use pattern weights
- Cut single layers only
- Use a leather needle for any marking
- Keep cuts decisive – leather doesn’t forgive mistakes
Learn more about leather and suede care for post-cutting handling.
Managing Synthetic Fabrics
Synthetic fabrics like polyester and nylon need special attention:
- May melt with heat (avoid hot tools near cut edges)
- Can be slippery during cutting
- Often don’t fray but may curl at edges
- Respond well to laser cutting for sealed edges
Creating Professional Finishes
Precision Notch Cutting
Notches are crucial for accurate assembly:
- Cut outward from the seam line, never inward
- Make notches 1/4″ long for visibility
- Group multiple notches together
- Use small, sharp scissors for clean cuts
Seam Allowance Management
Understanding seam allowances improves cutting accuracy:
- Standard allowances: 5/8″ for garments, 1/4″ for quilting
- Grade seam allowances for bulk reduction
- Consider fabric thickness when planning allowances
- Learn about seam allowance troubleshooting for common issues
Scaling Up Production
Cutting Multiple Garments
When making several items:
- Use pattern weights for faster setup
- Cut similar pieces together
- Organize by construction order
- Label each piece clearly
- Plan cutting sessions to minimize setup time
Commercial Cutting Techniques
Professional shops use advanced methods:
- Marker making: Computer layout for maximum efficiency
- Band saws: For thick materials
- Hot knives: For synthetic fabrics that seal when cut
- Computerized cutting: For high-volume production
For quilters and precision sewers, foundation paper piecing requires exceptional cutting accuracy:
Technology Integration in Modern Cutting
Digital Pattern Software
Modern technology enhances cutting accuracy:
- CAD programs for pattern creation and modification
- Nesting software to minimize fabric waste
- Tablet apps for pattern placement
- 3D design software that converts to 2D cutting patterns
Smart Cutting Tools
New tools make cutting easier:
- Laser-guided scissors for straight cuts
- Smart rulers with digital measurements
- Cutting mats with app connectivity
- Voice-activated measuring tools
Future of Fabric Cutting
Emerging technologies include:
- AI-powered pattern layout
- Robotic cutting systems
- Augmented reality cutting guides
- 3D scanning for custom fit patterns
Machine Integration and Workflow
Connecting Cutting to Sewing Machine Setup
Proper cutting sets up successful sewing:
- Cut pieces work better with proper presser feet
- Accurate cuts reduce machine troubleshooting needs
- Good cutting helps achieve better stitch quality
- Follow maintenance schedules for optimal performance
Workflow Optimization
Create an efficient cutting-to-sewing process:
- Batch cutting all pieces before sewing
- Sort by construction order
- Pre-mark all construction details
- Organize notions and supplies
- Set up workspace for smooth transitions
Sustainable Cutting Practices
Minimizing Fabric Waste
Responsible cutting saves money and resources:
- Plan layouts carefully before cutting
- Save scraps for small projects
- Use remnants creatively
- Donate unused fabric to schools or community groups
Fabric Efficiency Techniques
Maximize every yard:
- Digital layout planning before cutting
- Combine projects to use remnants
- Consider bias binding from scraps
- Plan coordinating accessories from leftovers
Environmental Considerations
Make cutting more sustainable:
- Choose quality tools that last longer
- Maintain equipment properly
- Recycle worn-out cutting mats
- Use water-based marking tools when possible
Conclusion
Mastering fabric cutting transforms your sewing from good to exceptional. The techniques covered in this guide – from basic grain alignment to advanced laser cutting methods – provide a complete foundation for any sewing project. Whether working with delicate silk, challenging stretch fabrics, or industrial-scale production, the principles remain the same: preparation, precision, and the right tools for the job.
Key Takeaways
- Preparation is paramount: Pre-washing, pressing, and proper alignment prevent most cutting problems
- Tool selection matters: Match your cutting method to your fabric and project requirements
- Accuracy compounds: Small mistakes in cutting become bigger problems during construction
- Practice builds skill: Start with forgiving fabrics and simple projects before tackling challenging materials
- Technology enhances tradition: Modern tools complement, rather than replace, fundamental cutting skills
Take Your Skills Further: Put these techniques into practice with our complete set of fabric cutting tools – from planning and calculating to troubleshooting and optimization.
Essential Recommendations
- Invest in quality tools and maintain them properly – sharp blades and accurate rulers are non-negotiable
- Always test on scraps when trying new techniques or working with unfamiliar fabrics
- Plan your layout completely before making the first cut – this prevents costly mistakes
- Keep learning about new fabrics and techniques as the textile industry evolves
- Focus on safety – proper tool handling protects both you and your projects
Moving Forward:
Start with the basics covered in the early sections of this guide, then gradually incorporate advanced techniques as your confidence grows. Remember that even experienced sewers continue learning new methods and adapting to innovative fabrics. The cutting stage sets the foundation for everything that follows, making it worth the time and attention to get it right.
Whether you’re a beginner making your first simple project or a professional tackling complex designs, these cutting techniques will help you achieve better results, waste less fabric, and enjoy the sewing process more. Take your time, use sharp tools, and remember that precision in cutting leads to professional results in your finished projects.