Master essential skills, safety, and budget-smart techniques to start your sewing journey with confidence
Learning to sew opens doors to creativity, saves money, and gives you control over your wardrobe. Whether you want to mend a torn seam, create custom home decor, or design your own clothes, sewing is a rewarding skill anyone can master. This guide will take you from complete beginner to confident creator, covering everything you need to know to start your sewing journey successfully.
Starting your sewing adventure doesn’t need to feel overwhelming. With the right guidance, tools, and approach, you’ll build confidence with each project. This guide covers safety essentials, budget planning, machine basics, and step-by-step techniques to help you succeed from day one.
Table of Contents
- Getting Started: Is Sewing Hard for Beginners?
- Planning Your Sewing Budget
- Essential Safety Guidelines
- Essential Sewing Supplies and Tools
- Understanding Your Sewing Machine
- Hand Sewing Fundamentals
- Reading and Using Sewing Patterns
- Your First Sewing Projects
- Troubleshooting Common Problems
- Advanced Techniques and Skill Building
- Sustainable Sewing Practices
- Frequently Asked Questions
Getting Started: Is Sewing Hard for Beginners?
Sewing is not difficult, but it does require patience and practice. Most beginners can learn basic stitches and complete simple projects within their first week. The key is starting with appropriate projects and gradually building skills.
Want to know where you currently stand? Take our sewing skill assessment quiz to discover your current level and get personalized next steps.
Can I Learn Sewing By Myself?
Yes, many successful sewists are self-taught using online resources, books, and practice. However, taking a class or finding a mentor can speed up the learning process and help you avoid common mistakes. Self-teaching has several advantages including learning at your own pace, lower costs, and the flexibility to focus on projects that interest you.
How to Start to Learn to Sew
The best way to start learning to sew is by gathering basic supplies, watching instructional videos, and practicing on scrap fabric. Begin with simple hand stitches before moving to a machine. Focus on mastering one technique at a time rather than trying to learn everything at once.
Planning Your Sewing Budget: Smart Spending for Beginners
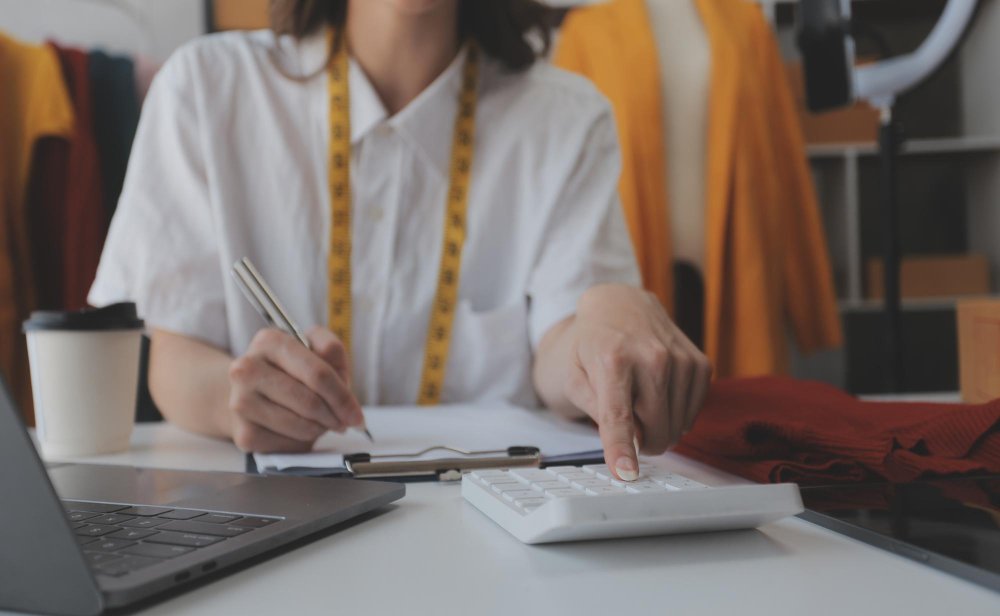
One of the biggest questions new sewists ask is “Is it expensive to start sewing?” The answer depends on your approach and goals. Here’s how to plan your sewing budget wisely.
Get an accurate estimate for your specific situation with our sewing cost calculator that factors in your goals, preferred projects, and local pricing.
Startup Cost Breakdown
Minimum Budget (Hand Sewing): $25-50
Basic Machine Setup: $150-300
Money-Saving Strategies
- Buy Used Equipment: Check thrift stores and estate sales for vintage machines that often work better than modern budget models
- Shop Sales: Sign up for fabric store newsletters to catch 40-60% off sales
- Start with Remnants: Buy fabric remnants and end-of-bolt pieces for practice projects
- Use Free Patterns: Download free PDF patterns online before investing in commercial patterns
- Repurpose Materials: Practice on old sheets and clothes before buying new fabric
Is It Cheaper to Sew or Buy Clothes?
For basic items, buying is often cheaper initially. However, sewing becomes cost-effective when you consider quality (homemade items often last longer), fit (custom sizing eliminates alterations), style (create exactly what you want), and repairs (extend clothing life significantly).
Compare the long-term costs of sewing versus buying with our detailed cost calculator that shows potential savings over time.
Essential Safety Guidelines for Sewing
Sewing Machine Safety
Before You Start:
- Always unplug the machine when changing needles or making adjustments
- Keep your workspace well-lit and clutter-free
- Tie back long hair and avoid loose jewelry
- Never leave the machine plugged in unattended
While Sewing:
- Keep fingers at least 1 inch away from the needle at all times
- Watch the needle, not the fabric guide
- Start slowly until you’re comfortable with your machine’s speed
- Turn off the machine immediately if something seems wrong
- Never force fabric through the machine

Tool Safety
Scissors and Rotary Cutters:
- Keep cutting tools sharp (dull tools require more pressure and are dangerous)
- Cut away from your body
- Use cutting mats with rotary cutters
- Store tools safely away from children
- Never use fabric scissors on paper or other materials
Iron Safety:
- Always use the correct temperature for your fabric
- Place iron on heat-resistant surface when not in use
- Unplug iron immediately after use
- Keep iron cord away from cutting and sewing areas
- Never leave a hot iron unattended
What to Wear While Sewing
Wear comfortable, fitted clothing that won’t get caught in the machine. Avoid loose sleeves, dangling jewelry, and scarves. Tie back long hair and consider wearing an apron to protect your clothes from fabric dust and threads.
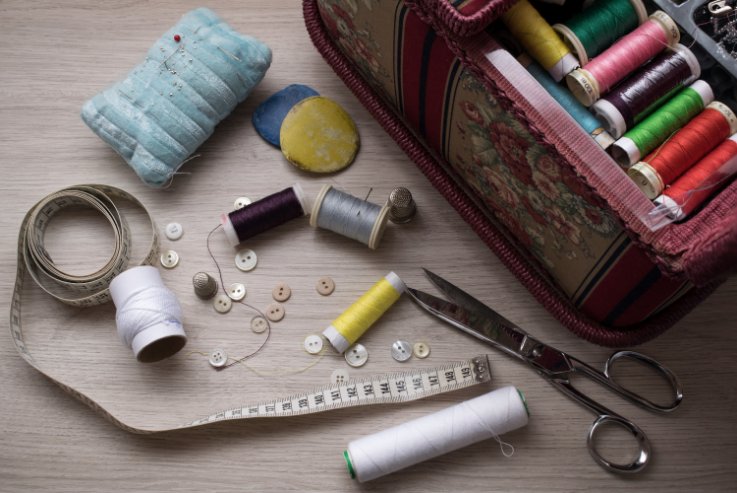
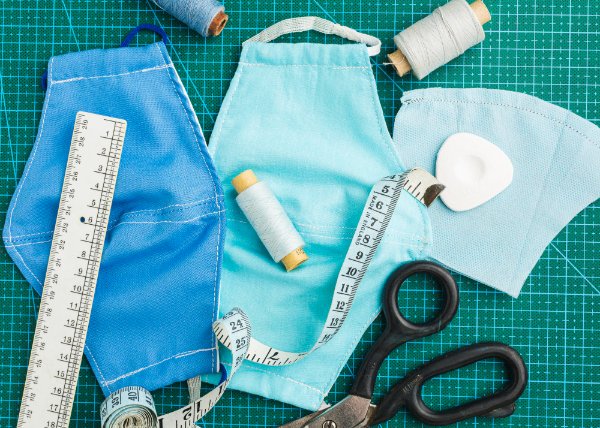
Essential Sewing Supplies: What Does a Beginner Need to Start Sewing?
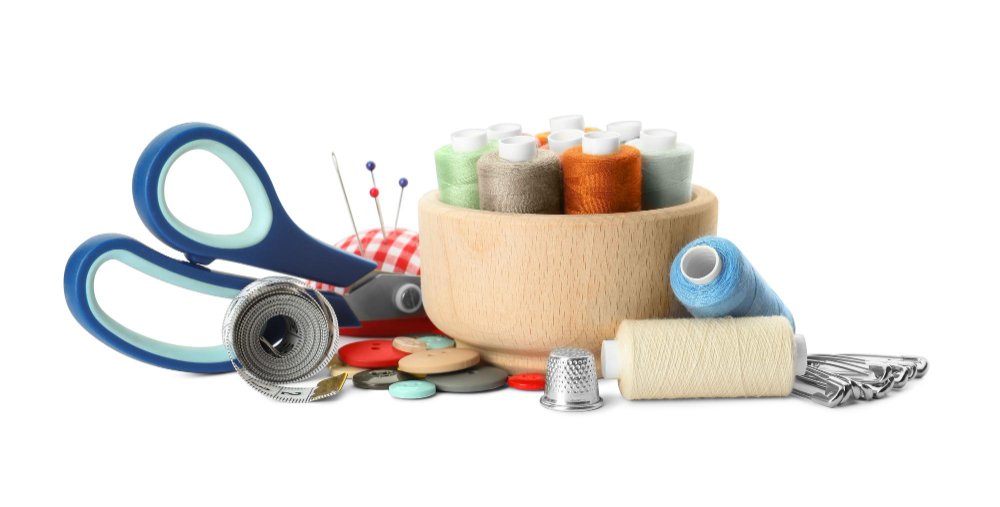
Starting with the right supplies makes learning easier and more enjoyable. You don’t need everything at once, but certain tools are essential from day one.
Use our interactive sewing supplies checklist generator to create a personalized shopping list based on your budget and sewing goals.

What Should Be in a Basic Sewing Kit?
| Category | Must-Have Items | Estimated Cost |
|---|---|---|
| Cutting Tools | 8-10 inch fabric scissors, small detail scissors, seam ripper | $20-35 |
| Measuring Tools | 60-inch measuring tape, clear ruler, fabric markers | $10-15 |
| Hand Sewing | Variety pack needles, thimble, thread in basic colors | $10-15 |
| Pins | Pin cushion, straight pins | $8-12 |
Choosing Your First Sewing Machine
What Should a Beginner Sewing Machine Have?
A good basic sewing machine for beginners should include straight stitch and zigzag stitch, adjustable stitch length and width, free arm for sleeves and cuffs, built-in light, and an easy threading system.
- Brother XM2701 ($150-200): Great value with many features
- Singer Start 1304 ($99-129): Ultra-simple for true beginners
- Janome 2212 ($149-179): Durable mechanical machine
For more detailed guidance, check our comprehensive sewing machine buying guide for beginners.
Mechanical vs. Computerized
For budgets under $300, choose mechanical over computerized. Mechanical machines are more reliable and easier to maintain at this price point.
Fabric Selection for Beginners
What is the Easiest Material to Sew for Beginners?
The easiest fabrics for beginners are cotton quilting fabric (stable, doesn’t stretch, forgiving), cotton canvas (durable for bags and home decor), and lightweight cotton (easy to handle and press).
Fabrics to Avoid Initially:
- Silk (slippery and expensive)
- Stretchy fabrics (knits require special techniques)
- Velvet or corduroy (difficult to cut and sew accurately)
- Very sheer or delicate materials
Fabric Shopping Tips:
- Start with solid colors (easier to see stitching)
- Buy extra for practice and mistakes
- Pre-wash all fabric before cutting
- Choose natural fabrics when possible for easier handling
Understanding Your Sewing Machine
How Does a Sewing Machine Work?
A sewing machine creates stitches by interlocking two threads: the top thread (from the spool) and the bobbin thread (from below). The needle carries the top thread down through the fabric, where it loops with the bobbin thread to form a secure stitch.
Key Components:
- Needle: Carries top thread through fabric
- Bobbin: Holds bottom thread in case below needle
- Feed dogs: Metal teeth that move fabric forward
- Presser foot: Holds fabric in place while sewing
- Tension discs: Control thread tightness
Learn more about different presser feet and their uses in our detailed guide.
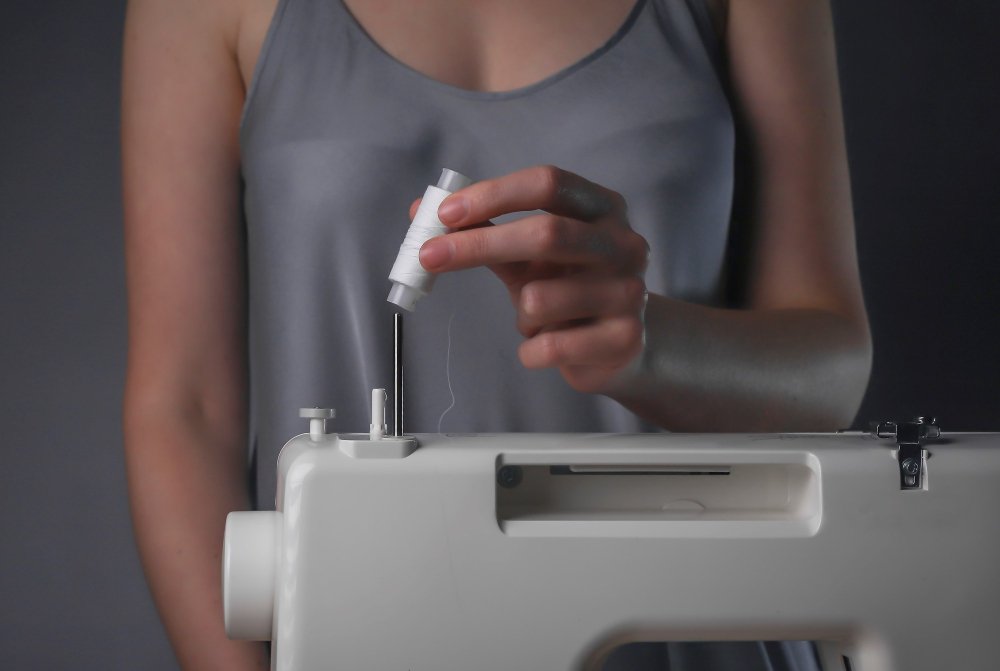
How to Thread a Sewing Machine

Step-by-Step Threading:
- Upper Threading:
- Place thread spool on spool pin
- Guide thread through thread guide at top
- Wrap around upper tension disc
- Thread through take-up lever (small hook that moves up and down)
- Guide down through needle bar thread guide
- Thread needle from front to back
- Bobbin Threading:
- Wind bobbin with matching thread using bobbin winder
- Insert bobbin into bobbin case (follow your machine’s specific method)
- Pull bobbin thread up through needle plate
- Final Steps:
- Lower presser foot to engage tension
- Turn hand wheel to take one complete stitch
- Pull both threads to back of machine
- Always thread with presser foot up (disengages tension)
- Use good lighting
- Cut thread at angle for easier needle threading
- Refer to your machine manual for specific threading path
For more detailed instructions, visit our guide on threading techniques.
How Do You Use a Sewing Machine?
Getting Started:
- Thread machine completely
- Choose appropriate needle for fabric weight
- Select stitch type and length
- Place fabric under presser foot
- Lower presser foot
- Begin sewing slowly
Basic Operation:
- Use the handwheel to position needle
- Guide fabric gently (don’t pull or push)
- Maintain steady, slow speed initially
- Backstitch at beginning and end of seams
- Lift presser foot to remove fabric
How to Sew a Straight Line
Sewing a straight line takes practice. Watch the seam guide on your machine’s throat plate rather than the needle. Keep your eyes ahead of where you’re sewing, guide the fabric gently without pulling, and maintain steady pressure on the foot pedal. Practice on paper first to build muscle memory without wasting fabric.
Master this essential skill with our detailed tutorial on how to sew a straight stitch.
What is a Serger?
A serger (overlock machine) cuts fabric edges while simultaneously sewing and finishing seams. It uses 3-4 threads to create professional-looking, stretch-friendly seams. Consider a serger after mastering basic sewing machine skills, when sewing lots of knit fabrics, for professional-looking finishes, or when making activewear or children’s clothes.
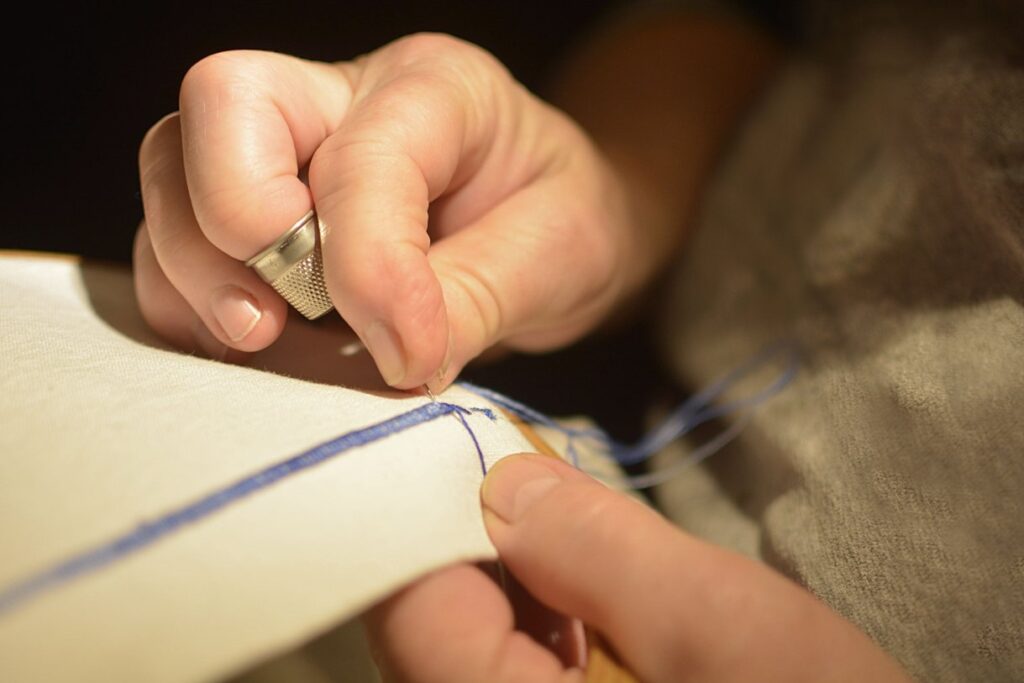
Hand Sewing Fundamentals
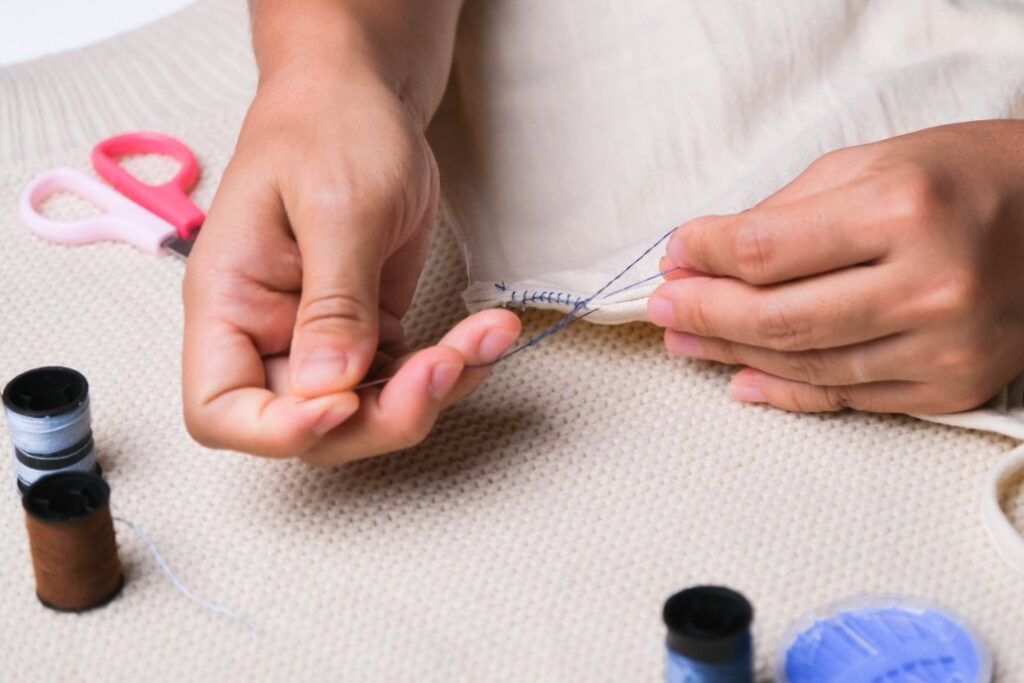
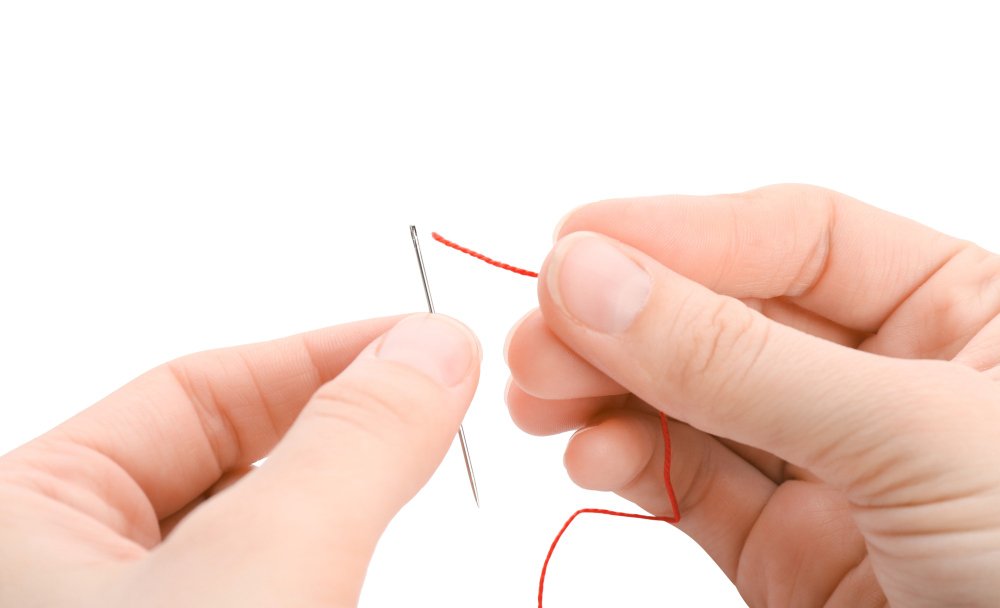
How to Start Sewing by Hand for Beginners
Hand sewing is the foundation of all sewing skills. Even if you plan to use a machine, learning hand techniques helps you understand how stitches work.
Should I Learn to Hand Sew First?
While not required, learning hand sewing first has advantages. It helps you understand stitch formation, requires minimal investment, is portable and quiet, and builds fine motor skills. However, you can also start with a machine if that’s your primary interest.
Which is the Most Basic Stitch that Beginners Should Start With?
The running stitch is the most basic stitch for beginners. It’s simply an in-and-out stitch that creates a dashed line. This stitch is perfect for basting, gathering fabric, and basic seams. Once you master the running stitch, move on to the backstitch for stronger seams.
Essential Hand Stitches:
- Running Stitch: Basic forward stitch for seams and gathering
- Backstitch: Strong seam stitch that won’t pull apart
- Whip Stitch: For hemming and edge finishing
- Blanket Stitch: Decorative edge finish
- Button Stitch: For attaching buttons securely
Learn how to attach buttons properly with our step-by-step button sewing guide.
How to Tie a Knot for Sewing
To tie a starting knot, thread your needle and hold the tail end. Wrap the thread around your index finger, roll the wrap off your finger while holding it between thumb and finger, then pull tight. For ending a stitch, make a small stitch in the same spot, pull the thread through leaving a small loop, pass the needle through the loop twice, then pull tight.
How to Tie Off a Stitch
To secure your stitching at the end, take a small backstitch where you ended, create a loop but don’t pull it tight, pass your needle through the loop 2-3 times, then pull tight to create a knot close to the fabric. Trim the thread leaving a small tail.
Getting Started with Hand Sewing:
- Cut thread 18-24 inches long (longer tangles easily)
- Tie knot at end
- Use thimble on middle finger of needle hand
- Keep stitches even in size and spacing
- Cut thread at angle for easier threading
How to Sew Holes in Clothes
Small Holes (less than 1/4 inch):
- Clean edges of hole
- Use matching thread
- Weave thread back and forth across hole
- Work perpendicular to first layer
- Secure with small knots on wrong side
How to Sew a Hole for Beginners:
For larger tears, cut a small patch of matching fabric, place the patch under the hole, use small running stitches around the edges, and trim excess patch fabric. The key is to work slowly and keep your stitches small and even.
How to Sew a Rip in a Shirt:
Turn the shirt inside out, align the torn edges carefully, pin in place, use a backstitch along the tear line, and press with an iron when finished. For tears in seams, simply restitch along the original seam line.
Reading and Using Sewing Patterns
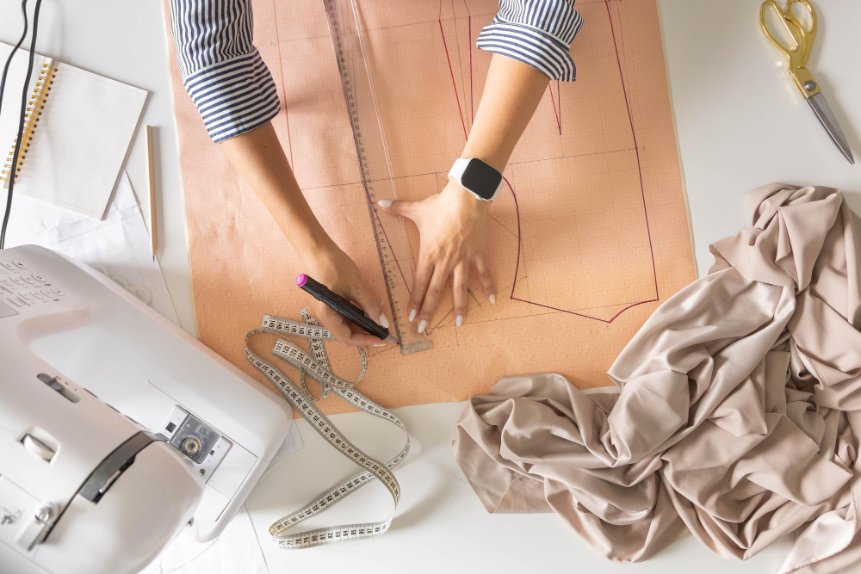
How to Read a Sewing Pattern
Sewing patterns are like blueprints for your projects. Understanding pattern symbols and markings is crucial for success.
Learn to read patterns like a pro with our comprehensive sewing pattern guide.
Pattern Envelope Information:
- Size chart and measurements
- Fabric requirements
- Skill level indicators
- Finished garment measurements
Pattern Piece Markings:
- Grain line arrows: Show fabric direction
- Notches: Triangular marks for matching pieces
- Dots: Mark pocket placements, darts, or details
- Fold lines: Indicate where to place pattern on folded fabric
- Cutting lines: Solid lines showing where to cut
Can I Learn to Sew Without a Pattern?
Yes, you can learn to sew without patterns. Many beginners start with simple rectangular projects like pillowcases, napkins, or tote bags that don’t require patterns. As you gain confidence, you can trace existing clothing to create your own patterns or experiment with basic shapes. However, patterns are helpful for learning proper garment construction and achieving professional results.
Understanding Seam Allowance
Seam allowance is the fabric between the cutting line and stitching line. Most patterns use 5/8-inch seam allowances, but always check pattern instructions. Consistent seam allowances are crucial for proper fit.
Master this essential concept with our guide to understanding seam allowances.
Your First Sewing Projects
What is the First Thing a Beginner Should Sew?
The first thing a beginner should sew is a fabric square or simple napkin. This teaches you how to sew straight seams, turn corners, and create clean edges without the pressure of making something complex. Once comfortable, move to a pillowcase, which introduces basic seam construction and hemming.
What is the Easiest Thing to Sew for a Beginner?
The easiest things to sew for beginners are fabric squares or napkins (practice straight stitching and corners), pillowcases (learn basic seams and hemming), simple tote bags (practice straight seams and handles), drawstring bags (introduction to casings and elastic), and kitchen towels (perfect for practicing hems).
Perfect First Projects
- Fabric Squares/Napkins
- Pillowcase
- Simple Tote Bag
- Drawstring Bag
- Kitchen Towels
Ready to choose your first project? Our interactive project planner matches you with the perfect beginner project based on your skills, time, and interests.
Also check out our collection of easy sewing projects for beginners with step-by-step instructions.
What is the Simplest Thing to Sew?
The simplest thing to sew is a straight seam on two pieces of scrap fabric. This fundamental skill forms the basis of all sewing projects. Practice sewing straight lines of different lengths before moving to projects with corners or curves.
What Clothes Should I Sew as a Beginner?
What is the Easiest Item of Clothing to Sew?
The easiest item of clothing to sew is an elastic waist skirt. It requires only basic straight seams, a simple hem, and an elastic waistband. No zippers, buttons, or complex fitting required.
What is the Easiest Clothing to Learn to Sew?
| Garment | Skills Required | Time Needed |
|---|---|---|
| Elastic Waist Skirt | Straight seams, basic hem, elastic waistband | 2-3 hours |
| Simple A-Line Skirt | Zipper installation, waistband | 4-5 hours |
| Pajama Pants | Pattern layout, curved seams, elastic waist | 3-4 hours |
| Simple Apron | Straight seams, ties, bias binding | 2-3 hours |
Find patterns perfect for your skill level in our beginner-friendly sewing patterns collection.
Can You Sew Clothes as a Beginner?
Yes, beginners can absolutely sew clothes. Start with loose-fitting garments with elastic waists, choose simple patterns marked “easy” or “beginner,” and use forgiving fabrics like cotton. Avoid fitted garments, zippers, and buttonholes until you’ve mastered the basics.
Can a Beginner Sew a Dress?
Yes, a beginner can sew a dress, but choose wisely. Look for simple shift dresses or sundresses with elastic necklines, avoid patterns with darts, zippers, or complex closures, and use lightweight cotton or cotton poplin fabric. A basic dress can be a great second or third project after mastering simple items.
When you’re ready, follow our guide on how to sew a dress for step-by-step instructions.
How to Successfully Sew Your First Shirt or Dress
- Choose the Right Pattern: Look for patterns with minimal pieces and simple construction
- Read Everything First: Review all instructions before cutting fabric
- Make a Muslin: Test fit with cheap fabric first
- Take Accurate Measurements: Measure twice, cut once
- Press as You Go: Pressing makes everything easier and more professional
- Don’t Rush: Quality takes time
What Clothes to Avoid Initially:
- Fitted blazers (require advanced techniques)
- Jeans (heavy fabric and topstitching challenges)
- Formal wear (expensive mistakes and complex construction)
- Swimwear (specialized fabrics and techniques)
How Can I Practice Sewing Without Wasting Fabric?
Practice on paper first to understand machine settings and stitch formation. Use old bed sheets, pillowcases, or worn clothing for practice. Save fabric scraps from other projects for technique practice. Buy fabric remnants specifically for learning. Practice new stitches on muslin or calico, which are inexpensive.
How Do I Cut Fabric Accurately?
Use sharp fabric scissors or a rotary cutter, pin patterns securely to prevent shifting, cut on a flat, stable surface, use weights to hold fabric if working with slippery materials, and cut in long, smooth strokes rather than short snips. Never lift fabric while cutting.
Learn professional cutting techniques in our complete guide to fabric cutting.
Troubleshooting Common Sewing Machine Problems

General Troubleshooting Steps
When your machine isn’t working properly, follow this systematic approach:
- Turn off and unplug machine
- Rethread completely (most problems stem from threading issues)
- Check needle (replace if bent, dull, or wrong size)
- Clean bobbin area (remove lint and thread bits)
- Check tension settings
- Test on scrap fabric
For comprehensive troubleshooting, visit our sewing machine troubleshooting guide.
Common Problems and Solutions
| Problem | Likely Cause | Solution |
|---|---|---|
| Thread bunching under fabric | Incorrect threading or tension | Rethread with presser foot up, adjust upper tension |
| Skipped stitches | Dull or incorrect needle | Replace needle, ensure it’s fully inserted |
| Needle breaking | Pulling fabric or wrong needle size | Let feed dogs move fabric, use appropriate needle |
| Uneven stitches | Tension issues or feed dog problems | Clean feed dogs, adjust tension, check bobbin |
When to Seek Professional Help
Take your machine to a professional when timing is off (needle hits bobbin case), you experience motor problems or electrical issues, persistent tension problems occur after trying all fixes, or for annual maintenance (recommended every 1-2 years). Professional service costs typically range from $75-150 for basic tune-up.
Keep your machine running smoothly with our sewing machine maintenance guide.
Advanced Techniques and Skill Building

How to Learn Sewing Fast
To learn sewing quickly, practice daily even if just for 15-30 minutes, focus on one technique at a time until mastered, watch video tutorials while practicing, take a structured class for guided learning, and set specific project goals. However, remember that quality learning takes time. Rushing can lead to frustration and bad habits.
Learning Resources: Classes vs. Self-Teaching
Can I Learn Sewing Online?
Yes, you can absolutely learn sewing online. Many successful sewists use online courses, YouTube tutorials, and virtual workshops. Online learning offers flexibility, often costs less than in-person classes, and allows you to learn at your own pace. The key is choosing quality resources and staying motivated.
How Do I Start a Beginners Sewing Class?
To start teaching sewing, first ensure you have solid intermediate to advanced skills. Create a simple curriculum covering threading, straight seams, and one complete project. Gather multiple machines if teaching groups, prepare handouts with key information, start with small groups of 3-5 students, and charge appropriately for your time and expertise.
Cost of Sewing Classes
| Class Type | Cost Range | Best For |
|---|---|---|
| Community Centers | $30-80 for 4-6 weeks | Budget-conscious beginners |
| Fabric Store Classes | $25-50 per session | Specific techniques |
| Private Instruction | $40-80 per hour | Personalized learning |
| Online Courses | $20-100 per course | Self-paced learning |
How Long Does it Take to Learn Sewing?
Factors Affecting Learning Speed:
- Practice frequency (daily vs. weekly makes huge difference)
- Project complexity
- Quality of instruction and resources
- Previous crafting experience
What is the Best Age to Start Sewing?
Children can start learning basic hand sewing around age 5-6 with supervision. Machine sewing can begin around age 8-10, depending on the child’s coordination and maturity. However, sewing has no upper age limit. Many people successfully start sewing in their 50s, 60s, and beyond. The best age to start is whenever you’re interested.
Is It Too Late to Learn Sewing?
It’s never too late to learn sewing. Mature learners often have advantages including more patience and focus, better fine motor control, clearer project goals, and more time to practice. Adaptations like good lighting, magnifying tools, and ergonomic seating make sewing accessible at any age.
What is an Advanced Beginner in Sewing?
An advanced beginner has mastered basic machine operation and straight seams, completed 10-15 simple projects successfully, can install invisible zippers, understands seam allowances and is ready to try fitted garments and can work with various fabric types. This stage typically comes after 6-12 months of regular practice.
Advanced Project Planning
What is the Most Difficult Thing to Sew?
The most challenging projects for experienced sewists include tailored jackets and coats (multiple layers, interfacing, precise fit), wedding dresses (expensive fabric, complex construction, high stakes), men’s dress shirts (precise collar and cuff construction), leather goods (specialized tools and techniques required), and swimwear (stretch fabrics and specialized notions).
What to Sew with Shirting?
Shirting fabric (lightweight woven cotton) is perfect for button-up shirts and blouses, simple dresses, pajamas, children’s clothing, and lightweight skirts. Choose quality shirting with a tight weave for best results.
What is the First Step in Tailoring?
The first step in tailoring is taking accurate measurements. Professional tailoring requires understanding body proportions, creating a fitting muslin, and making multiple adjustments. This is an advanced skill that comes after mastering basic sewing.
What are Sewing Notes?
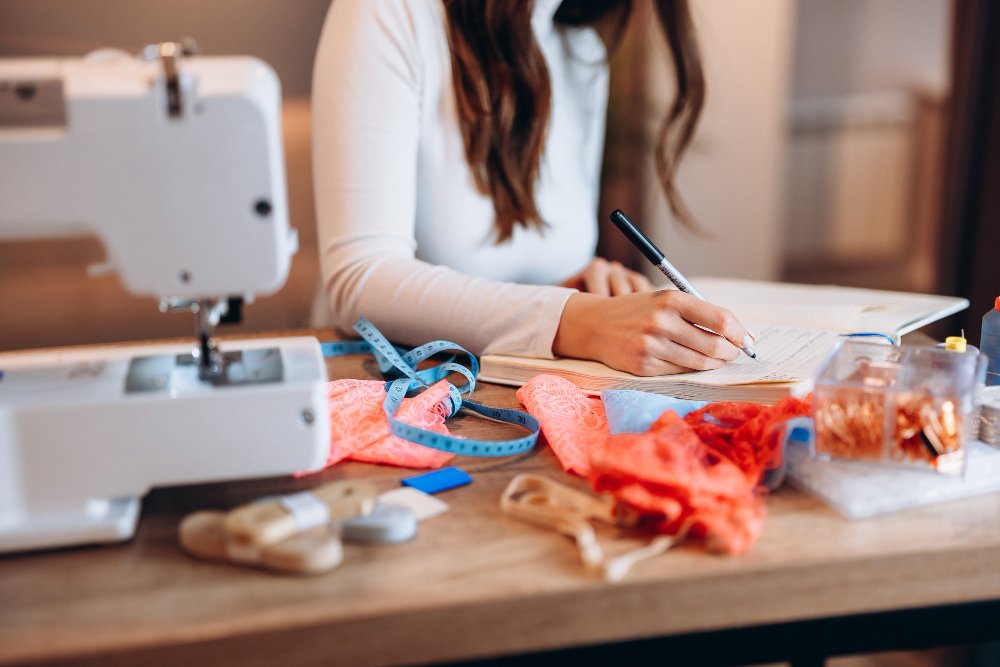
Sewing notes are written records you keep while working on projects. They include fabric used, pattern adjustments made, problems encountered and solutions, time spent, and lessons learned. Keeping sewing notes helps you improve faster and remember what worked for future projects.
Building Your Sewing Skills

Creating a Practice Routine
Consistent practice is the key to becoming a confident sewist. Here’s how to structure your sewing time for maximum improvement.
Daily Practice (15-30 minutes):
- Hand stitching while watching TV
- Threading and basic machine operation
- Practicing specific techniques on scrap fabric
- Learning one new stitch or skill
Weekly Projects (2-4 hours):
- Complete small projects like pillowcases or napkins
- Learn new techniques like installing zippers
- Work on ongoing larger projects
- Practice problem areas from previous projects
Monthly Challenges:
- Try new fabric types like cotton lawn or flannel
- Attempt more complex techniques
- Take on skill-building projects that push your abilities
- Complete one garment from start to finish
Skill Progression Path
Common Mistakes and How to Avoid Them
Top Beginner Mistakes:
How to Sew Without a Sewing Machine
While machines make sewing faster, you can create beautiful items by hand. Hand sewing is portable, quiet, requires minimal investment, and gives you complete control over every stitch.
Hand Sewing Essentials
Tools You’ll Need:
- Quality hand needles (sharps for general sewing, betweens for quilting)
- Strong thread (cotton or polyester)
- Thimble to protect your finger
- Small sharp scissors
- Good lighting and comfortable seating
Techniques for Hand Construction
Creating Strong Seams by Hand:
- Use backstitch for strong seams: This creates a continuous line of stitching that’s as strong as machine sewing
- Finish raw edges with blanket stitch: Prevents fraying and adds a decorative touch
- Create buttonholes with blanket stitch: Hand-sewn buttonholes are actually stronger than machine versions
- Use running stitch for gathering: Perfect for creating ruffles and gathered details
Best Hand-Sewing Projects
| Project Type | Why It Works Well | Time Estimate |
|---|---|---|
| Quilts and Patchwork | Traditional hand-quilting is portable and meditative | Several weeks |
| Embroidery | Decorative stitching is meant to be done by hand | Varies by design |
| Repairs and Alterations | Quick fixes often easier by hand than setting up machine | 15-30 minutes |
| Historical Costume | Authentic period garments require hand sewing techniques | Several months |
| Travel Projects | Hand sewing is completely portable | Varies |
Tips for Hand Sewing Success
- Keep stitches small and even: Aim for 8-10 stitches per inch for regular seams
- Use thread no longer than your arm: Longer thread tangles and weakens
- Take breaks to prevent hand fatigue: Stand up, stretch your hands every 20-30 minutes
- Practice on scraps before starting projects: Build confidence with your stitches first
- Invest in good-quality needles: Sharp needles make everything easier
When Hand Sewing is Better Than Machine Sewing
Choose hand sewing when working with delicate fabrics that might be damaged by machine feeding, sewing small repairs where setting up the machine takes longer, creating invisible hems on dress pants or skirts, attaching appliqué lace or decorative elements, or working on projects while traveling or in small spaces.
Sustainable Sewing Practices
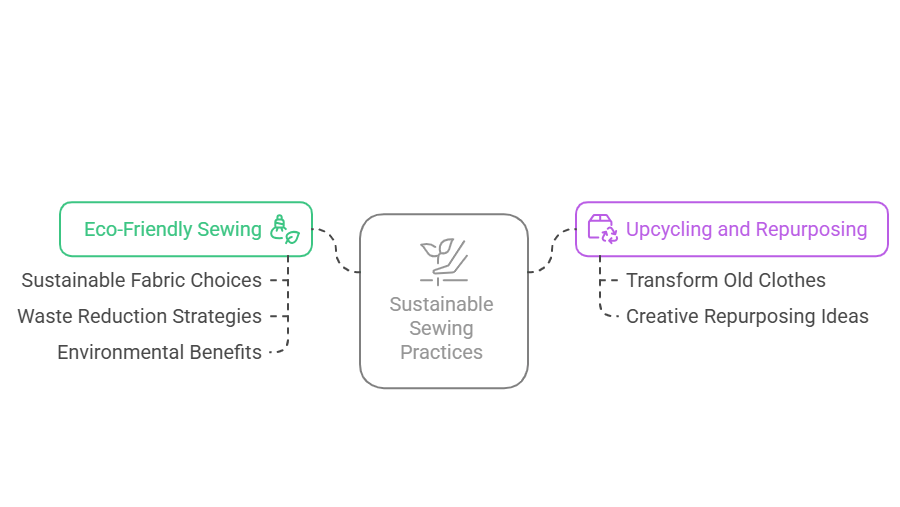
Eco-Friendly Sewing
Sustainable Fabric Choices:
- Organic cotton and linen
- Recycled polyester
- Hemp and bamboo fibers
- Deadstock and remnant fabrics
Waste Reduction Strategies:
- Save fabric scraps for small projects
- Repurpose old clothing into new items
- Share patterns and supplies with others
- Choose quality over quantity
Environmental Benefits
Sewing reduces textile waste, decreases demand for fast fashion, extends clothing lifespan through repairs, and creates unique, personalized items. Learn more about making sustainable choices in our guide to fast fashion vs. slow fashion.
Upcycling and Repurposing
Transform Old Clothes:
- Turn shirts into tote bags
- Convert pants into skirts
- Create quilts from worn fabrics
- Make children’s clothes from adult garments
Creative Repurposing Ideas:
- Use vintage sheets for practice fabric
- Transform curtains into clothing
- Create patchwork from fabric scraps
- Make accessories from leftover materials
Frequently Asked Questions
Conclusion
Sewing is a journey of continuous learning and creativity. Whether you’re drawn to practical skills like mending and alterations or dream of creating custom clothing and home decor, the fundamentals covered in this guide provide your foundation for success.
Key Takeaways
Safety First: Always prioritize safety with proper tool handling, workspace organization, and machine operation. Taking time to follow safety guidelines prevents injuries and makes sewing more enjoyable. Keep your workspace well-lit and clutter-free.
Start Simple: Begin with basic projects and gradually build skills. Rushing to complex projects often leads to frustration and poor results. Master the fundamentals before advancing. Your first pillowcase doesn’t need to be perfect.
Budget Wisely: You don’t need expensive equipment to start sewing. Focus on quality basics and add tools as your skills and interests develop. Remember that sewing can save money long-term through repairs and custom creation.
Practice Regularly: Like any skill, sewing improves with consistent practice. Even 15-20 minutes of daily practice will build muscle memory and confidence faster than occasional long sessions. Make it part of your routine.
Learn from Mistakes: Every sewist makes mistakes, even experienced ones. View errors as learning opportunities rather than failures. Keep a sewing journal to track what works and what doesn’t. Document your projects with photos.
Join the Community: Connect with other sewists through local classes, online forums, or social media groups. The sewing community is welcoming and always willing to help beginners. Share your work and ask questions freely.
Be Patient with Yourself: Learning to sew takes time, and everyone progresses at their own pace. Celebrate small victories and don’t compare your beginning to someone else’s years of experience. Focus on your own growth.
Focus on Quality: It’s better to complete one well-made project than several rushed ones. Take time to understand techniques properly and work at a comfortable pace. Quality work builds better skills.
Maintain Your Equipment: Keep your tools clean, sharp, and properly maintained. A well-maintained sewing machine will serve you for decades, while dull scissors and bent pins make every project harder. Regular maintenance prevents problems.
Keep Learning: Sewing offers endless opportunities to learn new techniques, work with different materials, and create increasingly complex projects. Stay curious and open to new challenges. Try new fabric types and techniques regularly.
Your Next Steps
- Set up your workspace with good lighting and organization
- Invest in quality basic tools rather than many cheap ones
- Choose your first project from the beginner suggestions above
- Practice safety habits from day one
- Connect with local sewing resources like fabric stores and classes
- Set realistic goals for your first few months
- Document your progress with photos and notes
- Plan your next three projects to maintain momentum
Essential Tools to Get Started
Use our interactive tools to plan your sewing journey:
Final Thoughts
Remember, every expert was once a beginner. The most important step is simply starting. With patience, practice, and the right foundation, you’ll soon discover the joy and satisfaction that comes from creating something beautiful with your own hands.
Whether you sew for practical reasons, creative expression, or stress relief, this ancient craft offers modern benefits that enrich life in countless ways. Sewing connects you to a long tradition of makers while giving you independence and creative control.
Your sewing journey begins with a single stitch. Take that first step with confidence, knowing you have the knowledge and tools needed to succeed. Welcome to the wonderful world of sewing.