From Thread Breaks to Tension Troubles: Your Complete Step-by-Step Solution Guide
Ever wondered why your thread keeps breaking right in the middle of your favorite project? You’re definitely not alone. Almost every sewist faces these hiccups, but here’s the good news: most sewing machine problems have simple fixes you can handle at home.
Your machine works like a precise team where every part needs to do its job perfectly. When one thing goes wrong, it affects everything else. But don’t worry – this guide will walk you through the most common issues and show you exactly how to fix them.
Table of Contents
What is the Common Problem in Sewing?
Thread-related issues top the list of sewing frustrations. Whether it’s breaking, bunching, or creating loops, thread problems affect nearly 80% of all sewing sessions. The second most common issue? Tension troubles that create uneven stitches.
These problems usually happen because of:
- Incorrect threading
- Wrong needle for your fabric
- Dirty or damaged machine parts
- Poor quality thread
Let’s dive into each problem and get your machine running smoothly again.
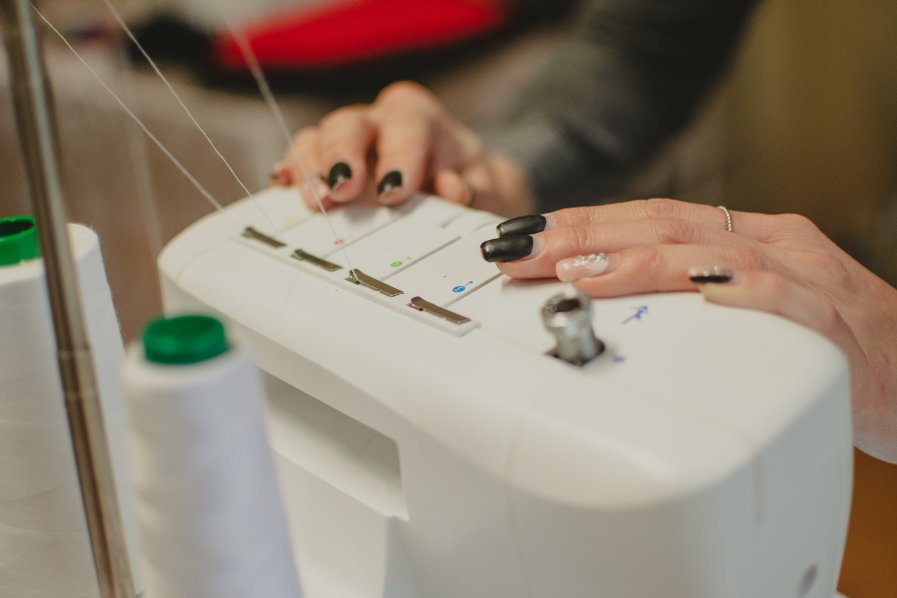
Understanding Your Sewing Machine’s Basics
Before jumping into fixes, you need to understand how your machine creates stitches. Your sewing machine works by having the top thread meet the bobbin thread inside your fabric. When this meeting doesn’t happen correctly, you get skipped stitches, loops, or breaks.
The main players in this process are:
- Thread tension discs (control how tightly thread flows)
- Take-up lever (pulls thread through the stitch)
- Feed dogs (move fabric forward)
- Bobbin case (holds bottom thread)
Thread Problems and Solutions
Why Does My Thread Keep Breaking When I’m Sewing?
Thread breakage happens for several reasons, and finding the right cause saves you tons of frustration.
Most Common Causes:
- Dull or bent needle – Replace every 6-8 hours of sewing
- Wrong needle size – Use larger needles for thicker fabrics
- Old or cheap thread – Quality thread makes a huge difference
- Incorrect tension – Usually too tight on top thread
- Rough needle eye – Even tiny burrs can snap thread
Quick Fix Steps:
- Change your needle first (this fixes 60% of thread breaks)
- Rethread your machine completely with the presser foot up
- Test with quality thread like Gutermann or Coats & Clark
- Lower your top tension by one number and test
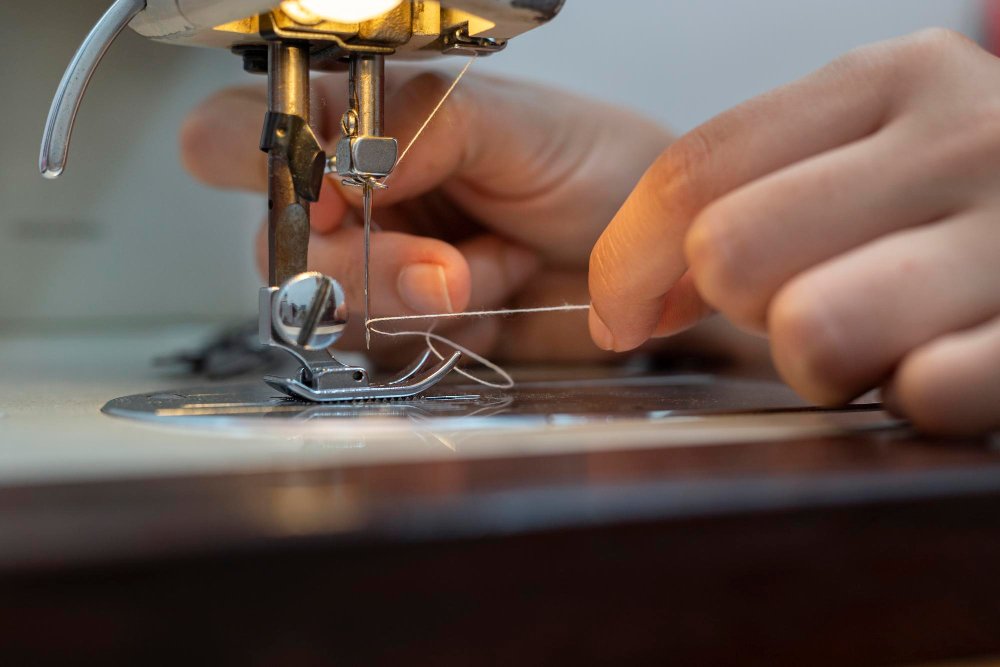
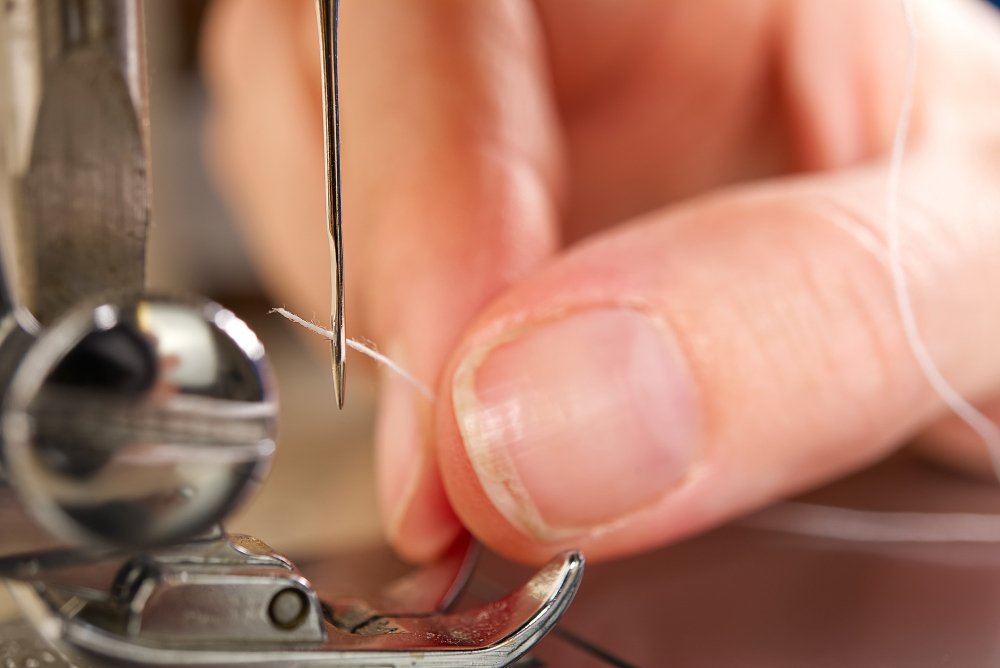
Why is the Thread Not Going Through Fabric?
When your needle penetrates fabric but doesn’t create stitches, you’ve got a timing or threading issue.
Check These Areas:
- Needle position – Make sure the flat side faces the correct direction
- Threading path – Follow your manual exactly, missing even one guide causes problems
- Bobbin insertion – Wrong direction prevents proper thread catch
- Take-up lever position – Should be at highest point when you start sewing
Thread Bunching and Bird’s Nests
Thread bunching (also called “bird nesting”) creates messy tangles under your fabric. This happens when your threads don’t balance properly.
For Bunching on Top:
- Bobbin tension too loose
- Top thread not in tension discs
- Bobbin incorrectly inserted
For Bunching Underneath:
- Top tension too loose
- Incorrect upper threading
- Starting too close to fabric edge
Professional Fix: Always rethread both top and bobbin threads after any jam. Clean out all thread bits first, then thread with your presser foot raised so tension discs can open properly.
How to Fix Thread Nesting Under Fabric
Thread nesting creates those frustrating tangles that jam your machine. Here’s the step-by-step fix:
- Stop immediately – Don’t pull fabric or force anything
- Cut threads – Snip tangled threads carefully with small scissors
- Remove fabric – Lift presser foot and remove work gently
- Clean thoroughly – Remove needle plate and clear all thread bits
- Rethread completely – Both top and bobbin threads
- Test on scraps – Always test before returning to your project
Tension Troubles: Getting It Just Right
How Do I Know if My Thread Tension is Too High?
High tension creates several telltale signs:
- Thread breaks frequently
- Fabric puckers along seam lines
- Tight, rope-like stitches
- Difficulty pulling fabric through machine
Visual Check: Proper tension hides the knot between fabric layers. If you see bobbin thread on top or top thread on bottom, your tension needs adjustment.
What Tension Should My Sewing Machine Be On?
Most machines work best with tension set between 3-5, but this varies by fabric and thread combination.
Tension Guidelines by Fabric:
| Fabric Type | Tension Setting | Notes |
|---|---|---|
| Cotton | 4-5 | Standard setting for most projects |
| Silk/Delicate | 2-3 | Lower tension prevents damage |
| Denim/Heavy | 5-6 | Higher tension handles thick layers |
| Stretch/Knit | 3-4 | Moderate tension with ballpoint needle |
| Lace fabrics | 2-3 | Very light tension to prevent pulls |
What Tension Should I Use for Cotton?
Cotton fabrics typically sew best with tension set to 4 or 5. Start at 4 and test on fabric scraps. If stitches look loose, increase to 5. For heavy cotton like denim, you might need 6.
What Should the Tension Be Set at on a Singer Sewing Machine?
Singer machines usually come preset to 4, which works for most common fabric types. Singer’s official tension troubleshooting documentation confirms that tension settings between 3-5 work optimally for most medium-weight fabrics, with adjustments needed based on thread weight and fabric density. Start with 4 and adjust from there.
How to Tell if Tension is Too Loose or Tight
Too Loose Signs:
- Loops on fabric surface
- Stitches pull apart easily
- Bobbin thread visible on top
Too Tight Signs:
- Fabric puckers
- Thread breaks often
- Hard to turn hand wheel
Perfect Tension:
- Stitches lock between fabric layers
- Even appearance on both sides
- Fabric lays flat without puckering
Needle and Bobbin Issues
Choosing the Right Needle
Your needle choice affects everything from stitch quality to thread breaks. Match your needle to both fabric weight and thread type.
Needle Guide:
| Fabric Weight | Needle Size | Best For |
|---|---|---|
| Lightweight | 60/8 – 70/10 | Silk, chiffon, organza |
| Medium Weight | 80/12 – 90/14 | Cotton, linen, wool |
| Heavy Weight | 100/16 – 110/18 | Denim, canvas, leather |
| Stretch Fabrics | 75/11 – 90/14 | Jersey, knits, spandex |
Pro Tip: When working with delicate lace fabrics, use a 60/8 or 70/10 needle to prevent snags and pulls.
According to Brother International’s official troubleshooting guidelines, proper needle insertion prevents up to 70% of stitch formation problems. Always ensure the flat side of your needle faces the correct direction as specified in your machine manual.
Correct Bobbin Insertion and Tension
Bobbin problems cause more frustration than almost any other issue. Here’s how to get it right:
Bobbin Insertion Check:
- Thread should unwind in the direction shown in your manual
- Thread must click into the tension spring
- Bobbin should sit flat in the case
- Case should drop in smoothly without forcing
Bobbin Tension Test: Hold the bobbin case by the thread. It should drop slowly and stop when you jerk slightly. If it drops fast, tension is too loose. If it won’t drop, tension is too tight.
Machine Mechanics and Maintenance
Why Isn’t My Sewing Machine Stitching Properly?
Poor stitching usually comes down to four main areas:
- Threading errors – Most common cause
- Needle problems – Wrong type, dull, or bent
- Timing issues – Needs professional adjustment
- Dirt buildup – Regular cleaning prevents this
Why Isn’t My Sewing Machine Pulling the Fabric Through?
When fabric won’t feed properly, check these components:
Feed Dog Problems:
- Lowered for free-motion sewing
- Clogged with lint and thread bits
- Worn teeth can’t grip fabric
Presser Foot Issues:
- Wrong pressure for fabric type
- Foot not lowered properly
- Using wrong foot for your project
Quick Fix: Clean feed dogs weekly with a stiff brush. For different presser feet options, match the foot to your sewing technique.
How to Lubricate a Sewing Machine
Regular lubrication keeps your machine running smoothly and prevents costly repairs.
Lubrication Steps:
- Clean first – Remove lint and debris before oiling
- Use proper oil – Only sewing machine oil, never household oils
- Apply sparingly – One drop per point marked in manual
- Run machine – Sew without fabric for 2-3 minutes to distribute oil
- Wipe excess – Clean any oil residue to prevent dust attraction
Frequency: Oil every 8-10 hours of sewing time, or monthly for regular users.
For complete maintenance guidance, check our detailed sewing machine maintenance guide.
Advanced Troubleshooting
Skipped Stitches Solutions
Skipped stitches happen when your needle doesn’t catch the bobbin thread properly.
Common Causes:
- Wrong needle type for fabric
- Needle inserted incorrectly
- Machine timing off (needs professional service)
- Thread too heavy for needle size
Fabric-Specific Solutions:
For Stretch Fabrics: Use ballpoint needles that slip between fibers instead of piercing them. Regular needles can cause runs in knit fabrics.
For Heavy Fabrics: Switch to a leather or denim needle. These have stronger shafts and sharper points to penetrate thick materials.
Why is My Fabric Puckering When Sewing?
Fabric puckering ruins the look of your finished project. Here’s how to prevent it:
Main Causes:
- Tension too tight
- Wrong needle size
- Poor quality thread
- Sewing too fast on delicate fabrics
Prevention Tips:
- Test stitch on fabric scraps first
- Use appropriate sewing machine stitches for your fabric
- Support fabric weight while sewing
- Consider using stabilizer for very light fabrics
How to Fix a Pulled Thread in Fabric
Pulled threads happen especially with delicate fabrics like silk or fine knits.
For Minor Pulls:
- Gently work thread back into fabric with a needle
- Steam lightly to relax fibers
- Press with appropriate heat setting
For Major Pulls:
- Assess if fabric is still usable
- Consider creative solutions like decorative patches
- In severe cases, you may need to replace the fabric piece
Computerized and Smart Sewing Machine Issues
Modern sewing machines bring new challenges alongside their convenience features.
Software and Connectivity Problems
Common Smart Machine Issues:
- App connectivity failures
- Touch screen calibration problems
- Software update glitches
- Design transfer errors
Basic Troubleshooting:
- Restart machine completely
- Check Wi-Fi connection strength
- Update app and machine firmware
- Reset to factory settings if problems persist
Automatic Feature Malfunctions
When Automatic Features Fail:
- Switch to manual mode temporarily
- Check user manual for reset procedures
- Ensure proper threading for automatic functions
- Contact manufacturer if under warranty
Seasonal Maintenance Calendar
Keeping your machine in top shape requires regular attention throughout the year.
Monthly Tasks
- Clean lint from bobbin area and feed dogs
- Oil according to manual specifications
- Check needle condition and replace if needed
- Test tension on different fabric scraps
Quarterly Tasks
- Deep clean entire machine interior
- Replace any worn presser feet
- Check all moving parts for smooth operation
- Update software on computerized machines
Annual Tasks
- Professional tune-up and timing check
- Replace worn parts like belts or gears
- Calibrate computerized features
- Replace all needles regardless of use
Emergency Mid-Project Fixes
Sometimes problems happen right in the middle of important projects. Here are quick fixes to get you back on track:
Temporary Solutions
For Thread Breaks:
- Switch to slightly looser tension temporarily
- Use higher quality thread for remainder of project
- Take more frequent breaks to check needle condition
For Tension Problems:
- Mark your current settings before adjusting
- Make small changes (quarter turns) and test
- Keep fabric scraps nearby for testing
For Feed Problems:
- Reduce stitch length temporarily
- Help guide fabric gently (don’t pull)
- Clean feed dogs quickly with brush
When to Call a Professional
Some problems require expert attention to prevent further damage.
Professional Service Indicators
Immediate Professional Help Needed:
- Grinding or unusual mechanical noises
- Needle bar doesn’t move smoothly
- Timing problems (needle hits bobbin case)
- Electrical issues or smoke
Can Wait for Scheduled Service:
- Minor tension inconsistencies
- Worn feed dog teeth
- Belt replacement needs
- Routine maintenance overdue
Choosing a Repair Service
What to Look For:
- Certified technicians for your machine brand
- Written estimates before work begins
- Warranty on repair work
- Quick turnaround times
The American Sewing Guild recommends professional servicing every 12-18 months for regular users, or after every 100 hours of operation for heavy use, to maintain optimal performance and prevent costly repairs. This professional maintenance schedule helps catch small issues before they become expensive problems.
Brand-Specific Tips
Different sewing machine brands have unique quirks and solutions.
Singer Troubleshooting
Singer machines typically need tension around 4 for most projects. Common Singer issues include:
- Bobbin case placement sensitivity
- Needle threading sequence importance
- Model-specific oil points
Brother Machine Tips
Brother machines often feature:
- Automatic threading that can jam
- Touch screen calibration needs
- Specific needle orientation requirements
Janome Considerations
Janome machines are known for:
- Precise tension requirements
- High-quality internal components
- Longer service intervals
Understanding Different Fabric Challenges
Different fabrics present unique sewing challenges that require specific solutions.
Working with Delicate Fabrics
For Silk and Chiffon:
- Use size 60/8 or 70/10 needles
- Reduce presser foot pressure
- Lower tension settings
- Sew slowly for control
For Lace Materials:
- Use sharp microtex needles
- Minimal tension to prevent pulls
- Consider using tissue paper underneath
- Test on scraps first
Heavy Fabric Solutions
For Denim and Canvas:
- Use size 100/16 or 110/18 needles
- Increase tension slightly
- Slow down stitching speed
- Use heavy-duty thread
For Multiple Layers:
- Switch to longer stitch length
- Use appropriate seam allowances
- Consider grading seams to reduce bulk
Quality Thread Matters
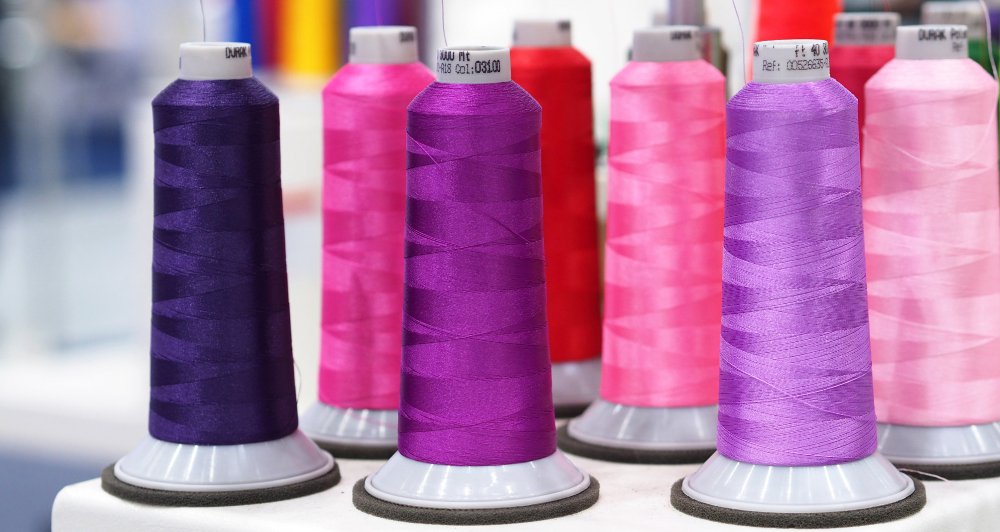
Your thread choice affects every aspect of sewing performance.
How to Tell if Threads are Bad
Signs of Poor Quality Thread:
- Frequent breaks during sewing
- Fuzzy or hairy appearance
- Inconsistent thickness
- Fading or color bleeding
- Brittle feel when bent
Thread Storage Tips:
- Keep spools in cool, dry places
- Avoid direct sunlight exposure
- Use thread within 2-3 years of purchase
- Store upright to prevent unwinding
Thread Weight and Fabric Matching
Thread Weight Guide:
- 30-40 weight: Heavy fabrics, topstitching
- 40-50 weight: General sewing, most cottons
- 60-80 weight: Delicate fabrics, quilting
- 100+ weight: Very fine work, heirloom sewing
Troubleshooting Flowchart: Your Step-by-Step Problem Solver
When sewing problems hit, don’t guess at solutions. This systematic approach will guide you through the most effective troubleshooting sequence that professional repair technicians use. Follow these steps in order for the best chance of quick resolution.
Most sewing issues resolve within the first four steps, but having a clear process prevents you from missing obvious fixes or making problems worse. Print this flowchart and keep it near your sewing station for quick reference during projects.
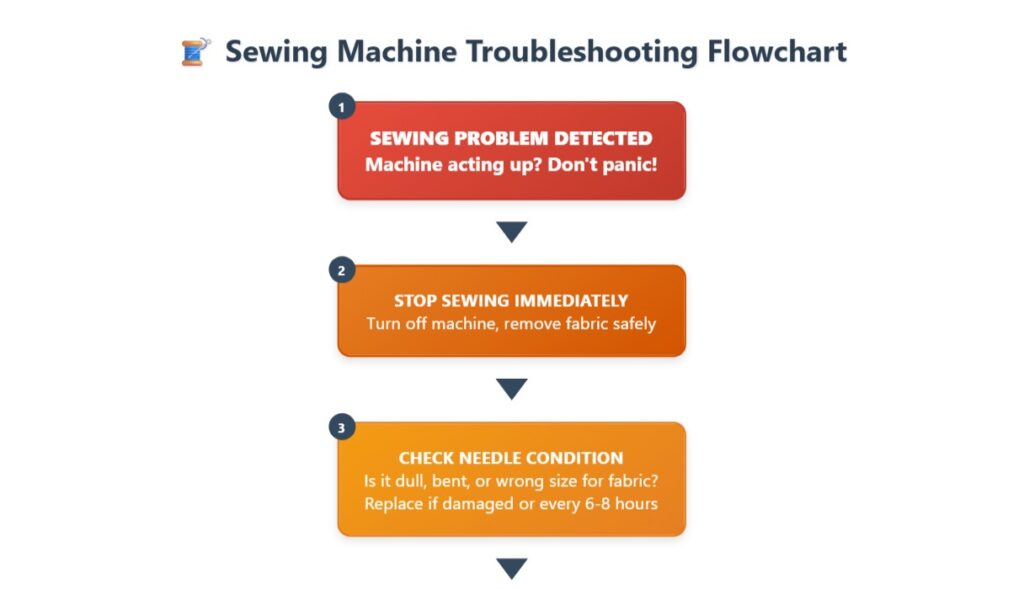
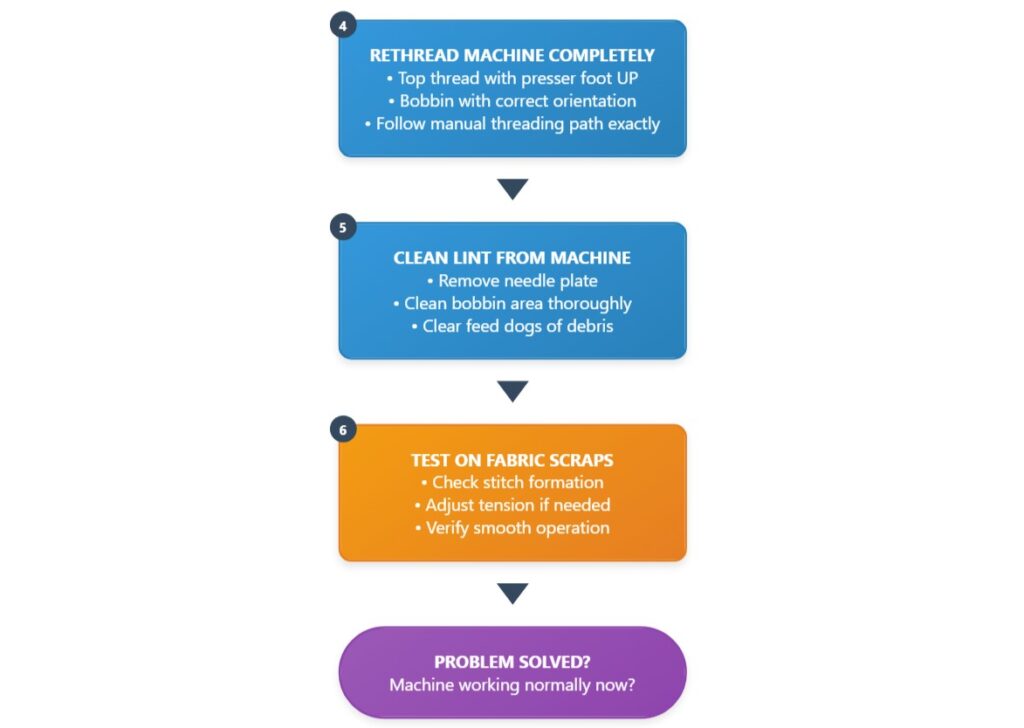
This flowchart covers about 85% of common sewing machine problems. The key is following the sequence exactly – skipping steps often leads to missed solutions. For example, many sewists jump straight to tension adjustments when a simple needle change would have solved the problem immediately.
Important Notes:
- Always complete steps 1-5 before testing, even if you think you know the problem
- Keep fabric scraps near your machine for testing adjustments
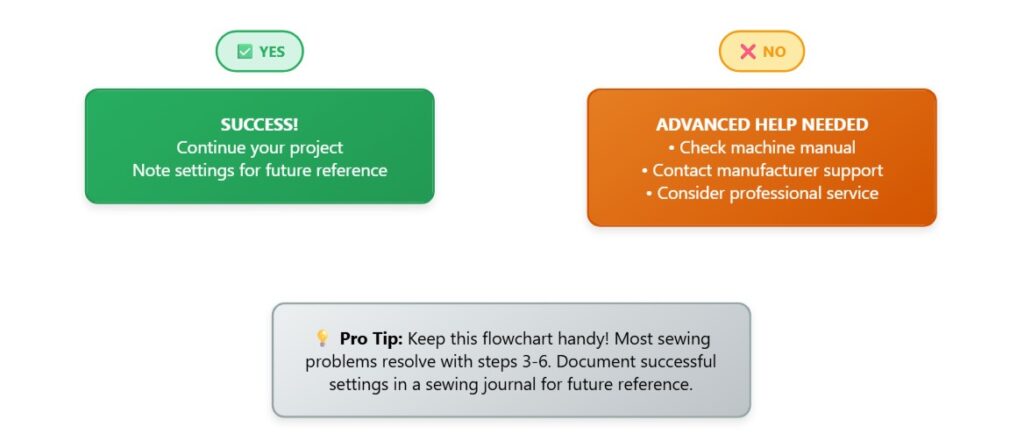
- Document successful settings in a sewing journal for future reference
- If problems persist after following this flowchart, the issue likely requires professional attention
Remember: patience during troubleshooting saves time in the long run. Taking five minutes to work through this process systematically often prevents hours of frustration later.
Prevention Strategies
The best troubleshooting is prevention. Build these habits into your sewing routine:
Daily Sewing Habits
- Start each session with needle check
- Keep quality thread at your machine
- Clean lint after every project
- Test tension on scraps before starting
Weekly Maintenance
- Deep clean bobbin area
- Check all threading paths
- Inspect presser feet for damage
- Organize and check supply quality
Project Planning
- Choose appropriate needles for each fabric
- Plan seam finishing methods in advance
- Have backup supplies ready
- Keep detailed notes of successful settings
Troubleshooting by Symptom Quick Reference
Thread Issues
- Breaks frequently: Change needle, check tension, verify thread quality
- Forms loops: Check bobbin insertion, adjust top tension
- Won’t go through needle: Use needle threader, check needle eye for damage
- Bunches under fabric: Rethread top thread, check bobbin orientation
Stitch Problems
- Skips stitches: Replace needle, check threading path, verify fabric/needle match
- Loose stitches: Increase tension gradually, check bobbin thread path
- Uneven stitches: Clean machine, check needle condition, verify proper threading
Fabric Issues
- Won’t feed through: Clean feed dogs, adjust presser foot pressure, check for lint
- Puckers while sewing: Reduce tension, use appropriate needle, slow down speed
- Pulls or snags: Change to ballpoint needle for knits, reduce presser foot pressure
Building Your Troubleshooting Skills
Becoming proficient at machine troubleshooting takes practice and patience.
Keep a Sewing Journal
Track successful settings for different fabric combinations:
- Fabric type and weight
- Needle size and type used
- Thread brand and weight
- Tension settings that worked
- Any special techniques used
Build Your Skills Gradually
Start with basic sewing techniques and gradually work up to more challenging projects. This builds your troubleshooting instincts naturally.
Join Sewing Communities
Online and local sewing groups offer valuable troubleshooting support and shared experiences from fellow sewists.
Conclusion
Sewing machine troubleshooting doesn’t have to be overwhelming or mysterious. Most problems you’ll encounter have straightforward solutions that you can handle yourself with the right knowledge and approach.
The key takeaways for successful troubleshooting are:
- Start with the basics every time. A fresh needle and complete rethreading solve the majority of sewing problems. These simple steps should be your first response to any issue, regardless of how complex it might seem.
- Quality supplies make a real difference. Investing in good needles, thread, and regular maintenance prevents most problems before they start. Cheap supplies often cost more in frustration and time than quality materials cost upfront.
- Develop systematic habits. Clean your machine regularly, test settings on scraps, and maintain a troubleshooting journal. These practices build your skills and confidence while preventing many common issues.
- Know when to seek help. While you can handle most problems yourself, don’t hesitate to consult professionals for timing issues, unusual noises, or problems that persist despite following proper troubleshooting steps. Professional service protects your investment and ensures your machine continues performing well.
- Practice patience with yourself and your machine. Troubleshooting is a skill that improves with experience. Each problem you solve successfully builds your confidence and makes future issues easier to handle.
Remember that even experienced sewists encounter these challenges regularly. The difference lies in approaching problems systematically rather than randomly trying different solutions. With the techniques and knowledge in this guide, you’re well-equipped to handle whatever sewing challenges come your way.
Keep this guide handy during your sewing sessions, and don’t forget to check our essential sewing supplies and common sewing mistakes articles for additional support in your sewing journey.
Happy sewing, and may your projects flow smoothly from start to finish!
Frequently Asked Questions
What is the most common sewing machine problem?
Thread-related issues are the most common, affecting about 80% of sewing sessions. This includes thread breaking, bunching, or creating loops under fabric.
How often should I replace my sewing machine needle?
Replace your needle every 6-8 hours of sewing time, or immediately if it becomes bent, dull, or starts causing problems like skipped stitches or pulls in fabric.
Why does my thread keep bunching underneath my fabric?
Thread bunching usually indicates incorrect upper threading or that your bobbin isn’t inserted properly. Always rethread your machine with the presser foot raised to ensure proper tension disc engagement.
What tension setting should I use for most fabrics?
Most sewing machines work best with tension set between 4-5 for medium-weight fabrics like cotton. Start at 4 and adjust up or down based on your test stitches.
How can I tell if my sewing machine needs professional service?
Seek professional help if you hear grinding noises, the needle hits the bobbin case, timing seems off, or problems persist despite proper troubleshooting. Annual professional maintenance is also recommended.
Why won’t my sewing machine feed fabric through properly?
Check that your feed dogs are raised and clean, presser foot pressure is appropriate for your fabric, and there’s no lint buildup preventing proper fabric movement.
How do I know if my thread tension is correct?
Perfect tension creates stitches that lock between fabric layers, with the knot invisible from both sides. If you see bobbin thread on top or top thread on bottom, adjust tension accordingly.
Can I use any type of oil on my sewing machine?
Only use oil specifically designed for sewing machines. Household oils can gum up mechanisms and attract dust, causing more problems than they solve.