Master Button Attachment with Professional Techniques for Lasting Results
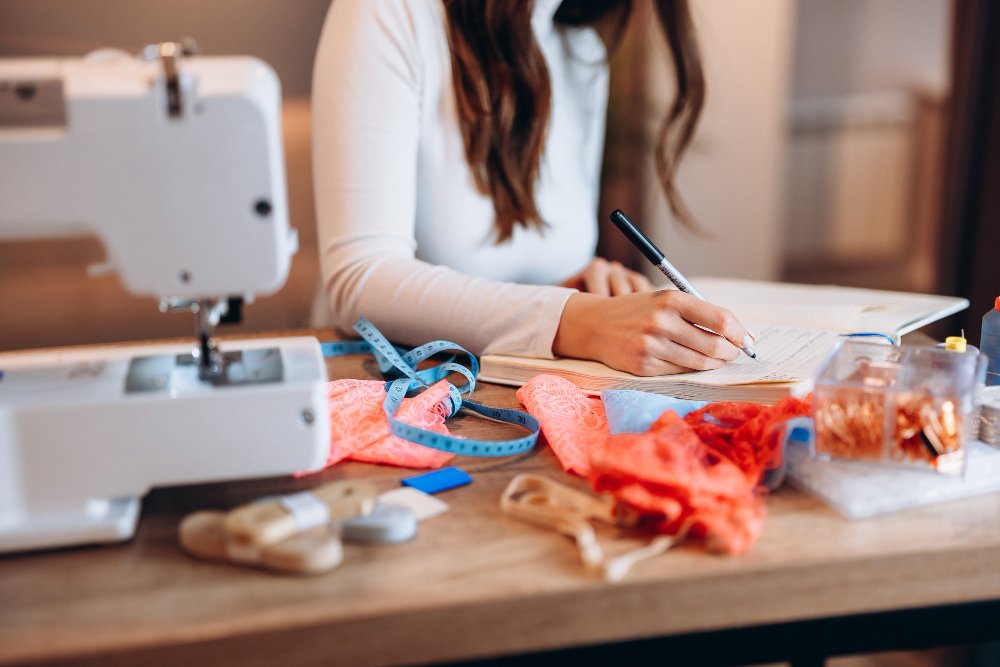
Lost a button at the worst possible moment? You’re not alone. Learning to sew a button is one of those essential life skills that can save you time, money, and embarrassment. Sewing a button requires just a needle, thread, and a few minutes of your time. This comprehensive guide will teach you everything from basic button attachment to advanced techniques that ensure your repairs last for years.
Table of Contents
Quick Answer: How to Sew a Button Step by Step
- Gather supplies: needle, thread, button, scissors
- Thread your needle and tie a knot
- Mark button placement on your fabric
- Create an anchor point with small stitches
- Sew through button holes 6-8 times
- Create a thread shank for proper spacing
- Secure with knots on the back side
For personalized guidance, try our interactive tools: Button Type Quiz to find the perfect button for your project, Thread Calculator for optimal thread recommendations, and Progress Tracker to follow along step-by-step.
Need more detailed instructions? Keep reading for step-by-step techniques, troubleshooting tips, and professional secrets.
Follow this proven workflow to ensure consistent, professional results every time you sew a button:
This systematic approach ensures you don’t skip crucial steps that could lead to button failure later. Each step builds on the previous one, creating a secure foundation for your button attachment.
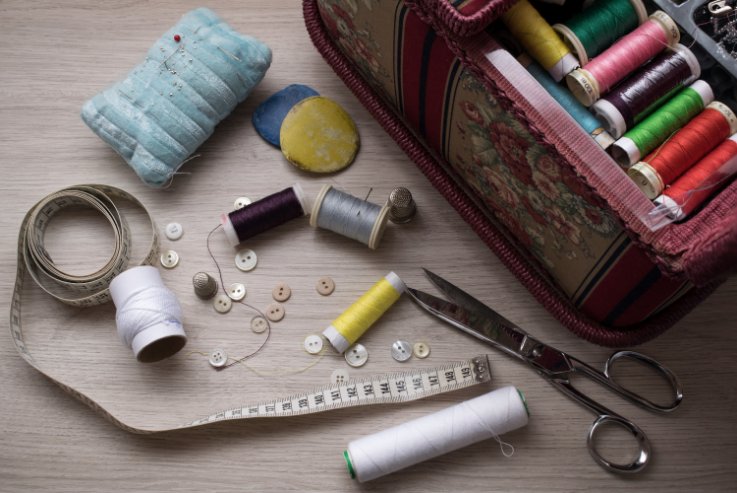
Essential Materials and Tools
Before you start, gather these basic supplies. Having quality materials makes the difference between a repair that lasts weeks versus years.
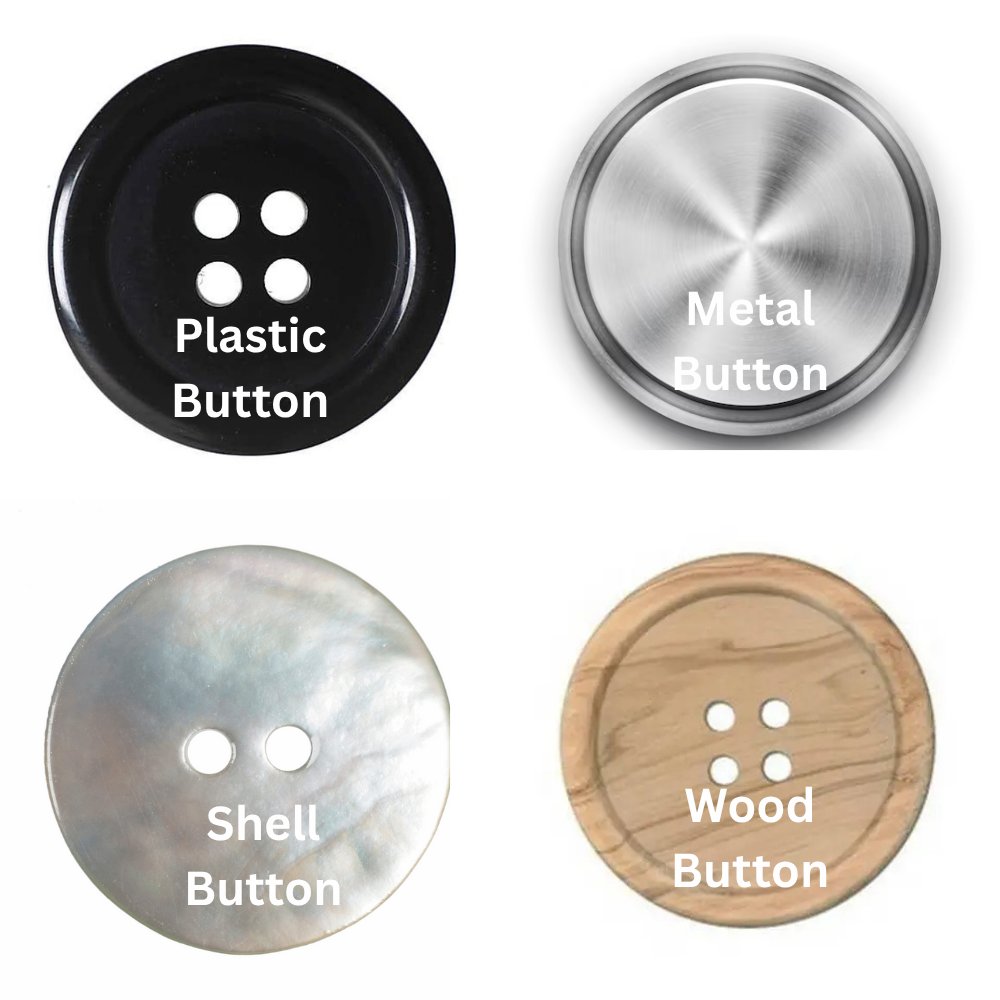
Button Selection Guide
| Button Type | Best For | Durability | Cost |
|---|---|---|---|
| Plastic | Everyday shirts, children’s clothes | Good | Low |
| Metal | Jeans, jackets, coats | Excellent | Medium |
| Shell | Dress shirts, formal wear | Very Good | High |
| Wood | Casual wear, sweaters | Good | Medium |
Not sure which button to choose? Our Button Type Quiz asks 3 simple questions about your project and provides personalized recommendations based on fabric type, garment use, and care requirements.
Size Matching Tips:
- Lightweight fabrics need smaller buttons (under 1/2 inch)
- Heavy coats can handle large buttons (3/4 inch or more)
- Always check that your needle fits through button holes
Understanding the characteristics of different button types helps you choose the right option for your specific project and fabric weight:
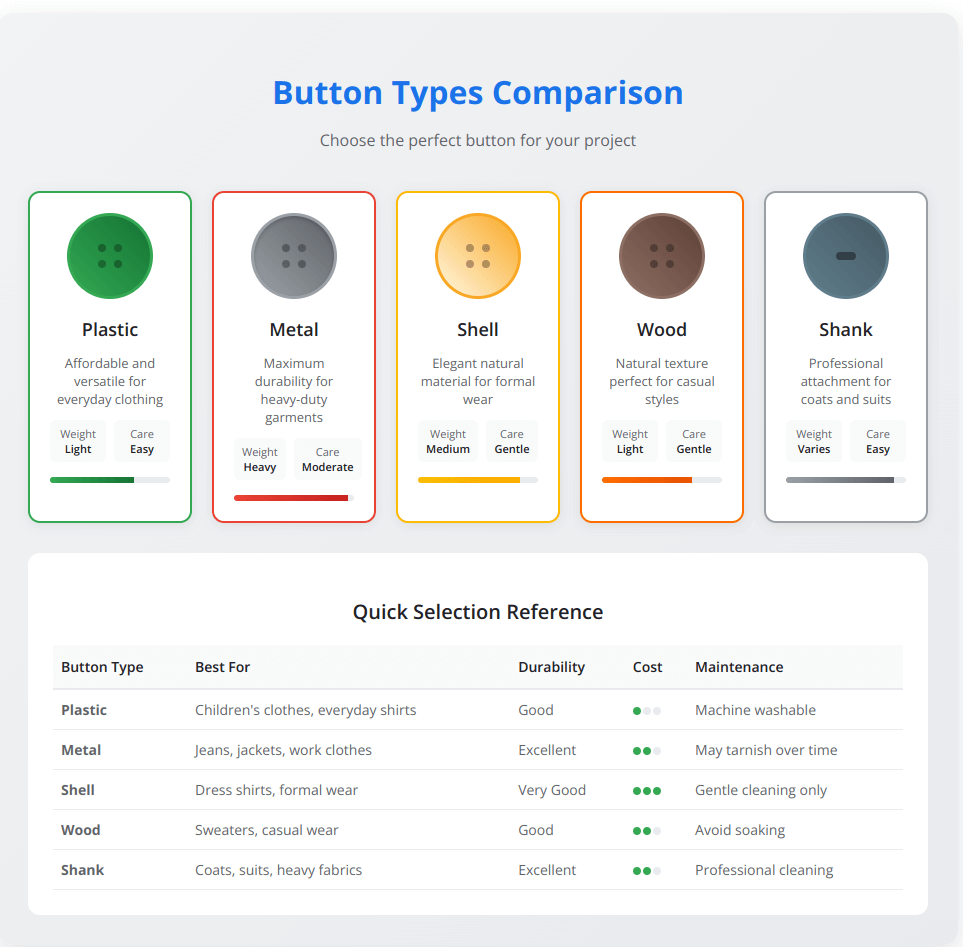
When selecting a replacement button, always try to match the original material and style. If the original button isn’t available, choose a type that complements the garment’s weight and intended use. For valuable or sentimental items, consider consulting with a professional tailor who may have access to specialty button suppliers.
Understanding Button Heritage
Buttons are more than functional fasteners – they’re cultural artifacts with fascinating histories. The Smithsonian’s extensive button collection showcases how button design has evolved from purely practical items to decorative statements that reflect social status, artistic trends, and manufacturing innovations.
Understanding this heritage helps explain why certain button styles work better for specific garments. For example, shell buttons became associated with formal wear not just for their appearance, but because they were expensive and demonstrated quality craftsmanship. Similarly, the standardized button placement conventions we follow today (men’s buttons on the right, women’s on the left) have historical roots dating back centuries.
When you’re selecting replacement buttons or planning new projects, consider both the practical requirements and the cultural context. A historically-appropriate button choice can elevate a simple repair into a restoration that honors the garment’s original character.
Size Matching Tips:
- Lightweight fabrics need smaller buttons (under 1/2 inch)
- Heavy coats can handle large buttons (3/4 inch or more)
- Always check that your needle fits through button holes
Thread Selection Made Simple
Choose thread based on your fabric and button type:
- For everyday repairs: Polyester thread works for most situations
- For heavy-duty items: Use upholstery thread or button thread
- Color matching: Match your thread to either the button or fabric, depending on which you want to emphasize
Need help choosing the right thread? Use our Thread Calculator to get personalized thread recommendations based on your fabric weight, button size, and expected use frequency.
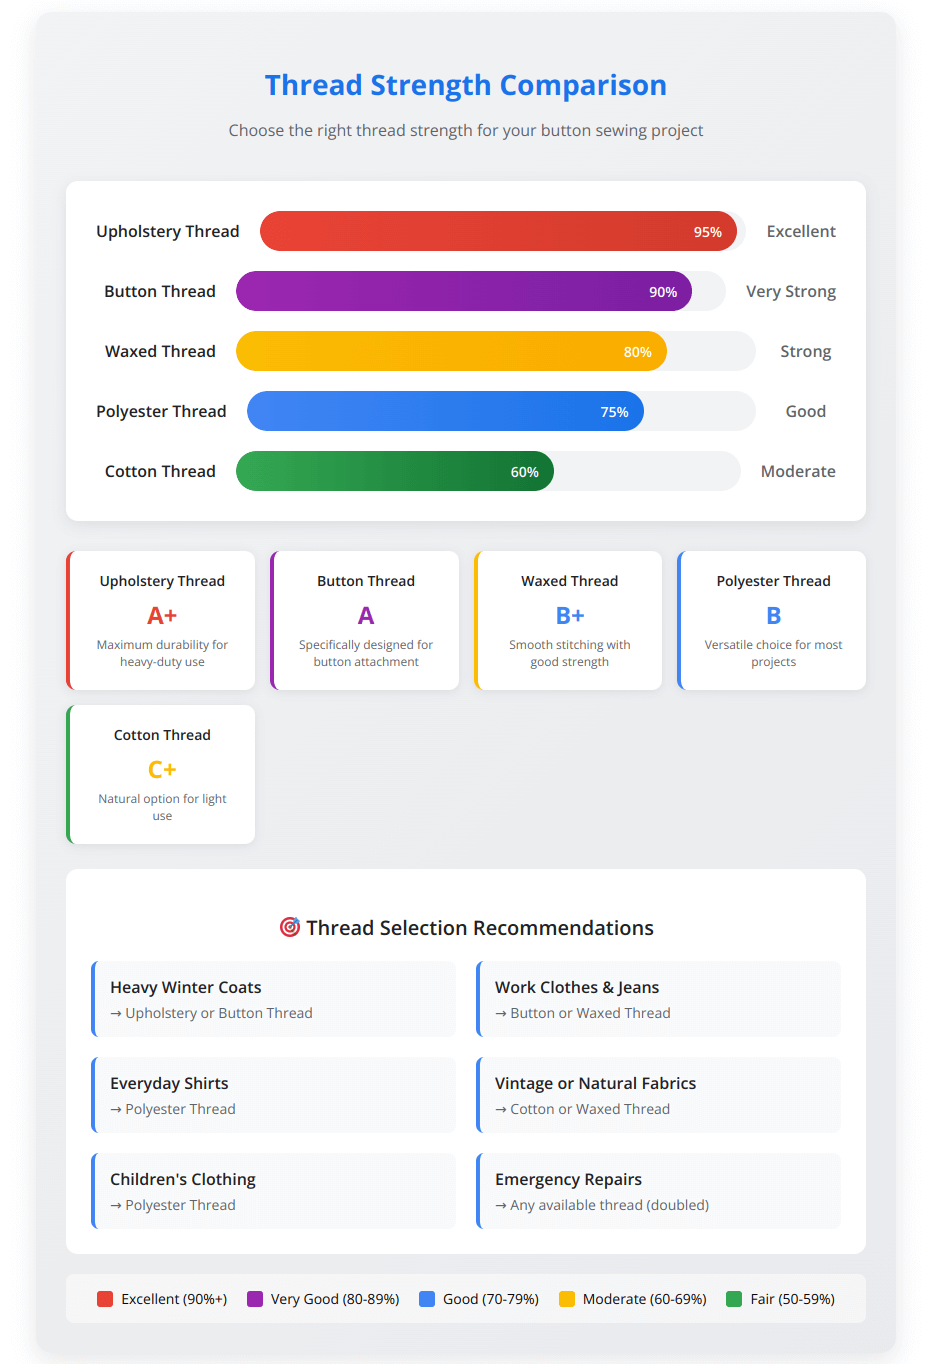
Understanding the characteristics of different thread types helps you make the right choice for your specific project:
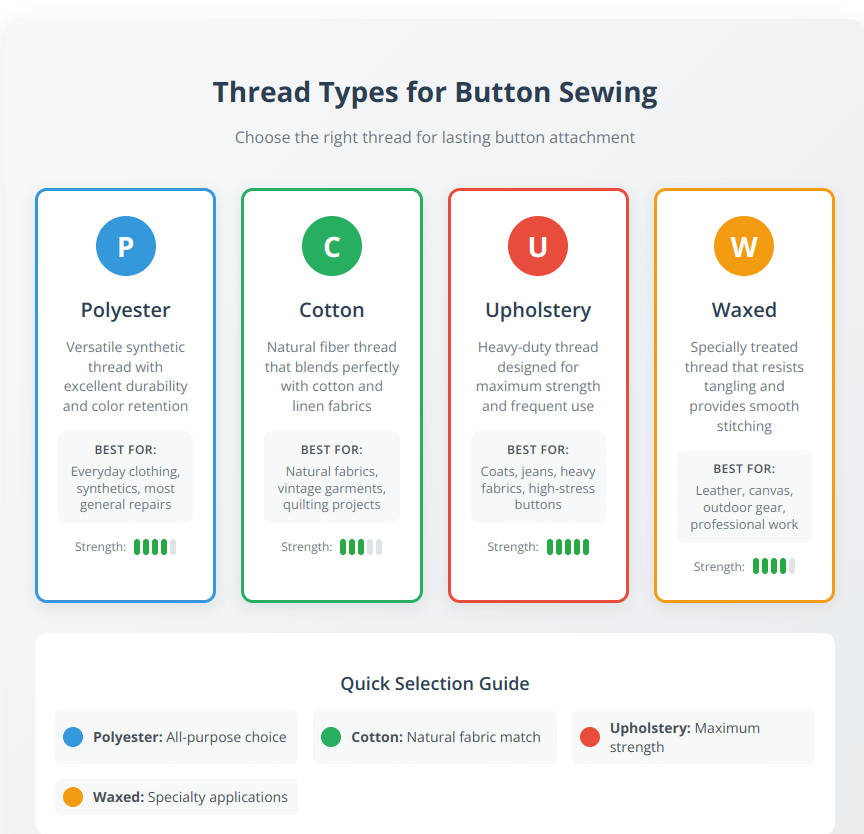
Pro tip: Waxed thread resists tangling and provides extra strength for buttons that get frequent use. When in doubt, polyester thread is your safest choice for most button repairs.
For beginners, consider starting with a basic sewing supplies kit that includes these thread varieties.
Must-Have Sewing Tools
- Sharp needle (size 5-7 for most projects)
- Small scissors for clean thread cuts
- Thimble to protect your pushing finger
- Ruler for accurate button placement
- Fabric marker for marking positions
For those interested in machine button sewing as an alternative to hand sewing, major sewing machine manufacturers like Brother provide detailed guides on using specialized presser feet and automated stitching for high-volume button attachment. While this guide focuses on hand sewing techniques, machine methods can be valuable for large projects or when you need to attach many buttons quickly.
See the machine technique in action with this official demonstration from Brother’s sewing experts.
For beginners, consider starting with a basic sewing supplies kit that includes these essentials.
Preparing Your Button and Fabric
Proper preparation prevents problems later. Take a few extra minutes here to ensure professional results.
Finding the Perfect Button Placement
For replacement buttons: Look for tiny holes or thread marks where the original button was attached. These show exactly where your new button should go.
For new garments: Measure the distance between existing buttons to maintain consistent spacing. Dress shirts typically have buttons spaced 3-4 inches apart.
Alignment trick: Use a ruler to ensure buttons line up in a straight line. This is especially important for visible buttons on coats or shirts.
Fabric Preparation
Thin fabrics: Add a small piece of interfacing on the back side where the button will sit. This prevents the button from tearing through with regular use.
Heavy fabrics: Make sure fabric layers are smooth and flat. Pin everything in place while you work.
Stretchy fabrics: Back with non-stretch stabilizer to prevent distortion when the button is used.
Always check if your fabric needs special care before starting your repair.
Complete Sewing Techniques
Follow along systematically with our Interactive Progress Tracker to ensure you complete every step correctly and achieve professional results.
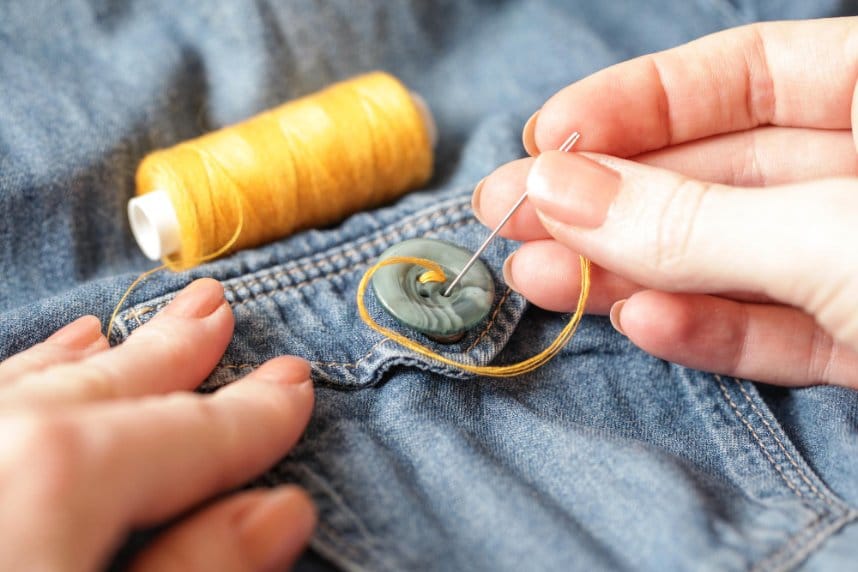
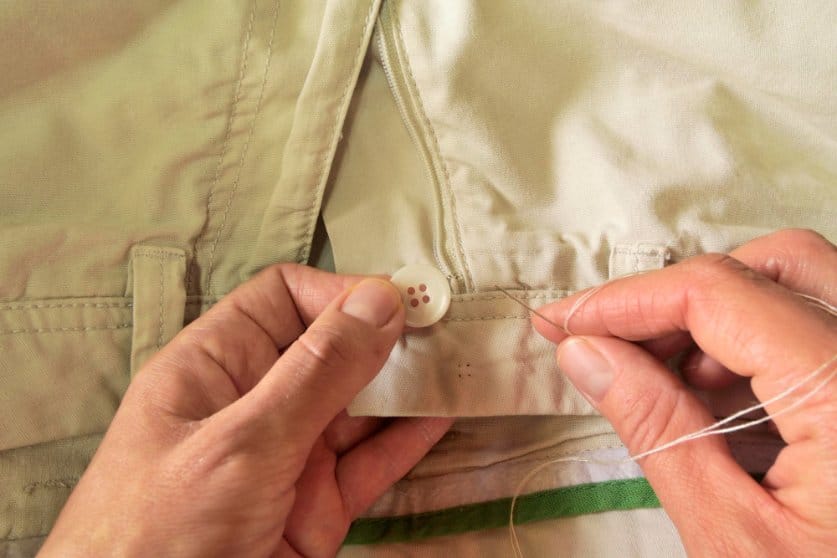
How to Sew on a 4-Hole Button by Hand
This is the most common button type and the foundation for all other techniques.
Step 1: Thread Preparation
- Cut 18 inches of thread
- Thread your needle and tie a knot at the end
- For extra strength, double your thread by folding it in half
Step 2: Create Your Anchor
- Push needle up through fabric from the back
- Make 2-3 small stitches in the same spot
- This creates a strong foundation for your button
Step 3: Position and Secure
- Place button over your anchor point
- Push needle up through one hole
- Place a toothpick across the button (this creates proper spacing)
- Go down through the diagonal hole
Step 4: The “X” Pattern
- Continue sewing in an “X” pattern across the button
- Complete 6-8 passes through all holes
- Keep your stitches firm but not overly tight
Step 5: Create the Thread Shank
- Remove the toothpick
- Bring needle up between button and fabric (don’t go through button)
- Wrap thread around the threads under the button 4-5 times
- Push needle to back and secure with knots
For visual learners, this step-by-step video demonstration shows the complete 4-hole button technique in action.
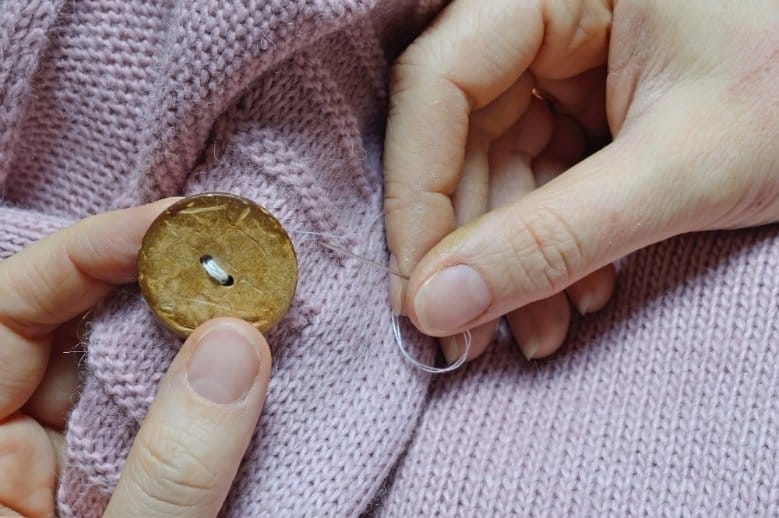
How to Sew on a Single Loop (Shank) Button
Shank buttons have a small loop on the back instead of holes through the face. They’re common on coats and heavy garments.
Thread your needle with about 18 inches of thread and knot the end.
Mark placement exactly where you want the button to sit.
Start from the back: Push your needle up through the marked spot.
Attach the shank: Slide the button’s loop onto your thread, positioning it over where your needle emerged.
Secure with loops: Take your needle back down through the fabric very close to where it came up. You’re essentially creating loops around the shank.
Repeat: Make 6-8 of these securing loops, keeping them tight and even.
Finish strong: Bring needle to the back and create secure knots.
Watch this professional technique for attaching shank buttons with the strength and precision used in high-end tailoring.
What is the Strongest Way to Sew a Button?
For maximum durability, especially on items that see heavy use:
- Use button thread or upholstery thread instead of regular sewing thread
- Create a fabric anchor with interfacing or a small fabric patch on the back
- Make more passes through the holes (8-10 instead of 6)
- Create a substantial thread shank to reduce stress on attachment threads
- Use the cross-stitch method for 4-hole buttons rather than parallel lines
Assess your current skill level with our Button Sewing Difficulty Assessment to get personalized project recommendations that match your experience and abilities.
Understanding thread strength helps you choose the right material for your specific needs:
This technique is perfect for jeans, work shirts, and children’s clothing that gets tough treatment. The investment in stronger thread pays off with buttons that stay attached much longer.
This technique is perfect for jeans, work shirts, and children’s clothing that gets tough treatment.
Master the crucial thread shank technique that separates amateur from professional button attachment.
Advanced Techniques and Special Situations
Emergency Button Repairs
Sometimes you need a quick fix in public. Here’s how to sew a button when you don’t have proper supplies:
- No needle? Straighten a paperclip or safety pin
- No thread? Use dental floss (unflavored works best)
- No scissors? Bite the thread or use a key edge to cut
- Shaky hands? Do the repair in a bathroom where you can sit down
Learn creative emergency solutions for button failures when you don’t have proper sewing supplies.
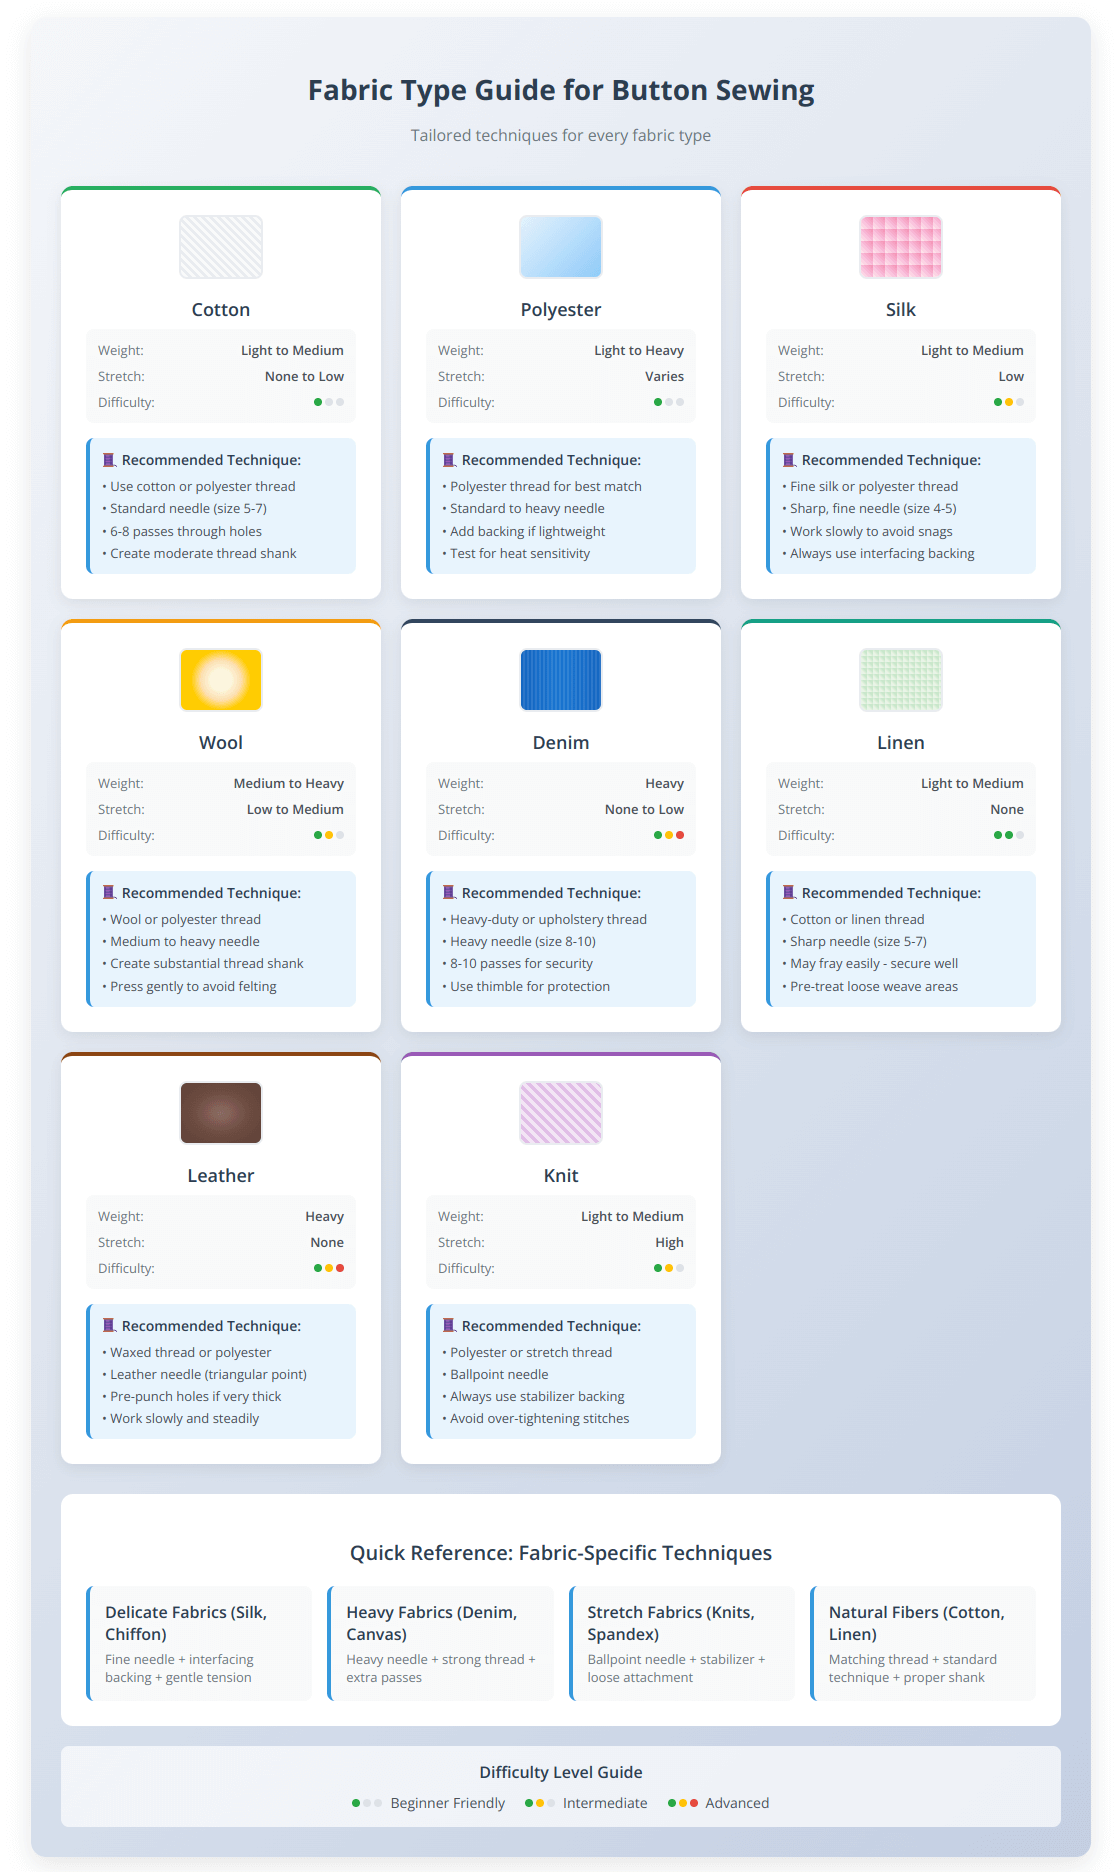
Button Repair for Different Fabric Types
- Delicate fabrics (silk, chiffon): Use a smaller needle and lighter thread. Work slowly to avoid snags.
- Stretchy materials (knits, spandex): Always use a backing material to prevent stretching. Consider using a slightly looser attachment.
- Heavy fabrics (denim, canvas): Use heavy-duty thread and a larger needle. Create a more substantial thread shank.
- Leather and suede: Use a leather needle and waxed thread. For detailed care instructions, check our leather clothing care guide.
Different fabric types require specific approaches for successful button attachment:
Heavy fabrics (denim, canvas): Use heavy-duty thread and a larger needle. Create a more substantial thread shank.
For detailed care instructions on specific fabrics, check our comprehensive fabric care guides.
Professional Finishing Touches
Check your work: Gently tug the button to ensure it’s firmly attached but still has enough give for buttoning.
Test the function: Try buttoning and unbuttoning several times to verify:
- Button moves smoothly through buttonhole
- Thread shank provides adequate space
- Button doesn’t wobble or feel loose
Clean finish: Trim thread ends to about 1/4 inch from knots. Gently tug fabric to hide any loose threads on the wrong side.
Buttonhole Basics for Complete Button Systems
How to Sew Buttonholes for Beginners
While this guide focuses on button attachment, understanding buttonholes helps create complete closures.
Hand-sewn buttonholes:
- Mark the exact length needed (button diameter plus thickness)
- Cut carefully with small, sharp scissors
- Reinforce edges with tight blanket stitches
Machine buttonholes: Most modern sewing machines have automatic buttonhole functions. Check your sewing machine manual for specific instructions.
Do You Sew Buttons or Buttonholes First?
Always sew buttonholes first. Here’s why:
- Buttonholes determine exact button placement
- It’s easier to adjust button position than to redo buttonholes
- You can test fit with temporary buttons before final attachment
How to Make a Simple Rose Buttonhole
A decorative technique that adds elegance to formal garments:
- Create a standard buttonhole
- Use decorative thread in a contrasting color
- Work tiny blanket stitches around the opening
- Create small loops at each end that resemble rose petals
Troubleshooting Common Problems
When Buttons Keep Coming Loose
Problem: Buttons fall off repeatedly
Solutions:
- Use stronger thread (upholstery or button thread)
- Create a proper thread shank
- Add interfacing backing
- Check if buttonhole is too tight (causing stress)
Fabric Puckering Around Buttons
Problem: Fabric bunches around the button area
Solutions:
- Don’t pull thread too tight while sewing
- Create adequate thread shank
- Use appropriate needle size for your fabric
- Consider using a backing material
Button Placement Mistakes
Problem: Buttons don’t align properly
Solutions:
- Always measure from existing buttons
- Use a ruler to ensure straight lines
- Mark placement before removing old buttons
- Test with pins before sewing permanently
Still having difficulties? Take our Skill Level Assessment to identify areas for improvement and get targeted recommendations for building your button sewing expertise.
Care and Maintenance
Extending Button Life
Regular inspection: Check buttons on frequently worn items every few months. Look for loose threads or cracks.
Preventive maintenance: Reinforce slightly loose buttons before they fall off completely.
Proper storage: When washing, button garments completely to prevent catching on other items.
Gentle handling: Avoid pulling on buttons when putting on or removing clothes.
When to Replace vs. Repair
Replace when:
- Button is cracked or broken
- Thread holes are enlarged from repeated repairs
- Button no longer matches others on the garment
Repair when:
- Button is loose but intact
- Only one or two attachment threads have broken
- Button is rare or expensive to replace
Special Projects and Creative Applications
How to Make Your Own Buttons
Creating custom buttons adds personal flair to your projects:
- Fabric-covered buttons: Use button kits available at craft stores
- Polymer clay buttons: Shape and bake decorative buttons
- Shell or wood buttons: Sand and finish natural materials
- Vintage buttons: Repurpose buttons from old garments
Decorative Button Techniques
- Contrast threading: Use thread that stands out for decorative effect
- Multiple buttons: Layer small buttons over larger ones
- Button clusters: Group several small buttons instead of one large one
- Shanked variations: Add decorative elements to basic shank buttons
Interactive Button Selection Quiz
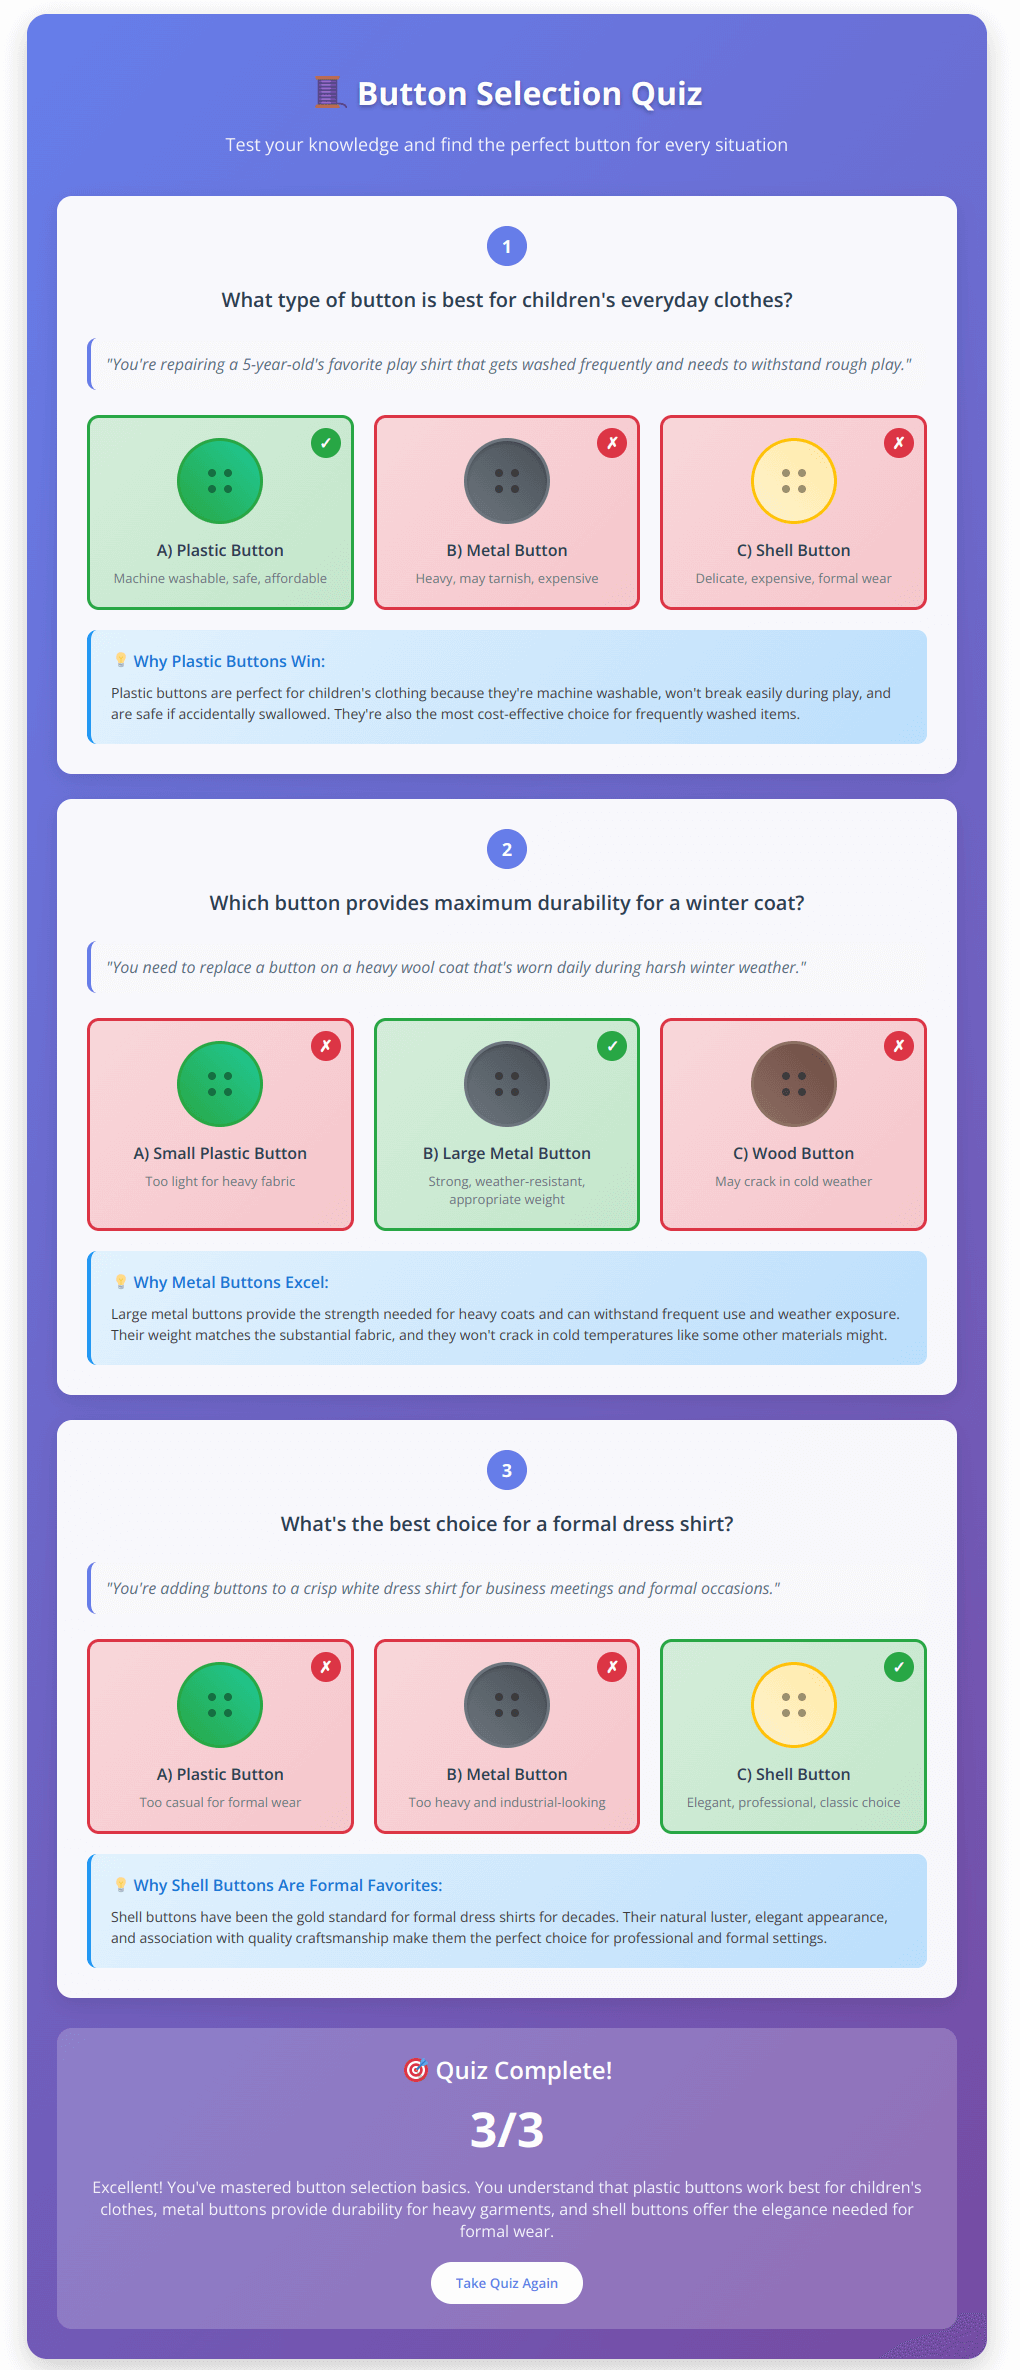
Button Selection Knowledge Check
Understanding button selection can seem overwhelming at first, but these practical scenarios will help you make the right choice every time. Test your knowledge with this interactive guide:
What type of button should you use?
Quick Reference Answers:
Scenario 1: Children’s Everyday Clothes
✅ Plastic buttons – Machine washable, safe, affordable, and durable for frequent washing
Scenario 2: Heavy Winter Coat
✅ Large metal buttons – Provide strength for heavy fabric, weather-resistant, appropriate weight
Scenario 3: Formal Dress Shirt
✅ Shell buttons – Elegant appearance, professional look, traditional choice for formal wear
These real-world scenarios demonstrate the key principles of button selection: match the button material to the garment’s use, consider maintenance requirements, and think about the overall aesthetic you want to achieve.
Remember these guidelines as you select buttons for your own projects. When in doubt, consider the garment’s primary use and choose accordingly.
Frequently Asked Questions
How Many Times Should You Sew a Button?
For most applications, pass through each hole 6-8 times. Heavy-duty applications (work clothes, children’s items) may need 8-10 passes for maximum security.
Can You Sew Button Holes by Hand?
Yes, hand-sewn buttonholes are traditional and durable. They require patience but offer complete control over size and placement. Start with tight blanket stitches around a carefully cut opening.
Is Sewing a Button Hard?
Not at all! Button sewing is one of the easiest sewing skills to learn. With basic supplies and a few minutes of practice, most people can sew a secure button. The key is taking time to create proper thread shanks and secure knots.
Which Way Should Buttons Be Sewn On?
For men’s clothing: Buttons go on the right side (when wearing)
For women’s clothing: Buttons go on the left side (when wearing) This convention dates back centuries and helps identify men’s versus women’s garments.
What’s the Hardest Thing to Sew?
While buttons are beginner-friendly, challenging sewing projects include tailored jackets, wedding dresses, and items requiring precise fit. However, even complex projects build on basic skills like button sewing.
How to Sew a Loop by Hand?
Fabric loops (for button closures):
1. Cut a strip of fabric on the bias
2. Fold lengthwise and sew a narrow seam
3. Turn right side out using a safety pin
4. Attach both ends securely to garment
Thread loops (for small buttons):
1. Make several loose stitches the desired loop length
2. Cover with tight blanket stitches
3. Secure ends firmly in fabric
What Does Button Stitching Mean?
Button stitching can refer to:
• Functional stitching: Securing buttons for closure
• Decorative stitching: Using contrast thread for visual appeal
• Reinforcement stitching: Extra passes for durability
What tools can help me improve my button sewing skills?
We’ve created several interactive tools to enhance your button sewing experience:
• Button Type Quiz – Find the perfect button for any project in 30 seconds
• Thread Calculator – Get strength recommendations based on your fabric and button specs
• Skill Assessment – Discover your current level and get personalized improvement tips
• Progress Tracker – Follow our step-by-step checklist for consistent results
These free tools complement this guide and help ensure successful button repairs every time.
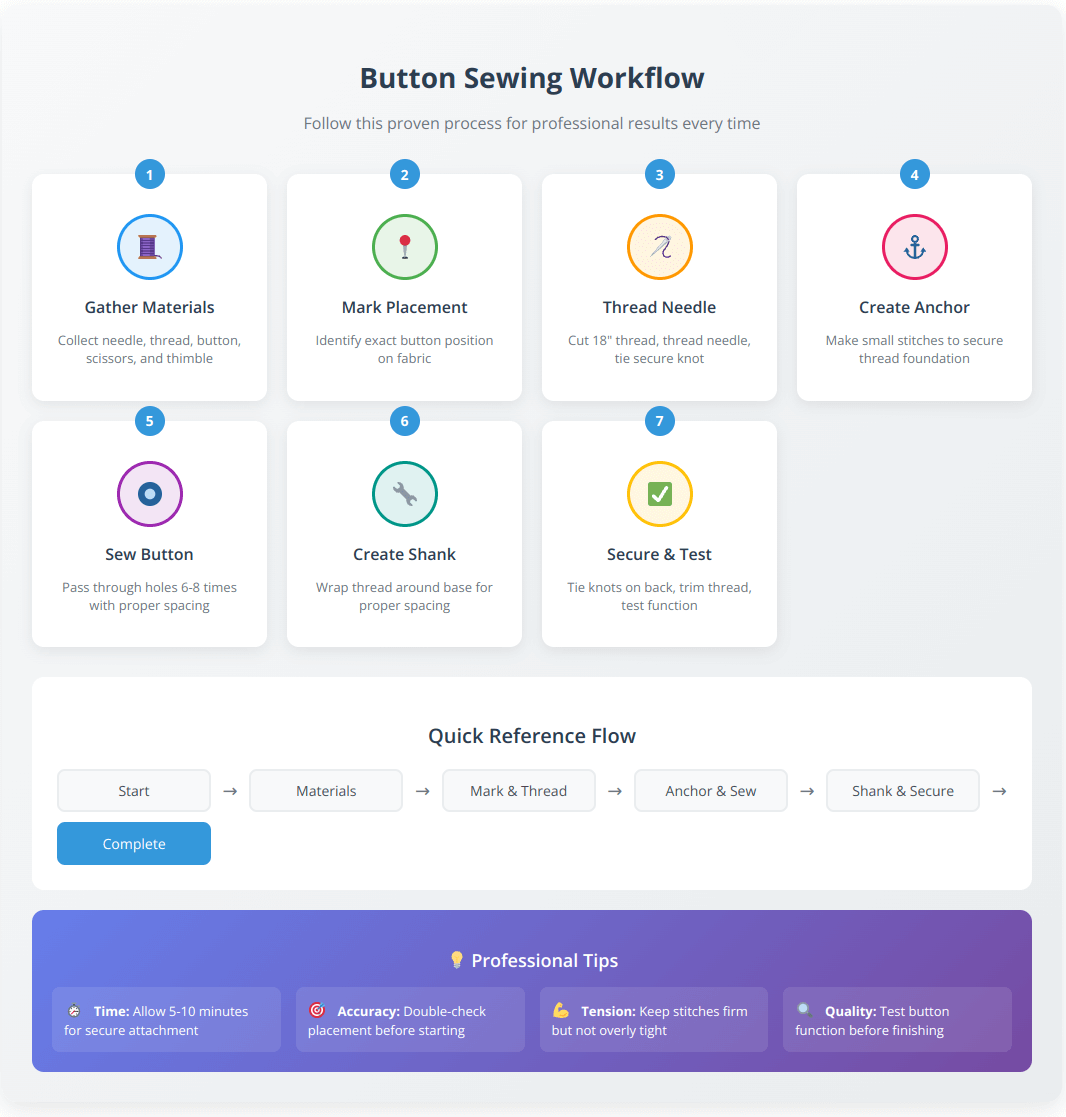
Button Sewing Workflow Chart
Follow this proven workflow to ensure consistent, professional results every time you sew a button:

Step-by-Step Workflow Summary
🧵 Step 1: Gather Materials (1 min)
- Needle, thread, button, scissors, thimble
- Choose appropriate thread type for your fabric
📍 Step 2: Mark & Thread (1 min)
- Mark exact button placement on fabric
- Thread needle with 18″ of thread, tie secure knot
⚓ Step 3: Create Anchor (30 sec)
- Make 2-3 small stitches in same spot
- Creates strong foundation for button attachment
🔘 Step 4: Sew Button (2-3 min)
- Pass through button holes 6-8 times
- Use toothpick spacer for proper thread shank
🔧 Step 5: Create Shank (1 min)
- Remove spacer, wrap thread around base
- Provides space for fabric thickness when buttoned
✅ Step 6: Secure & Test (30 sec)
- Tie secure knots on fabric back side
- Test button function and movement
🎯 Step 7: Complete (30 sec)
- Trim excess thread to 1/4 inch
- Final inspection for professional finish
Total Time: 5-10 minutes for a secure, professional attachment that will last for years.
This systematic approach ensures you don’t skip crucial steps that could lead to button failure later. Each step builds on the previous one, creating a secure foundation for your button attachment.
Pro tip: Don’t rush the process. Taking time for each step, especially creating the proper thread shank, makes the difference between a repair that lasts weeks versus one that lasts years.
Conclusion
Mastering button sewing transforms you from someone who depends on others for basic clothing repairs into a self-sufficient person who can handle wardrobe emergencies with confidence. This comprehensive guide has covered everything from basic button attachment to advanced techniques for specific fabrics and challenging situations.
Key takeaways for successful button sewing:
- Master the fundamentals first. Understanding proper thread selection, needle choice, and basic stitching techniques provides the foundation for all other skills. Practice the standard 4-hole button technique until it becomes second nature.
- Preparation prevents problems. Taking time to properly mark placement, stabilize fabric, and gather appropriate materials makes the difference between repairs that last months versus those that last years.
- Adapt techniques to your specific situation. Different fabrics, button types, and garment uses require modified approaches. Heavy coats need stronger thread and more secure attachment than lightweight shirts.
- Create proper thread shanks consistently. This single technique prevents more button failures than any other factor. The small space between button and fabric accommodates the thickness of the opposite fabric layer when buttoned.
- Practice makes permanent. Like any skill, button sewing improves with repetition. Start with practice pieces or damaged clothing you don’t mind experimenting on before working on valuable garments.
- Build your repair toolkit gradually. Invest in quality needles, various thread types, and proper tools as you gain experience. A well-stocked sewing supplies collection enables you to handle any button emergency.
- Know when to seek help. While button sewing is accessible to beginners, complex repairs on expensive garments or items with sentimental value might warrant professional attention. Understanding your limits prevents costly mistakes.
- Use the right tools for guidance. Our interactive button sewing tools provide personalized recommendations for button selection, thread choice, and skill development, making the learning process more efficient and enjoyable.
The time invested in learning proper button sewing techniques pays dividends throughout your life. No more waiting for repairs, no more safety pin solutions, and no more embarrassing wardrobe malfunctions. With these skills in your toolkit, you’re prepared to handle one of the most common clothing repairs with confidence and competence.
Whether you’re reinforcing a loose button before it falls off, replacing a lost button in an emergency, or adding custom buttons to a handmade garment, these techniques ensure professional results every time. Start with simple projects and gradually work up to more challenging repairs as your confidence and skills develop.
Remember, every expert was once a beginner. Your first button might not look perfect, but with practice and patience, you’ll develop the muscle memory and technique that makes button sewing quick and reliable. Consider this guide your reference resource – return to it whenever you encounter new challenges or need to refresh your technique.