Master the timeless craft of creating durable, beautiful lace through traditional knotting techniques
Table of Contents
- What is Tatting?
- History and Background
- Tatting vs Other Lace-Making Techniques
- Essential Materials and Tools
- Getting Started: Setup and Preparation
- Basic Tatting Techniques
- Advanced Techniques and Patterns
- Common Problems and Solutions
- Project Progression Guide
- Care and Maintenance
- Modern Applications and Innovations
- Resources and Community
- Frequently Asked Questions
What is Tatting?
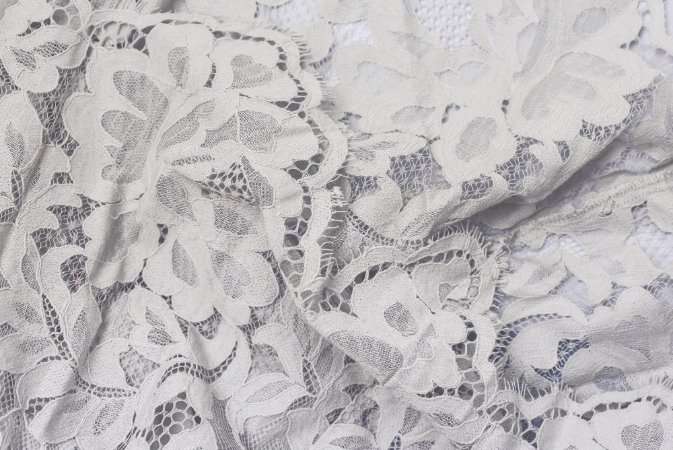
Tatting is a specialized form of lace making that creates incredibly durable and intricate designs using only thread and a small shuttle or needle. Unlike other knotted lace techniques, tatting produces lace that can last over 200 years while maintaining its delicate appearance.
This craft transforms simple thread into stunning accessories, home decor, and clothing embellishments through a series of half-hitch knots. The resulting fabric resembles traditional lace but offers superior strength and longevity, making it perfect for heirloom pieces and everyday use.
What’s the Difference Between Lace and Tatting?
While tatting creates lace, not all lace is tatted. Here’s how they differ:
| Aspect | Tatting | Traditional Lace |
|---|---|---|
| Construction Method | Knotting technique using shuttles | Various methods: weaving, braiding, needlework |
| Durability | Extremely durable (200+ years) | Varies by construction method |
| Tools Required | Shuttle or needle, thread | Depends on type: bobbins, needles, looms |
| Learning Curve | Moderate, requires tension control | Varies greatly by technique |
| Portability | Highly portable | Varies by equipment needed |
History and Background
Early 1800s – Maritime Origins
Sailors developed decorative knotting techniques while creating nets and rigging. These practical skills evolved into artistic expression during long voyages.
1820s – European Adoption
Maritime techniques reached European shores, blending with existing needlework traditions to create what we now recognize as tatting.
1851 – Standardization
Mlle Eléonore Riego de la Branchardière published the first comprehensive pattern manual, standardizing terms like “picot” and “join” that remain essential today.
1920-1940 – Golden Age
Tatting reached peak popularity with lace collar trends. Commercial pattern sales doubled as home economics classes taught the craft widely.
Present Day – Modern Revival
Contemporary artists combine traditional techniques with bold colors and mixed media, proving this heritage craft adapts to new creative visions.
Where Did Tatting Lace Come From?
The exact origins of tatting remain debated among historians. While some trace it to various lace-making traditions, the most widely accepted theory credits 19th-century sailors who adapted their rope-working skills into decorative arts.
According to historical research, contemporary tatting methods arose in the 19th century, influenced by the numerous publications of Mlle Eléonore Riego de la Branchardière who developed the concepts and terms for picots and chains that remain essential today.
These seafarers created intricate knotwork during long voyages, often as gifts for loved ones back home. When these techniques reached European parlors, they evolved into the refined craft we know today, earning names like “frivolité” in France and “Schiffchenarbeit” (work of the little boat) in Germany.
Tatting vs Other Lace-Making Techniques
Is Tatting Like Crochet?
While both create beautiful textiles, tatting and crochet use fundamentally different techniques:
Tatting Characteristics
- Uses knotting technique
- Creates permanent, non-unraveling stitches
- Requires shuttle or specialized needle
- Produces extremely durable results
- Mistakes require cutting and restarting
Crochet Characteristics
- Uses looping technique
- Creates stitches that can be easily undone
- Uses standard crochet hooks
- More forgiving for beginners
- Mistakes can be “frogged” (unraveled)
Is Tatting Like Macramé?
Tatting and macramé both use knotting techniques, but they serve different purposes. Macramé typically creates larger decorative items using thick cords, while tatting focuses on delicate lace using fine threads. The knot structures also differ significantly, with tatting using specific half-hitch sequences that create sliding stitches.
Is Crochet Considered Lace?
Crochet can create lace-like fabrics, but it’s technically a different category. Cotton lace and other traditional laces use various construction methods, while crochet lace is a subset of crochet work that mimics lace appearance through specific stitch patterns and thread choices.
Essential Materials and Tools
What Tool is Used for Tatting?
Tatting requires minimal equipment, making it one of the most portable crafts:
| Tool Type | Material | Best For | Price Range |
|---|---|---|---|
| Post Shuttle | Plastic/Wood | Beginners | $5-15 |
| Bobbin Shuttle | Metal/Bone | Advanced patterns | $15-50 |
| Tatting Needle | Metal | Those who prefer needle work | $8-20 |
| Vintage Shuttles | Ivory/Tortoiseshell | Collectors | $50-500+ |
What Kind of Thread Do You Use for Tatting?
Thread choice significantly impacts your tatting experience and results:
Beginner Thread Recommendations
- Size 10 cotton thread: Thick enough to see stitches clearly
- DMC Cordonnet: Excellent for learning tension control
- Variegated colors: Help identify which thread forms rings
- High-quality cotton: Provides good grip and durability
Thread Size Guide
| Thread Size | Thickness | Best Use | Skill Level |
|---|---|---|---|
| Size 3-5 | Very thick | Practice, children’s projects | Absolute beginner |
| Size 8-10 | Thick | Learning, home decor | Beginner |
| Size 20 | Medium | Most projects, jewelry | Intermediate |
| Size 40-80 | Fine | Delicate work, heirloom pieces | Advanced |
Essential Supplies Checklist
Primary Tools
One shuttle (post-style recommended for beginners) and sharp, pointed scissors for clean cuts.
Thread Selection
Start with size 10 cotton thread in a light color that contrasts with your work surface.
Optional Helpers
Small crochet hook for picking up dropped stitches, pattern holder, and good lighting.
Organization
Small bag or box to keep everything together – tatting’s portability is one of its greatest advantages.
Getting Started: Setup and Preparation

Watch this comprehensive beginner tutorial covering essential materials and basic knot techniques
How to Wrap a Tatting Shuttle
Proper shuttle winding prevents tangles and ensures smooth work flow:
Wind Clockwise
Always wind thread clockwise around the shuttle’s center post. This direction prevents unwinding during use.
Maintain Even Layers
Create uniform layers without overlapping. Rotate the shuttle as you wind to distribute thread evenly.
Leave Working End
Keep 4-6 inches of thread free for your first stitches. Too little makes starting difficult; too much creates tangles.
Test Thread Flow
Pull gently to ensure thread flows smoothly without catching. Rewind if you encounter resistance.
Proper Hand Positioning
Correct hand positioning is crucial for consistent tension and comfortable tatting:
Hand Setup Steps
- Non-dominant hand: Pinch thread between thumb and middle finger, 4 inches from the end
- Loop creation: Pass thread over index finger to create a stable working loop
- Dominant hand: Hold shuttle like a pencil, maintaining light but controlled grip
- Working distance: Keep hands 6-8 inches apart for optimal control
Basic Tatting Techniques
The Foundation: Double Stitch
Every tatted piece begins with mastering the double stitch, which consists of two half-hitches:
First Half-Hitch
Pass shuttle under the ring thread, up through the loop, and pull snug. The shuttle thread should wrap around the ring thread.
Second Half-Hitch
Pass shuttle over the ring thread, down through the loop, and pull snug. This completes one double stitch.
The Flip
After each half-hitch, the knot should “flip” so the shuttle thread forms the core and the ring thread creates the knot. This is essential for proper stitch formation.
Test Sliding
Completed stitches should slide easily along the core thread. If they don’t slide, the flip didn’t occur properly.
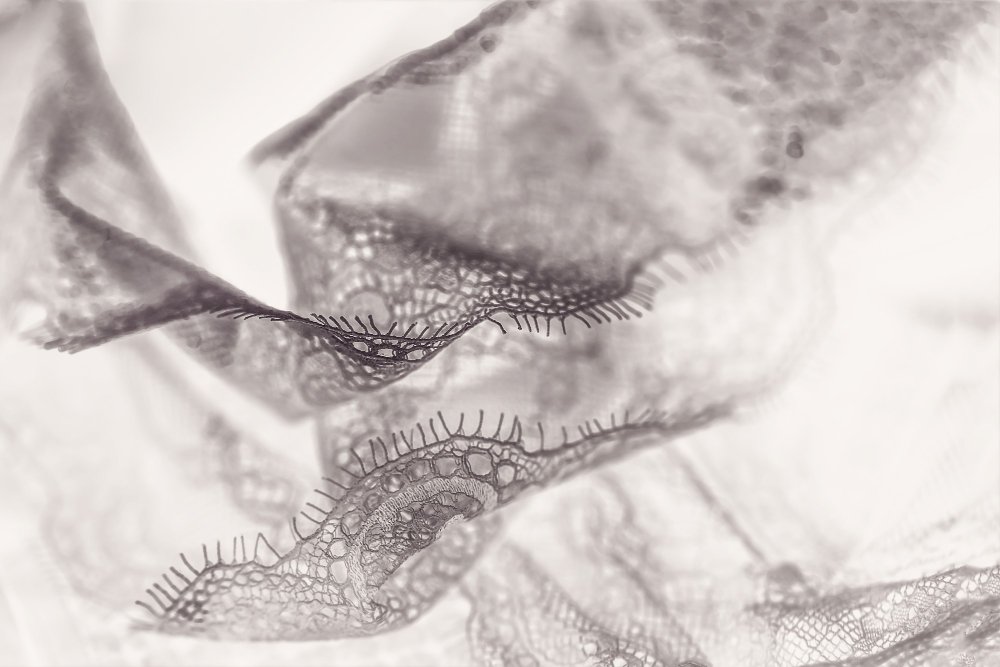
How to Flip the Knot in Tatting

Master the essential knot flip technique with this detailed visual demonstration
The knot flip is the most crucial aspect of tatting technique. Here’s how to master it:
Troubleshooting Flip Problems
- Knots won’t slide: Ring thread tension too tight during formation
- Loose, messy stitches: Insufficient shuttle thread tension
- Inconsistent appearance: Varying tension between first and second half-hitches
- Thread tangles: Working too quickly without checking stitch formation
Creating Your First Ring
Rings are the fundamental building blocks of tatted lace:
Make Practice Stitches
Create 8-10 double stitches, ensuring each slides freely along the core thread.
Close the Ring
Pull the shuttle thread firmly to draw stitches together into a ring shape. The first and last stitches should meet.
Check Ring Quality
A proper ring lies flat, has even stitches, and closes completely without gaps or puckering.
Secure and Continue
Pull shuttle thread tight and prepare for your next element (ring or chain).
What Are the Different Types of Tatting?
| Type | Tools Used | Learning Difficulty | Best For |
|---|---|---|---|
| Shuttle Tatting | Traditional shuttle | Moderate | Traditional patterns, portability |
| Needle Tatting | Specialized tatting needle | Easier for some | Those comfortable with needlework |
| Finger Tatting | Hands only | Limited applications | Emergency repairs, demonstration |
Is Tatting Easier with Needle or Shuttle?
Both methods produce similar results, but each has advantages:
Shuttle Tatting Advantages
- Traditional method with historical patterns
- Better thread control and tension
- Faster once technique is mastered
- More portable for travel
Needle Tatting Advantages
- Familiar tool for sewers
- Easier to understand stitch formation
- Less coordination required initially
- Good for trying tatting before investing in shuttles
Advanced Techniques and Patterns
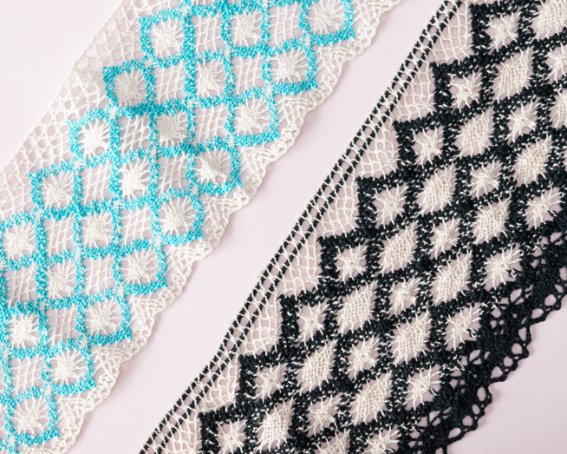
Picots: Decoration and Function
Picots serve dual purposes in tatting – they add decorative elements and provide joining points for complex patterns:
Create the Gap
After completing a double stitch, leave a small gap (usually 1/4 inch) before starting the next stitch.
Form Following Stitches
Make additional double stitches, then slide all stitches together. The gap becomes a decorative loop.
Size Consistency
Use a consistent measure for picot size – many tatters use the width of a shuttle or a small ruler.
Functional vs Decorative
Joining picots should be smaller than decorative ones. Plan picot placement to enhance both beauty and structural integrity.
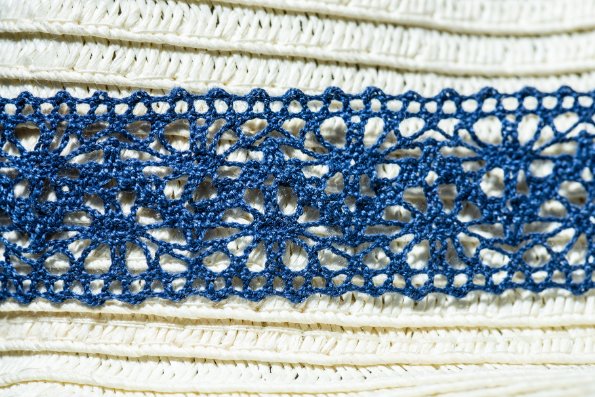
Chains: Connecting Elements

Learn to create chains that connect rings and form flowing patterns in tatted lace
Chains connect rings and create flowing patterns in tatted lace:
Chain Construction Steps
- Flip your work: After completing a ring, turn the work to position for chain making
- Ball thread control: Hold ball thread with non-dominant hand like ring thread
- Shuttle thread work: Make double stitches using shuttle thread around ball thread core
- Maintain direction: Keep consistent working direction for even chain appearance
Joining Techniques
Seamless joins create professional-looking tatted lace without visible connections:
| Join Type | When to Use | Difficulty | Strength |
|---|---|---|---|
| Picot Join | Connecting rings to chains | Beginner | Very Strong |
| Lock Join | Continuous rounds | Intermediate | Strong |
| Josephine Knot | Decorative elements | Advanced | Moderate |
What is a Josephine Knot in Tatting?
The Josephine knot is a decorative element made from only first half-hitches (no second half). This creates a twisted, rose-like appearance perfect for flower centers and ornamental details.
Start the Knot
Make only the first half of a double stitch – shuttle under ring thread, up through loop.
Repeat First Halves
Continue making only first half-hitches. Most Josephine knots use 5-10 repetitions.
Close and Shape
Pull shuttle thread to close the knot. The single-direction stitches create a natural spiral.
Integration
Use Josephine knots as flower centers, chain decorations, or standalone elements in complex patterns.
How to Use Beads in Tatting
Adding beads elevates tatted jewelry and decorative pieces:
Bead Integration Methods
- Pre-stringing: Thread beads onto shuttle thread before beginning
- Picot placement: Slide beads into picots for secure positioning
- Chain integration: Position beads between double stitches in chains
- Center positioning: Place single beads in ring centers using specialized techniques
Common Problems and Solutions
The 30-Day Beginner Challenge
Learning tatting requires patience and practice. Most beginners encounter frustration in the first month. Here’s your roadmap to success:
Week 1: Focus only on making single rings. Expect uneven stitches and tension problems.
Week 2: Practice picots and joining. Your hands will start remembering the motions.
Week 3: Attempt simple chains. Mistakes are normal – cutting and restarting builds skills.
Week 4: Complete your first simple pattern. Celebrate this major milestone!
Major Problem Categories
Tension Issues
| Problem | Cause | Solution | Prevention |
|---|---|---|---|
| Loose, gappy stitches | Insufficient shuttle tension | Pull shuttle thread tighter | Practice consistent pulling motion |
| Tight stitches won’t slide | Excessive ring tension | Relax ring thread during formation | Focus on tension release timing |
| Uneven ring shape | Inconsistent stitch tension | Practice uniform pulling force | Count and maintain rhythm |
Structural Problems
Rings Won’t Close
- Check that stitches slide freely
- Ensure proper knot flipping occurred
- Verify you’re pulling shuttle thread, not ring thread
- Practice sliding motion before attempting closure
Chains Look Twisted
- Maintain consistent working direction
- Check ball thread positioning
- Ensure proper thread core identification
- Practice chain-only exercises
How to Tie Off Tatting
Proper finishing ensures your tatted pieces remain secure and beautiful:
Plan Your Ending
End at a logical point in your pattern, preferably after completing a ring or chain section.
Create Tiny Knots
Make small, tight knots with both threads close to the last stitch. Use a needle to position knots precisely.
Weave Thread Ends
Use a small crochet hook or needle to weave thread ends through nearby stitches for security.
Trim Carefully
Cut excess thread close to the work, leaving just enough to prevent unraveling.
Project Progression Guide
5 Projects for Skill Building
Project 1: Simple Bookmark Beginner
Skills learned: Basic rings, picots, consistent tension
Time required: 2-3 hours
Materials: Size 10 cotton thread, basic shuttle
Create a chain of 10 rings with decorative picots. Perfect for practicing fundamental techniques without complex joins.
Project 2: Jewelry Earrings Beginner
Skills learned: Small-scale work, finishing techniques
Time required: 1-2 hours
Materials: Size 20 thread, earring findings
Single ring earrings with decorative picots. Introduces working with finer thread and jewelry assembly.
Project 3: Lace Edging Intermediate
Skills learned: Chains, joining, pattern following
Time required: 4-6 hours
Materials: Size 20 thread, ball thread
Create edging for handkerchiefs or linens. Combines rings and chains with regular joining points.
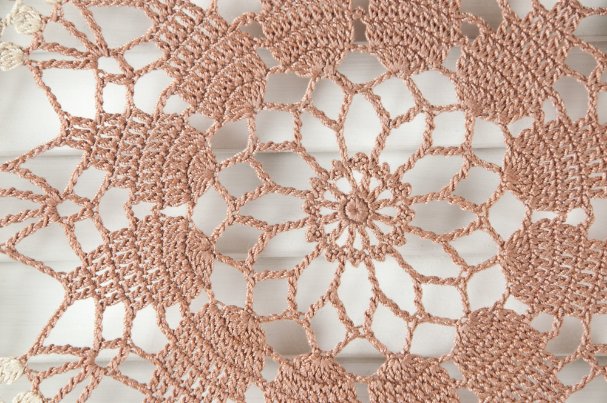
Project 4: Small Doily Intermediate
Skills learned: Circular construction, complex joins
Time required: 8-12 hours
Materials: Size 20-40 thread, pattern guide
Round doily with multiple pattern rounds. Introduces radial construction and pattern reading skills.
Project 5: Beaded Bracelet Advanced
Skills learned: Bead integration, complex shaping
Time required: 6-8 hours
Materials: Size 20 thread, small beads, clasp
Combines all previous skills with bead work and jewelry construction for a wearable masterpiece.
Care and Maintenance
How to Wash Tatting
Proper care preserves your tatted pieces for generations:
Pre-wash Assessment
Check for loose threads, weak joins, or delicate areas that need special attention.
Gentle Hand Washing
Use lukewarm water with mild detergent. Avoid vigorous agitation that could distort the lace.
Careful Rinsing
Rinse thoroughly in clean water of the same temperature to prevent shocking the fibers.
Proper Drying
Lay flat on towels, shaping gently while damp. Avoid hanging, which can distort the piece.
How to Stiffen Tatting Lace
Stiffening gives structure to decorative pieces like doilies and ornaments:
| Method | Materials | Best For | Durability |
|---|---|---|---|
| Sugar Water | Sugar, water | Temporary stiffening | Low (attracts insects) |
| Liquid Starch | Commercial fabric starch | Moderate stiffening | Medium (washable) |
| PVA Solution | White glue, water | Permanent stiffening | High (not washable) |
| Spray Starch | Aerosol starch | Light stiffening | Low (needs reapplication) |
How to Attach Tatting to Fabric

Professional techniques for attaching tatted lace to garments and linens
Attaching tatted lace to garments and linens requires careful technique to maintain both beauty and durability:
How to Attach Lace to Fabric by Hand
Prepare the Fabric Edge
Fold and press a clean hem. For best results, remove a single thread to create a straight folding guide.
Position the Lace
Pin tatted lace along the hemmed edge, ensuring even distribution and proper alignment with fabric grain.
Choose Your Stitch Method
Use hidden stitches for invisible attachment or buttonhole stitches for decorative, durable connections.
Secure and Finish
Work with matching thread, taking care to catch only the lace picots or edge, not the main pattern.
Attachment Methods Comparison
Hidden Stitch Method
- Nearly invisible from front
- Best for delicate items
- Requires careful positioning
- Ideal for cotton lace projects
Buttonhole Stitch Method
- Very secure attachment
- Withstands frequent washing
- Creates decorative edge
- Perfect for table linens
Modern Applications and Innovations
Contemporary Tatting Artists
Modern tatters are revolutionizing this traditional craft through innovative approaches:
Color Innovation
Contemporary artists use vibrant, non-traditional colors and variegated threads to create striking modern pieces that maintain classical techniques.
Mixed Media Integration
Combining tatting with jewelry making, fiber arts, and even digital design tools creates hybrid artworks that bridge traditional and contemporary aesthetics.
Wearable Art
Modern jewelry designers incorporate tatted elements into earrings, necklaces, and bracelets, making this historic craft relevant for contemporary fashion.
Digital Communities
Online platforms connect tatters worldwide, sharing patterns, techniques, and innovations that accelerate the craft’s evolution.
Selling Your Tatted Creations
The handmade market offers opportunities for skilled tatters to monetize their hobby:
| Platform | Best For | Fees | Audience |
|---|---|---|---|
| Etsy | Unique, artisan pieces | 6.5% transaction fee | Craft enthusiasts |
| Local Craft Fairs | Building local reputation | Booth rental fees | Local community |
| Facebook Marketplace | Local sales | Free | Neighbors and friends |
| Commission Work | Custom pieces | None | Specific clients |
How Popular is Tatting?
While not as widespread as knitting or crochet, tatting maintains a dedicated community of practitioners worldwide. Recent surveys suggest approximately 50,000-100,000 active tatters globally, with growing interest among younger crafters seeking unique, traditional skills.
The craft’s popularity cycles, experiencing revival periods when fashion trends favor handmade lace and artisanal textiles. Social media platforms have particularly helped younger generations discover and share tatting techniques.
Resources and Community
Learning Resources
Books and Patterns
- “The Complete Book of Tatting” by Rebecca Jones
- “Tatting with Visual Patterns” by Mary Konior
- “Modern Tatting Patterns” by Georgia Seitz
- Historic pattern collections from Mlle Eléonore Riego
Online Communities
- International tatting forums and groups
- YouTube tutorial channels
- Facebook tatting communities
- Reddit r/tatting subreddit
Supplies and Tools
- Specialty tatting supply retailers
- Antique shuttle collectors
- Thread manufacturers (DMC, Anchor, Lizbeth)
- Local yarn and craft stores
Guilds and Organizations
- International Organization of Lace, Inc.
- Local lace guilds and tatting circles
- Historical societies with textile focuses
- Museum educational programs
Building Your Skills
Continuous learning accelerates your tatting journey. The Instructables Tatting 101 guide provides excellent step-by-step instructions with detailed photos for visual learners.
- Join local groups: Hands-on learning from experienced tatters
- Attend workshops: Learn advanced techniques and historical methods
- Study museum pieces: Analyze construction of antique tatted items
- Experiment freely: Develop personal style through creative exploration
- Document progress: Keep photos of completed projects for motivation
Frequently Asked Questions
Which is harder, embroidery or tatting?
Both crafts have learning curves, but they challenge different skills. Embroidery requires precision and artistic vision, while tatting demands tension control and spatial reasoning. Most people find tatting initially more frustrating because mistakes can’t be easily undone, but once mastered, it becomes quite meditative.
How long does it take to learn tatting?
Basic techniques can be learned in a few weeks, but achieving consistent, professional-quality work typically takes 3-6 months of regular practice. Most beginners can complete their first simple project within a month of starting.
What’s the difference between tatting and other types of lace?
Tatting creates lace through knotting techniques, while other methods include weaving (filet lace), needlework (needle lace), or braiding (guipure lace). Tatted lace is particularly durable because each stitch is a permanent knot.
Can I use regular sewing thread for tatting?
While possible, tatting thread is specially designed for the craft. Regular sewing thread may be too weak or slippery. Start with proper tatting thread in size 10 or 20 for best results and easier learning.
Is tatting suitable for children?
Children aged 10 and older can learn tatting with supervision. It develops fine motor skills and patience. Start with larger thread (size 5-8) and simple patterns. Adult guidance helps with frustration management during the learning process.
How do I fix mistakes in tatting?
Unlike knitting or crochet, tatting mistakes usually require cutting the thread and restarting from the last good joining point. This is why practicing tension control and working slowly initially pays off in the long run.
What’s the difference between lace and lace+?
“Lace+” typically refers to enhanced or modified lace fabrics with added features like stretch properties, water resistance, or embedded technology. Traditional tatted lace is pure fiber construction without additives, prized for its natural beauty and durability.
Can tatting be done by machine?
True tatting is exclusively a hand craft. While machines can create lace that resembles tatting, the unique knotting structure and tension control require human hands. This handmade aspect contributes to tatted lace’s value and appeal.
Conclusion
Tatting represents more than just another fiber craft – it’s a direct connection to centuries of maritime tradition and feminine artistry. This remarkable technique transforms simple thread into heirloom-quality lace that outlasts most modern textiles, making every stitch an investment in lasting beauty.
The journey from beginner frustration to confident creation follows a predictable path. Your first attempts will likely feel clumsy and produce uneven results. This is completely normal. Every skilled tatter has a collection of early practice pieces that showcase the learning process. The key is persistence through the initial challenging month when muscle memory develops and tension control becomes instinctive.
Key Takeaways for Success
- Start with quality materials: Size 10 cotton thread and a reliable shuttle make learning easier
- Master tension control early: This fundamental skill affects every aspect of your tatting
- Practice the flip consistently: Proper knot formation is essential for sliding stitches
- Embrace mistakes as learning: Every cut-and-restart builds understanding
- Join a community: Local guilds or online groups provide support and inspiration
Looking Forward
Modern tatting offers exciting possibilities beyond traditional doilies and collar edgings. Contemporary artists integrate this historic technique with jewelry making, mixed media art, and fashion design. The fundamental skills you learn create a foundation for both preserving tradition and exploring innovative applications.
Whether you’re drawn to tatting for meditation, artistic expression, or practical skill development, this craft rewards patience with unique satisfaction. Unlike many modern hobbies, tatting produces tangible, lasting results that can be shared, worn, and treasured for generations.
The portable nature of tatting makes it an ideal companion for modern life. A shuttle and thread fit in any bag, transforming waiting time into productive creativity. This accessibility, combined with the craft’s rich history and enduring beauty, ensures tatting remains relevant in our fast-paced world.
Final Recommendations
Begin your tatting journey with realistic expectations and quality tools. Invest in proper instruction through books, videos, or local classes. Most importantly, give yourself permission to learn gradually. The complexity that makes tatting challenging also makes it deeply rewarding once mastered.
Consider tatting as both a personal skill and a cultural preservation activity. By learning this traditional craft, you join an unbroken chain of artisans stretching back over two centuries. Your tatted pieces become part of this continuing story, carrying forward techniques and beauty that might otherwise be lost.
Start with simple projects and celebrate small victories. Your first completed ring marks a significant achievement. Your first joined pattern represents major progress. Each project builds skills that open new creative possibilities, making tatting a lifetime journey of discovery and artistic growth.
Remember that every expert was once a beginner. The satisfying rhythm of tatting, the pleasure of creating lasting beauty, and the connection to generations of skilled artisans await your dedication to learning this remarkable craft.