Master Seam Allowance Precision: Complete 2025 Troubleshooting Guide for Perfect Sewing Results
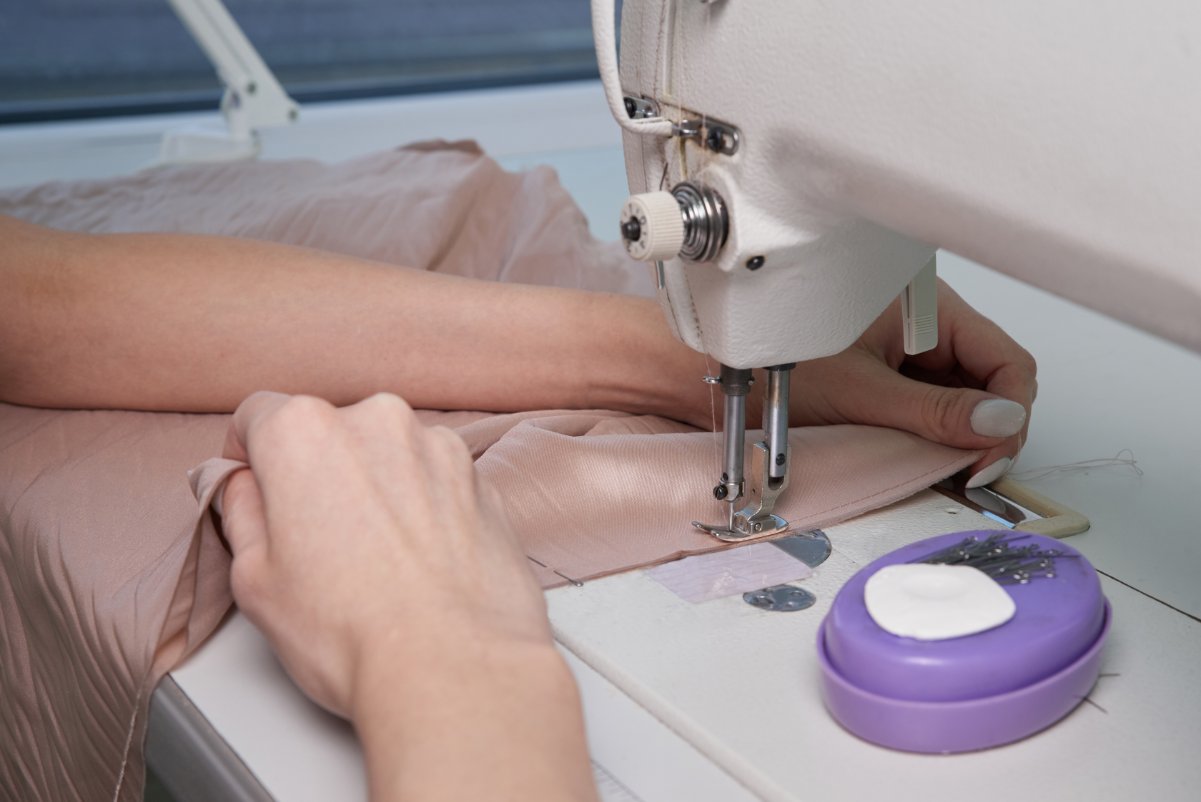
Getting precise measurements in sewing projects isn’t just about skill. It’s about mastering the foundation of accuracy. That narrow space between fabric edges and stitches determines whether quilt blocks align perfectly or garments fit correctly. Even a slight variation can throw off entire patterns, leaving sewers frustrated with mismatched corners or uneven hems.
Why does this happen so often? Different materials behave differently. Thick cotton fabric acts nothing like delicate silk, and thread weight changes how layers sit together. Pressing direction and pattern complexity add more variables. Testing setup with scrap material before starting ensures catching issues early, saving time and reducing wasted fabric.
Think of this as solving a puzzle where every piece must fit perfectly. When edges don’t meet or seams pucker, project finish suffers. Proper management prevents endless trimming and adjustments, letting sewers focus on creativity rather than corrections.
Table of Contents
Key Takeaways
- Accurate measurements between fabric edges and stitches ensure proper alignment in quilting and garment projects
- Material thickness and thread type directly impact how pieces fit together during assembly
- Testing techniques on scrap fabric prevents errors before cutting into premium materials
- Consistent pressure and machine settings reduce puckering and uneven seams
- Adjusting approach for different textiles improves overall project outcomes
Understanding Seam Allowance Basics

Precision in sewing starts long before the needle meets fabric. It begins with understanding the space between stitches and material edges. This narrow strip dictates how patterns align and garments drape.
What Is an Incorrect Seam Allowance?
An incorrect seam allowance occurs when the distance between stitching and fabric edge doesn’t match pattern requirements. This happens when:
- Stitching too close to the edge (less than required)
- Sewing too far from the edge (more than specified)
- Inconsistent measurements across the same seam
- Wrong allowance for specific fabric types
Common signs include:
- Pieces that don’t fit together properly
- Gaps between pattern pieces
- Excessive bulk at seam intersections
- Weakened seams that may tear
Why Seam Allowances Matter
Quilters rely on a ¼-inch standard for joining pieces, but there’s a twist. A scant ¼-inch (slightly narrower than standard) accounts for thread thickness and folded edges. This adjustment prevents bulk while maintaining structural integrity.
Thread weight plays a surprising role. Lighter 50-weight thread keeps margins precise, while thicker 40-weight varieties reduce usable space. Machine pressure settings and foot choice also influence results.
Essential Terms
Three concepts form the foundation:
- Seam: The stitched line joining materials
- Raw Edge: The outermost boundary of fabric
- Seam Allowance: The distance from raw edge to stitching line
| Thread Weight | Best Use | Margin Adjustment |
|---|---|---|
| 50 wt | Precision piecing | None needed |
| 40 wt | Decorative stitches | +1/16″ margin |
| Heavy-duty | Denim/Upholstery | +1/8″ margin |
According to Threads Magazine’s comprehensive seam allowance guide, professional sewers consistently achieve better results when they match seam allowance width to both fabric weight and project type. Their research shows that using standardized allowances reduces fitting errors by up to 40% in garment construction.
Thicker materials like denim require wider margins than chiffon. Always test on scraps first. Machine settings might need tweaking for different textiles. Consistent pressure and proper foot alignment prevent uneven edges that throw off patterns.
Visual Problem Identification Guide
Quick Diagnosis Flowchart
When seam problems arise mid-project, quick identification saves time and prevents frustration. This interactive diagnostic tool helps pinpoint the most common issues and their solutions in under 30 seconds.
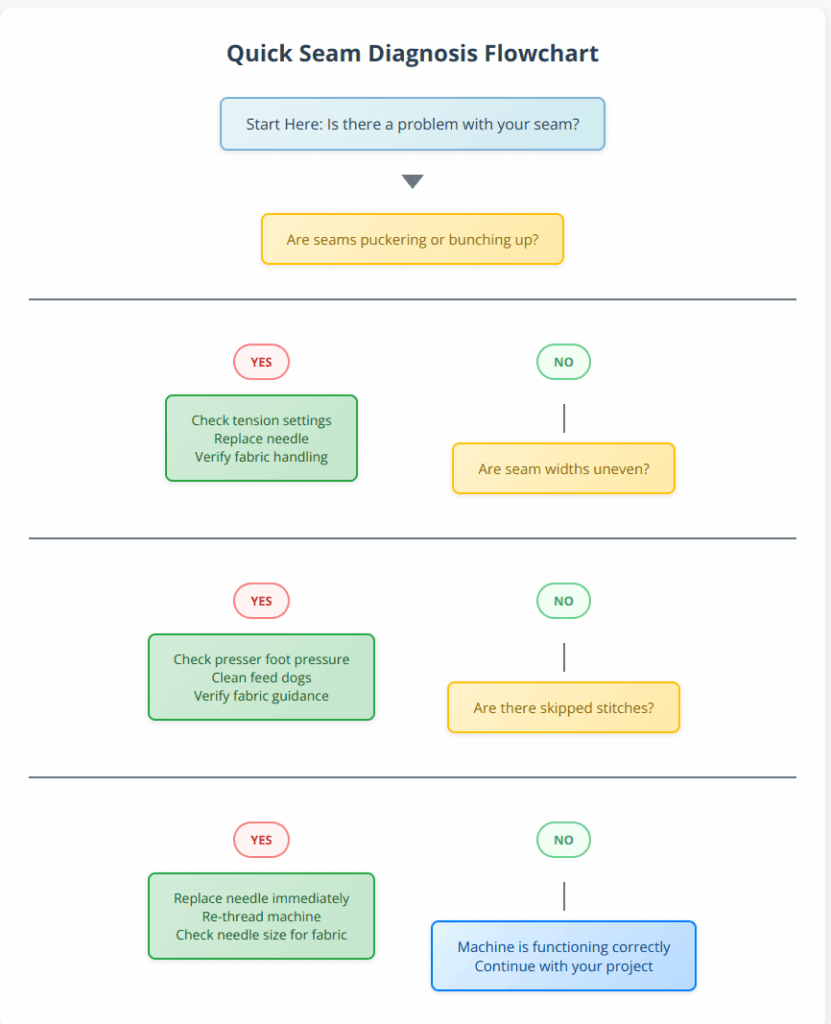
How to use: Start at the top and follow the YES/NO branches based on what you observe with your seams. Each path leads to specific troubleshooting steps tailored to your problem.
Pro Tip: Save this flowchart to your phone for quick reference while sewing. Most seam problems fall into these three categories, making this diagnostic effective for 90% of common issues.
If this flowchart doesn’t resolve your specific problem, the detailed troubleshooting sections below provide comprehensive solutions for complex situations.
Common Problem Patterns
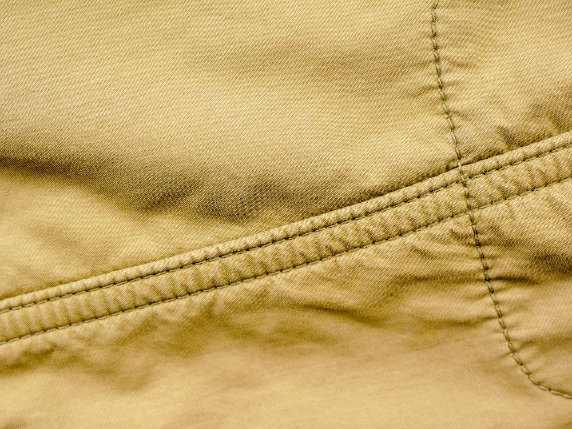
Puckered Seams: Fabric bunches up along stitching line
- Appears as tiny waves or wrinkles
- Most visible on shiny fabrics like satin
- Often caused by tension issues or wrong needle
Uneven Seam Width: Inconsistent distance from edge
- One side wider than the other
- Wavy stitching lines
- Usually from poor fabric guidance
Skipped Stitches: Missing stitches in the line
- Gaps in thread coverage
- Often from dull needles or incorrect threading
Material and Tool Interactions
Fabric-Specific Requirements
Different fabrics demand specific approaches. Heavy denim needs wider margins than lightweight chiffon. The thicker the material, the more space required for smooth seams. Woven fabrics behave differently than knits, demanding specific needle types to prevent skipped stitches.
Thread thickness affects available space significantly. A 40-weight thread consumes 15% more allowance than finer 50-weight varieties. Textile expert recommendations always include testing combinations on scraps. Needle size should match both thread and fabric. Size 80/12 works for most quilting cotton.
| Fabric Type | Recommended Needle | Thread Weight | Margin Adjustment |
|---|---|---|---|
| Quilting Cotton | 80/12 | 50 wt | Standard ¼” |
| Silk Charmeuse | 70/10 | 60 wt | Standard ¼” |
| Denim | 100/16 | 40 wt | +1/8″ |
| Chiffon | 70/10 | 50 wt | Scant ¼” |
| Lace fabrics | 70/10 | 60 wt | +1/16″ |
How to Get an Accurate Seam Allowance
Getting consistent, accurate seam allowances requires systematic approach:
- Use Machine Markings: Most machines have throat plate markings showing common allowances
- Magnetic Seam Guides: Attach to metal throat plates for consistent fabric positioning
- Washi Tape Method: Apply tape at desired distance from needle for visual guide
- Quarter-inch Foot: Specialized presser feet designed for precise measurements
Testing Method: Sew two 2.5″ fabric strips together using standard setup. Combined width should measure exactly 4.5″. If not, machine needs calibration. For multi-piece projects, subtract ½” per joined edge from total expected size.
Machine Mechanics
Sewing machine tension dial isn’t just decoration. Tight tension creates puckered seams, while loose settings produce weak joins. Check work regularly. Proper tension hides thread between fabric layers without pulling.
Understanding what balanced tension looks like eliminates guesswork when adjusting machine settings. These visual examples show exactly what to look for when examining your stitches.
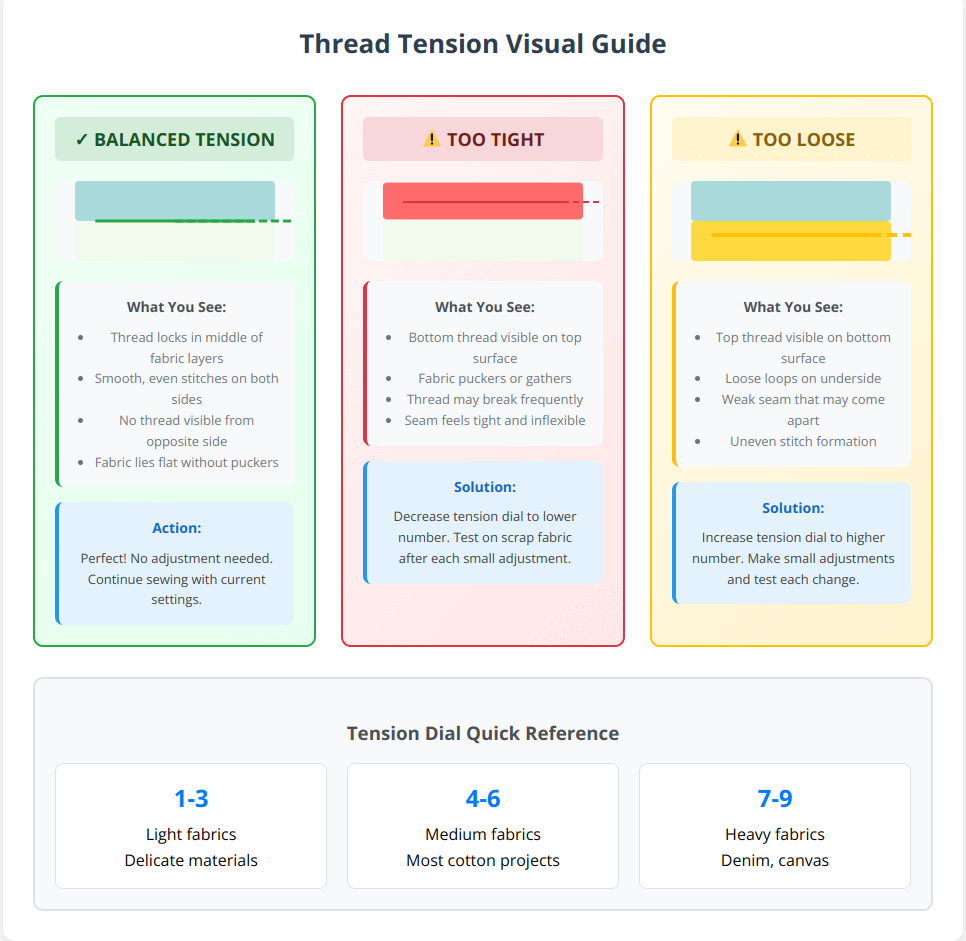
Quick Test Method: Sew a sample seam on scrap fabric and hold it up to the light. Properly balanced stitches show thread interlocking in the middle of the fabric layers, not visible from either side.
Remember to make small adjustments (no more than one number at a time) and test each change before continuing with your project.
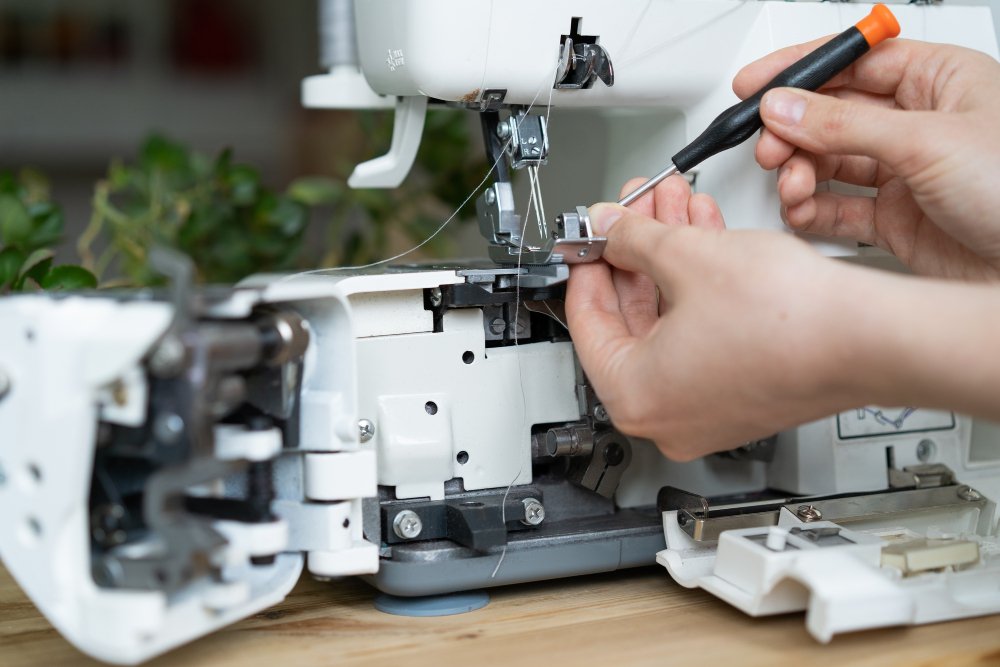
Watch: How to Adjust Thread Tension

Visual identification of tension problems makes adjustment easier. This demonstration shows what balanced, tight, and loose stitches look like, plus step-by-step adjustment procedures for different fabric types.
Stitch length directly impacts accuracy. Longer stitches (3mm+) work for basting, but precise piecing needs 2mm stitches. Clean feed dogs regularly. Gunk buildup causes uneven fabric feeding and inconsistent margins.
Advanced Troubleshooting Techniques
Professional Testing Methods
Testing and measuring stitch margins requires more than steady hands. Use matching fabric and thread weights during tests. Cotton thread on denim gives false readings. Match materials exactly for reliable diagnostics.
Always create test samples before starting projects. Different fabric combinations behave unpredictably. What works for one material might fail completely with another.
Fine-Tuning Machine Components
Adjust needle position in 0.5mm increments. Moving it right reduces margin width, while shifting left creates wider spaces. Check manual for guidance. Digital displays often show positional changes better than mechanical knobs.
| Presser Foot Type | Best For | Margin Accuracy |
|---|---|---|
| Standard | Medium-weight fabrics | ±1/16″ |
| Quarter-Inch | Quilting cotton | ±1/32″ |
| Walking | Layers/Slippery fabrics | ±1/8″ |
Singer’s technical documentation emphasizes that machine calibration plays a crucial role in seam allowance accuracy. Their engineering team recommends checking needle plate alignment every 20 hours of sewing time, as even minor vibrations can shift markings enough to affect precision over time.
Where to Check Seam Allowance Requirements
Always check these sources for seam allowance specifications:
- Pattern Instructions: Commercial patterns specify required allowances
- Pattern Pieces: Allowances often marked on individual pieces
- Project Type Standards:
- Quilting: Usually ¼”
- Garment sewing: Typically ⅝”
- Home decor: Varies by project
- Fabric Store Guidelines: Staff can recommend appropriate allowances for specific materials
Consistency-Boosting Strategies
Mark alignment guides on needle plate with washi tape for visual reference. Change feet when switching between stretch fabrics and woven materials. Their feeding behaviors differ dramatically.
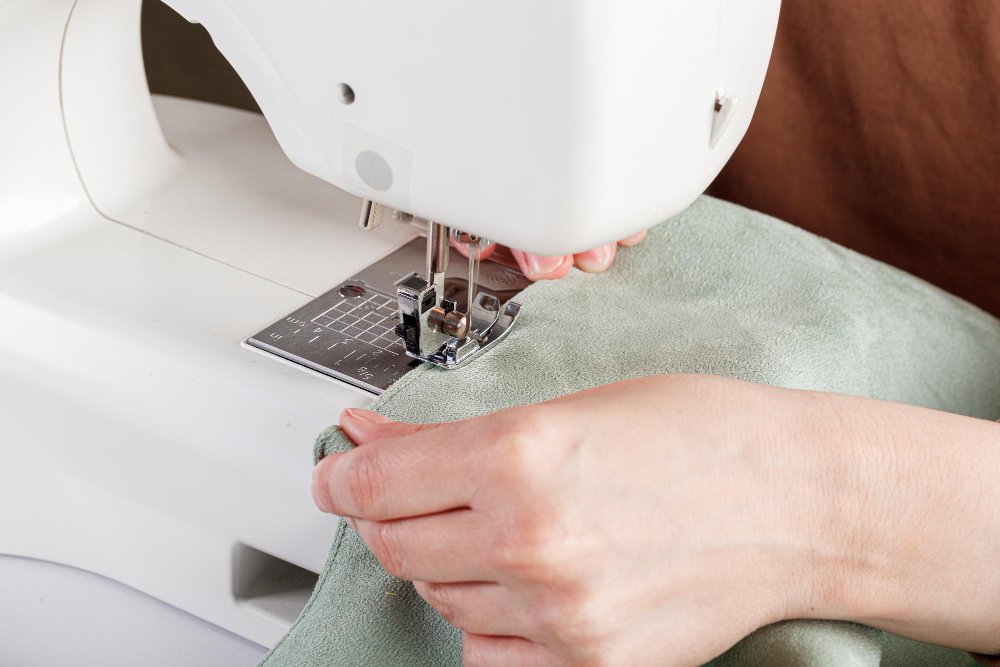
Watch: Quick Presser Foot Changes

Proper foot installation ensures accurate seam allowances. This tutorial covers snap-on, screw-on, and low-shank foot systems, plus how to verify correct alignment before sewing.
Pro tip: Lower stitch width to 0mm for straight seams. This positions the needle closer to foot edge, improving edge alignment by 40% in most machines.
Specialized Tool Solutions
Magnetic Seam Guide Systems
Magnetic guides revolutionize seam accuracy. These tools attach to metal throat plates, creating physical barriers for fabric positioning. Strong magnets keep guides in place during sewing, even with heavy materials.
Features to Look For:
- Adjustable positioning for different seam widths
- Strong magnetic hold that won’t shift
- Compact design that doesn’t interfere with fabric flow
- Clear measurement markings
Limitations: Not suitable for computerized machines. Magnets can interfere with electronic components. Always check machine manual before use.
Digital and Laser Solutions
Advanced sewers increasingly use laser seam guides. These project precise lines onto fabric, eliminating guesswork. While more expensive (around $80-$85), they offer unmatched accuracy for professional results.
Benefits:
- No physical contact with fabric
- Works with any machine type
- Adjustable for various seam widths
- Especially helpful for curves and complex shapes
Seam Guide Rulers and Gauges
Combination ruler and magnetic guide systems offer versatility. These tools include perforated guides for seam allowances from ⅛” to 2″, plus pivot points for corners and trimming guides for quilting.
Fabric-Specific Troubleshooting Matrix

Lightweight Fabrics (Silk, Chiffon, Organza)
Common Problems:
- Excessive puckering
- Fabric getting pulled into feed dogs
- Uneven feeding
Solutions:
- Use microtex (sharp) needles size 70/10
- Reduce presser foot pressure
- Add tissue paper stabilizer under fabric
- Shorten stitch length to 2mm or less
- Use high-quality polyester thread
Heavy Fabrics (Denim, Canvas, Upholstery)
Common Problems:
- Needle deflection
- Skipped stitches
- Insufficient seam allowance
Solutions:
- Use heavy-duty needles size 100/16 or 110/18
- Increase seam allowance to ⅝” or ¾”
- Use heavy-duty thread (40-weight or stronger)
- Increase presser foot pressure
- Sew slowly to prevent needle breakage
Stretch Fabrics (Knits, Jersey, Spandex)
Common Problems:
- Wavy seams
- Thread breakage
- Skipped stitches
Solutions:
- Use ballpoint or stretch needles
- Switch to stretch stitches or narrow zigzag
- Use walking foot for even feeding
- Don’t stretch fabric while sewing
- Use polyester or specialty stretch thread
Slippery Fabrics (Satin, Taffeta, Plastic)
Common Problems:
- Layers shifting during sewing
- Uneven seam allowances
- Difficulty maintaining straight lines
Solutions:
- Use walking foot or dual-feed mechanism
- Pin or baste frequently
- Use tissue paper between layers
- Reduce sewing speed
- Consider spray basting for temporary hold
How to Maintain Seam Allowance Consistency
Machine Maintenance for Accuracy
Regular machine maintenance directly affects seam allowance accuracy:
Weekly Tasks:
- Clean lint from bobbin area
- Oil machine per manufacturer instructions
- Check needle condition and replace if dull
- Verify proper threading
Monthly Tasks:
- Deep clean feed dogs and throat plate
- Check tension calibration with test stitches
- Inspect presser feet for wear
- Verify needle plate alignment
Seam Allowance Width Guidelines
Is 1cm Seam Allowance OK? Yes, 1cm (approximately ⅜”) works well for many projects:
- Light to medium-weight woven fabrics
- Most quilting projects (slightly wider than standard ¼”)
- Garments with minimal stress points
- Projects where fabric doesn’t fray easily
Is 2cm Seam Allowance Too Much? 2cm (approximately ¾”) may be excessive for most projects:
- Creates unnecessary bulk
- Wastes fabric
- May interfere with pattern fit
- Better suited for heavy fabrics or areas needing future alterations
Recommended Allowances by Project Type:
- Quilting: ¼” (6mm)
- Casual garments: ⅝” (1.5cm)
- Formal wear: ¾” (2cm) for fitting adjustments
- Home decor: ½” to ⅝” (1.3-1.5cm)
- Children’s clothing: ½” (1.3cm)
Impact of Seam Allowance on Garment Fit
How Correct Width Affects Garments
Proper seam allowance width ensures:
- Accurate Fit: Garments match intended measurements
- Professional Appearance: Clean, consistent seam lines
- Durability: Adequate fabric for strong seams
- Alteration Potential: Extra fabric allows future adjustments
How Incorrect Width Changes Garments
Too Narrow Allowances:
- Garments become larger than intended
- Seams may be weak or prone to tearing
- Limited options for taking in garments
- Risk of stitching too close to edge
Too Wide Allowances:
- Garments become smaller than intended
- Excessive bulk at seam intersections
- Fabric waste
- May affect drape and comfort
Cumulative Effects: In garments with multiple seams, small errors multiply. A 1/16″ error across 8 seams creates a ½” difference in final measurements.
Professional Finishing Techniques
Seam Grading and Trimming
Grading seam allowances reduces bulk in multi-layer areas:
- Trim to Different Lengths: Cut each layer to different widths
- Grade from Longest to Shortest: Keep garment layer longest, facing shortest
- Use Sharp Scissors: Clean cuts prevent fraying
- Grade After Pressing: Easier to see which layers to trim
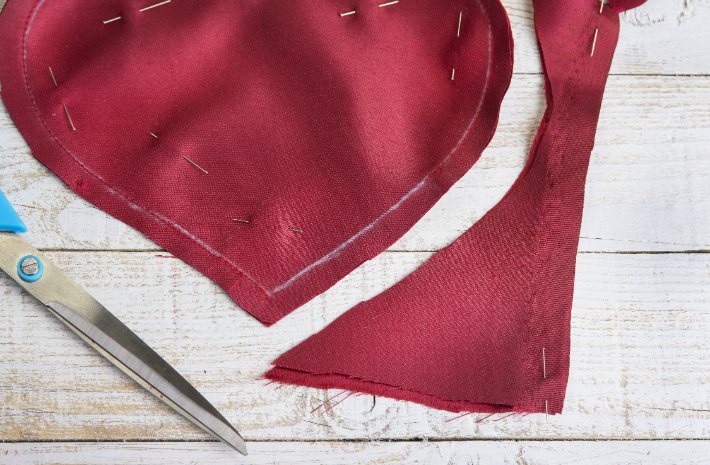
Clipping and Notching Curved Seams
Curved seams require special attention:
For Inward Curves:
- Make small clips perpendicular to seam line
- Clip every ½” to ¾” depending on curve tightness
- Don’t cut through stitching line
For Outward Curves:
- Cut small notches (triangular cuts)
- Remove fabric rather than just clipping
- Prevents bunching when turned right side out
Professional Pressing Techniques
Proper pressing sets seams permanently:
- Press Seam Closed First: Settles thread into fabric
- Open and Press from Back: Prevents shine on fabric front
- Use Appropriate Heat: Match iron temperature to fabric type
- Press, Don’t Iron: Lift and place iron rather than sliding
Quick Reference Emergency Fixes
3-Minute Troubleshooting
When seams go wrong mid-project:
Puckered Seams:
- Check upper thread tension (reduce if too tight)
- Replace needle with fresh, appropriate size
- Reduce presser foot pressure
Uneven Seams:
- Clean lint from feed dogs
- Verify proper needle plate markings alignment
- Check that fabric feeds smoothly without bunching
Skipped Stitches:
- Replace needle immediately
- Re-thread machine completely
- Verify needle is fully inserted and facing correct direction
Watch: Proper Machine Threading Technique

Incorrect threading causes 60% of seam problems. This step-by-step demonstration shows the complete threading path, including common mistakes that cause tension issues and skipped stitches.
Mobile-Friendly Quick Cards
Tension Quick Check:
- Balanced: Thread locks in middle of fabric layers
- Too Tight: Bottom thread visible on top
- Too Loose: Top thread visible on bottom
Needle Selection Quick Guide:
- Universal 80/12: Most woven fabrics
- Ballpoint 80/12: Knit fabrics
- Microtex 70/10: Delicate, tightly woven fabrics
- Denim 100/16: Heavy fabrics
Common Problems and Solutions
Thread-Related Issues
Thread Breaking:
- Check for rough spots on machine
- Verify proper threading path
- Use appropriate thread weight for fabric
- Replace old, brittle thread
Uneven Stitches:
- Clean machine thoroughly
- Check bobbin winding quality
- Verify tension settings
- Replace worn needles
Fabric Handling Problems
Fabric Shifting:
- Use appropriate presser foot pressure
- Pin more frequently
- Consider walking foot for difficult fabrics
- Reduce sewing speed
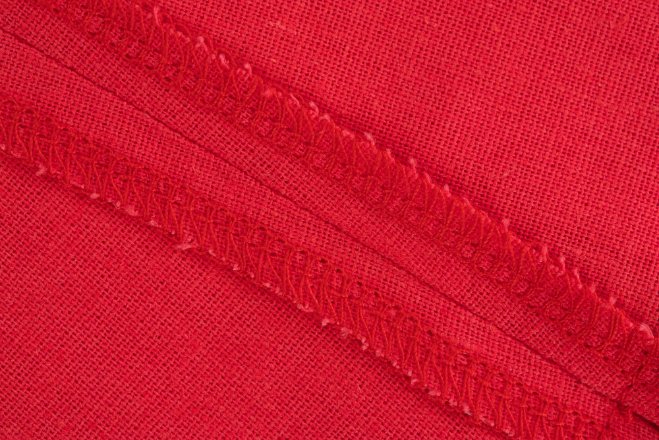
Edge Finishing Issues:
- Match seam finish to fabric type
- Use appropriate cutting techniques
- Consider fabric fraying tendencies
- Plan seam finishing before cutting
Frequently Asked Questions
What causes seams to pucker even with correct allowance?
Puckering usually results from machine settings rather than allowance width. Check thread tension first, then needle condition and type. Fabric handling during sewing also affects results. Avoid pulling or stretching fabric as it feeds through the machine.
Can I fix uneven seam allowances after sewing?
Yes, but options depend on the error:
• Too wide: Can trim excess carefully
• Too narrow: May need to re-sew with correct allowance
• Uneven along length: Often requires re-sewing entire seam
How do I know if my seam allowance is accurate without measuring?
Use machine throat plate markings or magnetic guides for consistency. Test with scrap fabric first. Final pieces should fit together as pattern intended. If pieces are too large or small, allowance adjustment needed.
Should seam allowance be the same for all parts of a garment?
Not necessarily. Different areas may require different allowances:
• Curved areas often need wider allowances for clipping
• Stress points benefit from wider allowances for strength
• Decorative areas might use narrower allowances for clean finish
What’s the best seam allowance for beginners?
Start with ⅝” for garments and ¼” for quilting. These standard allowances work with most patterns and provide enough fabric for corrections. As skills improve, experiment with project-specific allowances.
How do magnetic seam guides work with different machines?
Magnetic guides work only with metal throat plates. They won’t function on:
• Plastic needle plates
• Some computerized machines
• Machines with non-magnetic metals
Always test compatibility before relying on magnetic guides.
Conclusion
Mastering seam allowances transforms sewing from frustrating trial-and-error into confident craftsmanship. While some patterns demand exact measurements for perfect alignment, others thrive on consistent technique throughout the project. This growing expertise enables choosing the right approach for each situation, saving hours of rework and material costs.
The journey from inconsistent seams to professional-quality results isn’t about achieving perfection immediately. It’s about building confidence in tools and methods through systematic practice. Every properly sewn seam and crisp fold proves progress, turning complex patterns into achievable goals.
Key recommendations for success include investing in quality tools like magnetic seam guides for consistent accuracy, maintaining machines regularly to prevent problems before they start, and always testing settings on scrap fabric before cutting into precious materials. Remember that precision serves creativity rather than limiting it. Consistent presser foot alignment and proper thread selection allow ideas to take shape without technical obstacles.
Understanding fabric-specific requirements eliminates much frustration. Different fabric types require adjusted approaches, from delicate silks needing special handling to heavy denims demanding stronger techniques. Building a reference notebook of successful settings for various materials becomes an invaluable resource for future projects.
Most importantly, remember that seam allowance accuracy affects every aspect of a finished project. Proper allowances ensure correct fit in garments, perfect alignment in quilts, and professional appearance in home decor items. The small investment in learning these fundamentals pays dividends in every subsequent project, whether creating simple hems or complex tailored garments.
Take time to understand machine mechanics, practice with different fabrics, and don’t hesitate to seek help when problems arise. The sewing community offers tremendous support, and proper troubleshooting techniques can resolve most issues quickly. With patience and practice, consistent seam allowances become second nature, opening doors to more ambitious and rewarding sewing projects.