Your friendly, no-fail guide to hand and machine button sewing, for every garment, every fabric, and every skill level.
It is 7:30 AM. You grab your favorite shirt, button it up, and one pops right off onto the bathroom floor. Your meeting starts in an hour. You do not have time to find a tailor, and the safety pin trick just is not going to cut it this time.
Sound familiar? Keep reading. By the time you finish this guide, you will never let a missing button slow you down again.
Sewing a button is one of those life skills that looks harder than it actually is. You only need a needle, some thread, and a few minutes. This guide walks you through everything, from choosing the right supplies to sewing buttons on denim jeans, a wool coat, a school uniform, and more. Whether you have never held a needle in your life or you just need a refresher, you are in the right place.
If you want to jump straight to a specific section, use the table of contents below.
Quick Answer: 7 Steps at a Glance
How to Sew a Button (Short Version)
- Gather supplies: needle, thread, button, and scissors
- Thread your needle and tie a knot at the end
- Mark the button position on your fabric
- Create an anchor stitch to lock your thread
- Sew through the button holes six to eight times
- Wrap a thread shank under the button for spacing
- Knot and trim the thread on the back side
Want the full detail on every step? Keep reading. You will also find garment-specific tips, pro tricks, and fixes for when things go wrong.
Use our Button Sewing Progress Tracker to follow along step by step and make sure you do not miss anything.
Before You Start: 5 Quick Checks
Taking two minutes to prep before you pick up a needle saves a lot of frustration later. Run through this quick checklist first.
- Do you have a matching replacement button? Check the inside hem or seam of the garment first; many manufacturers sew a spare button there.
- Is your needle sharp enough to pass through the fabric without forcing it? A blunt needle causes puckering.
- Does the thread color match the garment, the other buttons, or both? Look at how the other buttons are sewn for guidance.
- Is the fabric around the button area clean and flat? Old thread remnants can throw off your placement. Snip them away first.
- For thin or delicate fabric, do you have a small scrap of interfacing or a backing button to reinforce the area? Skipping this step is one of the top reasons buttons pop off again.
Not sure which skill level applies to your project? Try the Button Sewing Skill Assessment to get a personalized recommendation.
How to Thread a Needle (Step Zero)
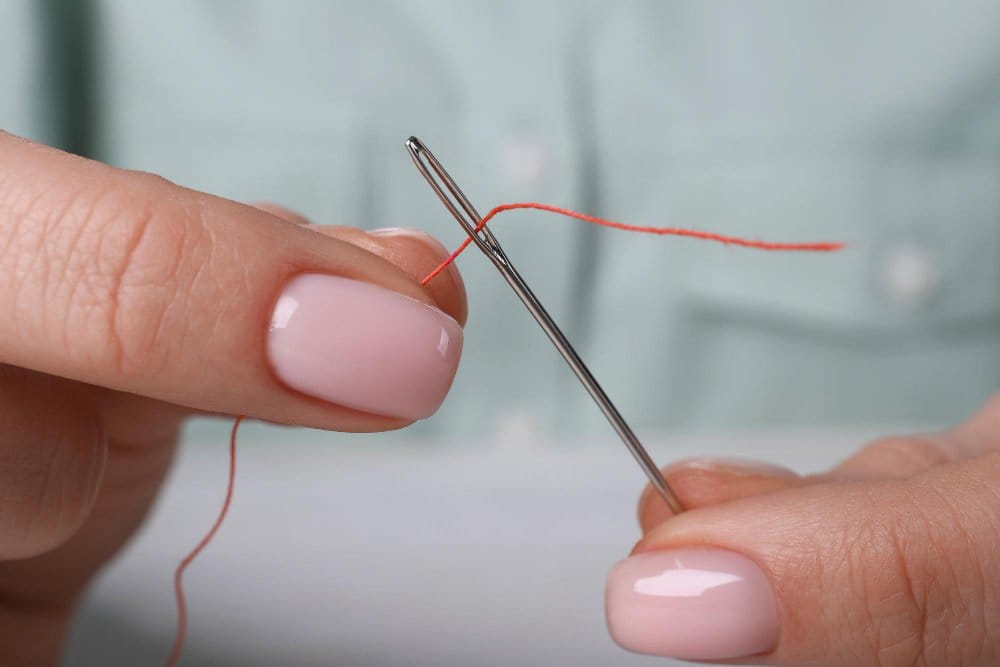
This step trips up more people than the actual button sewing. If you have ever spent five minutes poking thread at a needle, you are not alone. Here is how to do it without the frustration.
For button sewing, cut about 18 inches of thread before doubling. That gives you 9 working inches after folding, which is plenty for most buttons. For heavy coats or denim, cut 22 inches so you do not run short mid-repair.
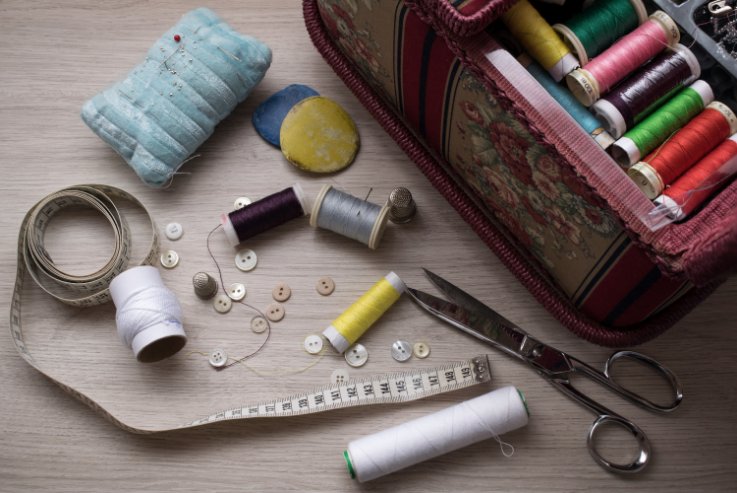
Essential Materials and Tools
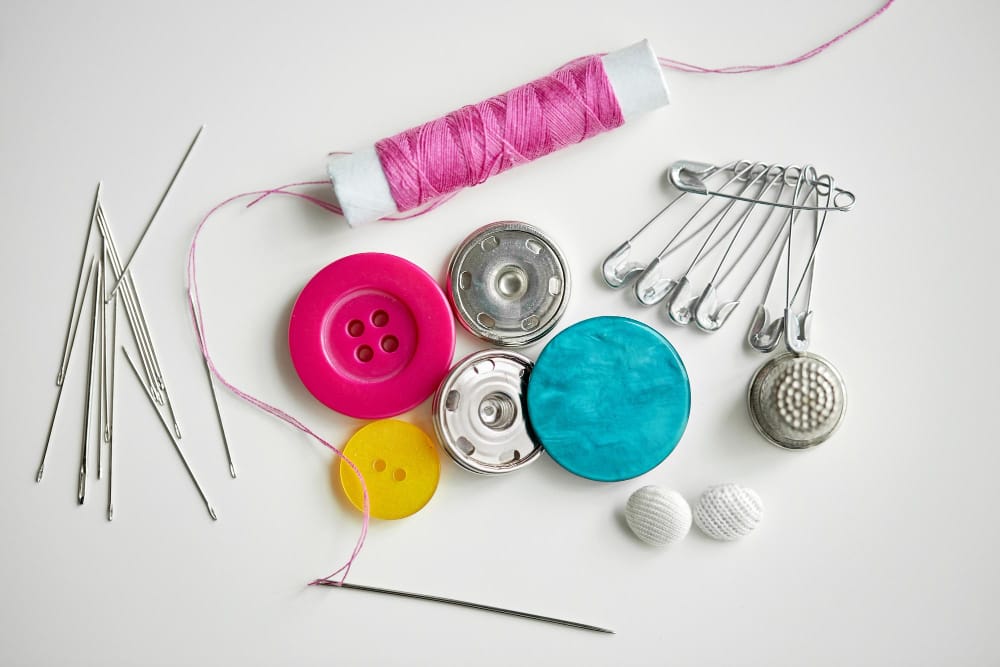
You do not need much. Here is the complete list of what to have ready before you start:
| Item | What to Look For | Notes |
|---|---|---|
| Needle | Size 5 to 7 for most fabrics | Use a leather needle for leather and suede; a sharp needle for tightly woven fabrics |
| Thread | Matches the button or fabric color | Polyester works for most repairs; upholstery thread for heavy-duty garments |
| Button | Same size and style as the original | Check the inside hem for a spare before buying one |
| Small scissors | Sharp tip for clean cuts | Nail scissors work fine in a pinch |
| Toothpick or pin | Wooden toothpick or a straight pin | Used as a spacer to create the thread shank |
| Thimble (optional) | Metal or rubber | Protects your pushing finger when working with thick fabrics |
| Fabric marker or chalk | Water-soluble | For marking exact button placement |
| Interfacing scrap (optional) | Non-woven fusible interfacing | Used to reinforce thin or stretchy fabrics behind the button |
New to sewing? Our guide to essential sewing supplies for beginners covers everything you need to build a basic kit without breaking the bank.
Understanding Button Types
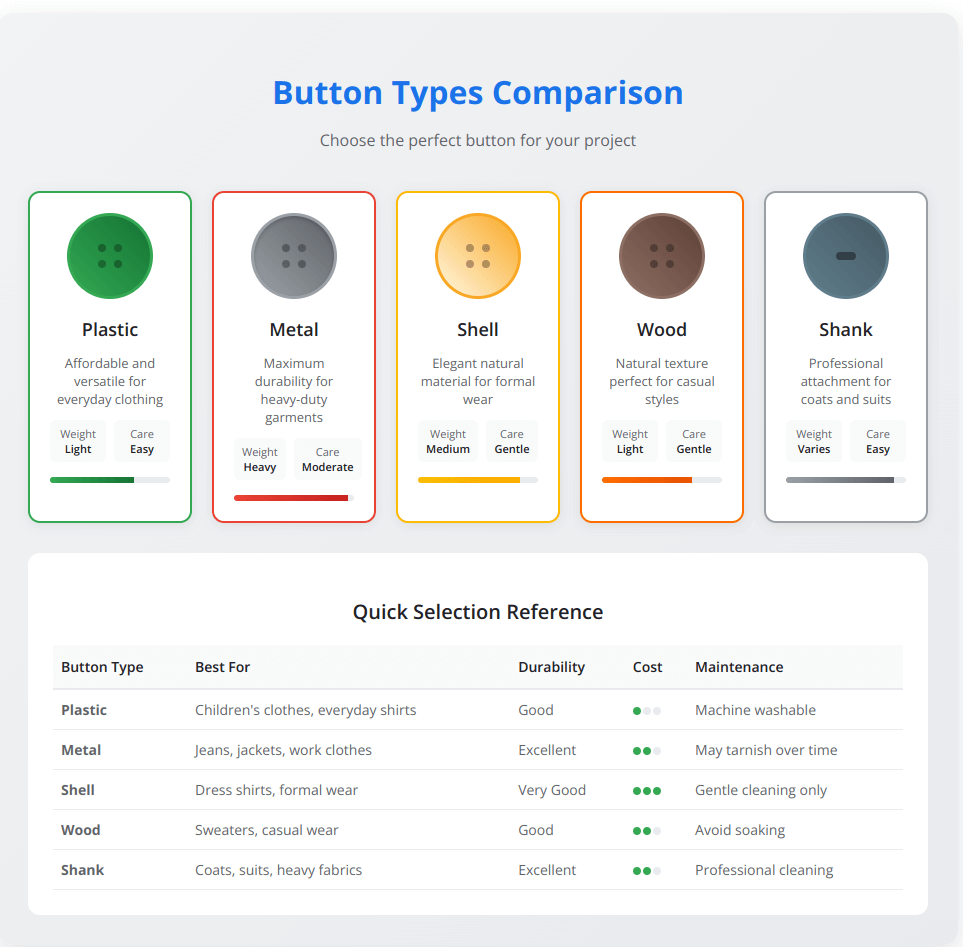
The type of button you are working with changes how you sew it. There are three main categories:
| Button Type | How to Identify It | Common Garments | Sewing Method |
|---|---|---|---|
| Flat 2-hole | Flat face, two holes through the center | Light blouses, pajamas, decorative use | Over-and-under stitches |
| Flat 4-hole | Flat face, four holes in a square or diamond pattern | Dress shirts, jeans, most casual wear | X-pattern or parallel stitches |
| Shank button | Solid face, small loop or loop on the back | Coats, blazers, formal jackets | Secure the loop to the fabric |
| Stud/jeans button | Metal rivet-style, no thread holes | Denim jeans, work wear | Pressed in with a tool, not sewn |
Not sure which button to use for your project? The Button Type Quiz gives you a recommendation in under 30 seconds based on your fabric and garment type.
Thread Selection: Choosing the Right Thread
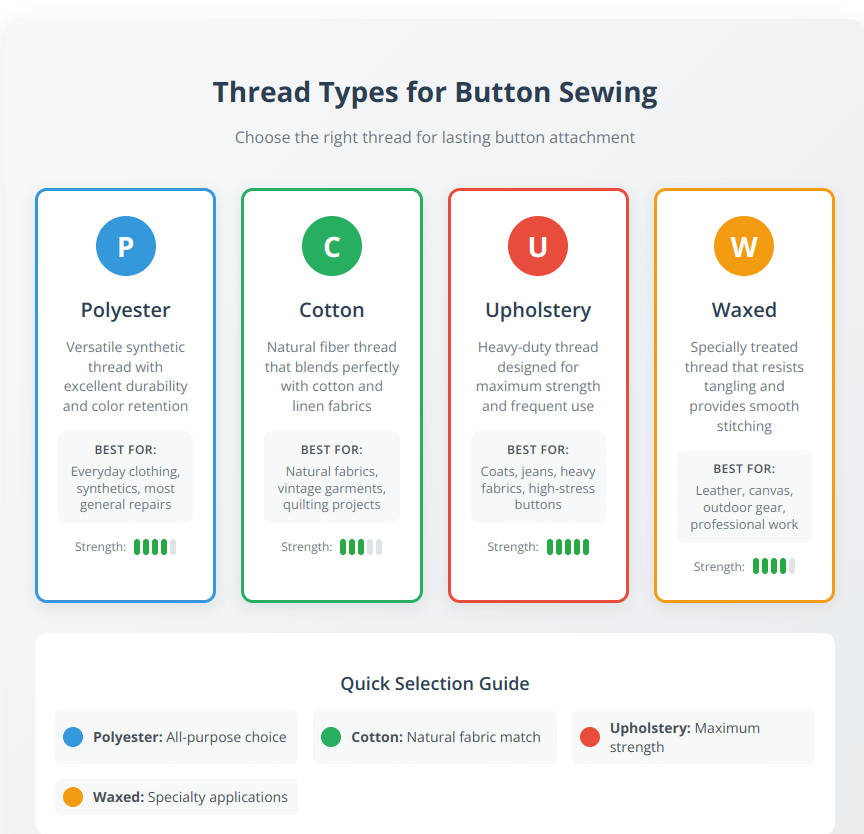
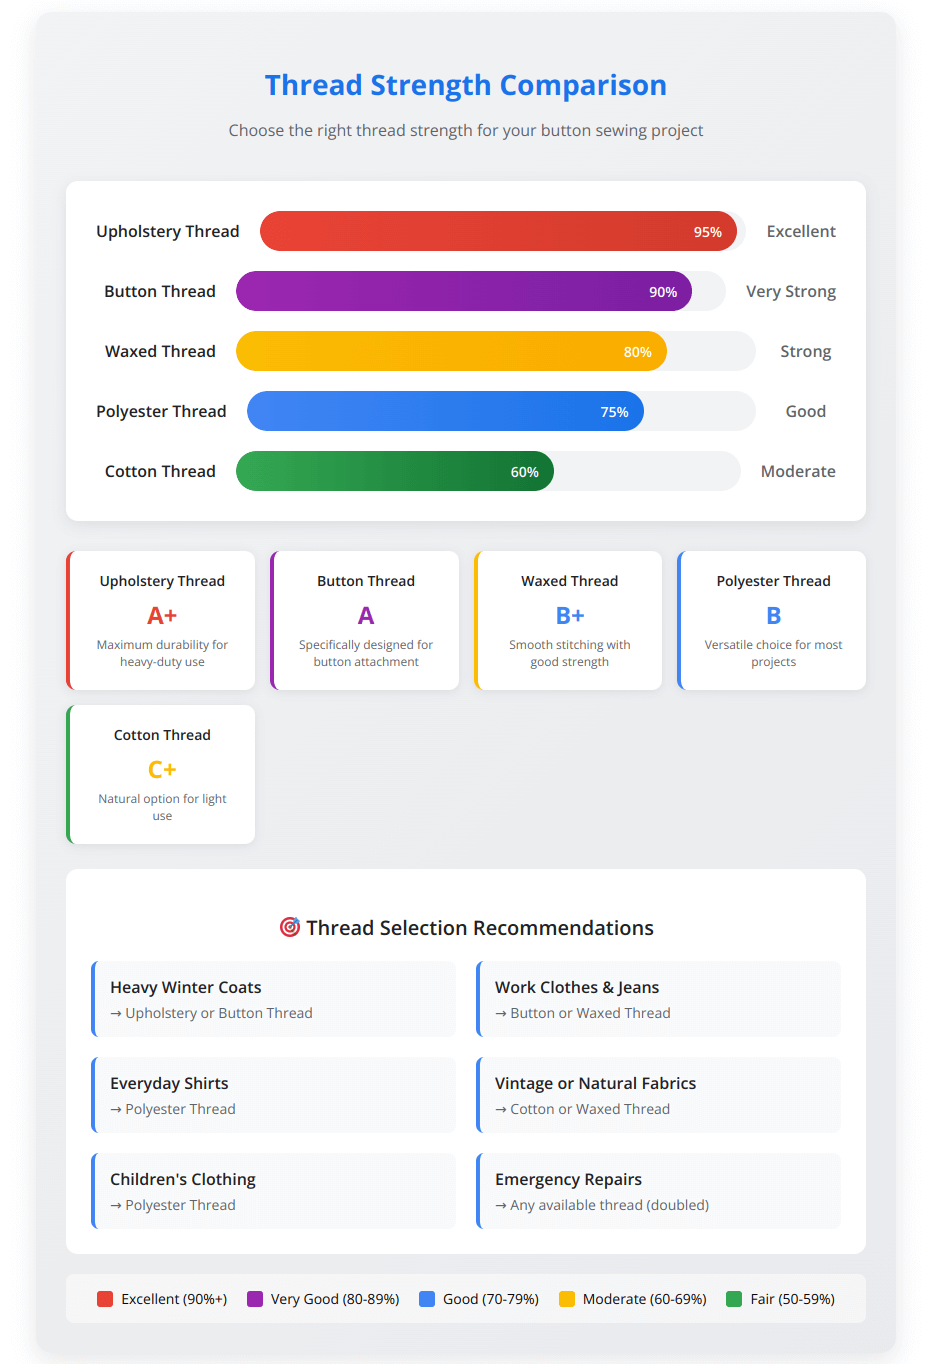
| Thread Type | Strength | Best For | Notes |
|---|---|---|---|
| Upholstery thread | Excellent | Heavy coats, denim, work wear | Thicker, so fewer passes needed |
| Button/buttonhole thread | Very good | Everyday shirts, jackets | Standard choice for most repairs |
| Waxed thread | Good | Leather, suede, heavy outerwear | Resists tangling; great for thick fabric |
| Polyester thread | Good | Most general repairs | Safest choice when you are unsure; works on almost any fabric |
| Cotton thread | Moderate | Natural fabrics (linen, cotton) on low-stress garments | Less stretch than polyester; can weaken over time |
Need more guidance on thread for a specific project? Our thread selection guide goes into more detail. You can also use the Thread Calculator tool for personalized recommendations based on your fabric weight and button size.
Preparing Your Fabric and Button
Good preparation is what separates a button that lasts years from one that pops off again in three weeks. Take an extra two minutes here and you will thank yourself later.
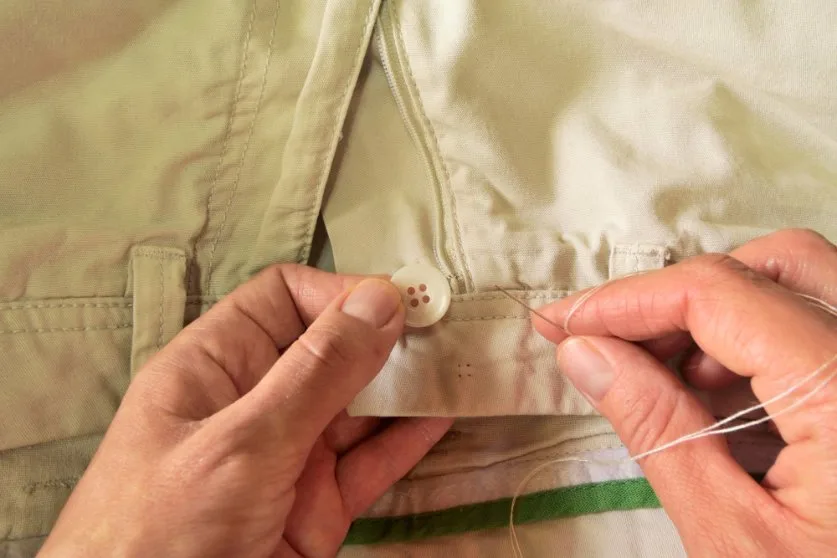
Finding the Right Placement
- Replacing a lost button: Look for tiny holes or faint thread marks where the original button sat. Those show you exactly where to place the new one.
- Adding a new button: Measure the gap between existing buttons and use a ruler to mark an evenly spaced position. Most dress shirts have buttons spaced about 3 to 4 inches apart.
- Alignment trick: Button up the garment and use a fabric marker to mark through the buttonhole onto the fabric below. That gives you the exact center point with zero guesswork.
Fabric Prep by Type
- Thin or lightweight fabric: Cut a small square of fusible interfacing and iron it onto the back of the fabric where the button will sit. This stops the button from tearing through over time.
- Heavy or thick fabric: Make sure all layers are lying flat. Pin the area if needed to keep things stable while you sew.
- Stretchy knit fabric: Back the area with a small piece of non-stretch stabilizer. Sewing directly into stretchy fabric without support causes puckering and eventually tears the stitches loose.
Complete Hand Sewing Techniques
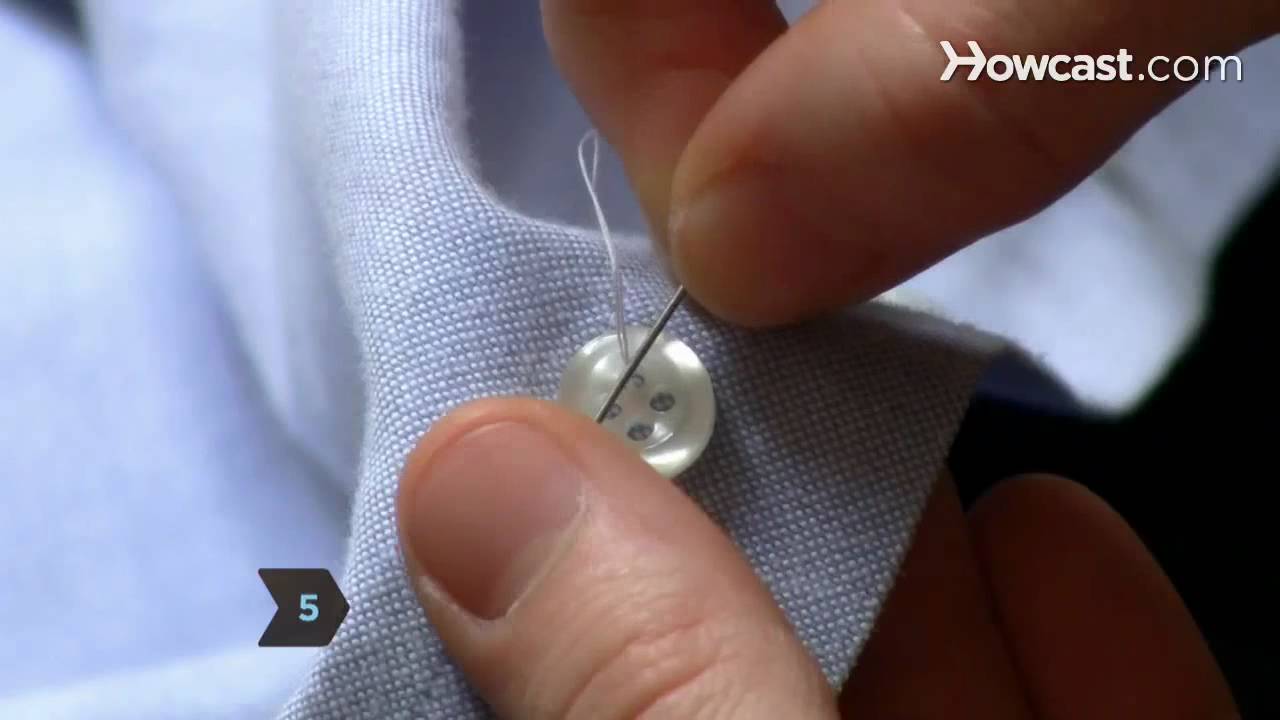
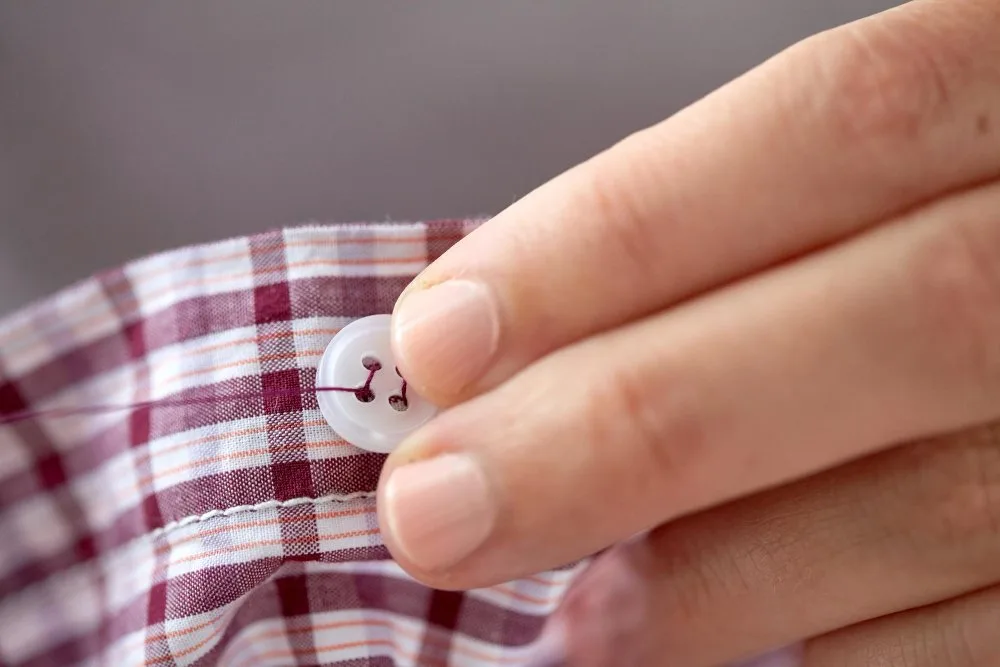
How to Sew on a 4-Hole Flat Button
This is the most common button type you will run into. Master this and you can handle almost any repair.
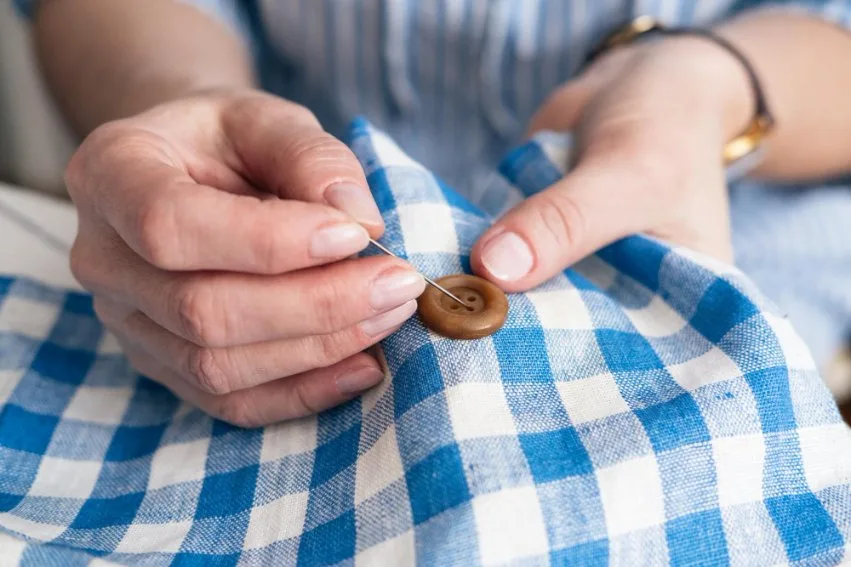
How to Sew on a 2-Hole Flat Button
The process is almost identical to the 4-hole method. Instead of an X pattern, you just sew straight back and forth between the two holes. Aim for six passes minimum. Finish with the same thread shank and knot on the back. The only difference is that 2-hole buttons are generally on lighter garments, so you do not need quite as many passes.
How to Sew on a Shank Button
Shank buttons are common on coats, blazers, and formal wear. They have a small metal or plastic loop on the back instead of holes on the face. The process is a little different.
Button Stitching Patterns: Which One Is Right for You?
Not all buttons are sewn the same way. The pattern of stitches you use on a 4-hole button changes how the thread sits, how strong the attachment is, and how it looks. Here are the three main patterns:
Cross-Stitch (X Pattern)
Sew diagonally across the button holes to form an X. This is the strongest method and the most common choice for everyday shirts and most repairs. The diagonal spread distributes stress better than parallel stitches.
Parallel Stitch
Sew in two straight parallel lines across the pairs of holes. This is the standard factory method on most ready-to-wear garments. It is slightly less strong than the X but looks neat and is quick to do.
Chicken-Foot Stitch
Rare outside of high-end bespoke tailoring. Stitches fan out from a central point under the button, creating a three-pronged pattern. Almost never needed for home repairs, but it is the hallmark of handmade luxury garments and is genuinely beautiful up close.
Sewing a Button by Machine
If you have a sewing machine, you can sew flat 2-hole and 4-hole buttons much faster than by hand. The technique varies depending on what your machine can do.
Method 1: Pre-Programmed Button Stitch
Many modern machines have a dedicated button-sewing mode. Select that stitch, attach the button-sewing foot, and place your button underneath. The machine handles the rest. Check your sewing machine manual for the specific steps.
Method 2: Zigzag Stitch (No Special Foot Needed)
- Set the stitch length to zero so the feed dogs do not move the fabric forward.
- Set the stitch width to match the distance between your button holes.
- Place the button under the presser foot (you can use a small piece of clear tape to hold it in place).
- Hand-turn the flywheel slowly to check the needle lands in each hole without hitting the button. Adjust width if needed.
- Sew about 10 to 12 stitches slowly. Leave thread tails and tie them off by hand on the back.
Watch: How to sew a button by hand, step by step. Click to play.
▶ Watch: How to Sew a Button Using a Sewing Machine (Video)The Complete Button Sewing Workflow

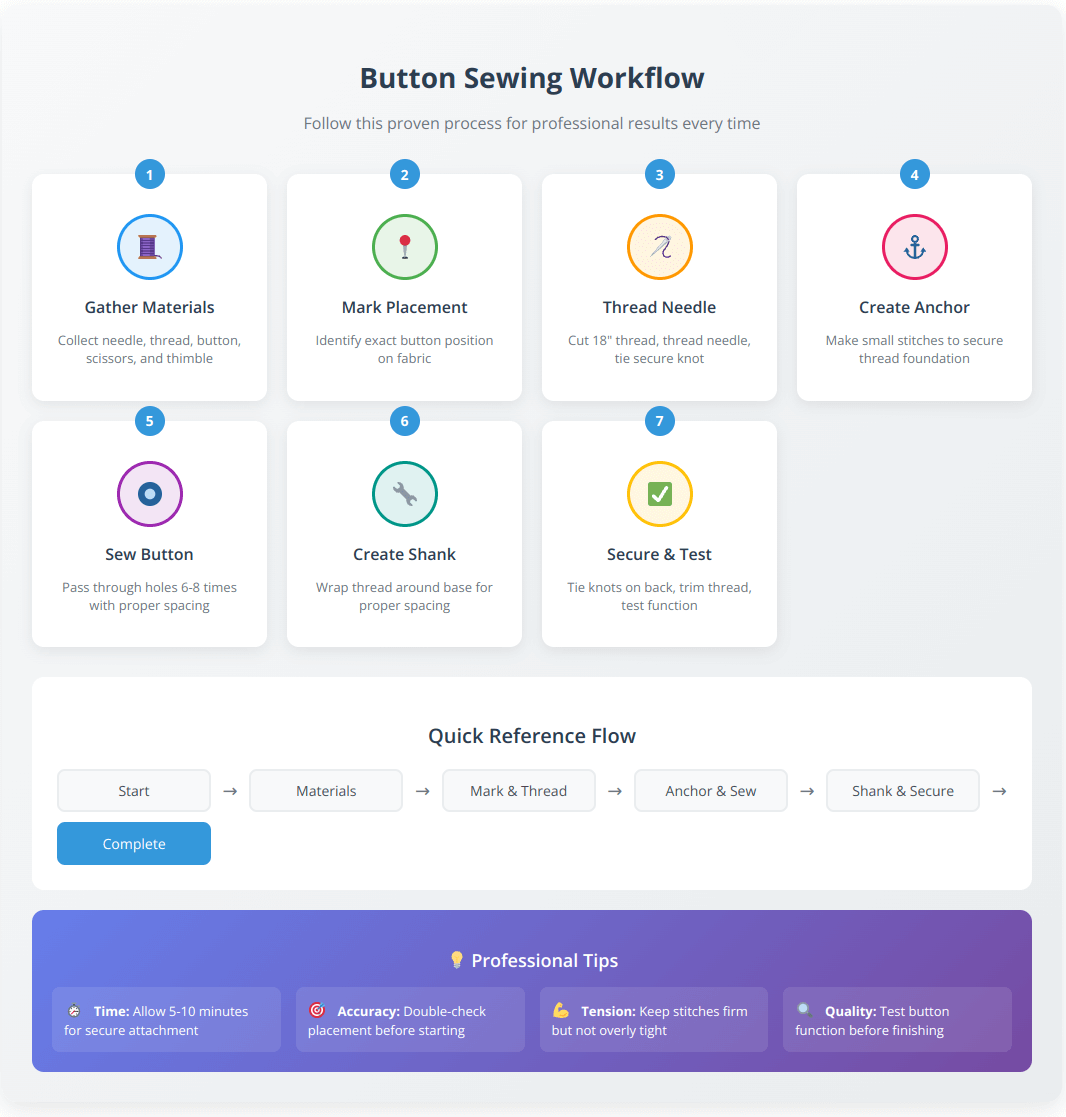
| Step | What to Do | Time |
|---|---|---|
| 1 | Gather materials: needle, thread, button, scissors, toothpick | 1 min |
| 2 | Mark exact button placement on fabric | 30 sec |
| 3 | Thread needle with 18 inches of thread, double and knot | 1 min |
| 4 | Create anchor stitches at marked position | 30 sec |
| 5 | Place button, add toothpick spacer, sew 6 to 8 passes | 2 to 3 min |
| 6 | Remove spacer, wrap thread shank 4 to 5 times | 1 min |
| 7 | Knot, trim, and test the button | 30 sec |
Garment-Specific Guides
The basic technique is the same for every button. But the details change depending on where you are working. Here is what you need to know for the garments people sew most often.
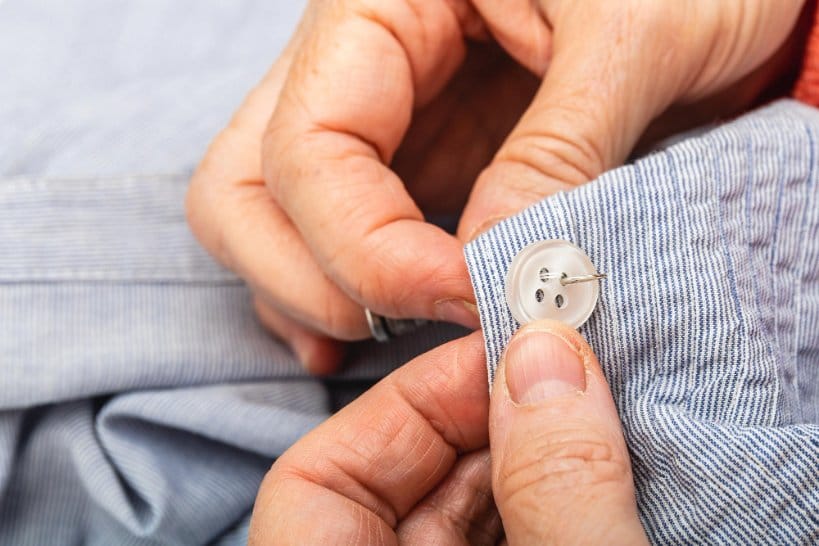
👔 Dress Shirt
- Use regular button thread or polyester, matched to the other buttons
- The shank on a dress shirt is minimal, about 3 mm of thread between button and fabric
- Sew in a parallel or X pattern, 6 passes minimum
- Men’s buttons go on the right; women’s go on the left
- Check all other buttons while you have the needle out and tighten any loose ones now
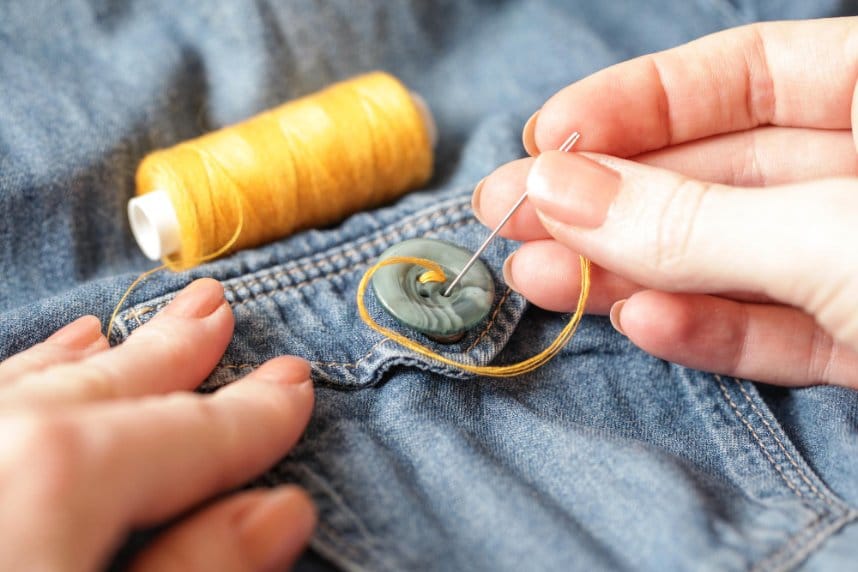
👖 Jeans and Pants
- Use upholstery thread or heavy-duty button thread
- Always add a backing button inside the waistband to prevent tearing through thick denim
- Create a longer thread shank to accommodate the thick denim layer when buttoned
- The waistband button on jeans takes a lot of stress, so aim for 10 passes minimum
- For more on caring for your denim, see our denim care guide
🧥 Coat
- Heavy fabric means a longer shank, so aim for at least 5 mm of wrap
- Shank buttons are common on coats; follow the shank button steps above
- Always use a backing button on the inside lining
- Wool coats: use waxed thread or heavy button thread. See our wool care guide for fabric notes
- Watch for the coat lining and work carefully so you do not accidentally sew through it
🕴 Suit Jacket or Blazer
- Use silk or button thread in a color that matches exactly; sloppy thread color shows on a suit
- Suit buttons are often shank-style or have a small cloth shank behind them
- The stitch pattern matters more here because it is often visible, so use the X pattern neatly
- Sew through the canvas and facing, not just the outer fabric, for the strongest hold
- For valuable suits, consider a professional tailor for this repair
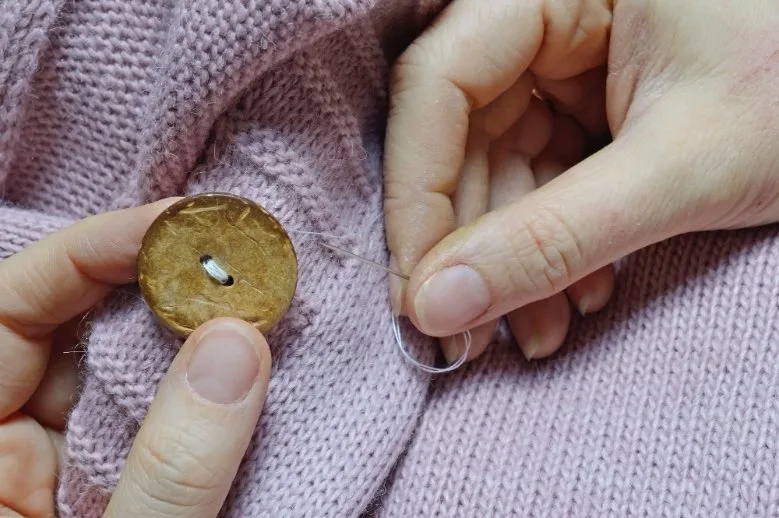
🧶 Cardigan and Knitwear
- Knit fabric stretches, so you must back it before sewing; use a small piece of non-stretch stabilizer or fusible interfacing on the back
- Sew loosely. If you pull the thread tight on a knit, you will pucker the fabric permanently
- A larger backing button on the inside is especially helpful for heavy cardigans
- Avoid sharp needles that might snag the knit loops; use a ball-point needle if possible
- See our guide to sweaters and cardigans for more care tips
🎒 School Uniform and Kids’ Clothes
- Durability first: use upholstery thread or heavy button thread. School clothes take punishment.
- Go for 10 to 12 passes through the holes instead of the usual 6 to 8
- A backing button on the inside is worth the extra two minutes
- Check all the buttons while you are at it and tighten anything that feels loose
- Avoid tiny buttons on very young children’s clothing; always check age-appropriate safety guidelines
- Quick tip for busy parents: sew the new button to a small patch of fabric first, then sew the patch to the uniform. Even faster and even stronger.
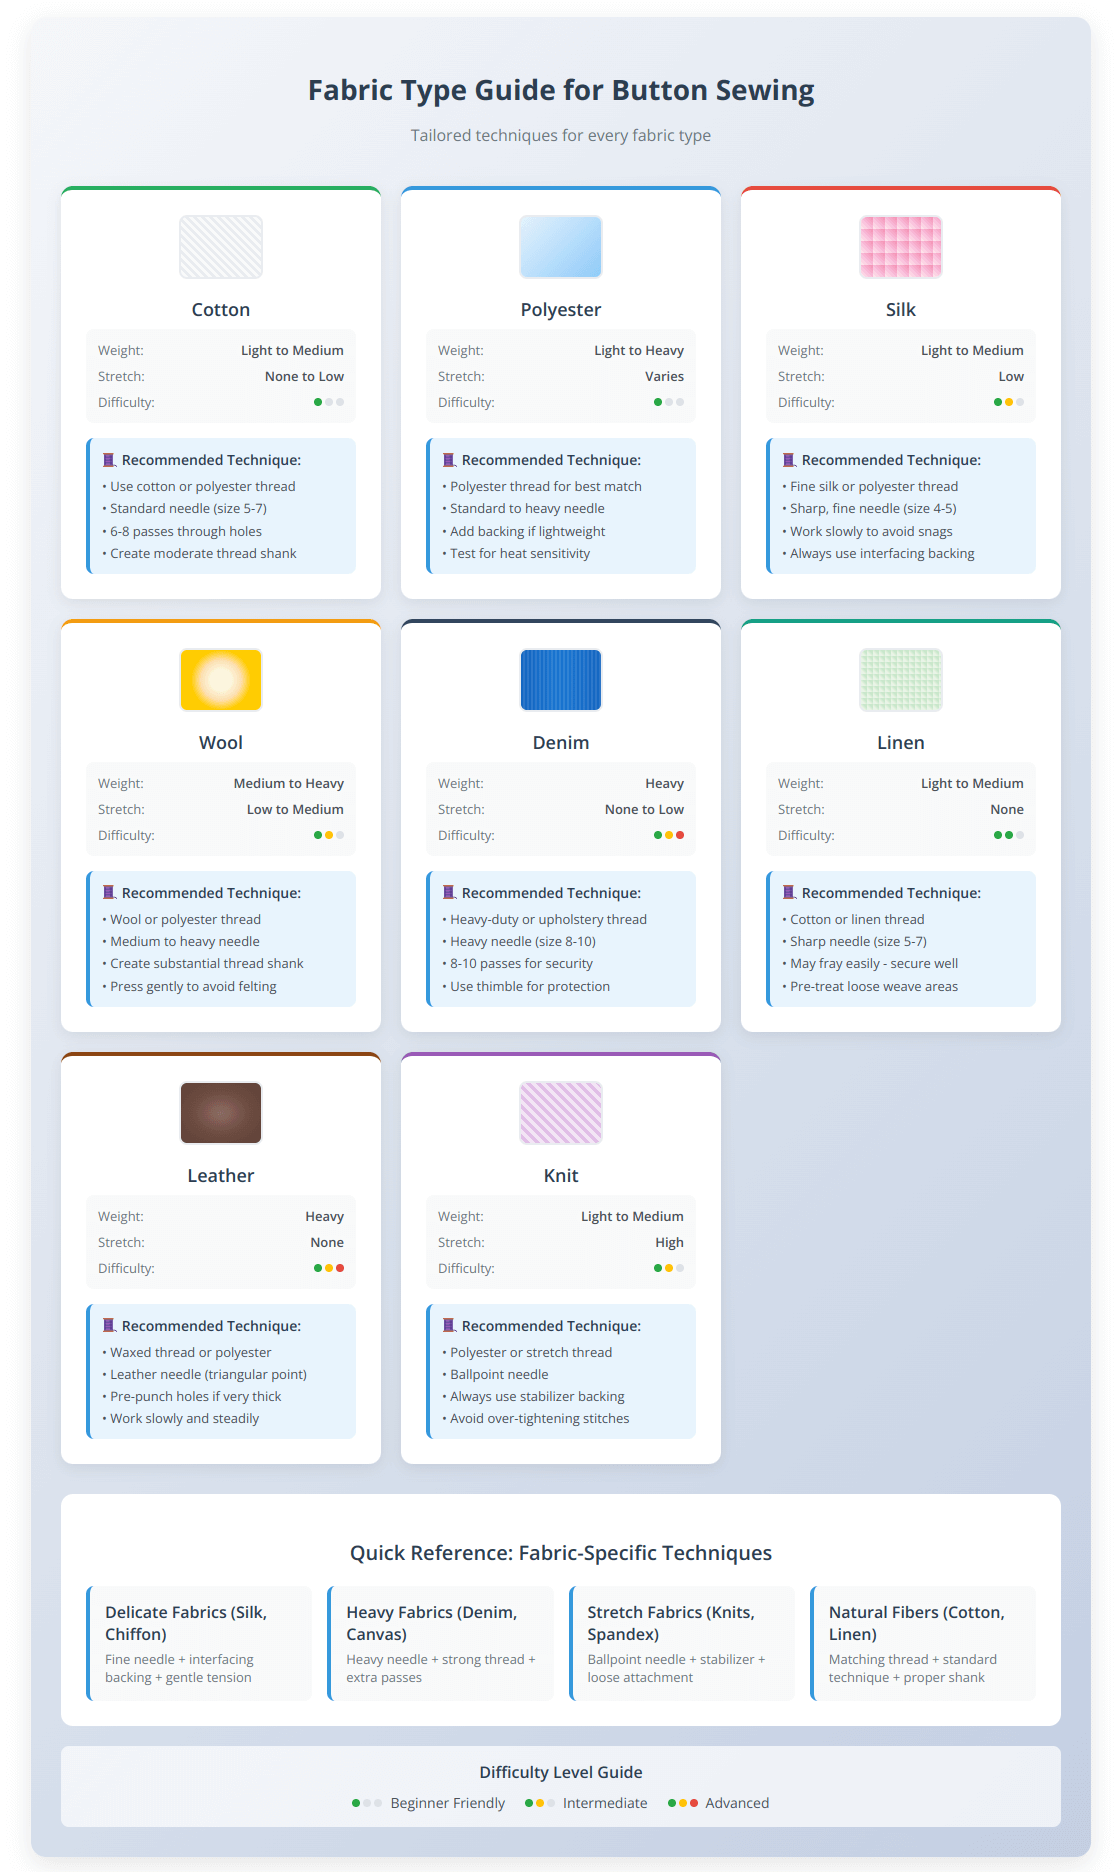
Sewing Buttons on Delicate and Special Fabrics
| Fabric | Needle | Thread | Special Notes |
|---|---|---|---|
| Silk | Size 9 sharp (very fine) | Silk thread or fine polyester | Work slowly; silk marks permanently from needle holes |
| Linen | Size 7 to 8 | Cotton or polyester | Linen frays, so always back the button area before sewing |
| Stretch / Knit | Ball-point needle | Polyester (has slight stretch) | Use stabilizer behind the button and sew loosely |
| Denim | Size 16 to 18 denim needle | Upholstery or jeans thread | Backing button essential; longer shank needed |
| Leather/Suede | Leather needle | Waxed thread | Each hole is permanent, so mark carefully before you start. See our leather care guide |
Pro Tips and Insider Hacks
These are the things tailors know that most online guides skip entirely. They make a real difference in how long your buttons stay put.
Emergency Button Repair Without a Sewing Kit
Sometimes a button falls off and you have nothing nearby. Here is how to handle the most common emergency scenarios.
| What You Are Missing | What to Use Instead |
|---|---|
| No needle | Straighten a safety pin or the sharp end of a large paperclip. Push very carefully. |
| No thread | Unflavored dental floss works surprisingly well. It is strong and slips through fabric easily. |
| No scissors | Score the thread back and forth against a key edge, or bite it. A sharp fold will also snap thread. |
| No button | A large shirt button from further down the placket can be moved up to the visible position. Or use a small brooch to close the gap temporarily. |
| No time at all | A small safety pin on the inside of the fabric is invisible from the outside and holds the closure cleanly. |
Tips for Left-Handed Sewers
Most sewing guides assume right-handedness without saying so. If you are left-handed, a few small adjustments make everything easier.
- Hold the needle in your left hand and the fabric in your right. This is the mirror image of what most guides show, and it is completely fine.
- Rotate your anchor stitches counterclockwise if that feels more natural. The direction does not affect the strength of the knot.
- Wrap the thread shank in the direction that is comfortable for you. Clockwise or counterclockwise, a shank is a shank. Do whichever direction your wrist prefers.
- When tying off knots, the standard instructions will feel backwards. The easiest approach is to slide the needle under the stitches on the back of the fabric, pull a loop through, and then pass the needle through the loop. This works just as naturally left-handed as right-handed.
- If threading the needle is harder for your left hand, use a needle threader, which removes handedness from the equation entirely.
What to Do If You Do Not Have a Spare Button
Losing a button and not having a match is frustrating, but you have more options than you think.
- Check the garment itself first. Most quality shirts, blouses, and jackets have a spare button sewn onto the inside hem, seam, or label tag. Look carefully before assuming you are out of luck.
- Move a less visible button. If the missing button is at the top of a shirt placket (the most visible position), remove the bottom button and use it for the replacement. The missing bottom button is usually hidden by a waistband or belt anyway.
- Visit a fabric or craft store. Chain stores like Jo-Ann Fabrics carry a huge range of buttons. Bring the garment or one of the original buttons to match the size and style.
- Shop online. Buttons are inexpensive and widely available on sites like Amazon, Etsy, and specialty sewing shops. Search by size in millimeters and material.
- Embrace a different button. If the garment has multiple buttons, replacing all of them with a fresh set can give a garment a brand-new look. This is popular in slow fashion and upcycling circles right now.
- Repurpose from old clothes. Keep a small jar of buttons from clothes you no longer wear. You will always have options when you need them.
Common Mistakes and How to Avoid Them
These are the mistakes that cause buttons to pop off again within days of being re-sewn. Every single one is easy to avoid once you know what to watch for.
The Real Cost: DIY vs. Paying a Tailor
Here is a number that surprises a lot of people: a professional tailor in the United States typically charges between $8 and $20 to sew on a single button. In major cities, some shops charge even more. The same repair by hand costs you a few cents of thread and about seven minutes of your time.
| Scenario | Tailor Cost | DIY Cost | You Save |
|---|---|---|---|
| 1 button on a shirt | $8 to $15 | Under $0.10 | $8 to $15 |
| All buttons on a coat (8 buttons) | $50 to $80 | Under $0.80 | $50 to $80 |
| School uniform buttons over a school year | $30 to $60 | Under $2 | $30 to $60 |
| Over a lifetime of clothing (10+ garments/year) | $1,000+ | Under $20 | $980+ |
The math speaks for itself. Button sewing is one of the highest-return skills you can pick up in 10 minutes. And once you know how, you know forever.
Why Sewing a Button Is One of the Most Sustainable Things You Can Do
This might sound like a stretch, but bear with us. Americans throw away roughly 81 pounds of clothing per person per year. A huge chunk of that is clothing discarded over minor damage: a broken zipper, a torn seam, or yes, a missing button. According to the EPA’s Facts and Figures on Materials, Waste and Recycling, the US generated 17 million tons of textile waste in a single year, with 11.3 million tons going straight to landfills. And the numbers keep climbing.
Sewing a button keeps a garment in use instead of in a landfill. That is not a small thing. Fast fashion has made it feel easier to replace than repair, but a generation of younger Americans is pushing back hard on that idea. Searches for sustainable fashion and clothing repair have grown every year since 2020, and new research shows that Gen Z is now more likely to repair clothes than millennials are.
You do not have to be passionate about sustainability to care about this. Every shirt you fix instead of toss is a shirt you do not have to replace, which saves you money and skips the environmental cost of manufacturing a new one. That is a win no matter how you look at it.
Want to go deeper on the slow fashion angle? Our article on fast fashion vs. slow fashion in 2025 covers this in full.
Teaching Kids to Sew a Button
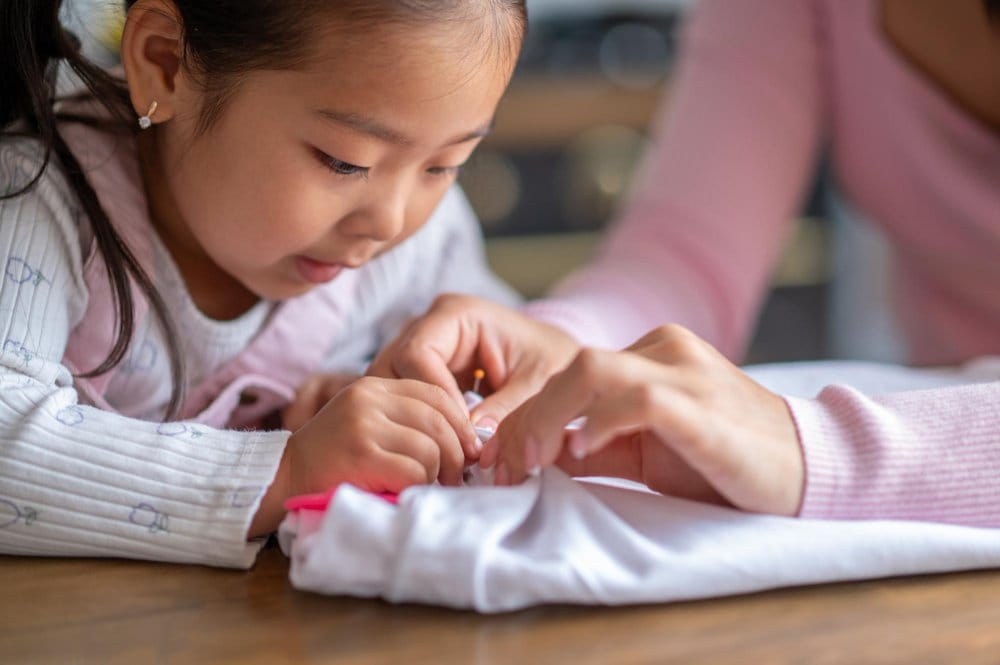
Button sewing is one of the best first sewing projects for kids. It is short, achievable, and the result is immediately useful. Most children can learn the basics of it by age 8 or 9 with some guidance.
How to Teach Kids Step by Step
- Start with a practice square, not a real garment. Cut two squares of medium-weight cotton fabric and sew a button to one of them first. Kids learn faster when they are not worried about ruining something important.
- Use a large blunt needle for young learners (also called a tapestry needle). It is safer and easier to thread.
- Choose a large, flat 4-hole button, which is easier to handle and easier to see what is happening.
- Pre-thread the needle yourself the first time or two. Let the child focus on the sewing part before adding the threading challenge.
- Count the passes out loud together. “One, two, three, four…” Kids stay engaged and learn the rhythm.
- Let them choose the thread color. A small choice makes them feel invested in the project.
Age Guidelines
| Age | What They Can Handle |
|---|---|
| 6 to 7 | Watching, passing the needle, holding fabric still |
| 8 to 9 | Full process with supervision; large needle, large button, practice fabric |
| 10 to 11 | Independent repair on real clothing with guidance nearby |
| 12 and up | Fully independent; can learn thread shank and finishing knot |
Button Care and Maintenance
Prevention beats repair. A few good habits will stop most buttons from falling off in the first place.
Habits That Keep Buttons Longer
- Button up before washing. An open placket is more likely to snag buttons on other clothes in the machine. Buttoning up also keeps the placket from stretching out of shape.
- Check buttons every few months on clothes you wear regularly. A button that is slightly loose is easy to fix in five minutes. A lost button requires a replacement search.
- Reinforce factory buttons on new shirts. Run one quick extra pass of thread through each button when you first buy a garment. Factory button sewing prioritizes speed, not durability.
- Avoid yanking buttons open. Pull garments over buttons gently. The most common cause of button failure is repeated lateral stress from pulling fabric apart instead of passing the button through the hole.
Washing Tips for Different Button Materials
| Button Material | Washing Notes |
|---|---|
| Plastic | Machine wash fine; avoid high heat in dryer, which can warp them |
| Metal | Can rust if exposed repeatedly to moisture without drying; air dry when possible |
| Shell / Mother of Pearl | Fragile; use a garment bag in the washing machine; avoid tumble drying |
| Wood | Hand wash or use a gentle machine cycle; always air dry; wood can crack with repeated heat |
For fabric-specific washing advice, our guide on how to wash and care for different fabrics covers every common material.
When to Repair vs. Replace a Button
| Situation | Repair or Replace? |
|---|---|
| Button is intact but the thread has broken | Repair: sew it back on |
| Button is cracked or chipped | Replace with a matching button |
| One button is lost and no spare exists | Replace all buttons for a consistent look, or source a close match online |
| Button holes in the fabric are enlarged or fraying | Reinforce with interfacing first, then repair |
| The same button has been re-sewn three or more times | The fabric is probably weakening; reinforce with a patch or backing before sewing again |
| Rare or vintage button with sentimental value | Repair carefully; if in doubt, take to a professional |
Troubleshooting Common Button Problems
| Problem | Likely Cause | Fix |
|---|---|---|
| Button keeps coming loose | Too few passes; no anchor; weak thread | Re-sew with heavier thread, 8 to 10 passes, proper anchor, and lock the knot with superglue |
| Fabric puckers around the button | Thread pulled too tight; no shank; wrong needle size | Re-sew more loosely; use a toothpick spacer for the shank; match needle size to fabric |
| Button sits crooked | Placement was not marked; fabric shifted during sewing | Mark placement before starting; pin the button in position before the first stitch |
| Thread shows through on the front of the fabric | Needle went too deep; stitches visible on the outside | On lined garments, sew only through the facing and canvas, not through the outer fabric |
| Button pulls through the fabric | Thin or weak fabric with no backing | Remove and re-do with a fusible interfacing patch and a backing button on the inside |
| Knot comes undone at the back | Single knot or loose finishing | Always tie a double knot and lock it with nail polish or superglue |
Quick-Reference Cheat Sheet
Screenshot this or save it. Everything you need for a solid button repair, at a glance.
7 Steps
- 1. Gather supplies
- 2. Thread needle, knot end
- 3. Mark placement
- 4. Anchor stitch x3
- 5. Sew 6 to 10 passes
- 6. Wrap thread shank
- 7. Knot and trim
How Many Passes?
- Shirt / blouse: 6 to 8
- Jacket / blazer: 8
- Coat: 8 to 10
- Jeans / denim: 10 to 12
- School uniform: 10 to 12
- Knitwear: 6 (loosely)
Thread by Fabric
- Everyday shirt: polyester
- Denim / coat: upholstery
- Silk / blouse: silk thread
- Leather: waxed thread
- Emergency fix: dental floss
Common Mistakes
- Skipping thread shank
- No anchor stitch
- Too few passes
- Thread too tight
- Wrong thread color
- Single finishing knot
Pro Hacks
- Superglue the knot
- Toothpick as shank spacer
- Double-pass for speed
- Reinforce new shirt buttons
- Button up before washing
Time Estimates
- Shirt button: 5 to 7 min
- Coat button: 10 to 12 min
- Jeans button: 10 to 15 min
- Emergency pin: 30 sec
- Threading needle: 1 min
📱 Screenshot this to keep it handy for your next quick repair.
Frequently Asked Questions
Conclusion
Button sewing is one of those rare skills that is quick to learn, takes almost no equipment, and is useful every single year for as long as you own clothes. If you walked away from this guide with nothing else, carry these things with you:
- The thread shank is non-negotiable. It is the difference between a button that stays on for years and one that pops off in a month. Use the toothpick spacer every time.
- Preparation saves time. Two minutes of checking placement, testing thread, and stabilizing fabric prevents you from having to redo the job later.
- Match your thread and technique to the garment. A dress shirt and a pair of jeans need very different approaches. Now you know which one applies when.
- Lock the knot. A single drop of clear nail polish or superglue on your finishing knot adds years to any button repair. This one habit alone is worth learning the whole process for.
- Reinforce before things break. Checking and tightening buttons on frequently worn garments every few months is faster and easier than doing an emergency repair.
- The sustainability math is real. Every garment you repair instead of replace saves money, reduces waste, and keeps something you already like in your closet longer.
- Teach the skill to your kids. A child who can repair their own clothes is more self-sufficient and more confident. It is a gift that keeps giving.
Your first button might not look perfect, and that is completely fine. After three or four repairs, the process becomes automatic. The needle goes where it needs to go, the shank winds naturally, and the knot ties itself. You will get there faster than you think.
For a complete introduction to hand sewing beyond button work, our beginner’s guide to sewing is a great next step. And if you are building out your first sewing kit, the essential sewing supplies guide covers everything you actually need without the fluff.
Now go find that shirt. The button is not going to sew itself.