The No-Frustration Guide for Beginners, Seniors, Kids, and Anyone Dealing with Shaky Hands or Poor Eyesight
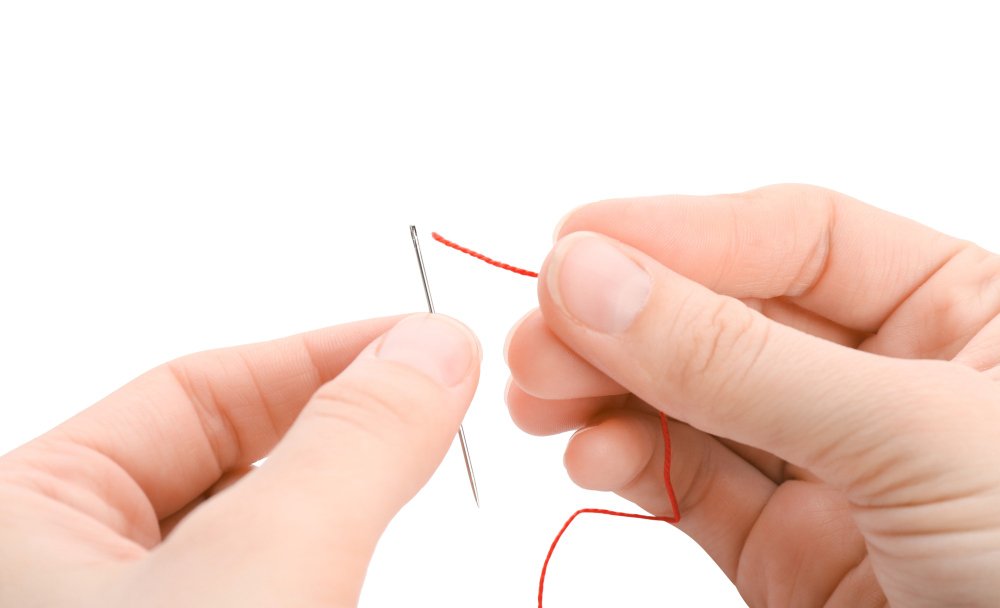
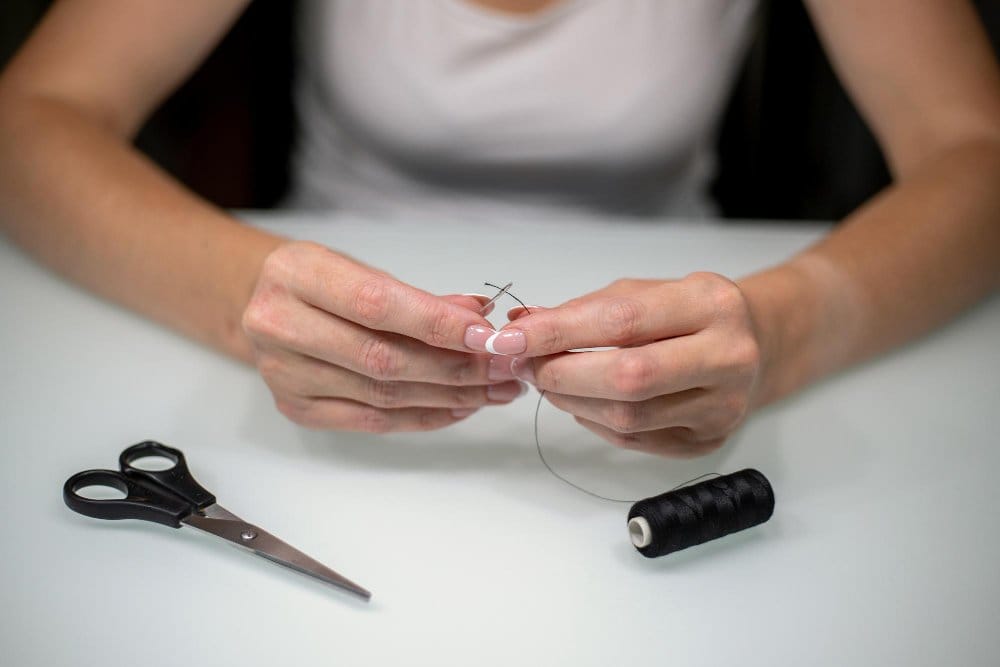
You pick up a needle. The thread is ready. And then it all goes sideways. The thread keeps flopping around, the tip keeps fraying, and that tiny hole seems to get smaller every time you look at it. Sound familiar? You’re definitely not alone.
Threading a needle trips up beginners and experienced sewers alike. But here’s the thing: it doesn’t have to be this way. With the right method, you can get a needle threaded in seconds without any special tools.
The fastest approach is the fold-over pinch method. You fold your thread over the needle shaft, pinch it tight between your fingers, remove the needle, and push the eye down onto the pinched thread.
No tools, no squinting, and it works for almost any type of thread. Keep reading and you’ll master this one plus six other proven techniques.
Whether you’re sewing on a button, repairing a hem, or just getting started for the first time, this guide walks you through everything.
There are methods for kids, seniors, people with arthritis, and anyone who struggles with poor eyesight or shaky hands. Let’s get into it.
Table of Contents
- Understanding Needle and Thread Basics
- Essential Preparation Before You Start
- Method 1: The Fold-Over Pinch
- Method 2: Traditional Hand Threading
- Method 3: The Moisture Technique
- Method 4: Using a Needle Threader
- Method 5: Self-Threading Needles
- Method 6: The Paper Assist Technique
- Method 7: Advanced Techniques
- All 7 Methods at a Glance
- Which Side of the Needle Eye
- How to Double-Thread a Needle
- Threading with Kids
- Threading with Arthritis
- Threading as a Senior
- Threading for Specialty Fabrics
- Troubleshooting Threading Problems
- Threading a Sewing Machine Needle
- Starting Your Sewing Journey
- Sewing as a Sustainable Skill
- Real-Life Sewing Emergencies
- Expert Tips from Experienced Sewers
- Your Complete Threading Toolkit
- Frequently Asked Questions
- Conclusion
Key Takeaways
- The fold-over pinch method is the fastest technique and needs no tools
- Good lighting and a clean-cut thread end make every method easier
- Needle threaders, self-threading needles, and automatic devices are great options for those with vision or dexterity challenges
- Matching your needle size to your thread and fabric type matters more than most people realize
- Machine-made needles have one smoother side of the eye that threads more easily
- Threading a needle is a learnable skill that gets easier every time you practice it
Understanding Needle and Thread Basics
Before jumping into the methods, it helps to understand what you’re working with. A sewing needle has two main parts: the sharp tip that pierces fabric, and the eye, which is the small hole where your thread goes.
The eye size varies depending on the needle type and what it’s made for.
Choosing the wrong needle for your thread is one of the most common reasons threading feels so frustrating. If your thread is too thick for the eye, it won’t fit. If it’s too thin, it slips right out.
Getting the right match makes everything easier.
Types of Needles and Which Are Easiest to Thread
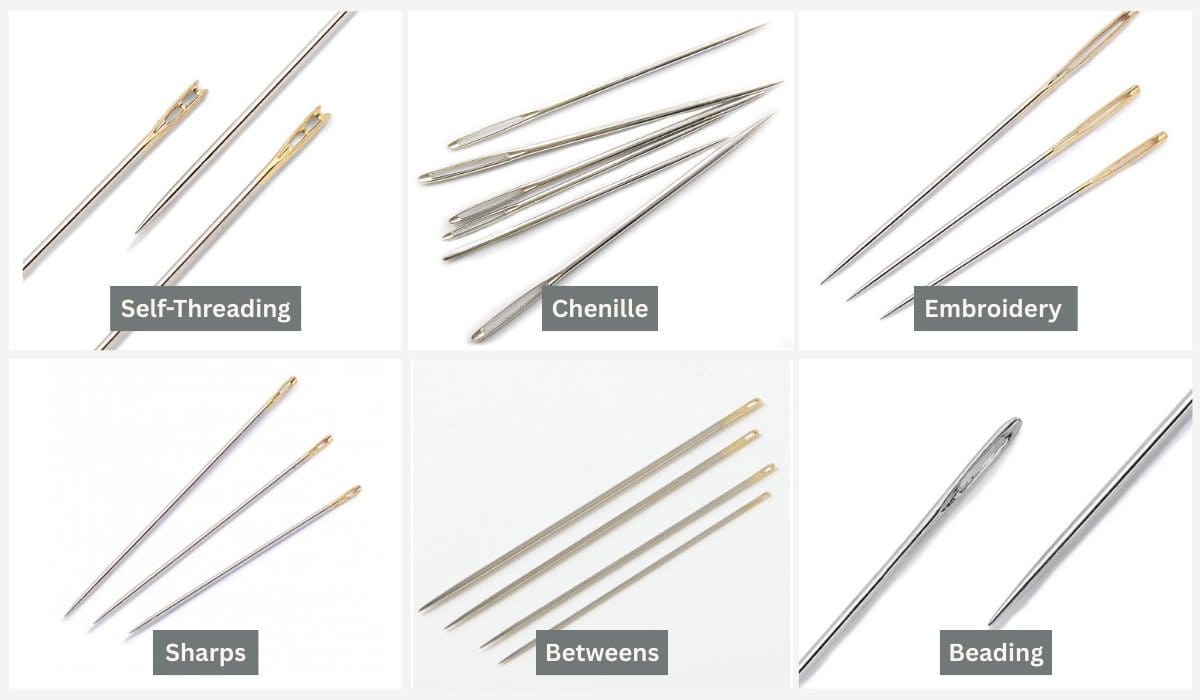
Not all needles are the same. Here’s a quick breakdown of the most common types:
| Needle Type | Eye Size | Best For | Threading Ease |
|---|---|---|---|
| Self-Threading (Calyx Eye) | Slotted opening | All general sewing, great for beginners | Very Easy |
| Tapestry / Chenille | Large | Embroidery, needlepoint, thick thread | Easy |
| Embroidery / Crewel | Long, larger | Embroidery floss, decorative stitching | Easy |
| Sharps (General Purpose) | Medium | Most hand sewing and repairs | Moderate |
| Quilting / Betweens | Small, round | Quilting through multiple layers | Moderate |
| Beading | Very small | Beads and fine decorative work | Challenging |
Matching Your Needle to Your Fabric and Thread
This table gives you a quick reference for common fabric types. Using the right combo means less frustration with both threading and sewing.
| Fabric Type | Needle Size | Thread Type | Examples |
|---|---|---|---|
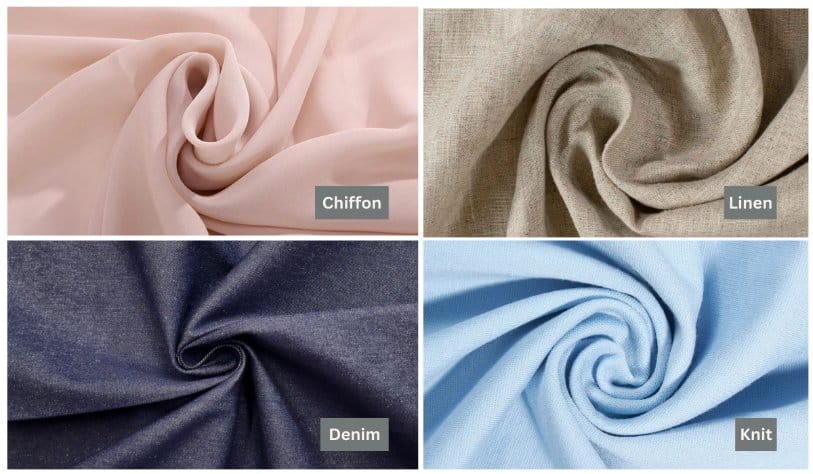
| Lightweight / Sheer | 60/8 or 70/10 | Fine polyester or silk | Silk, chiffon, organza, voile |
| Medium Weight | 80/12 | All-purpose polyester | Cotton, linen, chambray |
| Heavyweight | 90/14 or 100/16 | Heavy-duty polyester or denim thread | Denim, canvas, upholstery fabric |
| Stretchy / Knit | 75/11 (ballpoint) | Polyester or stretch thread | Jersey, spandex, ribbed knit |
Want to go deeper on fabric types? Check out our guide to common fabric types and their uses.
Essential Preparation Before You Start
A little setup goes a long way. Most threading failures come down to poor preparation, not bad technique. These steps take less than a minute and dramatically improve your success rate.
Cut Your Thread the Right Way
Always use sharp fabric scissors or thread snips. Cut your thread at a 45-degree angle to create a clean, pointed tip. This prevents the fibers from splaying out before you even start threading.
Your thread length should be about 18 to 24 inches for hand sewing. Longer threads tangle easily. Shorter ones mean you’ll have to re-thread too often. A good rule of thumb: cut a length equal to the distance from your fingertips to your elbow.
Set Up Good Lighting
Poor lighting is one of the top reasons people struggle with threading. Natural daylight is best. If that’s not available, use a bright task lamp pointed directly at your work.
Some sewers keep a small piece of white card behind their needle to create contrast and make the eye easier to see.
Gather Your Tools
Before you start any sewing project, it’s worth having these nearby:
- Sharp scissors or thread snips
- A needle threader (backup option)
- Beeswax or thread conditioner
- Extra needles in a few sizes
- A white card or paper for contrast
- Good lighting source
If you need help building your kit from scratch, our guide to essential sewing supplies for beginners covers everything you need.
Free Needle Threading Tools
- Interactive Needle Threading Checklist – Run through this before you start and boost your success rate from 30% to over 90%
- Needle Threading Method Quiz – Get a personalized method recommendation based on your tools and challenges
- Needle Threading Skills Tracker – Track your progress across all 7 methods as you practice
The 7 Methods: Step-by-Step
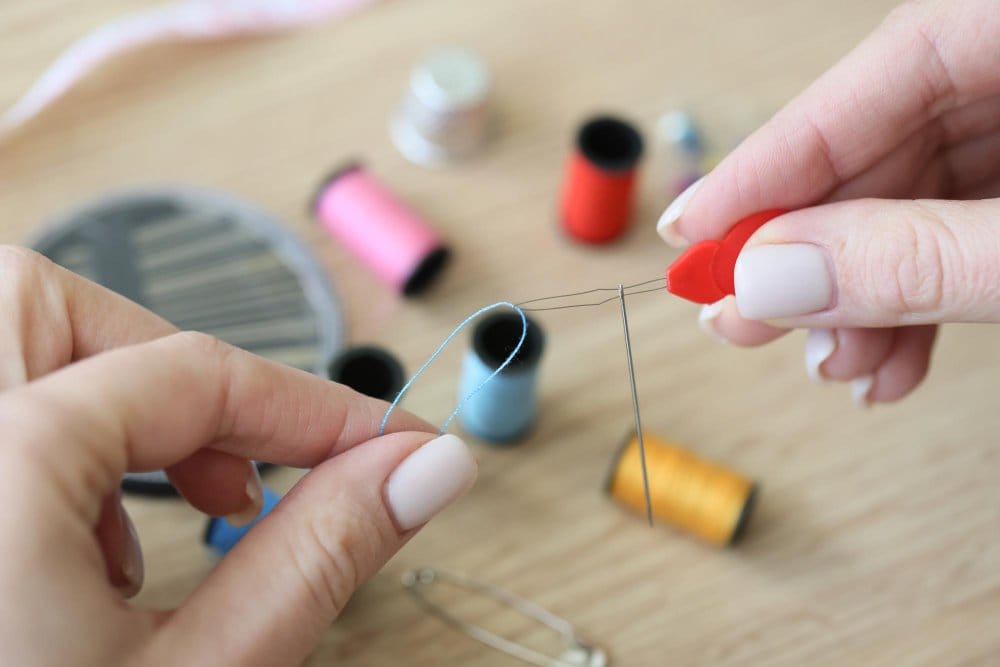
The Fold-Over Pinch Technique (Easiest and Fastest)
This is the method that changes things for most people. It’s quick, it works without any tools, and it gets easier every time you do it.
The basic idea is that your fingers compress the thread, making it stiff enough to push through the needle eye.
- Hold your thread and lay the needle on top of it, about half an inch from the thread’s end
- Fold the thread over the needle shaft and pinch it tightly between your thumb and index finger
- Slide the needle out while keeping the thread pinched – you should barely see the thread tip between your fingers
- Place the needle eye over the pinched thread tip and push down until the thread passes through
- Grab the loop or thread end that comes through and pull to your desired working length
Easy Needle Threading: Pinch and Fold Method for Beginners
Loads on click
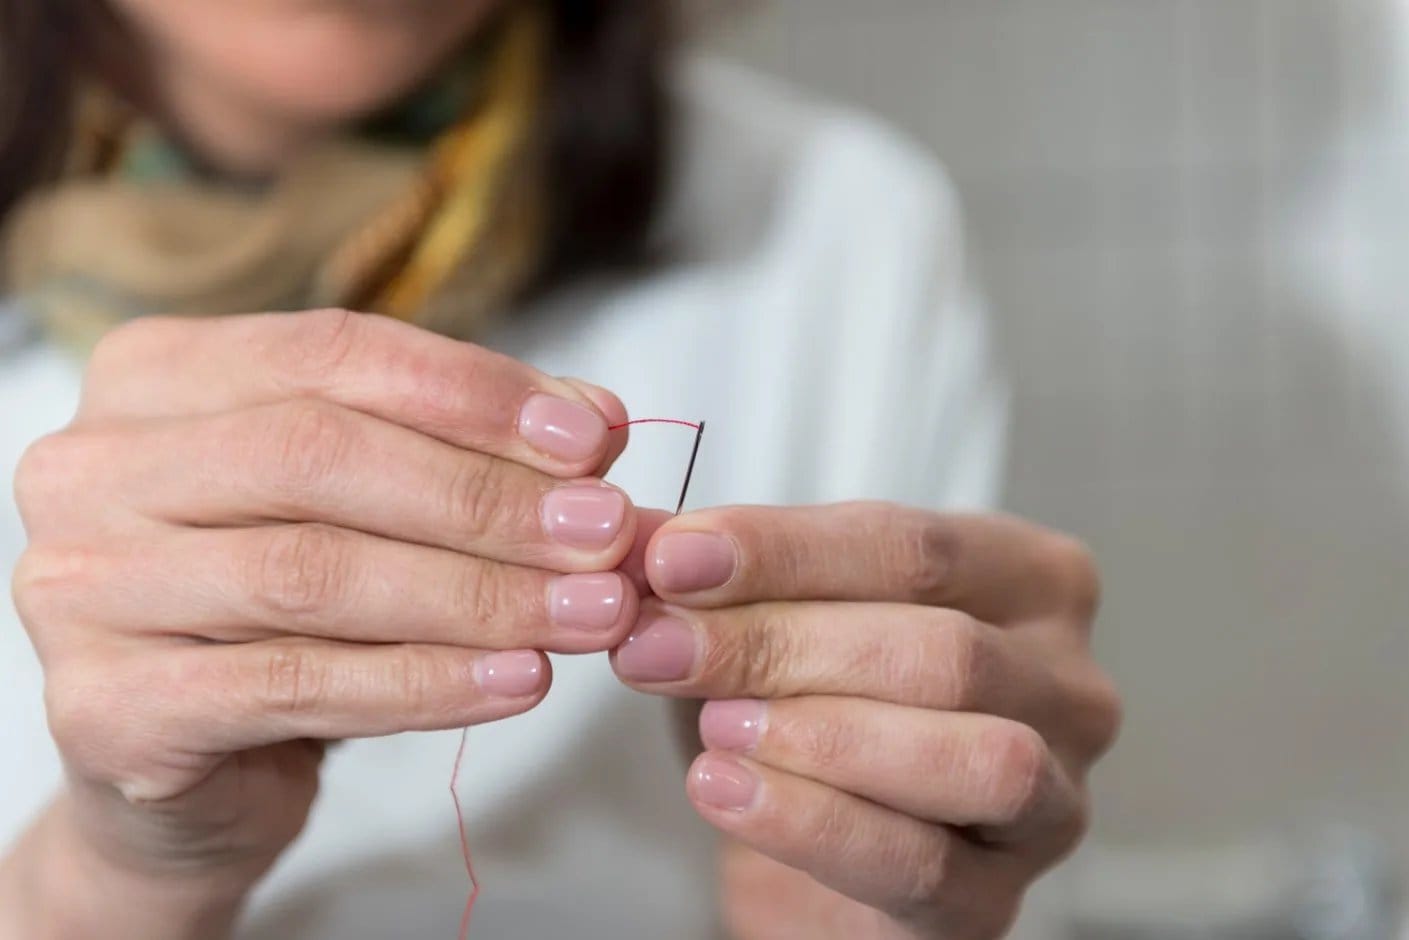
Traditional Hand Threading
This is the classic approach most people learn first. It works best with a fresh cut, good lighting, and a steady hand.
- Cut your thread cleanly at a 45-degree angle with sharp scissors
- Rest your elbows on a table to steady your hands
- Hold the needle 6 to 8 inches from your eyes for the best focus point
- Pinch the thread about half an inch from the tip between your thumb and finger
- Align the thread with the needle eye and push through with a smooth, straight motion
- Pull through until you have at least 4 inches on the short end

Watch: Easiest way to thread a needle (YouTube Short)
The Moisture Technique
A small amount of moisture can stiffen the thread tip just enough to make threading much easier. This works great when your thread end keeps splitting or flopping around.
- Wet your fingertip with clean water (not too much)
- Touch the thread end lightly to transfer just a tiny bit of moisture
- Wait 2 to 3 seconds for the fibers to stiffen slightly
- Thread immediately while the end is still firm
Alternative stiffening options:
- Beeswax: Run the thread across a beeswax block. This stiffens the thread, reduces friction, and conditions it against tangling
- Hairspray: A very light spritz on the thread tip, left to dry for a moment, gives a firm end that threads easily – especially useful in a pinch
- Clear nail polish: Apply a tiny drop to the very tip and let it dry fully. This is a permanent fix that works well for threads you use frequently
Sewing Hacks: Easy Ways to Thread a Needle Quickly
Loads on click
Using a Needle Threader
Needle threaders are small, inexpensive tools that take most of the difficulty out of threading. They come in wire-loop versions, flat hook versions, and automatic push-button versions. Even experienced sewers keep them on hand.
- Push the thin wire loop through the needle eye until it pokes out the other side
- Place about 4 inches of your thread through the larger wire loop
- Gently pull the wire loop back through the needle eye – the thread comes with it
- Pull your thread to the desired working length and remove the threader
Types of needle threaders:
- Wire loop: The most common type. Budget-friendly but the wire can bend and break with heavy use – keep a few spares
- Flat hook: More durable. Better for embroidery floss, yarn, or thicker threads
- Automatic (push-button): No eye contact needed at all. Great for seniors, people with arthritis, or anyone who wants consistently fast results

Watch: How to use a needle threader
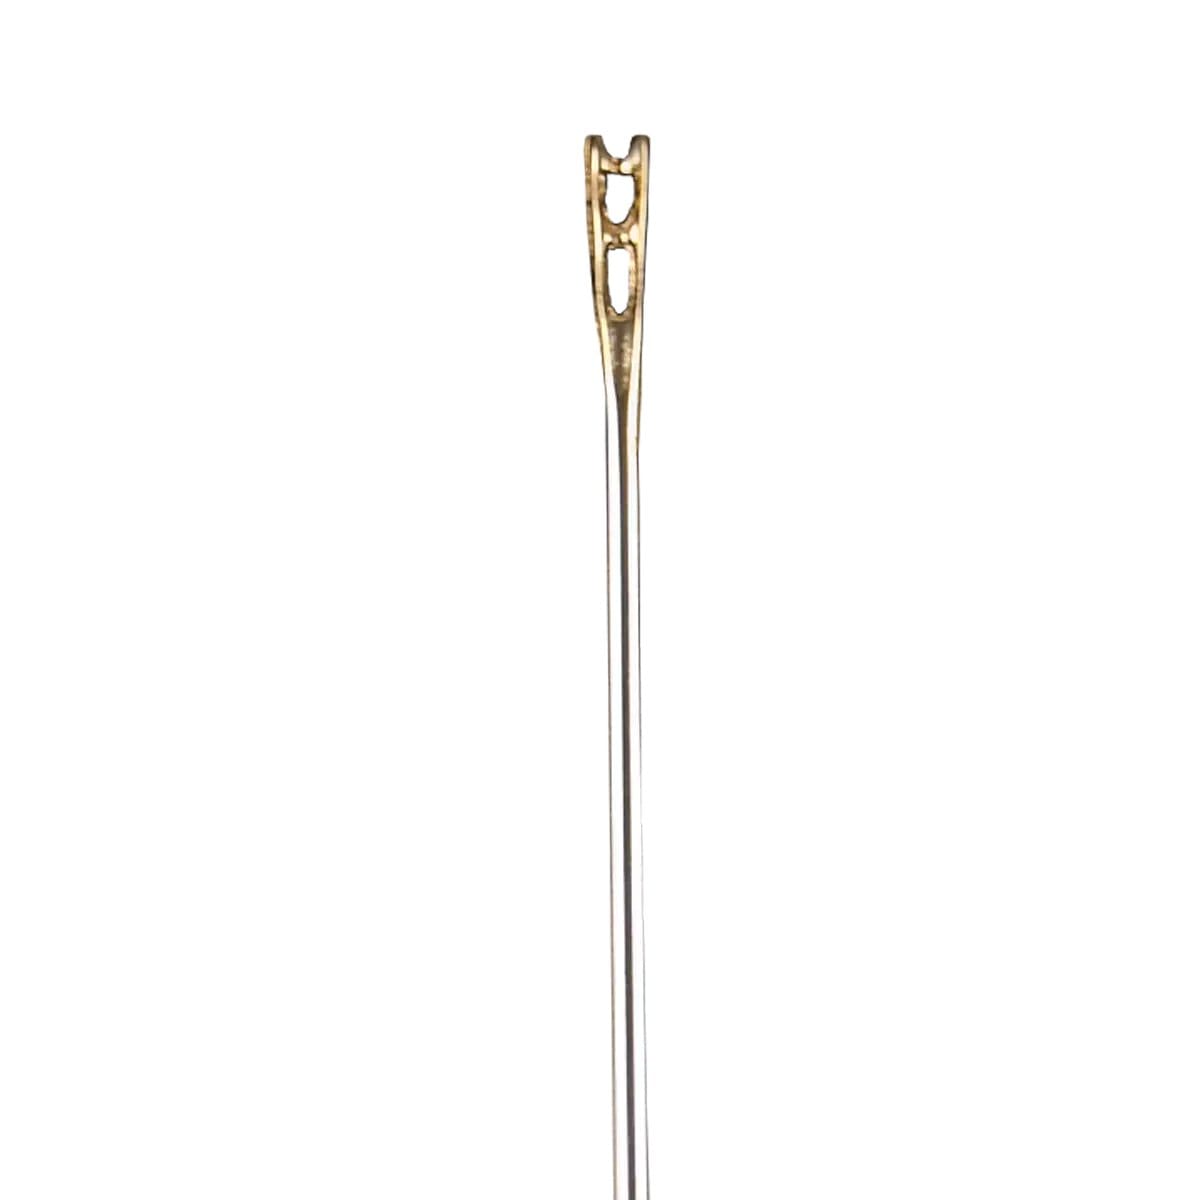
Self-Threading Needles
Self-threading needles (sometimes called calyx-eye needles) have a V-shaped slit at the top instead of a traditional round eye. Thread presses into the slit and snaps into the eye automatically. No precise aiming needed.
- Hold the needle with the V-shaped slit facing up
- Place your thread into the groove
- Press gently and slide toward the eye
- You’ll feel or hear a small snap as the thread drops into place
- Tug both ends to make sure it’s secure before you start sewing

Watch: Self-threading needles explained
The Paper Assist Technique
No needle threader? A small piece of paper can do the same job. This trick uses paper as a stiff guide to lead the thread through the eye. It’s one of the best no-tool backup methods.
- Fold a small piece of white paper in half
- Cut a small notch in the folded edge – just big enough for your thread
- Place your thread into the notch
- Push the folded paper edge through the needle eye, guiding the thread with it
- Once through, gently pull the paper away, leaving the thread in place
How to thread a needle using a piece of paper
Loads on click
Advanced Techniques for Tricky Situations
Some threading situations need a different approach altogether. Here’s how to handle the most common tricky scenarios.
Threading Multiple Strands (Embroidery Floss)
- Use the fold-over method – it handles multiple strands better than any other technique
- Keep all strands parallel – do not let them twist
- Use a larger-eye needle like a tapestry or embroidery needle
- Work with shorter thread lengths (12 to 15 inches) to reduce tangling
Threading Metallic or Specialty Thread
- Use a slightly larger needle than usual to reduce fraying
- Keep the working length short – metallic thread breaks down with friction
- Try a specialty metallic needle if you do this type of work often
- Handle cut ends minimally – metallic thread frays fast
Threading with Tweezers
- Grip the thread end firmly with fine-pointed tweezers
- Guide the tweezers and thread together through the needle eye
- Release the tweezers and pull the thread through
- Works well if you have steady hands but poor close-up vision

Watch: Thread a needle in 1 second
Quick Comparison: All 7 Methods at a Glance
Not sure which method to try first? This table gives you a side-by-side view to help you decide.
| Method | Tools Needed | Difficulty | Speed | Best For |
|---|---|---|---|---|
| 1. Fold-Over Pinch | None | Easy | Very Fast | All skill levels, most thread types |
| 2. Traditional Hand | None | Moderate | Moderate | Fine threads, practiced sewers |
| 3. Moisture | Water or wax | Easy | Moderate | Floppy or frayed thread ends |
| 4. Needle Threader | Needle threader | Very Easy | Fast | Poor vision, beginners, all ages |
| 5. Self-Threading Needle | Specialty needle | Very Easy | Very Fast | Arthritis, vision challenges, seniors |
| 6. Paper Assist | Small piece of paper | Easy | Moderate | No threader available, beginners |
| 7. Advanced / Tweezers | Tweezers or toothpick | Moderate | Moderate | Multiple strands, specialty thread |
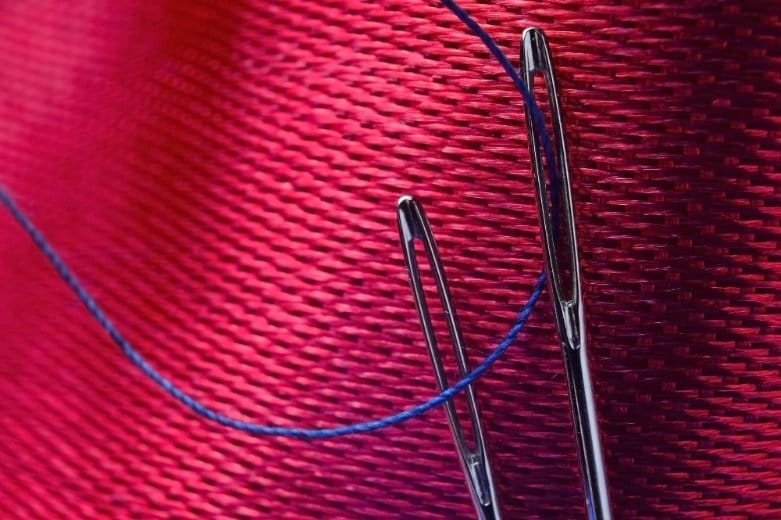
The Secret: Which Side of the Needle Eye to Thread From
Here’s something most guides skip over completely. Machine-made needles are stamped during manufacturing, and this process leaves one side of the eye slightly rougher than the other. The smoother side accepts thread much more easily.
If you’re struggling with traditional threading and the thread keeps catching on the edge of the eye, simply flip the needle around and try from the other side. Many experienced sewers say this single tip alone cuts their threading time in half.
You can also check which side is smoother by running your fingernail very gently across each side of the eye. The side with less resistance is your best threading direction.
How to Double-Thread a Needle
Single threading means one piece of thread goes through the eye, giving you a single strand to work with. Double threading means you fold the thread and pull both ends through, giving you two strands and a stronger stitch. Each approach has its place.
When to Use Single Thread
- Delicate fabrics that could be damaged by thick stitches
- Basting, hemming, and lightweight repairs
- Slip stitching and invisible hemming
When to Use Double Thread
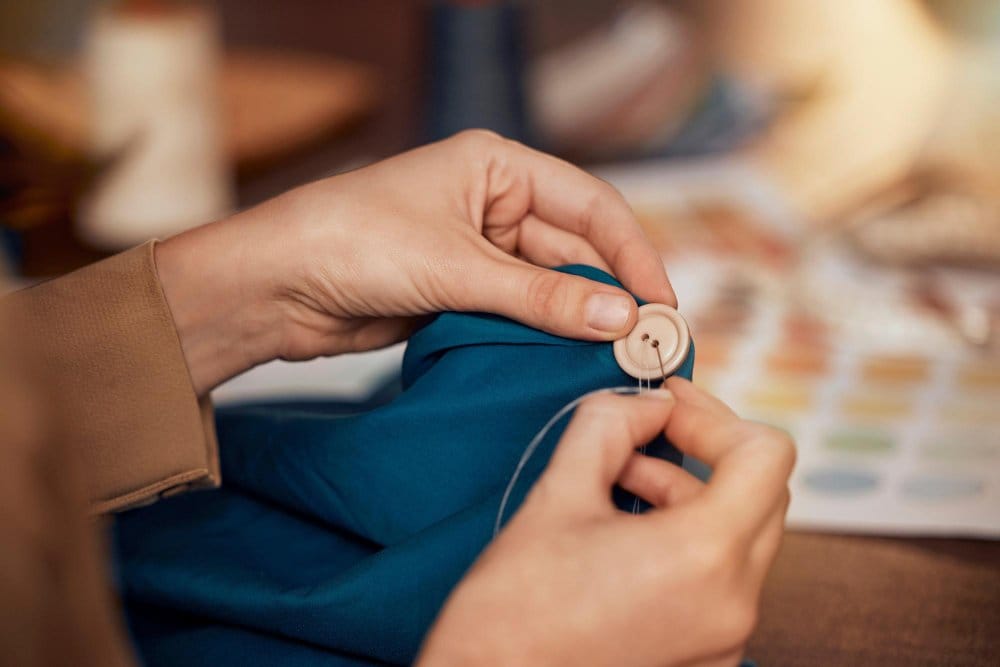
- Sewing on buttons – double thread holds far better under pressure
- Repairing seams that take a lot of stress
- Sewing through thick fabric layers
- Any repair where strength matters more than appearance
How to Double-Thread
- Cut a longer piece of thread than usual – about 36 to 40 inches
- Thread the needle using any method above
- Pull both ends of the thread together until they’re even
- Tie a knot through both ends together – this locks everything in place
- You now have two strands working together as one stronger thread
How to Thread a Needle with Kids
Teaching a child to thread a needle is a big moment. It builds fine motor skills, concentration, and gives kids a real sense of accomplishment. But small fingers and big enthusiasm need the right approach.
Choosing the Right Needle for Kids
Start with a large-eye blunt needle. Tapestry or plastic yarn needles are ideal for children under 10. They’re easier to thread, less sharp, and the larger eye is more forgiving.
As kids get older and more confident, you can move to sharper general-purpose needles.
Step-by-Step: Teaching Kids to Thread a Needle
- Start with bright-colored, thick yarn or embroidery floss – easier to see and handle
- Use a large-eye needle (tapestry size 18 or 20 is perfect)
- Have them cut a short piece of thread – about 12 to 15 inches
- Show them the fold-over method first – it’s the most kid-friendly technique
- Let them try the paper assist method as a backup option
- Give plenty of praise for each attempt, not just for success
Fun Activities to Build the Skill
- Thread yarn through holes punched in cardboard – builds the same hand-eye coordination without a tiny needle
- Lacing boards with large holes are great for younger kids (ages 3 to 6) to develop the pincer grip they’ll need later
- Simple embroidery kits designed for kids come with blunt needles, large patterns, and thick floss
- Sewing on a button is a great first real-world sewing project for older kids (ages 8 and up)
Sewing is also a great way to introduce kids to concepts like sustainability and clothing care. Check out our article on fast fashion vs. slow fashion for ideas on how to talk about these topics with young people.
How to Thread a Needle with Arthritis
Arthritis in the hands can make the smallest sewing tasks feel nearly impossible. The good news is that with the right tools and a few adjustments, you can absolutely keep sewing without pushing through unnecessary pain.
Best Needle Types for Arthritis
- Self-threading (calyx-eye) needles are the top choice. No precise aiming needed – just press the thread into the slot
- Large-eye needles (tapestry, embroidery) reduce how many attempts it takes to thread
- Needles with rubber grips or wrapped in medical tape are easier to hold without pressing hard
Best Tools and Techniques for Arthritis
- Automatic needle threader (Infila): Recommended by the Carroll Center for the Blind as a device that helps people “thread needles without seeing the tiny holes” and regain independence in their sewing activities. You insert the needle, add thread, and press a button. No fine motor skill needed for threading
- Desktop needle threader (Clover Desk model): A push-lever device that sits on your work surface and handles threading without any grip pressure
- Tabletop needle holders: Hold the needle in place so both hands are free to manage the thread
- Rubber thimbles: Add grip and reduce the pinching force you need to hold a needle
- Weighted wrist rests: Help stabilize shaky or stiff hands during threading
Pre-Sewing Hand Warm-Up Tips
Gentle hand warm-ups before sewing can reduce stiffness. Try:
- Soaking hands in warm (not hot) water for a few minutes
- Gentle finger stretches – slowly spread fingers wide, hold for 5 seconds, then relax
- Light hand massage with lotion, working from fingertips toward the wrist
- Squeezing a soft stress ball a few times to warm up the joints
Schedule your sewing sessions for times when your hands feel best. For many people with arthritis, mornings after the initial stiffness passes are often better than evenings.
How to Thread a Needle as a Senior
Many people return to sewing in their later years and discover that their hands and eyes don’t quite cooperate the way they used to. Vision changes are the most common challenge, and reduced fine motor control runs a close second.
Both are manageable with the right setup.
Vision Aids That Make a Difference
- Desktop magnifiers with built-in LED lighting are one of the most helpful investments a senior sewer can make. They magnify the needle eye and illuminate it at the same time
- Clip-on magnifying glasses attach to your regular glasses and provide magnification without requiring you to hold anything extra
- Daylight-balanced LED task lamps: These simulate natural daylight and dramatically reduce eye strain during close work. The American Academy of Ophthalmology recommends strong, focused lighting as one of the most helpful adaptations for low-vision tasks
Recommended Methods for Seniors
- Automatic needle threader – the single best solution for frequent threading without eye strain
- Self-threading (calyx-eye) needles – work by feel rather than sight
- Fold-over pinch method – relies more on touch than precise vision once you’ve practiced it
Organizing Your Sewing Space for Easy Access
- Keep needles pre-threaded and stored in a needle book or cushion, ready to grab
- Use high-contrast thread colors against your needle for better visibility
- Label your needle storage with large text or tactile markers
- Organize supplies in consistent locations so you can find everything by memory or touch
- A magnifying glass on a stand leaves both hands free for threading
Threading Needles for Specialty Fabrics
Delicate, specialty, or unusual fabrics need extra attention not just when sewing but when threading your needle too. Using the wrong needle or thread on fine fabric can damage the material before you even make your first stitch.
Silk and Chiffon
These lightweight, sheer fabrics need a very fine needle (size 60/8 or 70/10) and a thin silk or polyester thread. The fold-over method works well here because it compresses the thread without adding moisture, which can affect delicate silk fibers.
What Is Burnout Chiffon Fabric?
Burnout chiffon is a sheer, lightweight fabric with a raised, textured pattern. The pattern is created by applying chemicals that burn away some of the fibers, leaving a contrast between dense and sheer areas. It’s used in dresses, blouses, scarves, and eveningwear.
When threading a needle to work with burnout chiffon, treat it like the most delicate fabric you own. Use a size 60/8 or 70/10 fine needle and pair it with a silk or very fine polyester thread.
Use the fold-over pinch method to avoid adding moisture to the fibers. The chemical treatment makes the fabric extra prone to catching on rough needle edges, so always use a fresh, sharp needle.
You can explore children’s chiffon clothing options if you’re working on kids’ garments in this fabric.
Denim and Canvas
Heavy fabrics like denim or canvas need a size 90/14 or 100/16 needle paired with a heavy-duty or denim thread. These thicker threads actually thread more easily through larger-eye needles, so the fold-over method works particularly well.
Stretchy and Knit Fabrics
Use a ballpoint or stretch needle with polyester or stretch thread for stretchy fabrics. Ballpoint tips slide between fibers rather than piercing them, which prevents holes and runs.
When threading, avoid pulling or stretching the thread. Let it relax in its natural state before you thread.
Metallic Thread
- Use a needle one or two sizes larger than you normally would
- Keep thread lengths to 12 to 15 inches maximum to reduce friction breakdown
- Handle cut ends as little as possible – metallic thread frays almost immediately
- A specialty metallic needle has a larger, smoother eye that reduces shredding
For more on choosing the right thread for your project, our complete thread selection guide covers everything you need to know.
Troubleshooting Common Threading Problems
Why Is Threading Failing?
How to Tie a Knot That Stays Put
- Pull your thread through until you have 4 to 6 inches on the short tail end
- Wrap the long end of the thread around your index finger once
- Roll the loop off your finger by pinching and sliding it down the thread
- Pull both ends in opposite directions to tighten
For secure hand sewing after threading, our guide on how to sew a straight stitch walks you through the basics of actually making your stitches.
How to Thread a Sewing Machine Needle
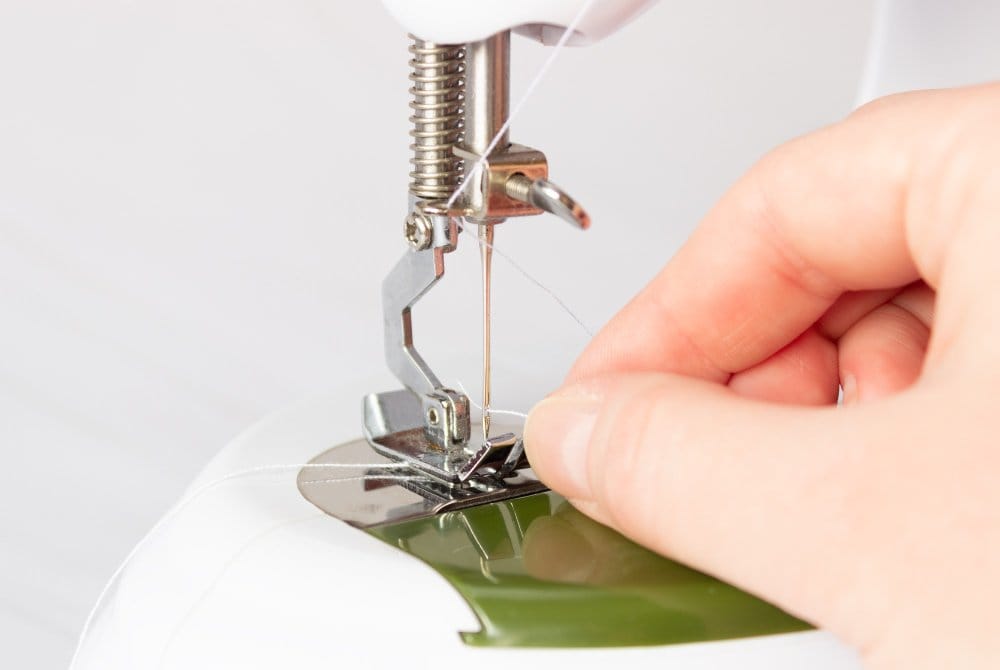
Sewing machine needles are smaller and require more precision than hand sewing needles. But the same principles apply. Here’s the basic process that works on most machines.
- Raise the needle to its highest position using the hand wheel
- Turn off the machine before threading for safety
- Follow your machine’s threading path guides from the thread spool down to the needle
- Use the fold-over pinch method to thread the needle from front to back (unless your machine manual specifies otherwise)
- Pull about 6 inches of thread through the needle eye before starting
Built-In Automatic Threaders
Many modern sewing machines (from brands like Singer, Brother, and Janome) have built-in threading mechanisms. These typically work by:
- Lowering the threader lever all the way down
- Hooking your thread under the small guide wire
- Releasing the lever slowly while holding the thread taut
- Pulling the small loop that forms through the needle eye
Starting Your Sewing Journey

Threading a needle is step one. Once you have it down, the natural next question is: what should I actually make? Here’s how to build confidence in a sensible order.
What Should a Beginner Sew First?
Start with projects that use simple straight stitches and don’t require precise fitting. These let you focus on getting comfortable with threading and stitching rhythm, without the pressure of a complicated result.
- Practice squares: Cut two equal squares of cotton fabric and sew them together along the edges. Pure muscle memory practice with no stakes
- Button reattachment: One of the most useful real-world skills you’ll use over and over. Our guide to sewing on a button walks you through the whole process
- Hem repairs: Fixing a drooping hem teaches straight stitching on real fabric. See our guide to sewing perfect hems for step-by-step help
- Running stitch samplers: Practice running a straight line of stitches across scrap fabric. This is the foundation stitch for almost everything else
- Simple embroidery: A great way to practice threading multiple strands while making something decorative at the same time
For a full list of project ideas scaled to your skill level, check out our easy sewing projects for beginners guide.
Hand Sewing vs. Machine Sewing
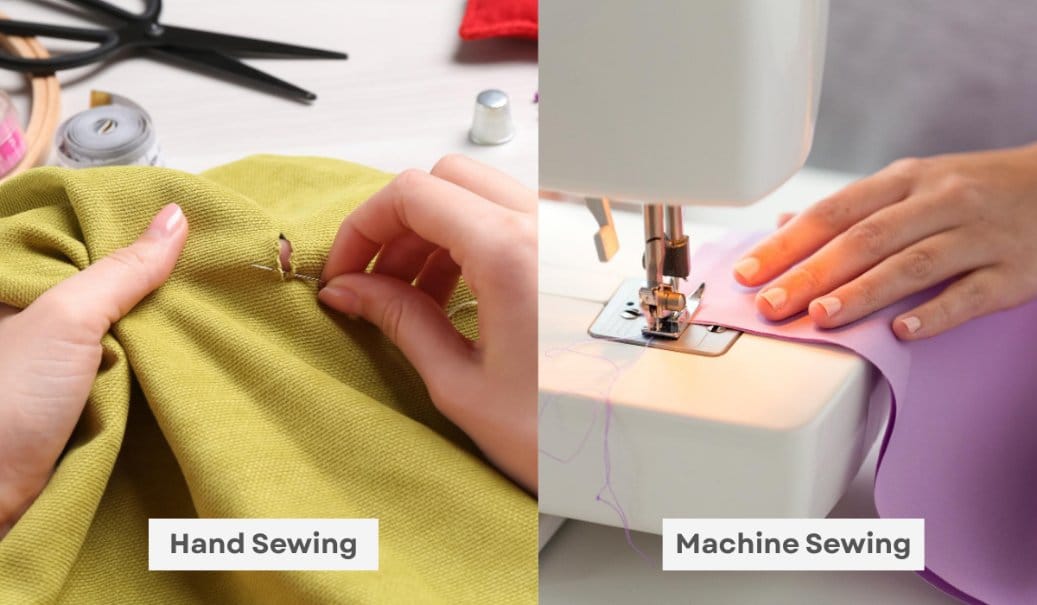
Both have their place, and knowing when to use each one saves you a lot of time and frustration.
Hand sewing gives you precision and portability. You can do it anywhere, it’s quiet, and it’s genuinely calming once you settle into a rhythm. It’s the better choice for repairs, alterations, delicate fabrics, and any detailed finishing work where a machine would be clumsy.
Machine sewing is faster and more consistent for long straight seams and larger projects. If you’re making garments from scratch or sewing something that needs hundreds of inches of seam, a machine will save you hours.
For everything else, a needle and thread is often the smarter, more precise tool.
If you’re considering your first sewing machine, our sewing machine guide covers what to look for and how to get started.
What to Use If You Don’t Have a Sewing Needle
In a genuine emergency, a few household items can pinch-hit for a needle:
- A safety pin: Can close a split seam or hold fabric together temporarily without any threading at all
- A straight pin: Works for tacking fabric in place while you wait to sew properly
- Iron-on hem tape: For hems specifically, fusible hem tape lets you press a repair in place without any stitching
- Fabric glue: A drop of washable fabric adhesive holds many repairs until you can get a proper needle and thread
These are temporary fixes only. For anything that needs to hold up through washing and regular wear, a needle and thread is always the right answer.
Sewing as a Sustainable Skill
Here’s something worth thinking about: every time you thread a needle and repair a piece of clothing instead of throwing it away, you’re making a small but real contribution to a more sustainable wardrobe.
The fashion industry produces enormous amounts of waste each year. Learning to repair your own clothes keeps garments in use longer and reduces how much ends up in landfills.
A button sewn back on, a hem repaired, a seam fixed – these are small acts with a real cumulative impact.
This is part of what the slow fashion movement is all about. It’s not just about buying less; it’s about caring for what you already own. Threading a needle is literally the first step in that process.
Our article on fast fashion vs. slow fashion goes deeper on why this matters and what you can do practically to make your wardrobe more sustainable.
Real-Life Sewing Emergencies and Quick Fixes
Knowing how to thread a needle quickly really pays off in everyday moments. Here are some of the most common situations where this skill comes in handy.
Button Popped Before a Big Meeting
Use double thread and a sharp needle. Sew on a replacement in under 5 minutes. The fold-over method is fastest under pressure.
Hem Unraveling on Your Favorite Jeans
A slip stitch with a matching thread color fixes this invisibly. Thread a sharps needle and use a single thread for the neatest result.
Halloween Costume Emergency
An hour before trick-or-treating is no time for sewing machine setup. A few hand stitches with a threaded needle can save the day.
Split Seam on a Dress
Use double thread and a backstitch for strength. Works on most fabrics when you don’t have time to get to a tailor.
Sock with a Hole
A darning needle and matching thread can mend even large holes. It’s a traditional skill that saves money and works surprisingly well.
Coat Lining Coming Away
Use a slip stitch with matching thread for a nearly invisible fix. A sharp needle and single thread work best on lining fabric.
Once you have threading down, sewing perfect hems is a great next skill to pick up. And if you’re just getting started with sewing overall, our beginner’s guide to sewing walks you through everything in order.
Expert Tips from Experienced Sewers
These are the kinds of tips that take years to pick up on your own. Save yourself the time.
The Arm’s-Length Thread Rule
Professional dressmakers cut their thread to arm’s length – the distance from fingertips to shoulder. This gives you roughly 22 to 24 inches, which is long enough to make good progress without tangling.
Knot the End You Cut Last
Thread comes off the spool with a grain direction, similar to fabric. Knotting the cut end (rather than the spool end) follows the thread’s natural twist and dramatically reduces tangling during hand sewing.
Pre-Thread Multiple Needles
For longer projects like embroidery or quilting, thread three or four needles before you start. When one runs out, you just grab the next. No interruption to your rhythm.
Beeswax Is Underrated
Running your thread through a block of beeswax before threading and sewing does three things at once: it stiffens the tip for easier threading, reduces friction while sewing, and prevents tangling. It’s a small step that makes a noticeable difference, especially with cotton thread.
The Contrast Trick
Struggling to see the eye? Thread dark needles with light-colored thread, and light-colored needles with dark thread. The contrast makes the hole much easier to target. You can also hold a white card behind the needle for instant contrast against any background.
Peripheral Vision Can Help
Some sewers find that looking slightly to the side of the needle eye, rather than directly at it, makes it easier to thread. The central part of your vision isn’t always the best for very fine focus.
Try looking just past the eye when you push the thread through. It sounds odd, but many people find it works.
Your Complete Threading Toolkit
You don’t need much to thread a needle consistently well. But having the right items on hand means you’ll never be stuck fighting with a fraying thread end.
Here’s exactly what to keep in your sewing kit.
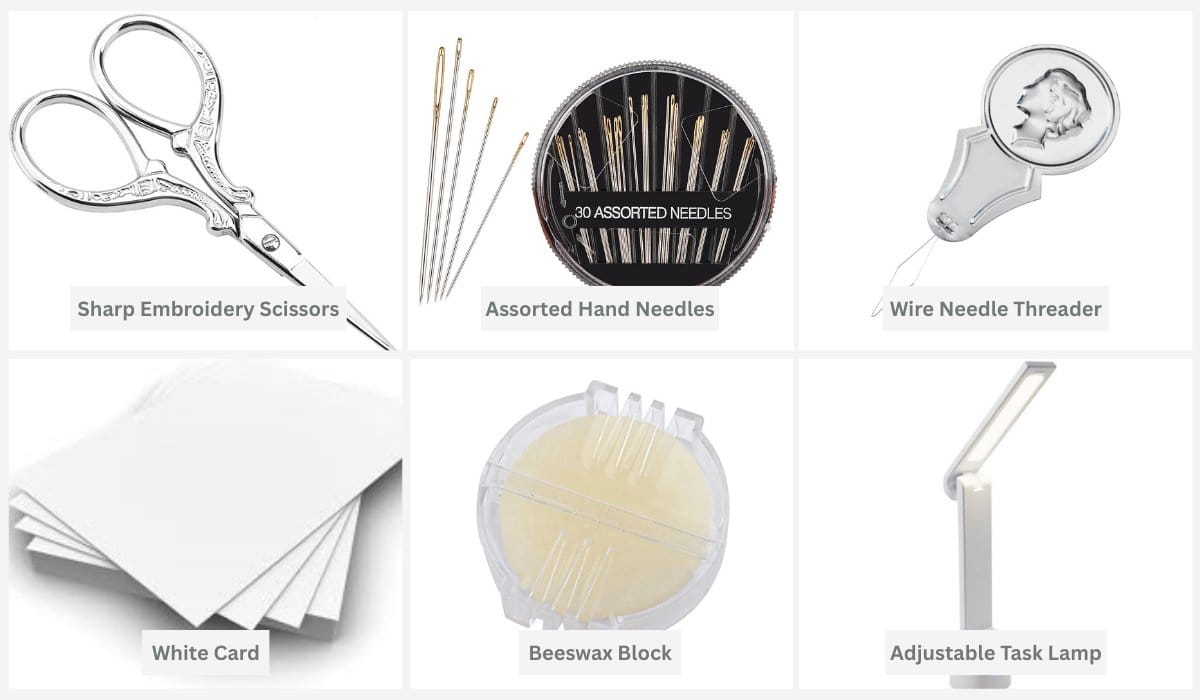
The Essentials (Everyone Needs These)
| Item | Why You Need It | Budget Option |
|---|---|---|
| Sharp embroidery scissors or thread snips | A clean angled cut on thread is the single biggest factor in easy threading | Any sharp scissors with fine blades |
| Assorted hand needles | Different fabrics and threads need different needle sizes | A basic variety pack covers most situations |
| Wire needle threader | Backup when your first attempt doesn’t work | Usually comes free in needle packs |
| White card or paper scrap | Instant contrast background to help you see the eye | Any white paper |
| Beeswax block or thread conditioner | Stiffens thread for threading, reduces tangling during sewing | Beeswax costs a few dollars and lasts years |
| Adjustable task lamp | The number one fix for threading difficulty at any age | Any bright directional lamp works |
Additions for Vision or Dexterity Challenges
| Item | Best For | Where to Find It |
|---|---|---|
| Self-threading (slotted eye) needles | Low vision, shaky hands, arthritis | Most sewing and fabric stores |
| Large-eye needles (chenille, tapestry) | Anyone who finds standard eyes difficult | Craft and sewing stores |
| Automatic push-button threader (Infila) | No fine motor skill needed at all | Carroll Center for the Blind and Amazon |
| Clover Desk Needle Threader | Stable, hands-free threading on a weighted base | Sewing and quilting stores, Amazon |
| Magnifying glass or lighted magnifier | Low vision, fine needles, detailed work | Craft stores, pharmacy reading aids section |
| Daylight-balanced LED task lamp | Seniors, anyone with eye strain | Hardware and home goods stores |
Optional but Useful
- Pincushion wristband: Keeps threaded needles and pins within easy reach while you work
- Needle minder or magnetic dish: Stops spare needles from scattering across your work surface
- Thread organizer board: Keeps multiple thread colors separated and tangle-free
- Pre-cut thread cards: Thread several needles in advance and wind the extras onto small cards for quick access during a project
- Tweezers: Fine-tipped tweezers are a great backup threading tool and handy for pulling threads through tight spots
If you’re building your kit from scratch, our essential sewing supplies guide covers everything you need to get started, including what to buy first and what you can skip for now.
Frequently Asked Questions
What is the easiest way to thread a needle?
The fold-over pinch method is the easiest for most people. Fold your thread over the needle shaft, pinch tight between your fingers, remove the needle, then push the eye down onto the pinched thread. It requires no tools and works with most thread types.
How do I thread a needle with poor eyesight?
Use an automatic needle threader (like the Infila), self-threading needles with slotted eyes, or a desktop magnifier with built-in lighting. The fold-over method also works well because it relies more on touch than precise vision. Good daylight-balanced lighting is also a major help.
How do I thread a needle with shaky hands?
Rest your elbows firmly on a table before threading. Use a needle threader or self-threading needle, which require less precise hand control.
An automatic push-button threader removes the need for steady hands entirely. Working in the morning, when hands tend to be steadier, can also make a big difference.
What is the best needle threader for seniors?
Automatic push-button threaders like the Infila or the Clover Desk Needle Threader are the top choices. They require no fine motor precision and thread needles with one press of a button.
The Carroll Center for the Blind recommends the Infila specifically for people who cannot see the needle eye clearly.
How do you thread a needle in one second?
Master the fold-over pinch method until it becomes muscle memory. Pre-cut your thread at an angle, execute the fold-over motion in one smooth movement, and with practice you’ll be threading in well under two seconds every time.
Why does my thread keep coming out of the needle?
You probably haven’t pulled enough thread through the eye. Pull at least 4 to 6 inches through on the short end and tie a knot.
If the thread keeps slipping, the needle eye might be too large for your thread. Try a smaller needle, or hold the tail end while you sew.
Does it matter which direction you thread a needle?
For hand sewing, direction doesn’t affect the quality of your stitches. However, machine-made needles have one side of the eye that’s smoother than the other, so threading from that side is easier.
For sewing machines, always follow your manual. Most specify threading from front to back.
How do I thread a needle for embroidery?
Use an embroidery needle with a long eye and the fold-over pinch method for multiple strands. Keep strands parallel (not twisted), use a shorter thread length (12 to 15 inches for metallic or delicate threads), and pre-thread several needles before starting your project.
What are the easiest needles to thread?
Self-threading needles (calyx-eye) are the easiest because the thread just presses into a slot. After that, large-eye needles like tapestry size 18 or embroidery needles are much more forgiving than standard sharps, especially for beginners.
How do I thread a needle without a needle threader?
Try the fold-over pinch method first. It’s the most reliable no-tool approach.
You can also use the paper assist technique (fold a small piece of paper around the thread and guide it through), the moisture technique (slightly dampen the thread tip), or tweezers to grip and guide the thread.
When should I use double thread instead of single thread?
Use double thread for anything that needs strength: sewing on buttons, repairing high-stress seams, or stitching through multiple thick layers. Use single thread for hemming, slip stitching, delicate fabrics, and basting, where a thicker stitch might show or cause puckering.
How do I thread a sewing machine needle?
Raise the needle to its highest position and turn off the machine. Follow the threading path marked on the machine body.
Use the fold-over pinch method to thread the needle from front to back, or use the built-in automatic threader if your machine has one. Always check your machine’s manual for model-specific instructions.
Why is threading a needle so hard?
The most common culprits are poor lighting, frayed thread ends, mismatched needle and thread sizes, unsteady hands, and simply using an inefficient technique. Most of these problems disappear with better preparation and the right method for your situation.
Is there a trick to threading a needle?
Yes. The fold-over pinch method is the most widely shared threading trick, and it genuinely works.
Another lesser-known trick is to flip the needle around and try threading from the other side. One side of a machine-made needle’s eye is always smoother, and that side is much easier to thread through.
Conclusion
Threading a needle might seem like the smallest step in any sewing project, but it sets the tone for everything that follows. When you can do it quickly and confidently, sewing becomes a much more enjoyable experience.
The most important thing to take away from this guide is that there is no single “right” method. The fold-over pinch technique works beautifully for most people and most threads.
But if you have arthritis, an automatic threader is a better fit. If you’re teaching a child, the paper assist method gives them something hands-on to work with.
If your eyesight has changed, self-threading needles work by feel rather than sight.
Here are the key points to keep in mind as you practice:
- Start with the fold-over pinch method. It’s the fastest, needs no tools, and works in the vast majority of situations.
- Prepare properly every time. A clean, angled cut and good lighting solve more threading problems than any trick or tool.
- Match your needle to your thread and fabric. Using the right combination makes threading easier and your stitches better.
- Have backup options ready. A needle threader in your sewing kit takes up no space and saves a lot of frustration.
- Try the smoother side of the eye. If threading isn’t working, flip the needle around. One side is always slightly easier than the other.
- Don’t skip the knot. Pull at least 4 to 6 inches through the eye and tie a secure knot so the thread doesn’t slip during sewing.
- Practice makes it faster. Threading a needle is a skill. The more you do it, the quicker and easier it becomes.
If you’re just starting out with sewing, threading a needle is the gateway to a whole range of practical skills.
From sewing on buttons to hemming pants to trying out easy beginner sewing projects, every stitch you make starts exactly here – with a threaded needle in your hand.
And if you want to explore sewing further, our complete beginner’s guide to sewing and our essential sewing supplies guide are good next stops.
You can also use our free Needle Threading Method Quiz to get a personalized recommendation based on your specific needs and challenges.