Master Pattern Reading, Sizing, and Layout for Successful Sewing Projects
Starting a new sewing project can feel exciting but also overwhelming, especially when faced with a pattern full of symbols, numbers, and instructions. Learning to read sewing patterns is like learning a new language, but with practice, you’ll be decoding them with confidence. Understanding how to read a sewing pattern is the foundation of successful sewing, saving you time, fabric, and frustration.
According to Sewing.org, the educational resource hub for the sewing community, proper pattern reading skills are fundamental to successful garment construction and can significantly reduce fabric waste and project failures.
Sewing patterns from companies like Simplicity, Butterick, and Vogue might look complicated at first glance, but they follow standard formats that become familiar with practice. The pattern envelope contains valuable information about fabric requirements, notions needed, and size measurements to guide your project. Inside, you’ll find pattern pieces marked with symbols that show where to cut, fold, and match pieces together.
Table of Contents
Understanding Sewing Patterns

Sewing patterns are roadmaps that guide you through creating garments and other projects. They contain essential information about fabric needs, cutting instructions, and step-by-step directions.
Types of Sewing Patterns
Commercial Patterns (The Big 4) The “Big 4” commercial pattern companies dominate the traditional pattern market:
- Simplicity: Known for beginner-friendly designs with clear instructions
- Butterick: Offers classic and vintage-inspired styles
- McCall’s: Features trendy, fashion-forward designs
- Vogue: Provides high-fashion, designer patterns
These patterns come in printed paper envelopes with pre-printed tissue paper pieces you cut and pin to fabric. They typically offer multiple sizes on one pattern sheet and are widely available in craft stores.
Independent Pattern Companies Independent or “indie” pattern companies like Closet Core Patterns, Grainline Studio, and Tilly and the Buttons often provide more detailed instructions and better customer support. They frequently offer both printed and PDF options, with many including video tutorials and online communities for support.
PDF vs. Paper Patterns
| Feature | PDF Patterns | Paper Patterns |
|---|---|---|
| Availability | Instant download | Wait for shipping |
| Cost | Often cheaper | Higher printing costs |
| Storage | Digital files | Physical storage needed |
| Reprinting | Unlimited reprints | One-time use (unless traced) |
| Assembly | Requires printing/taping | Ready to use |
| Pattern Updates | Easy updates | No updates possible |
PDF Pattern Advantages:
- Instant gratification – download and start immediately
- Can print at home or send to copy shop
- Never lose your pattern
- Often include layers for different sizes
Paper Pattern Advantages:
- No assembly required
- Tissue paper easy to pin and see through
- No printing costs or setup time
- Tried and tested format
Pattern Difficulty Levels
Understanding difficulty levels helps you choose appropriate projects:
- Beginner/Easy: Simple construction, minimal details, basic closures
- Confident Beginner: Slightly more complex with basic techniques like darts or simple sleeves
- Intermediate: Multiple pattern pieces, fitted garments, zippers, or detailed construction
- Advanced: Complex fitting, tailoring techniques, intricate details
Anatomy of a Sewing Pattern Envelope
Front of Envelope:
- Pattern number for identification
- Finished garment photos showing different views
- Size range available
- Sometimes difficulty level indicator
Back of Envelope:
- Size Chart: Body measurements for each size (different from ready-to-wear sizing!)
- Fabric Requirements: Listed by fabric width (45″ and 60″) and size
- Suggested Fabrics: Recommended fabric types and weights
- Notions List: Required items like zippers, buttons, interfacing, thread
- Finished Garment Measurements: Shows how much ease is built into the design
- Back Views: Technical drawings showing construction details
What Do Pattern Numbers Mean?
Pattern numbers serve multiple purposes:
- Company Identification: Each company has its numbering system
- Pattern Dating: Numbers often indicate when the pattern was released
- Size Information: Some companies include size ranges in the number
- Catalog Organization: Helps organize patterns by type or collection
For example, Simplicity 8352 tells you it’s a Simplicity pattern, while the specific number helps you find it in their catalog or online.
Understanding Pattern Measurements and Sizing
How to Measure Yourself for a Sewing Pattern
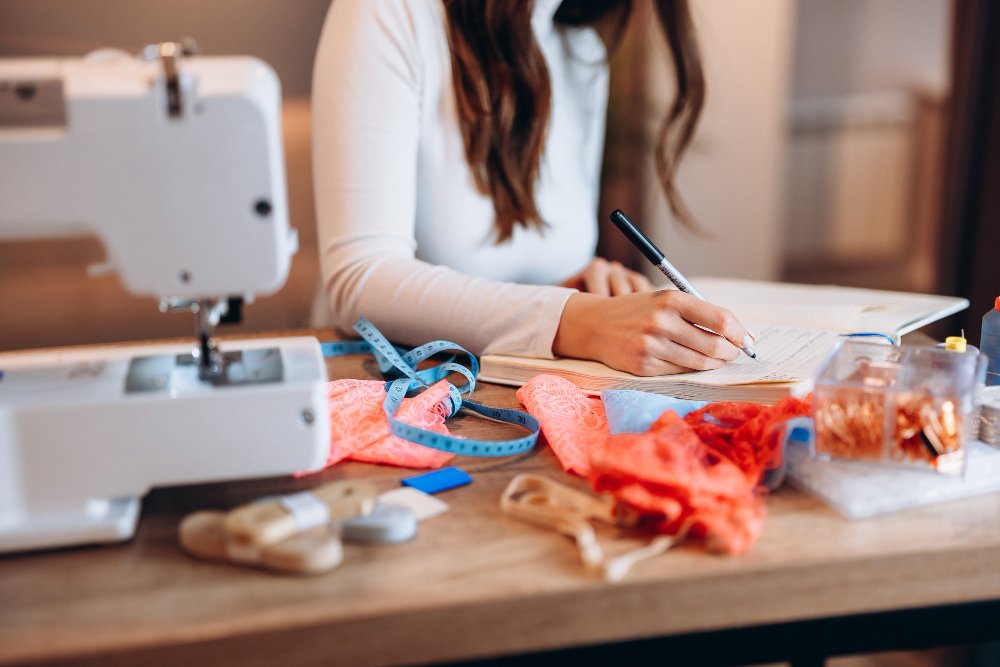
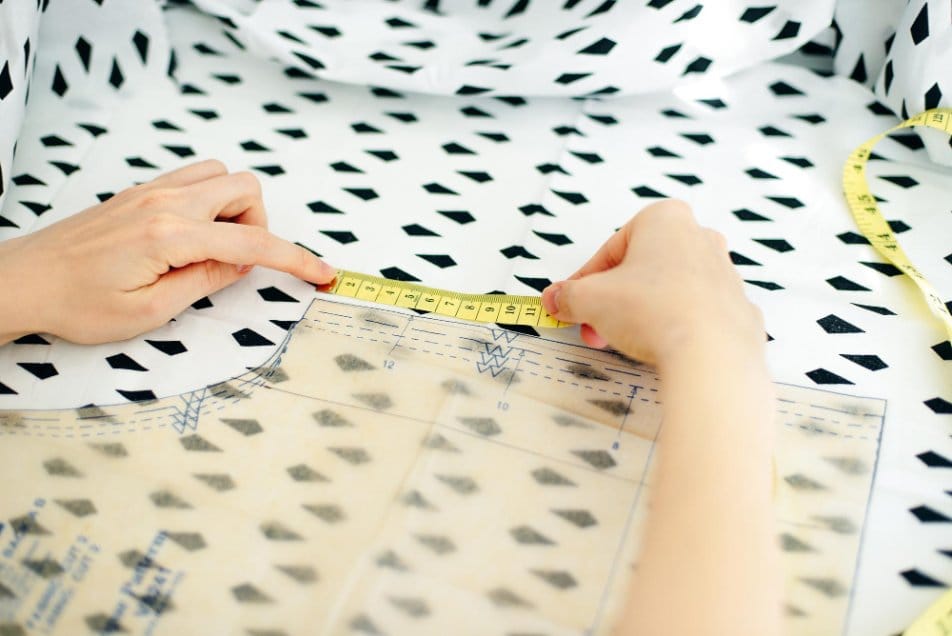
Taking accurate measurements is crucial for proper fit. You’ll need a flexible measuring tape and preferably someone to help you.
Essential Measurements:
- Bust: Measure around the fullest part of your bust
- Waist: Measure at your natural waistline (usually the narrowest part)
- Hips: Measure around the fullest part of your hips
- Back Neck to Waist: For length adjustments
Tips for Accurate Measuring:
- Wear well-fitting undergarments
- Stand naturally – don’t suck in your stomach
- Keep the tape measure snug but not tight
- Measure over a fitted t-shirt if you prefer
- Record measurements and keep them handy
Keep track of your measurements with our printable body measurement tracking sheet – perfect for monitoring changes and comparing across different pattern companies.
Taking accurate body measurements is the foundation of successful pattern selection and garment fit. Unlike ready-to-wear clothing that uses approximate size ranges, sewing patterns require precise measurements to ensure your finished garment fits properly. Many beginners make the mistake of choosing pattern sizes based on their usual clothing size, which can result in garments that are too small or poorly fitted.
The key to accurate measuring is understanding which measurements are most important for different types of garments and how to take them consistently. You’ll need a flexible measuring tape and preferably someone to help you, especially for back measurements. Remember to measure over the undergarments you plan to wear with the finished garment

Once you have your accurate measurements, record them and keep them handy for future pattern purchases. Body measurements can change over time, so it’s wise to re-measure yourself every few months or before starting major projects. These measurements will become your personal reference guide, helping you choose the right pattern size and make informed decisions about ease and fit preferences as you develop your sewing skills.
How to Pick Your Size on a Sewing Pattern
Step 1: Compare your measurements to the pattern size chart
Step 2: Choose based on your largest measurement
Step 3: If between sizes, consider the garment type:
- For fitted garments: choose the smaller size
- For loose-fitting garments: choose the larger size
What is a Misses Pattern? “Misses” refers to a standard size category for women, typically designed for:
- 5’5″ to 5’6″ height
- B-cup bust
- Standard proportions
- Sizes typically 6-20
Other categories include Petite (shorter torso and limbs), Plus Size (18 and up), and Miss Petite.
One of the most confusing aspects of sewing for beginners is understanding why pattern sizes seem so much larger than ready-to-wear clothing sizes. This size difference isn’t an error or oversight, it’s the result of different sizing standards that have evolved over decades. Pattern companies have maintained consistent sizing since the 1950s, while ready-to-wear has undergone significant “vanity sizing” changes.
Understanding this difference is crucial for choosing the correct pattern size and avoiding disappointment with fit. The size you wear in store-bought clothes may be 2-4 sizes smaller than your pattern size, and this is completely normal.
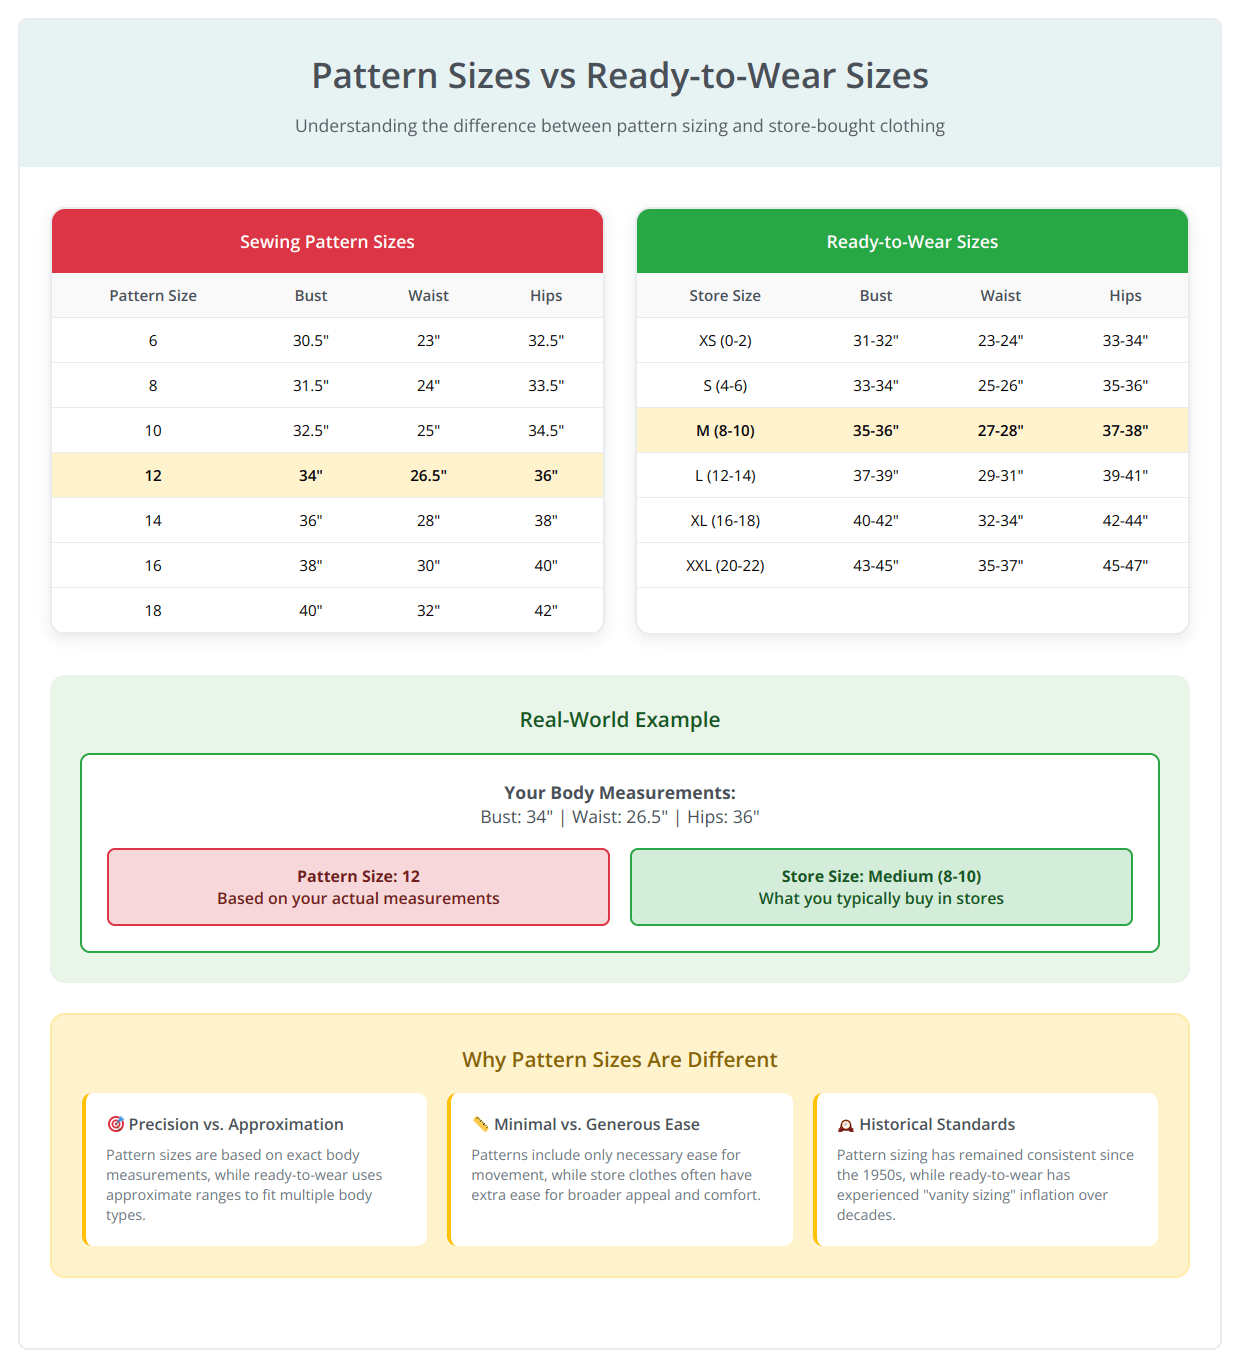
This size difference highlights why taking your own measurements is so important when selecting sewing patterns. Don’t be discouraged if your pattern size seems large compared to your usual clothing size, focus on the body measurements and the finished garment measurements to determine fit. Remember, the goal is creating clothes that fit your body perfectly, not fitting into an arbitrary size number.
What Does 45 and 60 Mean on a Sewing Pattern?
These numbers refer to fabric widths:
- 45″: Standard narrow fabric width (common for quilting cotton, many fashion fabrics)
- 60″: Wide fabric width (common for home decor fabrics, some fashion fabrics)
How to Tell if Fabric is 45 or 60:
- Check the fabric bolt label
- Measure from selvage to selvage
- Ask the fabric store staff
- Most quilting cottons are 44-45″
- Many knits and home decor fabrics are 54-60″
The pattern envelope shows different yardage requirements for each width because you can fit pattern pieces more efficiently on wider fabric.
Preparing Your Sewing Pattern
Should You Trace Sewing Patterns?
When to Trace:
- Multi-size patterns (to preserve other sizes)
- Expensive or vintage patterns
- When making alterations
- If you plan to make the pattern multiple times
When Not to Trace:
- Single-size PDF patterns
- Inexpensive patterns
- When time is limited
- For simple test garments
How to Trace a Sewing Pattern for Beginners
Materials Needed:
- Pattern tracing paper or Swedish tracing paper
- Fine-tip markers in different colors
- Rulers
- Weights or pins
Steps:
- Layer the tracing paper over the original pattern
- Trace your size line carefully with a fine marker
- Transfer all markings including notches, dots, and grainlines
- Label each piece with pattern name and piece number
- Cut out traced pieces along your marked lines
How to Trace a Pattern Without Cutting It Out
This technique preserves the original pattern completely:
- Use pattern weights instead of pins to hold the original pattern flat
- Place tracing paper over the pattern piece
- Trace around your size without cutting the original
- Mark all symbols and construction details
- Remove tracing paper and cut out your traced copy
The original pattern remains intact with all sizes available for future use.
Reading Pattern Markings and Symbols
Pattern Symbol Guide
| Symbol | Meaning | Purpose |
|---|---|---|
| ↔ | Grainline | Shows fabric direction |
| ⟩⟨ | Place on fold | Position at fabric fold |
| ▲ | Single notch | Match front pieces |
| ▲▲ | Double notch | Match back pieces |
| ● | Dot | Matching or construction point |
| ⟢ | Dart | Shaping line |
| – – – | Stitching line | Where to sew |
| — | Cutting line | Where to cut |
For easy reference while working on your projects, download our comprehensive pattern symbol reference chart to keep at your sewing station.
The Fashion Institute of Technology, an internationally recognized leader in fashion education for over 75 years, emphasizes that understanding pattern symbols and construction markings is essential for achieving professional-quality results in garment making.
The Made to Sew YouTube channel, run by Aneka Truman, provides excellent weekly tutorials specifically designed for dressmaking beginners. Her step-by-step videos break down complex pattern concepts into manageable, easy-to-understand segments
What Do the Little Triangles Mean on a Sewing Pattern?
Triangles are notches – crucial alignment marks that help you match pattern pieces correctly:
- Single notches (▲): Usually mark front pieces
- Double notches (▲▲): Usually mark back pieces
- Triple notches: Special alignment points
How to Cut Notches:
- Cut outward from the seam allowance (not inward)
- Make small snips about 1/8″ deep
- Or mark with chalk and cut small triangles outward
What Do Circles Mean on a Sewing Pattern?
Circles represent construction dots that indicate:
- Where to start or stop stitching
- Matching points between pattern pieces
- Button placement
- Pocket positions
- Dart points
Transfer these dots to your fabric using:
- Tailor’s chalk
- Washable fabric markers
- Pin pricks
- Tracing paper and wheel
Understanding Cut Numbers
“Cut 2” means:
- Cut two identical pieces from your fabric
- Often applies to symmetrical pieces like sleeves
- May specify “Cut 2 on fold” for pieces like backs
“Cut 1” means:
- Cut one piece only
- Often for unique pieces like front panels with buttonholes
Fabric Considerations

Reading Fabric Requirements
Pattern envelopes show fabric requirements in a table format:
Size    45" fabric    60" fabric
12      2 1/8 yards   1 7/8 yards
14      2 1/4 yards   2 yards
16      2 3/8 yards   2 1/8 yards
Understanding fabric width is essential for purchasing the correct amount of fabric and planning efficient pattern layouts. Most sewing patterns provide fabric requirements for both 45-inch and 60-inch wide fabrics, but the difference in layout efficiency can be dramatic. Choosing the right fabric width can save you money, reduce waste, and make the cutting process much easier.
Fabric width affects not only how much fabric you need to buy but also how efficiently you can arrange pattern pieces. Wider fabrics often allow for more economical layouts, especially for larger garments, while narrower fabrics may require more strategic planning and additional yardage.
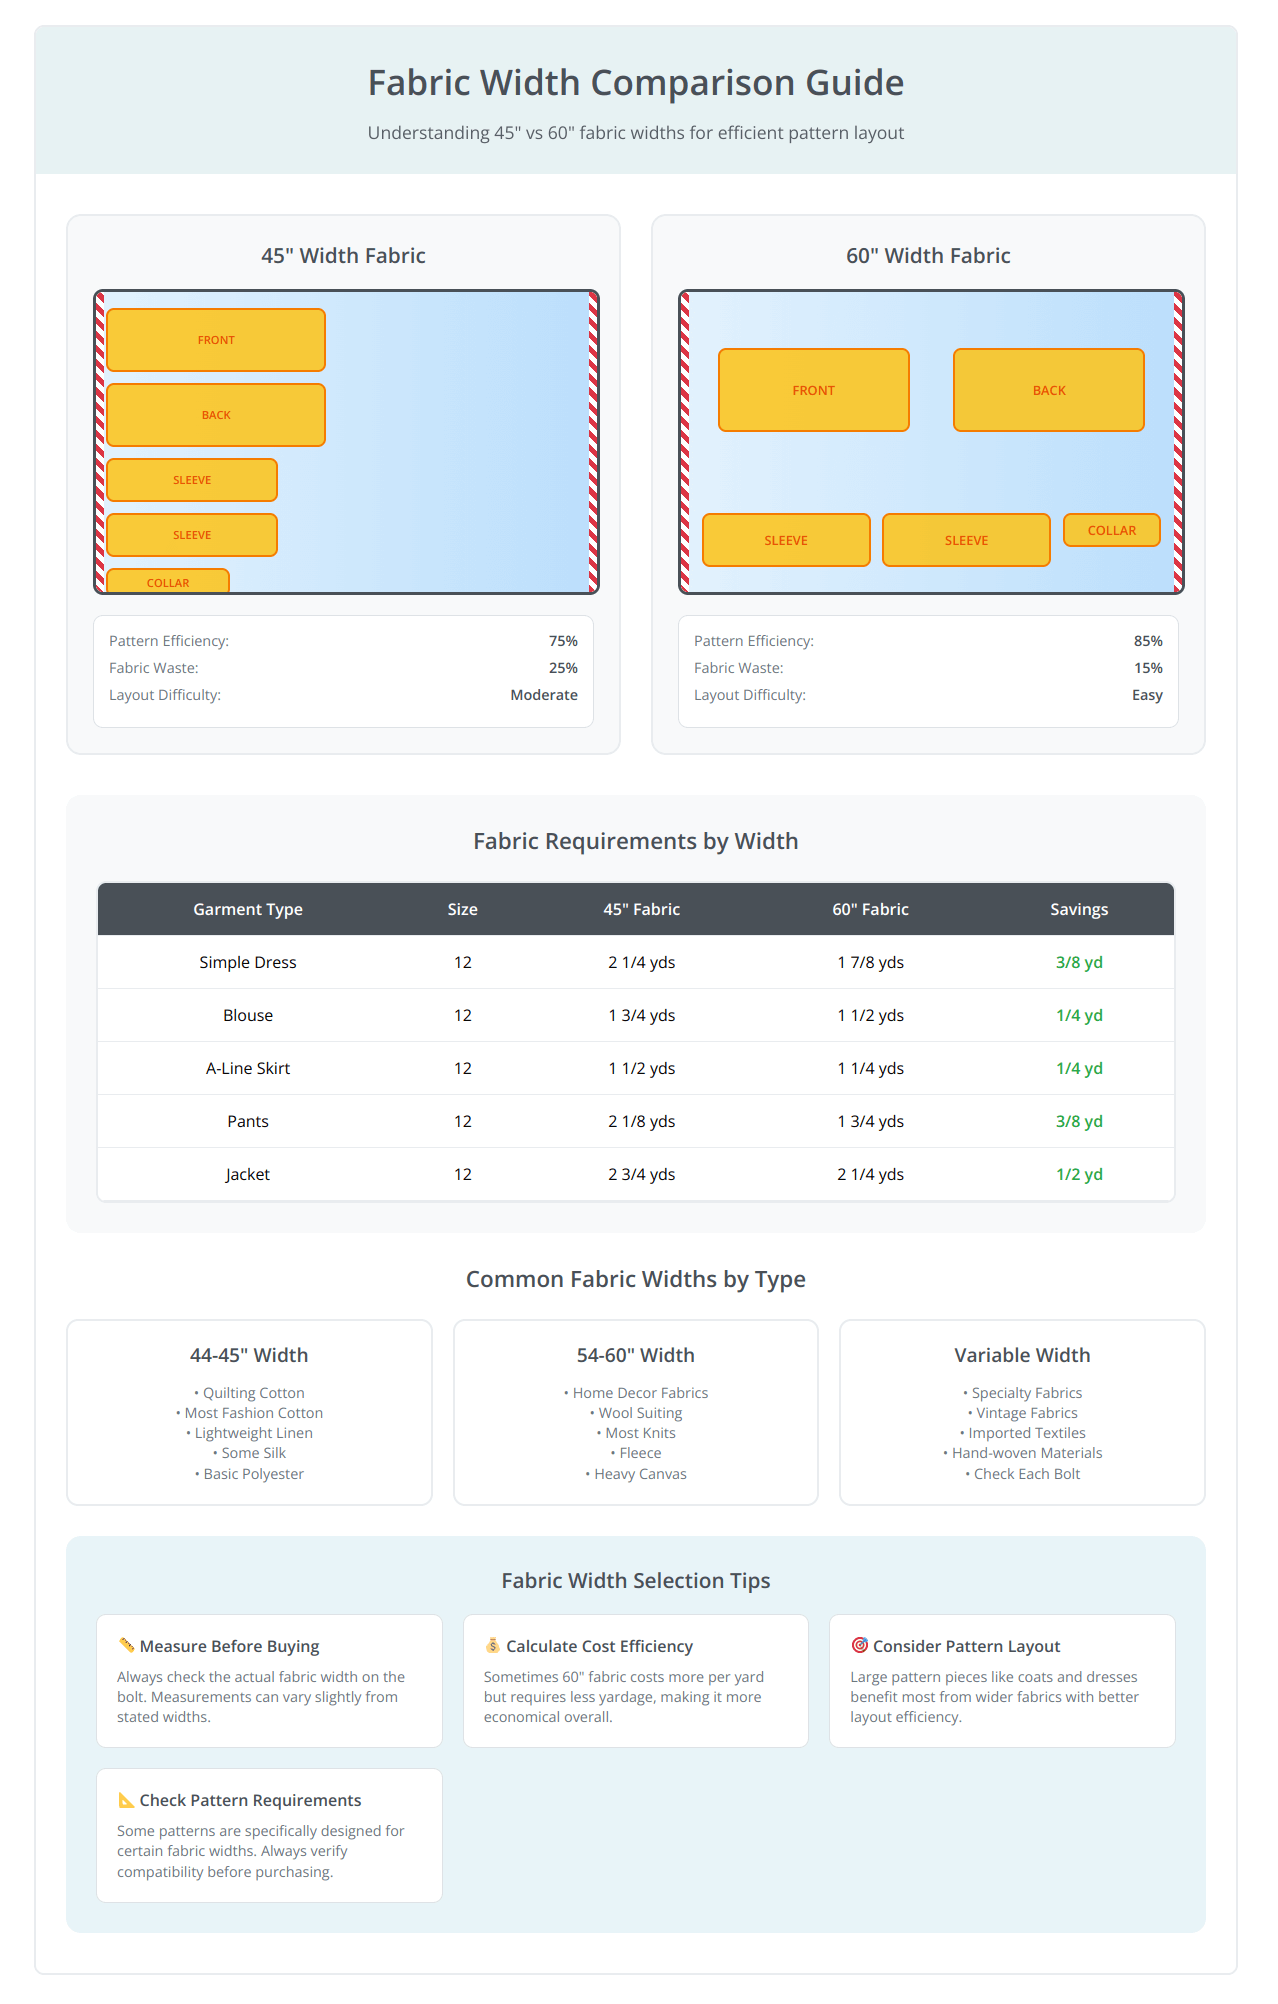
When shopping for fabric, always check the actual width on the bolt, as measurements can vary slightly from stated widths. Consider both the per-yard cost and the total yardage required when comparing fabrics of different widths. Sometimes a more expensive 60-inch fabric can be more economical overall due to reduced yardage requirements. Understanding these principles will help you make informed fabric choices that suit both your project needs and budget.
How to Calculate How Much Fabric You Need
Basic Formula:
- Find your size in the fabric requirements table
- Check your fabric width (45″ or 60″)
- Add 1/4 to 1/2 yard extra for:
- Pattern matching (if needed)
- Mistakes
- Pre-shrinking allowance
Take the guesswork out of fabric shopping with our fabric requirements calculator that accounts for pattern matching, pre-shrinking, and safety margins.
Selecting Appropriate Fabrics
Pattern envelopes list suggested fabrics for good reason. These recommendations ensure your finished garment will look and behave as intended.
Reading Fabric Suggestions:
- “Suitable for knits only”: Pattern designed for stretchy fabrics
- “Woven fabrics”: Pattern designed for non-stretch fabrics
- “Lightweight to medium weight”: Fabric weight recommendations
- “No obvious diagonal”: Avoid fabrics with strong directional patterns
For comprehensive fabric information, check our guide to common fabric types and their uses.
What is Nap in a Sewing Pattern?
Nap refers to fabrics with directional properties:
- Pile fabrics: Velvet, corduroy, fleece
- Directional prints: One-way patterns, text
- Brushed fabrics: Some cottons and wools
- Shiny fabrics: Satin, some silks
With Nap Layout:
- All pattern pieces face the same direction
- Requires more fabric (check “with nap” yardage)
- Ensures consistent color/texture appearance
Understanding Fabric Width Standards
Standard Fabric Widths:
| Type | Common Widths |
|---|---|
| Quilting Cotton | 44-45″ |
| Fashion Cotton | 45″ |
| Linen | 45-60″ |
| Knits | 58-60″ |
| Home Decor | 54-60″ |
| Wool | 60″ |
In the UK, standard widths follow similar measurements, though some specialty fabrics may vary.
Laying Out and Cutting Your Pattern
Pattern Layout Guidelines
Preparation Steps:
- Pre-wash your fabric according to care instructions
- Press fabric to remove wrinkles
- Check fabric width and confirm with pattern requirements
- Find the correct layout diagram for your size and fabric width
Grainline and Fabric Direction
Understanding Grainline:
- Lengthwise grain: Parallel to selvage (strongest)
- Crosswise grain: Perpendicular to selvage
- Bias: 45-degree angle to grain (most stretch)
Placing Grainline:
- Measure from grainline arrow to selvage at both ends
- Ensure measurements are equal
- Pin pattern piece securely
- Double-check before cutting
For detailed information about fabric direction, see our fabric cutting guide.
How to Pattern Match Fabric for Beginners
For Plaid or Striped Fabrics:
- Plan your layout carefully before cutting
- Match dominant lines at center front and major seams
- Buy extra fabric (usually 1/2 to 1 yard additional)
- Use single layer cutting method for precision
- Mark pattern pieces to indicate which direction they face
Pattern Matching Tips:
- Start with the main front piece
- Match at bust level for tops
- Match at hip level for skirts
- Don’t worry about perfect matching at all seams – focus on the most visible areas
Transferring Pattern to Fabric
Marking Methods
Temporary Marking Tools:
- Tailor’s chalk: Easy to remove, good for most fabrics
- Water-soluble markers: Disappear with water
- Air-erasable markers: Fade within 24-48 hours
- Tracing paper and wheel: Creates dots through pattern
Marking Techniques:
- Pin marking: Quick for notches and simple marks
- Chalk marking: Good for lines and curves
- Thread basting: Removable but time-consuming
- Tracing wheel: Accurate for detailed markings
Common Cutting Mistakes to Avoid
- Using dull scissors: Results in jagged edges and fabric damage
- Cutting against the grain: Can cause distortion
- Ignoring nap direction: Creates color/texture inconsistencies
- Rushing the cutting process: Leads to inaccurate pieces
- Not checking layout twice: Can result in insufficient fabric
PDF Pattern Specifics
How to Print PDF Patterns
At Home Printing:
- Check print settings: Scale should be 100% (actual size)
- Print test square first: Measure to ensure correct scale
- Use quality paper: Regular copy paper works fine
- Print only needed sizes: If pattern has size layers
Copy Shop Printing:
- A0 size printing: Usually costs $2-5 per pattern
- Professional quality: Heavy paper, precise scaling
- No assembly required: Printed as one large sheet
Assembling PDF Patterns
Tools Needed:
- Scissors or rotary cutter
- Tape or glue stick
- Flat surface for assembly
Assembly Steps:
- Trim margins from printed pages (usually right and bottom edges)
- Follow assembly guide included with pattern
- Align registration marks or grid lines
- Tape or glue pages together securely
- Check connections at pattern lines
Troubleshooting Common Pattern Problems
Size and Fit Issues
Problem: Pattern pieces seem too large or small
Solutions:
- Double-check your measurements against size chart
- Remember pattern sizes differ from ready-to-wear
- Consider the amount of ease designed into the garment
- Make a test garment (muslin) if unsure
Problem: Between two sizes
Solutions:
- Grade between sizes by drawing a line from one size to another
- Choose larger size for fitted garments, smaller for loose fits
- Make adjustments at fitting stage
Pattern Piece Problems
Problem: Pattern pieces don’t seem to match up
Solutions:
- Check you’re using the correct view pieces
- Verify you’ve cut the right number of each piece
- Look for matching notches and dots
- Consult pattern instructions for assembly order
Problem: Missing pattern pieces
Solutions:
- Check if pieces are shared between views
- Look for pieces that might be “cut from main fabric”
- Contact pattern company for replacement if truly missing
Construction Confusion
Problem: Instructions seem unclear
Solutions:
- Read through all instructions before starting
- Look for online tutorials or sewalongs
- Check pattern review websites for tips
- Break complex steps into smaller parts
For technical sewing issues, check our sewing machine troubleshooting guide.
Advanced Pattern Concepts
What is the Golden Rule Sewing Pattern System?
The golden rule pattern system uses proportional measurements rather than standard sizing. It calculates all garment dimensions based on your height as the base measurement, creating more personalized fit for individual body proportions.
How it Works:
- Your height becomes the master measurement
- All other measurements are calculated as proportions of your height
- Results in better fit for non-standard proportions
- Requires fewer adjustments than traditional sizing
What is the Pattern Maker’s Rule?
The pattern maker’s rule refers to basic principles followed when creating patterns:
- Ease must be appropriate for the garment type and fabric
- Grain direction must support the garment’s function
- Balance lines should create visual harmony
- Seam allowances must be consistent and appropriate
Three Principles of Pattern Making
- Fit: Pattern must accommodate the body with appropriate ease
- Function: Pattern must allow for intended use and movement
- Fashion: Pattern must create the desired style and silhouette
How to Size Up a Sewing Pattern for Beginners
Simple Sizing Up:
- Determine how much larger you need the pattern
- Add width evenly at side seams (divide total increase by number of seams)
- Maintain proportions at necklines and armholes
- Test fit with muslin before cutting final fabric
Complex Alterations:
- Consider taking a pattern alteration class
- Use pattern drafting books as reference
- Start with simple adjustments before attempting major changes
Pattern Organization and Storage
How to Organize Sewing Patterns
Physical Pattern Storage:
- File folders by pattern company or garment type
- Clear plastic sleeves to protect envelopes
- Binders with divider tabs for easy browsing
- Database or spreadsheet to track your collection
Get your pattern collection organized with our detailed pattern storage and organization guide, including printable labels and inventory templates.
Digital Pattern Organization:
- Computer folders organized by company, type, or season
- Cloud storage for backup and access from multiple devices
- Naming conventions that include pattern name, company, and size
- Regular backups to prevent loss
Pattern Inventory Tracking:
- Pattern name and number
- Size purchased or traced
- Fabric requirements
- Projects completed
- Modifications made
- Rating and notes
Working with Instructions
Do Sewing Patterns Have Instructions?
Yes, all legitimate sewing patterns include instructions, though the detail level varies:
- Commercial Patterns: Basic instructions with technical diagrams
- Indie Patterns: Often more detailed with beginner-friendly explanations
- PDF Patterns: May include video links and online support
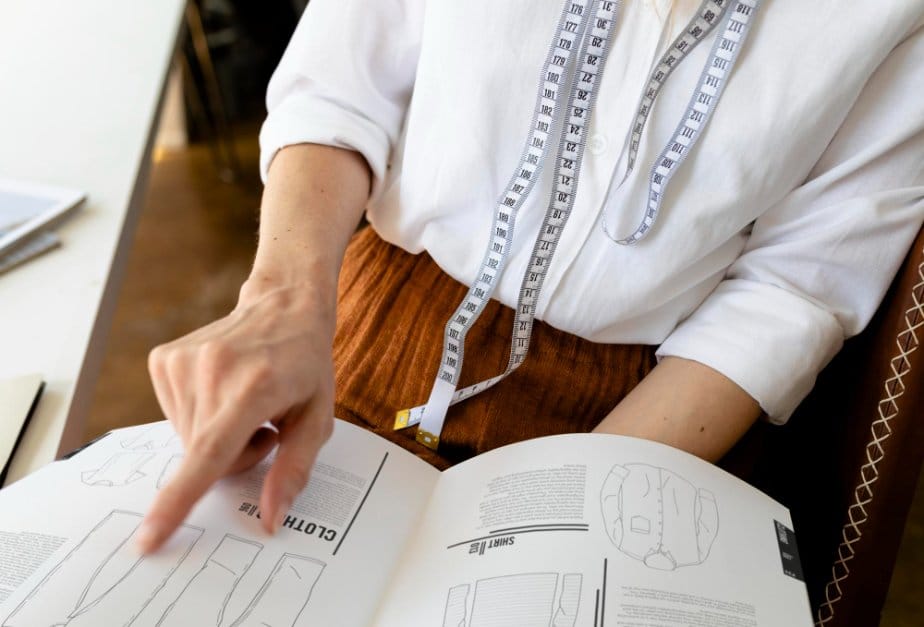
How to Read a Pattern Guide Sheet
Pattern Guide Contents:
- General information: Fabric requirements, notions, sizing
- Layout diagrams: How to arrange pieces on fabric
- Construction steps: Numbered instructions with diagrams
- Finishing techniques: Hems, closures, pressing
- Glossary: Sewing terms and techniques
What is a Pattern Guide Sheet?
The pattern guide sheet is the instruction booklet included with your pattern. It contains all the information needed to construct your garment, from cutting layouts to finished details.
Using the Guide Effectively:
- Read completely before starting
- Identify your view and circle relevant instructions
- Gather all materials listed
- Follow steps in order – don’t skip ahead
- Check off completed steps to track progress
Stay organized throughout your sewing project with our downloadable progress tracking checklist that helps you manage each step from cutting to finishing.
Seam Allowances and Construction
Understanding Seam Allowances
Most patterns include seam allowances, but the amount varies:
- 5/8″: Standard for most commercial patterns
- 1/2″: Common for some indie patterns
- 1cm: European and some modern patterns
- None included: Some patterns require you to add seam allowances
Check your pattern instructions to confirm seam allowance amounts. For detailed seam allowance information, visit our seam allowance guide.
How to Grade Seam Allowances
Grading reduces bulk in seam allowances, especially important for:
- Curved seams
- Multiple layers
- Thick fabrics
- Professional finish
Learn more about this technique in our seam allowance grading guide.
Advanced Techniques and Tips
Working with Stretch Fabrics
When your pattern calls for knits or stretch fabrics:
- Check stretch percentage: Pattern may specify required stretch
- Use appropriate needles: Ballpoint or stretch needles
- Choose correct stitches: Zigzag or stretch stitches
- Test on scraps: Before sewing final garment
For more information, see our guide to stretchy fabrics.
Professional Finishing Techniques
- Press as you go: Creates professional-looking results
- Finish seam edges: Prevents fraying and adds durability
- Use proper interfacing: Adds structure where needed
- Hand-finished details: Elevate the final appearance
Pattern Repeat Calculations
For Patterned Fabrics:
- Measure the repeat: Distance between pattern repetitions
- Calculate additional fabric: Usually one full repeat extra
- Plan layout carefully: Match patterns at key points
- Buy extra: Better to have too much than too little
For those interested in understanding how patterns translate to finished garments, WithWendy’s YouTube channel offers unique insights into both reading commercial patterns and creating your own patterns from existing clothing
Common Beginner Mistakes and Solutions
Measurement and Sizing Errors
Mistake: Choosing size based on ready-to-wear clothing
Solution: Always use your body measurements and pattern size charts
Mistake: Not accounting for ease
Solution: Check finished garment measurements to understand intended fit
Cutting and Layout Mistakes
Mistake: Ignoring grainline placement
Solution: Always measure and verify grainline positioning
Mistake: Cutting all pieces from wrong side of fabric
Solution: Pay attention to “right side” and “wrong side” markings
Construction Errors
Mistake: Not reading instructions completely
Solution: Review all steps before beginning construction
Mistake: Skipping pressing steps
Solution: Press seams as instructed for professional results
For easy reference while working on your projects, here’s a comprehensive table of the most frequent beginner mistakes and their solutions:
Here’s a comprehensive table for “Common Beginner Mistakes and Solutions”:
| Mistake | Why It Happens | Solution | Prevention Tips |
|---|---|---|---|
| Choosing wrong pattern size | Using ready-to-wear size instead of body measurements | Take accurate bust, waist, and hip measurements; compare to pattern size chart | Always measure yourself before each project; pattern sizes differ significantly from store sizes |
| Ignoring grainline placement | Not understanding fabric grain importance | Measure from grainline arrow to selvage at both ends; ensure equal distance | Use ruler to double-check grainline before pinning; mark selvage edge clearly |
| Cutting fabric incorrectly | Rushing or not following layout diagrams | Follow pattern layout for your fabric width and size; use sharp scissors | Prepare fabric by pressing; use weights or pins to secure pattern pieces |
| Missing or ignoring notches | Not understanding their importance for alignment | Cut notches outward from seam allowance; mark with chalk if preferred | Transfer ALL markings before removing pattern pieces |
| Not reading instructions completely | Eagerness to start sewing immediately | Read entire instruction sheet before cutting fabric | Highlight your view/size; make notes on confusing steps |
| Skipping fabric preparation | Unaware that fabric can shrink or distort | Pre-wash and press fabric according to care instructions | Always pre-treat fabric the same way you’ll care for finished garment |
| Using wrong seam allowance | Assuming all patterns use same allowance | Check pattern instructions for seam allowance amount (5/8″, 1/2″, or 1cm) | Mark seam allowance clearly on pattern pieces; use seam guide on machine |
| Choosing inappropriate fabric | Attracted to pretty fabric without checking suitability | Stick to pattern’s suggested fabric types, especially as beginner | Read fabric suggestions carefully; ask for help at fabric store |
| Not transferring pattern markings | Thinking they’re not important | Use tailor’s chalk, fabric markers, or thread basting to mark dots, lines, and symbols | Transfer markings immediately after cutting, while pattern is still pinned |
| Cutting pattern pieces incorrectly | Confusion about “cut 2” or “place on fold” instructions | Understand what each instruction means before cutting | Double-check cutting instructions; lay out all pieces before cutting any |
| Mixing up pattern pieces | Similar-looking pieces or multiple views | Label each piece after cutting; organize by garment section | Keep pattern envelope nearby for reference; store cut pieces separately by type |
| Not making a test garment | Wanting to use “good” fabric immediately | Make muslin/toile in cheap fabric for fitted garments | Consider test garments for expensive fabric or tricky fit |
| Ignoring ease requirements | Not understanding difference between body size and garment size | Check finished garment measurements on pattern; compare to body measurements plus desired ease | Learn about different types of ease (wearing ease vs. design ease) |
| Cutting single layer when should cut double | Misunderstanding fabric folding instructions | Pay attention to layout diagrams showing fabric folded or single layer | Check if pattern piece needs to be cut as pair (sleeves, pockets) |
| Using dull scissors or wrong tools | Not realizing tool quality affects results | Invest in sharp fabric scissors; use paper scissors only for patterns | Keep fabric scissors sharp; never use on paper or other materials |
| Not checking pattern accuracy | Trusting that all patterns are perfect | Measure pattern pieces against finished garment measurements; check for obvious errors | Read pattern reviews online; check pattern company errata if available |
| Rushing the layout process | Impatience to start sewing | Take time to plan layout carefully; double-check piece placement | Layout is foundation of success; rushing here causes problems later |
| Not understanding nap or directional prints | Unfamiliar with fabric behavior | Ensure all pieces face same direction for nap fabrics; buy extra fabric as specified | Run hand over fabric to check for nap; examine prints for direction |
| Mixing up right and wrong sides | Confusion about fabric orientation | Identify right side before cutting; mark wrong side with chalk if needed | Most fabrics have obvious right side; when in doubt, choose preferred side |
| Not adjusting for height | Assuming standard pattern length fits everyone | Check finished length measurements; adjust at lengthen/shorten lines | Measure similar garments you own for length preferences |
Quick Reference Checklist:
- ✓ Take accurate body measurements
- ✓ Read ALL instructions before cutting
- ✓ Pre-wash and press fabric
- ✓ Check grainline placement
- ✓ Transfer all markings
- ✓ Use appropriate tools
- ✓ Follow layout diagrams exactly
- ✓ Double-check before cutting
This table covers the most common mistakes beginners make when reading and using sewing patterns, providing both immediate solutions and long-term prevention strategies.
For visual learners who prefer video instruction, Evelyn Wood from Vintage Sewing School offers excellent tutorials on pattern reading fundamentals. Her video ’14 Things I Wish Someone Told Me About Sewing as a Beginner!’ addresses many common pattern-related challenges that new sewists face.
For comprehensive troubleshooting, check our sewing machine troubleshooting guide.
Building Your Pattern Collection
Choosing Your First Patterns
Recommended Beginner Projects:
- Simple A-line skirt
- Basic tote bag
- Straight-leg pajama pants
- Simple shift dress
- Basic apron
The American Sewing Guild, a national organization dedicated to sewing education with chapters across the country, recommends that beginners master pattern reading fundamentals before attempting complex projects, as this foundation prevents costly mistakes and builds confidence
Skills to Build Progressively:
- Straight seams and basic construction
- Curved seams and shaping
- Zippers and closures
- Sleeves and armhole construction
- Tailoring and advanced techniques
Pattern Review Resources
Before purchasing patterns, check review websites:
- PatternReview.com: Extensive database of user reviews
- Pattern company blogs: Often feature customer makes
- Social media: Search hashtags for pattern names
- Sewing forums: Get advice from experienced sewists
The sewing world has undergone remarkable transformation in recent years, driven by technological advances, changing consumer values, and global connectivity. Modern sewists have access to resources and communities that previous generations could never have imagined. From instant digital pattern downloads to virtual sewing circles, today’s sewing landscape offers unprecedented opportunities for learning, creating, and connecting.
Understanding these modern trends helps new sewists navigate the current sewing environment and take advantage of the best resources available. Whether you’re drawn to sustainable practices, cutting-edge technology, or vibrant online communities, there’s never been a better time to start your sewing journey.
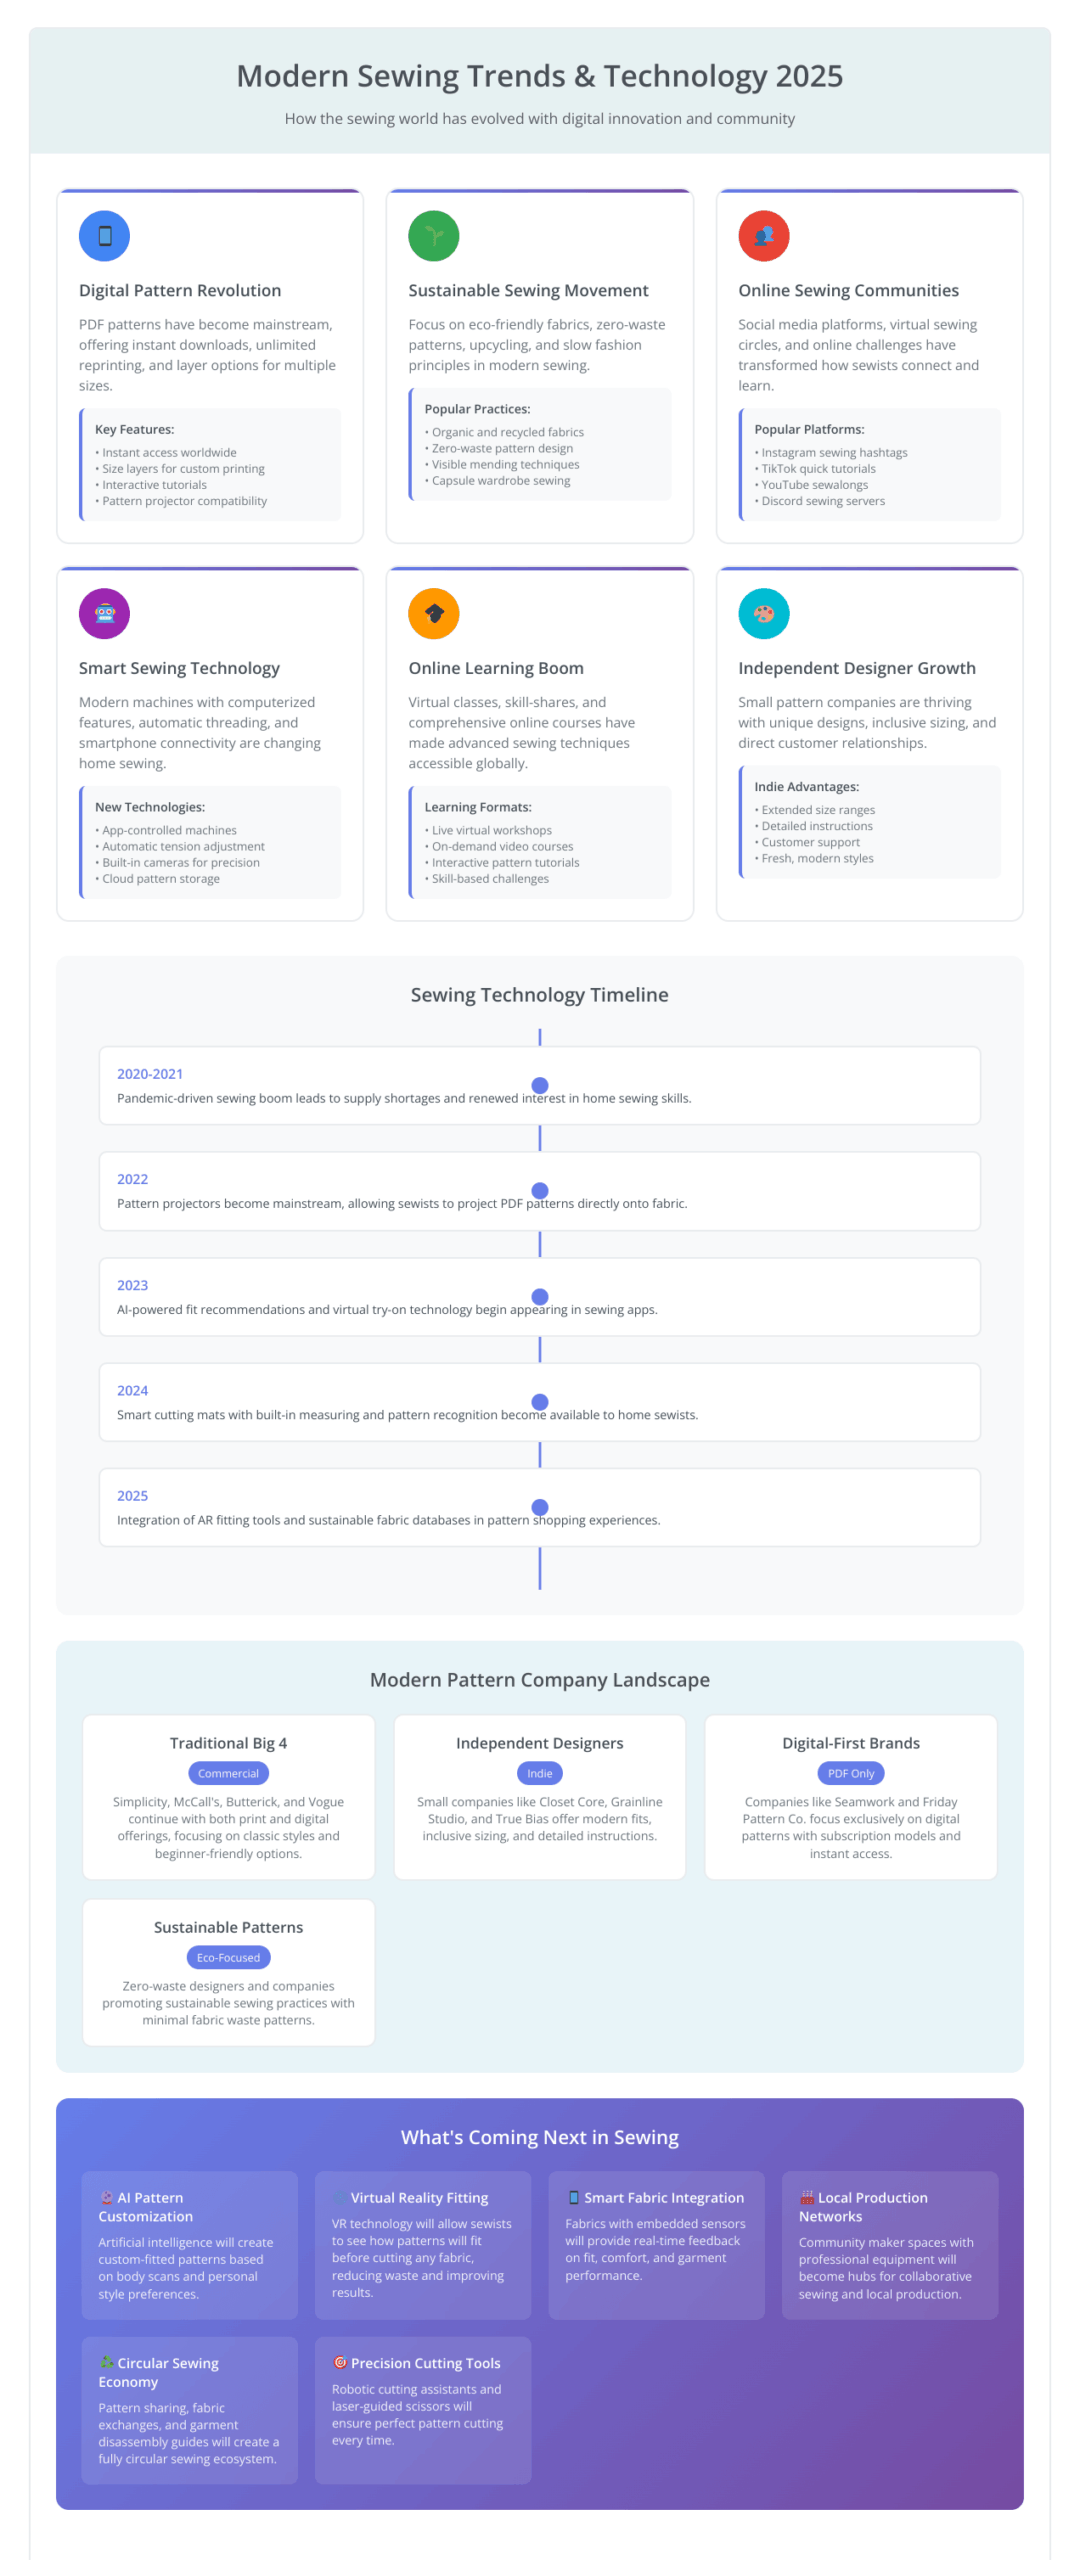
These evolving trends demonstrate that sewing continues to adapt and thrive in the digital age. As you begin your pattern reading journey, you’ll likely encounter many of these modern elements, from PDF patterns with video tutorials to online communities ready to help with questions. Embrace the resources that appeal to you while building fundamental skills that will serve you well regardless of how the sewing world continues to evolve. The core principles of reading patterns remain constant, but the tools and community support available to help you succeed have never been better.
Conclusion
Learning to read sewing patterns opens up a world of creative possibilities. While the process might seem overwhelming at first, remember that every expert sewist started as a beginner. The key is to start with simple patterns and gradually build your skills and confidence.
Essential Takeaways
- Pattern Selection: Choose patterns appropriate for your skill level and always read the entire instruction set before starting. The “Big 4” commercial patterns offer reliable, widely-available options, while indie designers often provide more detailed instructions and modern fits.
- Measurement and Sizing: Pattern sizes differ significantly from ready-to-wear clothing. Always use your actual body measurements and refer to the pattern’s size chart. When between sizes, choose based on your largest measurement and consider the intended ease of the garment.
- Fabric Preparation: Pre-wash your fabric and pay careful attention to grainline placement. Understanding fabric width (45″ vs 60″) helps you purchase the correct amount and plan your layout efficiently.
- Digital vs. Physical: Both PDF and paper patterns have advantages. PDF patterns offer instant gratification and unlimited reprinting, while paper patterns provide convenience and traditional ease of use. Choose based on your preferences and needs.
- Marking and Symbols: Pattern symbols are universal guidelines that ensure proper construction. Take time to transfer all markings accurately to your fabric – these seemingly small details make the difference between a professional and amateur-looking result.
- Troubleshooting Mindset: Mistakes are part of the learning process. When issues arise, refer back to the pattern instructions, check online resources, and don’t hesitate to make test garments before cutting expensive fabric.
- Progressive Skill Building: Start with simple projects and gradually tackle more complex techniques. Each successful project builds confidence and teaches valuable skills that apply to future endeavors.
Final Recommendations
- Invest in quality tools: Good scissors, measuring tools, and marking supplies make the process more enjoyable and accurate.
- Build a reference library: Keep pattern instructions, save useful tutorials, and maintain notes about successful techniques.
- Join the community: Online sewing groups, local classes, and pattern review sites provide support, inspiration, and troubleshooting help.
- Practice patience: Rushing through pattern reading and preparation often leads to mistakes that are time-consuming to fix later.
- Embrace the learning process: Every pattern teaches something new, whether it’s a construction technique, fit principle, or fabric behavior.
Remember that reading sewing patterns is a skill that improves with practice. Each project you complete makes the next one easier and more enjoyable. The investment you make in learning these fundamentals will pay dividends in every future sewing project, enabling you to create garments that fit well, look professional, and reflect your personal style.
Whether you’re drawn to simple everyday pieces or complex couture techniques, understanding how to read and interpret sewing patterns is your gateway to a lifetime of creative fulfillment. Take your time, be patient with yourself, and enjoy the journey of bringing your sewing visions to life.