Master 19 Essential Stitches, Troubleshoot Problems, and Choose the Right Settings for Every Fabric
Modern sewing machines offer incredible versatility with dozens of stitch options. While this variety opens creative possibilities, it can feel overwhelming when you’re starting out. This comprehensive guide will help you understand which stitches to use, when to use them, and how to troubleshoot common problems.
Table of Contents
Understanding Your Sewing Machine’s Stitch Options
Why Do Sewing Machines Have Different Stitches?
Sewing machines offer multiple stitches because different projects require different solutions. A straight stitch works perfectly for basic seams, but it would snap when used on stretchy fabrics like jersey knits. Decorative stitches add personality to projects, while utility stitches solve specific construction challenges.
Think of stitches as tools in a toolbox. Just as you wouldn’t use a hammer for every job, you shouldn’t rely on just one stitch type for all your sewing needs.
What Does “12 Stitch Sewing Machine” Mean?
When manufacturers advertise a “12 stitch sewing machine,” they’re telling you how many built-in stitch patterns the machine offers. Entry-level machines typically include 10-25 stitches, covering essential needs. Higher-end models may feature 50-400+ stitches, including decorative patterns and specialty functions.
Here’s what you actually need:
- Beginners: 10-20 stitches are plenty
- Intermediate sewers: 25-50 stitches provide good variety
- Advanced users: 50+ stitches for specialized projects
Essential Sewing Machine Stitches
The Straight Stitch: Your Workhorse
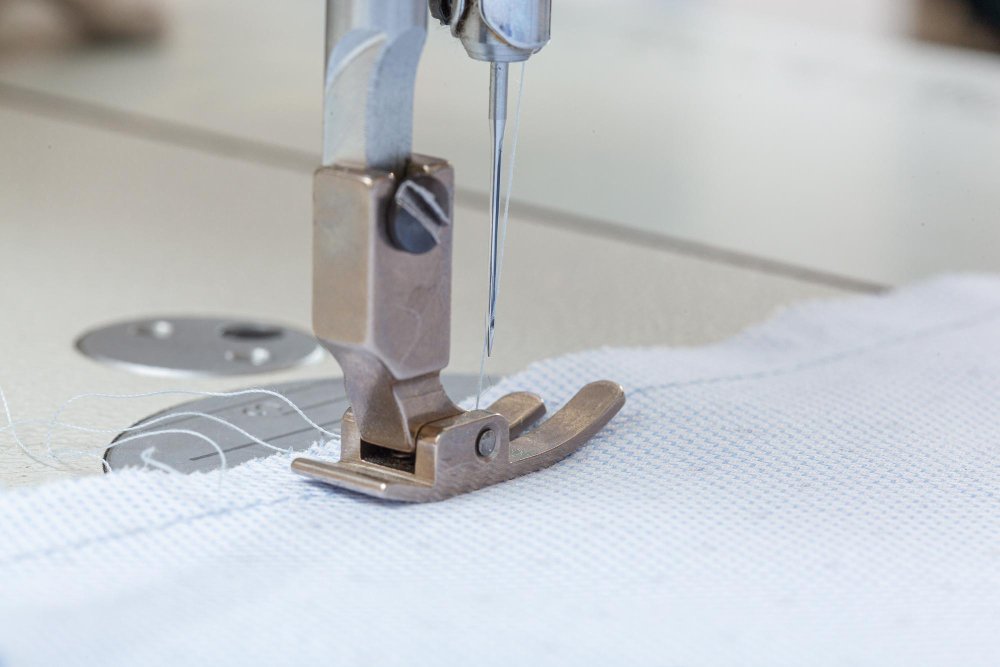
The straight stitch is the most basic and frequently used stitch on any sewing machine. This fundamental stitch creates a line of even stitches in a straight pattern, making it perfect for most construction tasks.
Best uses for straight stitch:
- Constructing seams in garments
- Hemming lightweight to medium fabrics
- Topstitching and decorative lines
- Basting (temporary stitching)
- Quilting straight lines
Stitch length recommendations:
- Lightweight fabrics: 1.5-2.5mm (silk, chiffon, voile)
- Medium-weight fabrics: 2.5-3mm (cotton, linen, wool)
- Heavy fabrics: 3-4mm (denim, canvas, upholstery)
- Basting: 4-5mm for easy removal
Learn the basics with our how to sew a straight stitch guide.
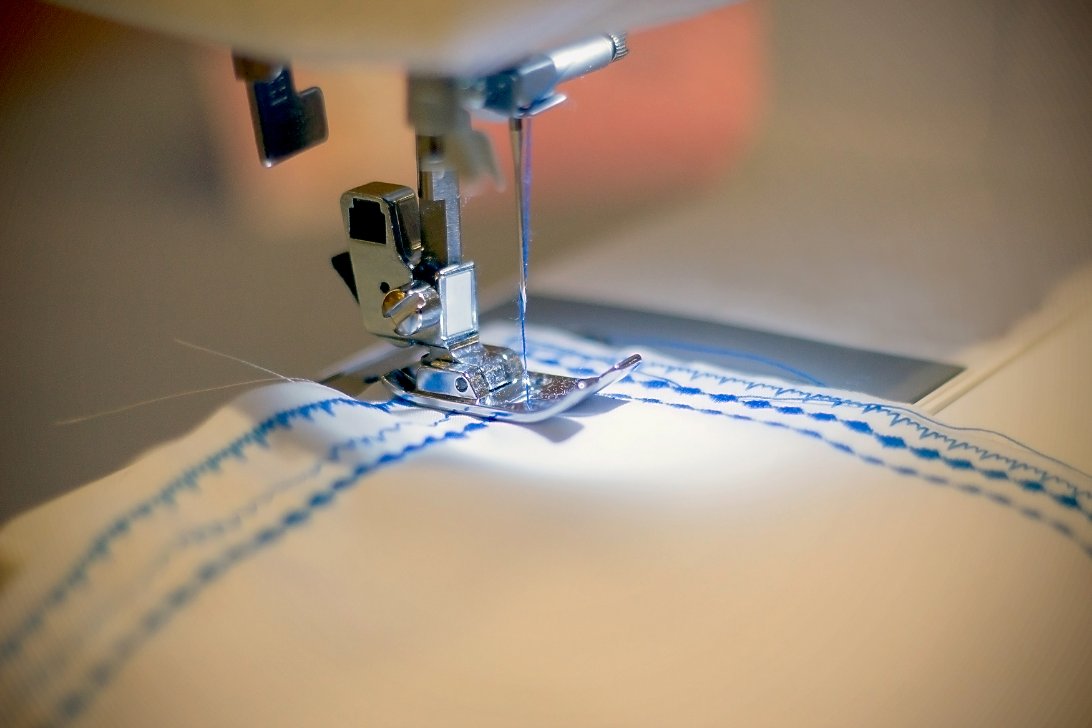
The Zigzag Stitch: Versatile and Essential
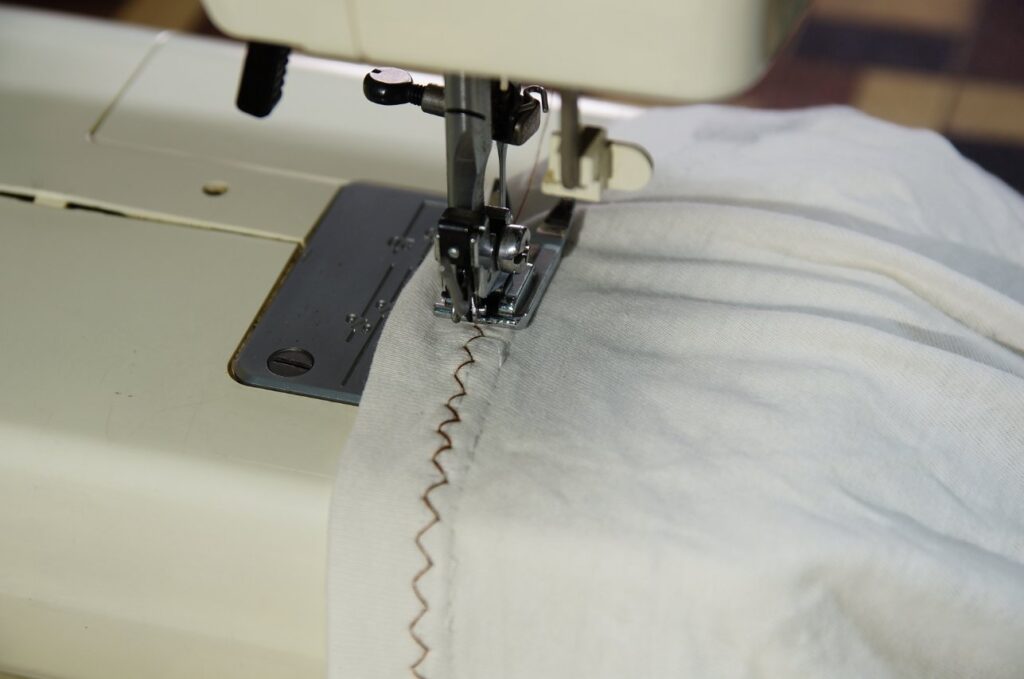
The zigzag stitch moves the needle from side to side while moving forward, creating a pattern that looks like the letter “Z” repeated. This stitch offers built-in stretch, making it invaluable for modern sewing.
What do you use a zigzag stitch for?
- Finishing raw edges to prevent fraying
- Sewing stretch and knit fabrics
- Creating buttonholes
- Attaching elastic
- Appliqué work
- Mending tears and holes
Zigzag vs. straight stitch differences:
- Flexibility: Zigzag stitches stretch with fabric; straight stitches don’t
- Edge finishing: Zigzag encases raw edges; straight stitches can’t
- Fabric compatibility: Zigzag works on all fabric types; straight stitch may break on stretchy materials
- Decorative potential: Zigzag can be decorative; straight stitch is purely functional
Zigzag stitch settings:
- Narrow zigzag (1-2mm width): Stretch seams, delicate edge finishing
- Medium zigzag (3-4mm width): Standard edge finishing, buttonholes
- Wide zigzag (5-6mm width): Heavy fabric edges, decorative effects

Triple Straight Stitch: Extra Strength
The triple straight stitch (also called triple stretch stitch) sews forward two stitches, back one stitch, creating an incredibly strong seam. Each stitch is reinforced three times, making it perfect for high-stress areas.
What is a triple straight stitch used for?
- Reinforcing seams in activewear and sportswear
- Sewing stretch fabrics without a serger
- Strengthening areas like crotch seams and armholes
- Creating durable topstitching on jeans and heavy fabrics
- Professional-looking flat-fell seams
Utility Stitches for Specific Tasks
Overcast and Overcasting Stitches
What stitch to use for raw edges?
Overcast stitches prevent fabric from fraying by wrapping thread around the raw edge. These stitches mimic the function of a serger on a regular sewing machine.
What stitches can an overlocker do? While traditional overlockers (sergers) create 3-thread, 4-thread, and 5-thread stitches, modern sewing machines offer overcast alternatives:
- Mock overlock stitch
- Overcast stitch
- Blanket stitch for edges
Blind Hem Stitch: Nearly Invisible Hems
The blind hem stitch creates professional-looking hems with minimal visible stitching on the right side of the fabric. This stitch catches just a few threads of the main fabric while securing the hem fold.
Which sewing machine stitches for hemming?
- Blind hem stitch: Best for invisible hems on pants, skirts, curtains
- Straight stitch: Simple hems on casual garments
- Twin needle hem: Professional stretch hem on knits
- Rolled hem: Delicate fabrics using special presser foot
What machine stitch is best for hemming? For most projects, the blind hem stitch provides the most professional results. However, the best choice depends on your fabric and desired appearance.
Buttonhole Stitches
Modern machines offer automatic or manual buttonhole functions. The machine creates dense zigzag stitches that form the buttonhole’s sides and bar tacks at each end.
Types of buttonholes:
- Standard buttonhole: Most common, works for most buttons
- Keyhole buttonhole: For thick shank buttons on coats
- Stretch buttonhole: For knit fabrics
- Bound buttonhole: Hand-finished technique for formal wear
Stretch and Specialty Stitches
Working with Stretch Fabrics
What stitch to use for stretchy fabric?
Regular straight stitches will break when stretch fabrics are pulled. Instead, use these stretch-friendly options:
- Narrow zigzag (1-2mm width): Mimics serger stitches
- Lightning stitch: Built-in stretch stitch on many machines
- Triple zigzag: Extra stretch and durability
- Stretch overlock: Combines seaming and edge finishing
Understanding Specialty Stitches
What is fagoting in sewing? Fagoting is a decorative stitch that joins two pieces of fabric with an open, lacy effect between them. The fabrics are placed slightly apart, and the fagoting stitch creates decorative threads bridging the gap. This technique is often used in heirloom sewing and vintage-style projects.
Machine Settings and Setup
How Do I Know What Settings to Use?
Choosing the right settings depends on several factors:
Fabric weight and type:
- Delicate fabrics: Shorter stitch length, lower tension
- Heavy fabrics: Longer stitch length, potentially higher tension
- Stretch fabrics: Zigzag or stretch stitches, balanced tension
Thread and needle compatibility: The relationship between these three elements affects stitch quality significantly.
| Fabric Weight | Needle Size | Thread Weight | Stitch Length |
|---|---|---|---|
| Lightweight (silk, chiffon) | 60/8 – 70/10 | 60-80wt | 1.5-2.5mm |
| Medium (cotton, linen) | 80/12 – 90/14 | 40-50wt | 2.5-3mm |
| Heavy (denim, canvas) | 100/16 – 120/19 | 30-40wt | 3-4mm |
| Stretch (jersey, lycra) | 70/10 – 80/12 Ballpoint | 40-50wt | 2-3mm zigzag |
What is the difference between sewing needle 90/14 and 80/12? The numbers refer to needle size – 80/12 is smaller than 90/14. The first number is European sizing, the second is American. Use 80/12 for medium-weight cotton fabrics and 90/14 for slightly heavier materials like denim or multiple layers.
For comprehensive needle selection guidance, Schmetz, the world’s leading needle manufacturer, provides detailed compatibility charts and technical specifications that help ensure optimal stitch quality across all fabric types.
How to Set Up Your Machine for Different Stitches
How do you set the sewing machine to produce different stitches?
For mechanical machines:
- Turn the stitch selection dial to your desired pattern
- Adjust stitch length using the length dial
- Set stitch width for zigzag patterns
- Choose appropriate presser foot
For computerized machines:
- Use the display panel to select stitch type
- Adjust settings using + and – buttons
- Machine may automatically set optimal length/width
- Install recommended presser foot
Tension Settings for Different Fabrics
What tension should I use for heavy fabric?
Heavy fabrics often require slightly loosened tension to accommodate their thickness. Start with your machine’s default setting (usually 4), then adjust:
- Heavy fabrics: Try tension 3-3.5
- Multiple layers: May need tension 2.5-3
- Thick threads: Often require lower tension
- Lightweight fabrics: May need tension 4.5-5
Signs of incorrect tension:
- Too tight: Fabric puckers, bobbin thread shows on top
- Too loose: Loops appear on top, messy stitches
- Unbalanced: One thread pulls the other through to wrong side
Singer’s technical experts emphasize that proper thread tension creates balanced stitches where both threads meet in the middle of the fabric layers, with neither thread visible on the wrong side of the project.

Troubleshooting Common Stitch Problems
When Stitches Go Wrong
Before adjusting tension or settings, check these common culprits:
1. Threading Issues (Most Common Cause)
- Rethread the entire machine with presser foot UP
- Check that thread flows freely from spool
- Ensure thread passes through all guides
- Verify bobbin is inserted correctly
2. Needle Problems
- Change to a fresh needle (every 8-10 hours of sewing)
- Check needle size matches fabric weight
- Ensure needle is fully inserted and tightened
- Use correct needle type (ballpoint for knits, sharp for wovens)
3. Machine Maintenance
- Clean lint from bobbin area after every few projects
- Oil machine according to manual instructions
- Check for bent or damaged parts
Common Problems and Solutions
| Problem | Likely Cause | Solution |
|---|---|---|
| Skipping stitches | Wrong needle type/size | Use ballpoint needle for knits, check size |
| Thread breaking | Old thread, wrong tension | Use fresh thread, adjust tension |
| Puckered seams | Tension too tight, stitch too short | Loosen tension, lengthen stitch |
| Loose stitches | Improper threading, low tension | Rethread machine, increase tension |
| Uneven stitches | Machine needs cleaning/oiling | Clean bobbin area, oil if needed |
Advanced Troubleshooting Flowchart
Follow this systematic approach to diagnose and fix most sewing machine problems:
Stitch Problem?
    ↓
Changed needle recently? → No → Change needle
    ↓ Yes
Rethreaded machine? → No → Rethread with foot UP
    ↓ Yes
Cleaned bobbin area? → No → Remove lint and debris
    ↓ Yes
Correct thread/fabric combo? → No → Check compatibility chart
    ↓ Yes
Adjust tension incrementally → Test on scraps → Still problems? → Professional service needed
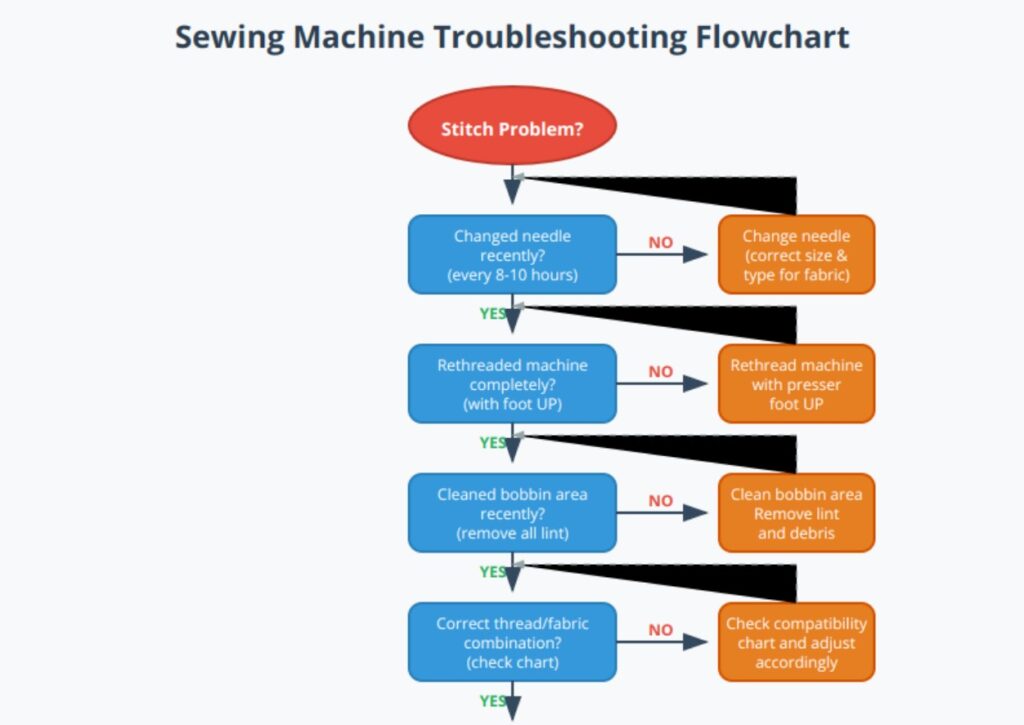
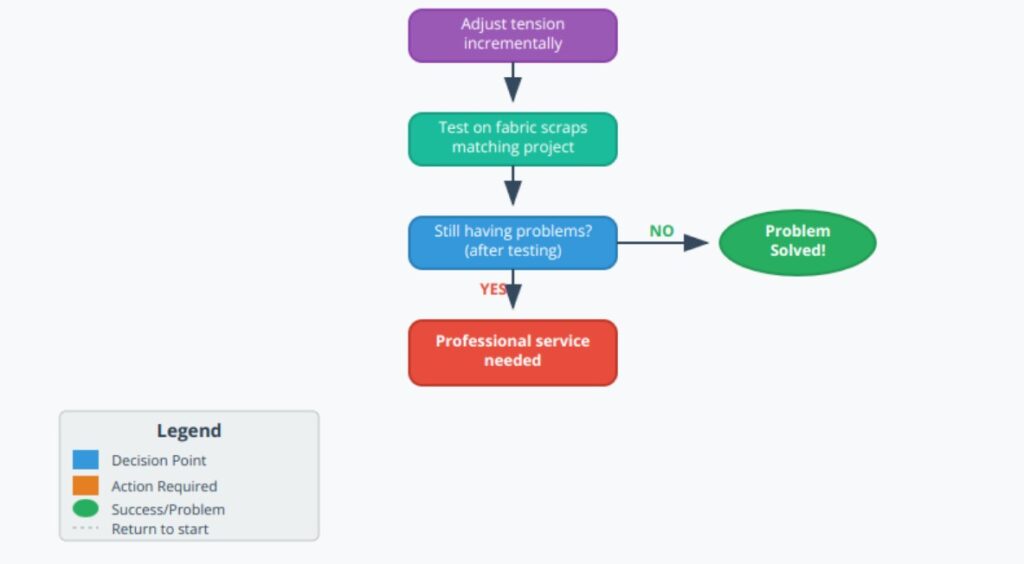
This flowchart addresses 95% of common sewing issues. Start at the red “Stitch Problem?” box and follow the decision path. Complete each orange action box before moving to the next blue decision point. The dashed gray lines show you should return to the beginning after completing any corrective action.
Key to success: Work through each step systematically rather than jumping ahead. Most problems resolve within the first three decision points.
Specialized Stitches and Techniques
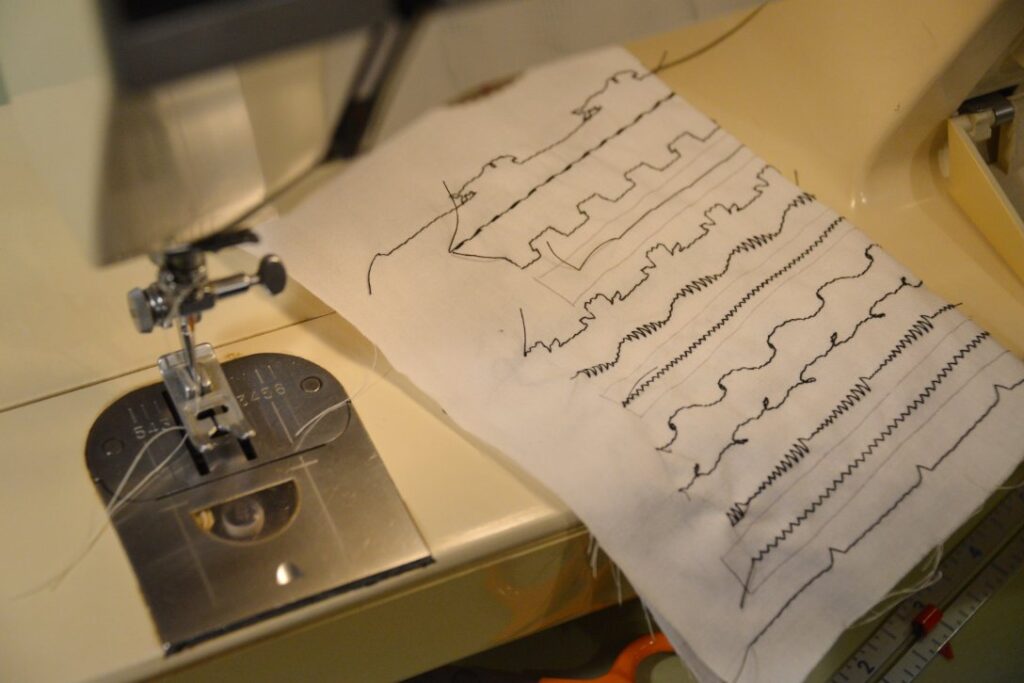
Decorative Stitches
Modern machines offer numerous decorative stitches for embellishment:
- Scallop stitches: Create curved, decorative edges
- Feather stitches: Delicate, branching patterns
- Cross stitches: Geometric decorative patterns
- Floral motifs: Complex decorative designs
Tips for decorative stitching:
- Always test on fabric scraps first
- Use stabilizer for best results
- Choose thread colors that complement your project
- Practice consistent spacing for professional results

Hand-Look Stitches
How to do blanket stitch? Many machines offer a blanket stitch that mimics hand-sewn edges. This stitch creates a series of L-shaped stitches along fabric edges, perfect for:
- Appliqué edges
- Fleece blankets
- Decorative hems
- Lace fabric applications
How to start a whip stitch? While traditionally a hand stitch, some machines offer a whip stitch function for:
- Joining fabric edges
- Decorative seaming
- Leather and felt projects
Advanced Stitch Techniques
How to double overlock stitch? A double overlock combines two rows of overlock stitching for extra security on very stretchy or loose-weave fabrics. This is typically done on sergers, but some high-end sewing machines offer similar functions.
What is the longest stitch on a sewing machine? Most machines offer stitch lengths up to 6mm, with some extending to 7mm. Long stitches are used for:
- Basting (temporary stitching)
- Gathering fabric
- Decorative topstitching
- Quilting large areas quickly
How to do a 3/4 stitch? This term typically refers to cross-stitch embroidery rather than machine stitching. However, some computerized machines offer partial decorative stitches that can create similar effects.
Industrial vs. Home Machine Stitches
Do Industrial Sewing Machines Only Do Straight Stitch?
Not all industrial machines are limited to straight stitches, but many are specialized for specific functions:
- Single-needle machines: Usually straight stitch only, built for speed and durability
- Overlock/serger machines: Create multiple thread overlock stitches
- Zigzag industrials: Heavy-duty zigzag for thick materials
- Specialty machines: Buttonhole, blind hem, or decorative stitch specialists
Industrial machines excel at doing one thing exceptionally well, rather than offering versatility like home machines.
Maintenance for Better Stitching
Regular Machine Care
Proper maintenance ensures consistent stitch quality:
After every project:
- Remove lint from bobbin area
- Check for tangled threads
- Store with needle up and presser foot down
Weekly (for frequent sewers):
- Clean entire bobbin area thoroughly
- Oil machine according to manual
- Check tension settings with test stitches
Monthly:
- Deep clean feed dogs and throat plate
- Inspect belts and moving parts
- Update needle supply
Annually:
- Professional service and adjustment
- Replace worn parts
- Calibrate computerized functions
Cleaning Your Machine Properly
Supplies needed:
- Small brush (often included with machine)
- Lint-free cloths
- Sewing machine oil (never use household oils)
- Small screwdriver
- Tweezers for removing stuck threads
Step-by-step cleaning:
- Turn off and unplug machine
- Remove needle and presser foot
- Take out bobbin and bobbin case
- Brush away lint from all accessible areas
- Clean feed dogs with brush
- Oil according to manual specifications
- Reassemble and test stitch quality
Choosing the Right Stitch for Your Project

Project-Based Stitch Selection
Garment construction:
- Seams: Straight stitch for most fabrics, narrow zigzag for knits
- Hems: Blind hem for invisible finish, straight stitch for casual
- Edges: Overcast stitch or serged finish
- Topstitching: Straight stitch with slightly longer length
Home décor projects:
- Curtains: Straight stitch seams, blind hem for panels
- Pillows: Straight stitch construction, decorative stitches for embellishment
- Upholstery: Heavy-duty straight stitch, reinforced seams
Quilting projects:
- Piecing: Short straight stitch (2-2.5mm)
- Quilting: Straight stitch or decorative patterns
- Binding: Straight stitch attachment, blind stitch finish
Fabric-Specific Recommendations
Understanding your fabric helps you choose appropriate stitches:
Woven fabrics (cotton, linen, silk):
- Straight stitch for most construction
- Overcast edges to prevent fraying
- Standard needle and thread combinations
Knit fabrics (jersey, rib, interlock):
- Narrow zigzag or stretch stitches
- Ballpoint needles essential
- Twin needle for professional hems
Stretch fabrics (lycra, spandex blends):
- Lightning stitch or narrow zigzag
- Lower tension settings
- Test stitch elasticity on scraps
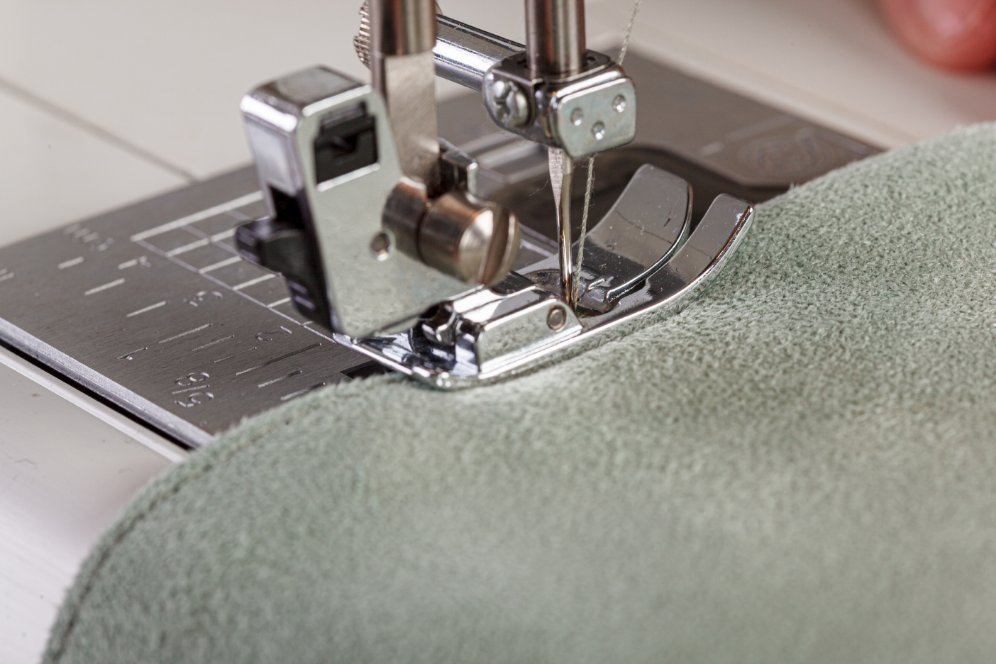
Heavy fabrics (denim, canvas, upholstery):
- Longer straight stitches (3-4mm)
- Heavy-duty needles (100/16 or larger)
- Consider triple straight stitch for reinforcement
Frequently Asked Questions
What is the most common stitch on a sewing machine?
The straight stitch is by far the most common and frequently used stitch. It’s suitable for about 80% of all sewing tasks, from basic seam construction to topstitching and hemming.
What is the most basic sewing stitch?
The straight stitch is the most basic machine stitch. It’s the foundation of most sewing projects and the first stitch beginners should master.
What stitch setting should I use for hemming?
For most hemming, use a blind hem stitch with appropriate hem foot. For casual hems, a straight stitch works well. The stitch length should be 2.5-3mm for medium-weight fabrics.
When should you use a zigzag stitch?
Use zigzag stitches when working with stretch fabrics, finishing raw edges, creating buttonholes, or when you need the seam to have some give. It’s also essential for appliqué work and mending.
How to set up a sewing machine for hemming?
1. Install blind hem foot or regular presser foot
2. Set machine to blind hem stitch or straight stitch
3. Adjust stitch length to 2.5-3mm
4. Test tension on fabric scraps
5. Mark hem allowance accurately before stitching
What is the strongest stitch for hemming?
The blind hem stitch provides the strongest, most professional hem finish. For extra durability on heavy-use items, consider a double-fold hem with straight stitching.
What is the lock stitch in hemming?
A lock stitch secures the beginning and end of your stitching line. Many machines have an automatic lock stitch function, or you can backstitch 3-4 stitches to secure the threads.
What kind of sewing machine do I need to hem pants?
Any basic sewing machine with a straight stitch can hem pants. A blind hem stitch and corresponding presser foot will give more professional results. For best results, choose a machine with adjustable stitch length and good stitch quality.
What is an overlock stitch?
An overlock stitch trims the fabric edge while simultaneously stitching and finishing it. True overlock stitches are created on serger machines, but many sewing machines offer overlock-style stitches that mimic this function.
What is a triple stitch on a sewing machine?
A triple stitch creates extra-strong seams by stitching forward, backward, then forward again in the same location. This reinforcement makes it ideal for stress points and stretch fabrics where regular seams might break.
Conclusion
Mastering sewing machine stitches transforms your projects from amateur attempts to professional-quality results. While the variety of available stitches might seem overwhelming initially, remember that most sewing can be accomplished with just a few essential stitches: straight stitch, zigzag, and blind hem.
Essential recommendations for stitch success:
Start with the basics: Master the straight stitch and zigzag before exploring decorative options. These two stitches handle 90% of most sewing projects effectively.
Match stitches to fabric properties: Cotton fabrics work well with straight stitches, while stretchy fabrics require zigzag or specialized stretch stitches. Understanding fabric behavior prevents seam failure and frustration.
Prioritize proper setup over advanced features: Correct needle selection, appropriate thread, and proper threading technique matter more than having dozens of decorative stitches. A well-maintained machine with basic stitches outperforms a feature-rich machine that’s poorly maintained.
Test before committing: Always test stitch settings on fabric scraps that match your project. This simple step prevents costly mistakes and helps you achieve optimal results.
Address problems systematically: When stitches look wrong, follow the troubleshooting flowchart. Most issues stem from threading problems, dull needles, or maintenance needs rather than complex tension adjustments.
Invest in regular maintenance: Clean your machine regularly and schedule annual professional servicing. Well-maintained machines produce consistent, beautiful stitches and last significantly longer.
Build skills gradually: Don’t feel pressured to use every stitch your machine offers. Focus on perfecting essential techniques before exploring decorative options. Quality execution of basic stitches impresses more than poorly executed complex ones.
Choose quality materials: Good thread, appropriate needles, and suitable fabric combinations create better results than expensive machines with poor materials. Invest in quality basics for consistent success.
Remember that becoming proficient with sewing machine stitches is a journey, not a destination. Each project teaches new skills and builds confidence. Start with simple projects using basic stitches, then gradually incorporate new techniques as your abilities grow.
Whether you’re learning to sew for the first time or expanding your skills, understanding when and how to use different stitches elevates your work. Focus on precision, practice regularly, and don’t hesitate to experiment on scraps. Your growing expertise with machine stitches will unlock endless creative possibilities in your sewing journey.