Master the art of dressmaking with this comprehensive tutorial covering everything from fabric selection to professional finishing techniques
Table of Contents
- Getting Started with Dress Sewing
- Essential Materials and Tools
- Selecting and Preparing Your Pattern
- Fabric Preparation and Cutting
- Step-by-Step Dress Construction
- Installing Closures and Zippers
- Professional Finishing Techniques
- Fitting and Adjustments
- Common Problems and Solutions
- Design Principles for Dress Making
- Special Considerations and Advanced Techniques
- Frequently Asked Questions
- Conclusion
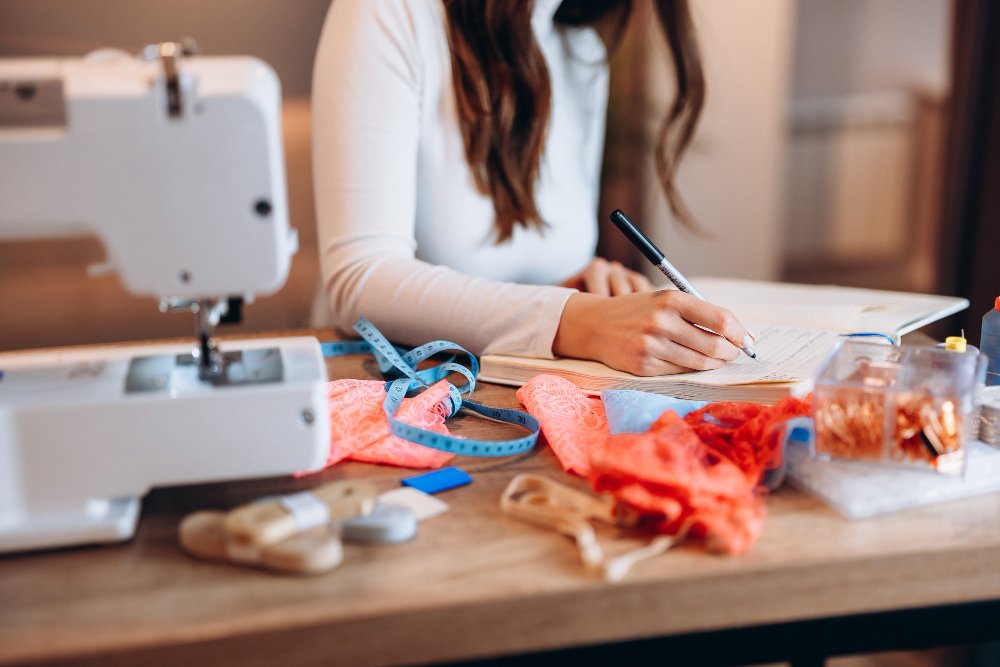
Getting Started with Dress Sewing
Sewing your own dress gives you complete control over fit, style, and fabric choice while saving money compared to purchasing ready-made garments. You can successfully create a beautiful dress even as a beginner by choosing the right pattern, selecting appropriate fabric, and following systematic construction steps.
Starting with the right materials and tools sets the foundation for your success. You’ll need to select a beginner-friendly pattern that matches your skill level and choose fabric that works well with both the pattern requirements and your sewing abilities. Stretchy knits and cotton blends offer forgiveness for new sewers while still producing professional-looking results.
What is the First Step in Making a Dress?
The first step in making a dress is planning your project. This involves selecting a suitable pattern, choosing appropriate fabric, and gathering all necessary tools and supplies. Never start cutting fabric without a clear plan and proper preparation.
Dressmaking Process Overview
What is the Easiest Dress to Make?
The easiest dress styles for beginners include:
- Shift Dress: Simple rectangle shape with minimal fitting
- A-line Dress: Fitted bodice with flared skirt
- Wrap Dress: Forgiving fit with adjustable waist
- Tunic Dress: Loose-fitting with straight seams
How Many Hours Does it Take to Sew a Simple Dress?
For beginners, expect to spend 6-12 hours total on your first dress, spread over several sessions. This includes cutting time (1-2 hours), construction (4-8 hours), and finishing details (1-2 hours). Advanced sewers can complete simple dresses in 3-5 hours.
How to Start Dressmaking for Beginners?
Begin with simple patterns from established companies like Butterick, Simplicity, or McCall’s. Choose styles with 4-6 pattern pieces maximum and avoid complex details like princess seams or multiple closures. Start with stable fabrics like cotton and gradually work up to more challenging materials.
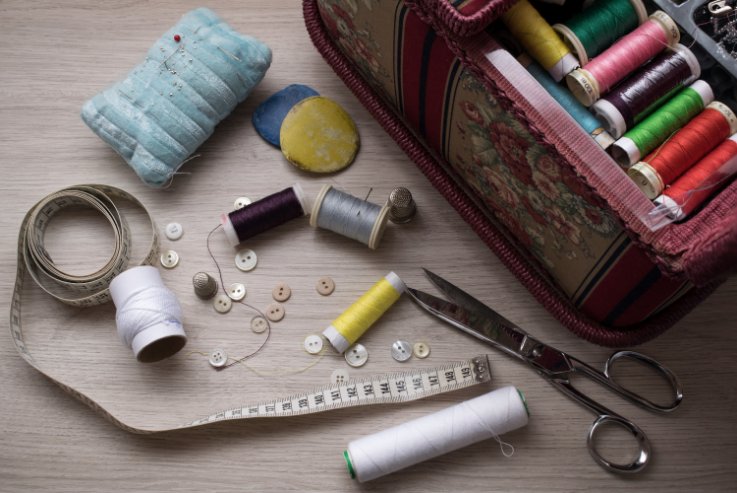
Essential Materials and Tools

Success in dress making starts with having the right equipment and materials on hand. A well-equipped workspace with quality tools and appropriate fabrics sets the foundation for professional-looking results.
What Does a Beginner Need to Start Sewing?
Essential items include: a reliable sewing machine, sharp scissors, measuring tape, pins, seam ripper, iron, and basic hand sewing needles. Start with these basics before expanding your tool collection.

Video: Essential Sewing and Dressmaking Tools for Beginners
Essential Sewing Tools
Your sewing machine is the most important tool for dress construction. It should handle various fabric types and provide consistent stitching for seams, hems, and topstitching.
Cutting Tools
Sharp fabric scissors or rotary cutter with cutting mat ensure clean, precise cuts. A rotary cutter works especially well for straight edges.
Measuring Tools
Measuring tape for body measurements, seam gauge for precise marking, and rulers for straight lines.
Marking Tools
Tailor’s chalk, fabric markers, and tracing wheels for transferring pattern markings to fabric.
Pressing Equipment
Iron and ironing board are essential for pressing seams and creating professional finishes throughout construction.
Choosing the Right Fabric
Fabric selection can make or break your project. Cotton fabrics offer stability and ease of sewing for beginners. They press well and hold their shape during construction.
What Fabrics Work Best for Dresses?
The best fabric depends on your dress style and skill level:
- Beginners: Cotton, cotton blends, stable knits
- Casual dresses: Jersey, ponte knits, cotton voile
- Formal dresses: Silk, crepe, fine woolens, lace fabrics
- Summer dresses: Linen, cotton lawn, rayon challis
Cotton Blends
Stable, easy to sew, holds shape well. Perfect for structured dresses and beginners. Available in countless colors and prints.
Jersey Knits
Stretchy, comfortable, forgiving of fitting issues. Great for casual dresses but requires special handling techniques.
Linen
Breathable, natural texture, perfect for summer dresses. Can be challenging for beginners due to fraying.
Rayon
Drapes beautifully, adds elegance to dress designs. Requires careful handling and pressing techniques.
Fabric Quantity Guidelines
| Fabric Width | Size XS-M | Size L-XL | Size XXL+ |
|---|---|---|---|
| 44-45 inches | 2-2.5 yards | 2.5-3 yards | 3-3.5 yards |
| 58-60 inches | 1.5-2 yards | 2-2.5 yards | 2.5-3 yards |
Recommended Notions and Supplies
Thread should match your fabric color closely. Purchase quality thread that won’t break during sewing or washing. Interfacing adds structure to necklines, armholes, and waistbands. Choose fusible interfacing that matches your fabric weight.
Selecting and Preparing Your Pattern

Choosing the right pattern sets the foundation for your dress project, while proper preparation ensures accurate construction. Pattern preparation involves transferring markings and making necessary adjustments before cutting fabric.
Do You Need a Pattern to Sew a Dress?
While it’s possible to sew without a pattern using existing garments as templates, patterns provide crucial guidance for beginners. They include important details like seam allowances, construction order, and fitting information that ensure success.
Finding the Right Dress Pattern
Commercial patterns offer the most comprehensive instructions and detailed sizing charts. Look for patterns labeled “easy” or “beginner” if you’re starting out. These typically feature minimal pieces, simple construction methods, and clear instructions.
Reading and Understanding Patterns
Pattern envelopes contain essential information including fabric suggestions, yardage charts, and finished measurements. Study these details before purchasing to ensure the pattern matches your project goals.
Pattern pieces include cutting lines, grainline arrows, notches, and construction markings. Grainlines must align with your fabric’s grain for proper drape and fit. Understanding pattern symbols is crucial for successful construction.
What Does “Grain” Mean in Sewing?
Grain refers to the direction of threads in woven fabric. The lengthwise grain runs parallel to the selvage and has minimal stretch. The crosswise grain runs perpendicular to the selvage and has slight stretch. The bias grain runs at a 45-degree angle and has maximum stretch and drape.
Sizing and Measurements
Sizing differs from ready-to-wear clothing. Measure your bust, waist, and hips, then compare to the pattern’s size chart. Choose your size based on the largest measurement and plan to adjust other areas if needed.
Important: Always make a test garment (called a “muslin” or “toile”) from inexpensive fabric before cutting your final fabric, especially for fitted styles.
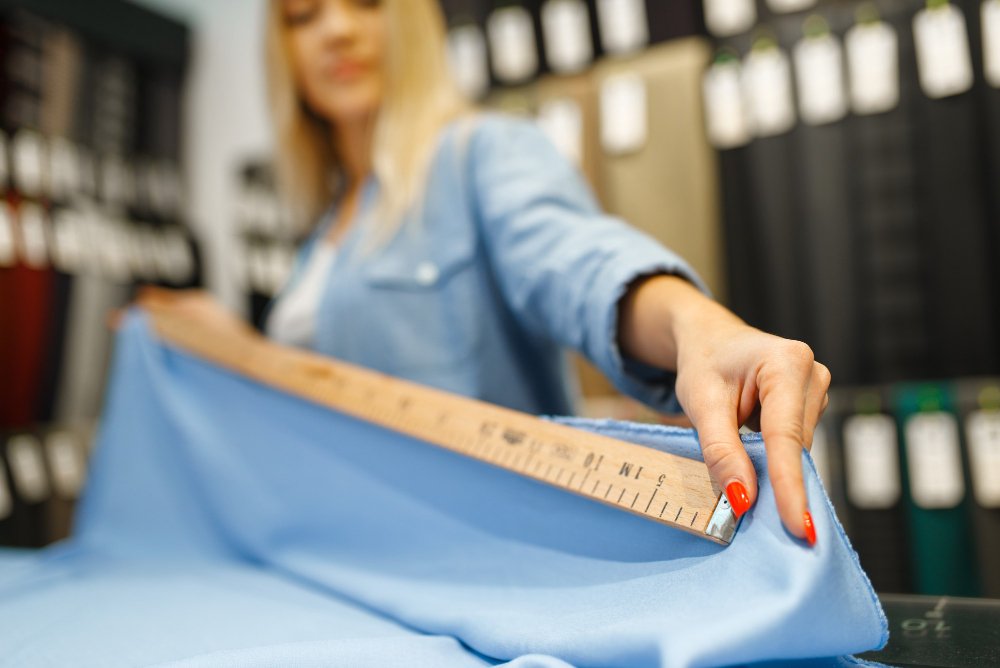
Fabric Preparation and Cutting

Proper preparation of fabric and pattern pieces forms the foundation of successful dressmaking. Pre-washing prevents shrinkage issues, accurate cutting ensures proper fit, and clear markings guide precise construction.
Pre-Washing and Preparing Fabric
Pre-wash all fabrics containing natural fibers like cotton, linen, viscose, or Tencel before cutting. These materials can shrink during their first wash, causing your finished dress to no longer fit properly.
- Wash your fabric using the same method you plan to use for the finished garment
- Use similar water temperature and detergent type
- Dry the fabric completely after washing
- Press the fabric thoroughly before cutting to remove all wrinkles
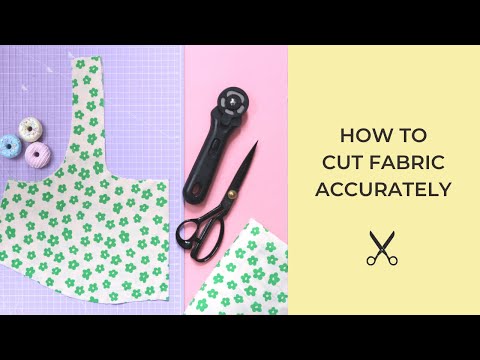
Video: Tips for Cutting Fabric Accurately – Essential steps for pre-washing fabric, checking grain, and using pattern weights for clean cuts
What Does “Cut and Sew” Mean?
“Cut and sew” refers to the traditional method of garment construction where fabric pieces are cut from patterns, then sewn together to create the finished garment. This differs from ready-to-wear manufacturing processes.
What are the Steps in Cut and Sew?
Laying Out and Cutting Fabric
Study your pattern’s cutting layout diagram carefully. This shows the most efficient arrangement of pattern pieces on your fabric width. For detailed guidance on fabric cutting techniques, check out our comprehensive fabric cutting guide.
What Does Clipping Mean in Sewing?
Clipping refers to making small cuts in the seam allowance to help curved seams lie flat. Clip perpendicular to the stitching line, cutting close to but not through the stitches. This is essential for necklines, armholes, and other curved areas.
Marking Pattern Details
Transfer all pattern markings to your fabric pieces immediately after cutting. Mark darts, notches, buttonholes, and construction lines accurately using appropriate marking tools for your fabric type.
Step-by-Step Dress Construction

The construction process involves critical elements that determine your dress fit and finish. Proper dart placement creates shape, secure shoulder seams provide structure, and clean neckline facing ensures a professional appearance.
What is the Easiest Piece of Clothing to Start Sewing?
The easiest garments for beginners are simple tops, tote bags, or pillowcases. However, a basic shift dress or tunic-style dress can also be an excellent first garment project due to its straight seams and minimal fitting requirements.
What’s the Easiest Sewing Project for Beginners?
Start with easy sewing projects like tote bags, pillowcases, simple skirts, and basic tops. These projects use straight seams and minimal fitting.
Sewing Bust Darts and Shaping
Bust darts create the three-dimensional shape your dress needs to fit properly around your torso. Mark your dart points carefully using your pattern pieces as a guide.

Video: How to Sew Darts | Beginner & Advanced – Master dart construction with professional techniques
Press bust darts toward the center front or downward, depending on your pattern instructions and dart placement.
How to Start a Basic Sew?
Always start with a few practice stitches on fabric scraps to check your tension and stitch quality. Begin sewing with a backstitch or lockstitch, then proceed with your chosen stitch length. Maintain consistent speed and guide the fabric gently.
Assembling Shoulder Seams
Shoulder seams bear significant stress and require careful attention to seam construction. These seams connect the front and back bodice pieces at your shoulders.
Attaching Neckline Facing
Neck facings create a clean, finished edge around your neckline while hiding raw fabric edges. The facing is typically cut from the same fabric as your dress.
Installing Closures and Zippers

Proper closure installation is what separates amateur work from professional results. Whether you’re adding zippers, buttons, or other closures, precision and technique matter.
Zipper Installation for Beginners
Zippers may seem intimidating, but with the right approach, they become manageable. Start with a simple centered zipper in a back seam before attempting invisible or side zippers.

Video: How to sew a zipper step-by-step – Complete guide with tips for avoiding common mistakes and achieving professional results
Button and Buttonhole Placement
Proper button placement ensures your dress closes smoothly and looks professional. Mark buttonhole positions carefully before sewing.
Button Spacing Tip: Space buttons 2-4 inches apart depending on the garment style. Always place buttons at points of stress like the bust and waist.
Alternative Closure Options
For beginners, consider these easier closure alternatives:
- Snap closures: Quick to install, invisible from the right side
- Hook and eye closures: Perfect for necklines and waistbands
- Tie closures: No hardware required, adjustable fit
- Wrap style: Self-closing design with no additional hardware
Professional Finishing Techniques

The difference between a homemade look and a professional finish lies in the details. Proper seam finishing, hemming, and pressing techniques elevate your dress from amateur to expert level.
How Do I Finish Seams on a Dress?
Seam finishing prevents fraying and creates a professional interior. Choose your finishing method based on fabric type and desired durability:
Serged Finish
Best for knits and casual fabrics. Requires a serger machine but creates the most professional edge.
Zigzag Stitch
Good alternative without a serger. Use a narrow zigzag stitch close to the raw edge.
French Seams
Ideal for lightweight or sheer fabrics. French seams enclose raw edges completely.
Bound Seams
Perfect for unlined formal dresses. Bound seam finishing creates couture-level results.
Professional Hemming Techniques
A well-executed hem can make or break the look of your dress. The hemming method you choose should complement your fabric and dress style.
For detailed hemming instructions for different fabric types, visit our comprehensive guide on sewing perfect hems.
Final Pressing and Steaming
Proper pressing throughout the construction process is crucial for professional results. Always press seams as you sew them, and give your finished dress a final pressing before wearing.
Pressing Tips: Use appropriate heat settings for your fabric type. Always test on a scrap first. Use a pressing cloth for delicate fabrics to prevent shine or damage.
Fitting and Adjustments

Getting the perfect fit is what transforms a sewn garment into a dress that looks custom-made for you. Understanding basic fitting principles and adjustment techniques is essential for successful dressmaking.
Taking Accurate Body Measurements
Accurate measurements are the foundation of good fit. Take measurements over form-fitting undergarments you plan to wear with the dress.
| Measurement | How to Measure | Tips |
|---|---|---|
| Bust | Around fullest part of bust | Keep tape parallel to floor |
| Waist | Around natural waistline | Bend side to side to find natural waist |
| Hips | Around fullest part of hips | Usually 7-9 inches below waist |
| Length | From shoulder to desired hem | Wear shoes you’ll wear with dress |
Common Fitting Issues and Solutions
Even with careful measurement, adjustments are often needed. Here are common fitting problems and their solutions:
Gaping Neckline
Problem: Neckline stands away from body
Solution: Take in shoulder seams or add darts
Tight Across Bust
Problem: Pulling across chest area
Solution: Let out side seams or add bust darts
Loose at Waist
Problem: Excess fabric at waistline
Solution: Take in side seams or add waist darts
Uneven Hem
Problem: Hem hangs unevenly
Solution: Re-measure and mark while wearing
What is a “Sloper” Pattern Used For?
A sloper (also called a basic block) is a fitted pattern piece with no design details, used as a foundation for creating other patterns. It’s custom-fitted to your measurements and serves as a starting point for design variations.
Can You Teach Yourself Dressmaking?
Absolutely! With quality resources, practice, and patience, you can teach yourself dressmaking. Start with simple projects, invest in good tools, and don’t be afraid to make mistakes. Online tutorials, books, and sewing communities provide excellent learning support.
Common Problems and Solutions

Every sewist encounters challenges. Learning to troubleshoot common problems saves time and frustration while improving your skills.
Sewing Machine Issues
Machine problems can derail your project quickly. For comprehensive troubleshooting, check our sewing machine troubleshooting guide.
Skipped Stitches
Causes: Wrong needle, incorrect threading
Solution: Change needle, rethread machine
Puckered Seams
Causes: Tension too tight, wrong stitch length
Solution: Adjust tension, increase stitch length
Thread Breaking
Causes: Old thread, rough needle
Solution: Use fresh thread, change needle
Uneven Stitching
Causes: Inconsistent speed, poor fabric guidance
Solution: Maintain steady pace, guide gently
Fabric-Related Problems
Different fabrics present unique challenges. Understanding your fabric’s properties helps prevent problems.
Construction Mistakes
When mistakes happen, don’t panic. Most construction errors can be fixed with patience and the right approach.
Do You Sow or Sew Clothes?
The correct term is “sew” clothes. “Sow” refers to planting seeds. This common confusion stems from the different pronunciations of similar spellings in English.
Design Principles for Dress Making
What are the 5 Principles of Design Dress?
The five key principles of dress design are:
- Balance: Visual weight distribution throughout the garment
- Proportion: Relationship between different parts of the dress
- Emphasis: Focal points that draw the eye
- Unity: Cohesive overall appearance
- Rhythm: Visual flow and movement in the design
What are the 7 Basic Principles of Design?
The seven fundamental design principles include the five above plus:
- Contrast: Differences in color, texture, or shape that create interest
- Movement: How the eye travels through the design
What are the Three Types of Design in Dress Making?
Dress design falls into three main categories:
- Structural Design: The basic silhouette and construction lines
- Decorative Design: Surface embellishments like embroidery or trim
- Functional Design: Practical elements like pockets and closures
How to Design a Dress for Beginners Step by Step?
What is the Five Outfit Rule?
The five outfit rule suggests that a versatile piece should be able to create at least five different looks. For dresses, this means considering how to style them differently with accessories, layers, and shoes.
What are the Four Basic Design Rules?
The four fundamental design rules are:
- Contrast: Create visual interest through differences
- Repetition: Repeat elements to create unity
- Alignment: Line up elements for organization
- Proximity: Group related elements together
What is a Blank in Fashion? A blank refers to a basic, undecorated garment that serves as a foundation for adding design elements, similar to how artists use a blank canvas.
Special Considerations and Advanced Techniques

What do Seamstresses Sew?
Professional seamstresses work on a wide variety of garments including everyday clothing, formal wear, alterations, home decor items, and specialty pieces like costumes and flower girl dresses.
For comprehensive sewing education and free patterns, Mood Fabrics offers excellent sewing tutorials ranging from basic techniques to advanced construction methods. Their extensive collection includes beginner-friendly projects and detailed instructional content.
Working with Special Fabrics
Some fabrics require special handling techniques:

Video: 4 Tips to Tame ANY Difficult Fabric – Professional techniques for handling challenging materials
Stretch Fabrics
Use ballpoint needles, stretch stitches, and don’t over-stretch while sewing. Allow fabric to relax before cutting.
Slippery Fabrics
Use sharp pins, tissue paper between layers, and consider hand-basting for accuracy.
Sheer Fabrics
Use French seams or enclosed seams, fine needles, and consider lining for opacity.
Heavy Fabrics
Use appropriate needle size, longer stitches, and consider grading seam allowances to reduce bulk.
Understanding Seam Allowances
Seam allowances are crucial for proper fit and construction. Standard allowances are 5/8 inch for most garments, but this can vary. Check our guide on seam allowances for detailed information.
The Sewing & Craft Alliance provides comprehensive educational resources including their SEW-lutions Guidelines, which cover all aspects of sewing from beginner instructions to advanced techniques. For additional learning support, Singer’s official website offers machine tutorials, maintenance guides, and educational content for sewers of all skill levels.
Frequently Asked Questions
The easiest sewing projects for beginners include tote bags, pillowcases, simple skirts, and basic tops. These projects use straight seams and minimal fitting. For more ideas, check out our easy sewing projects guide.
Cotton and cotton blends are ideal for beginners making simple dresses. They’re stable, easy to work with, press well, and available in many colors and patterns. Avoid stretchy or slippery fabrics until you gain more experience.
For beginners, expect 8-15 hours total, spread over several sessions. This includes pattern preparation (1-2 hours), cutting (1-2 hours), construction (5-10 hours), and finishing (1-2 hours). Experience significantly reduces this time.
No, you can start with basic equipment: a reliable sewing machine, sharp scissors, measuring tape, pins, and an iron. Invest in quality tools gradually as your skills and interest develop. Check our essential sewing supplies guide for recommendations.
Yes, basic pattern alterations include lengthening or shortening, adjusting width at waist or hips, and modifying necklines. Start with simple adjustments and consider taking a pattern alteration class for complex changes.
Try the dress on inside-out and pin adjustments. Common fixes include taking in or letting out side seams, adjusting shoulder seams, or adding darts. For major fit issues, consider it a learning experience and focus on prevention in your next project.
Measure your bust, waist, and hips, then compare to the pattern’s size chart. Choose the size that matches your largest measurement and plan to adjust other areas if needed. Pattern sizes often differ from ready-to-wear sizes.
Woven fabrics have no stretch and create structured dresses with crisp lines. Knit fabrics stretch and conform to the body, creating comfortable, form-fitting dresses. Beginners should start with stable woven fabrics.
Conclusion
Learning to sew your own dress is a rewarding journey that combines creativity, technical skill, and personal expression. Throughout this comprehensive guide, we’ve covered every aspect of dress construction, from selecting the perfect beginner-friendly pattern to mastering professional finishing techniques that will make your handmade dress indistinguishable from store-bought garments.
The key to successful dressmaking lies in understanding that every expert seamstress was once a beginner. Start with simple patterns and forgiving fabrics like cotton blends, invest in quality basic tools, and most importantly, embrace the learning process. Each mistake teaches valuable lessons that improve your skills for future projects.
Essential Takeaways for Success
Remember these crucial points:
- Always pre-wash your fabric to prevent shrinkage surprises
- Take accurate body measurements and choose pattern sizes accordingly
- Press as you sew for professional-looking results
- Start with simple designs and gradually work up to complex projects
- Don’t rush the process – quality takes time and patience
Building Your Sewing Skills
Use this guide as your foundation, but remember that sewing skills develop through practice. Start with our recommended easy sewing projects to build confidence before tackling more complex dress designs. Consider joining local sewing circles or online communities where you can share experiences and learn from other sewists.
As you progress, you’ll discover that sewing your own dresses offers incredible freedom. You control the fit, fabric quality, design details, and can create garments that perfectly match your personal style and body shape. The sustainability aspect is equally rewarding, as you reduce dependence on fast fashion while creating lasting, quality pieces for your wardrobe.
Next Steps in Your Sewing Journey
Once you’ve completed your first dress successfully, consider expanding your skills with these progressions:
- Try different dress silhouettes like wrap dresses or fit-and-flare styles
- Experiment with different fabric types to understand their unique properties
- Learn advanced techniques like invisible zippers or professional lining methods
- Explore pattern modifications to customize designs to your preferences
- Consider taking classes to learn specialized skills like pattern drafting
Remember, every professional designer and seamstress started exactly where you are now. With dedication, practice, and patience, you’ll develop the skills to create beautiful, well-fitted dresses that reflect your personal style and provide years of wearing pleasure. The journey from beginner to confident dressmaker is filled with small victories and continuous learning that makes every completed project deeply satisfying.
Take pride in each step of your progress, celebrate your successes, and view challenges as opportunities to grow. Your handmade dress represents not just a garment, but a testament to your creativity, patience, and developing craftsmanship. Welcome to the wonderful world of dressmaking!