Everything you need to know about choosing, sewing, and caring for this delicate embroidered eyelet fabric
What is Broderie Anglaise Fabric?
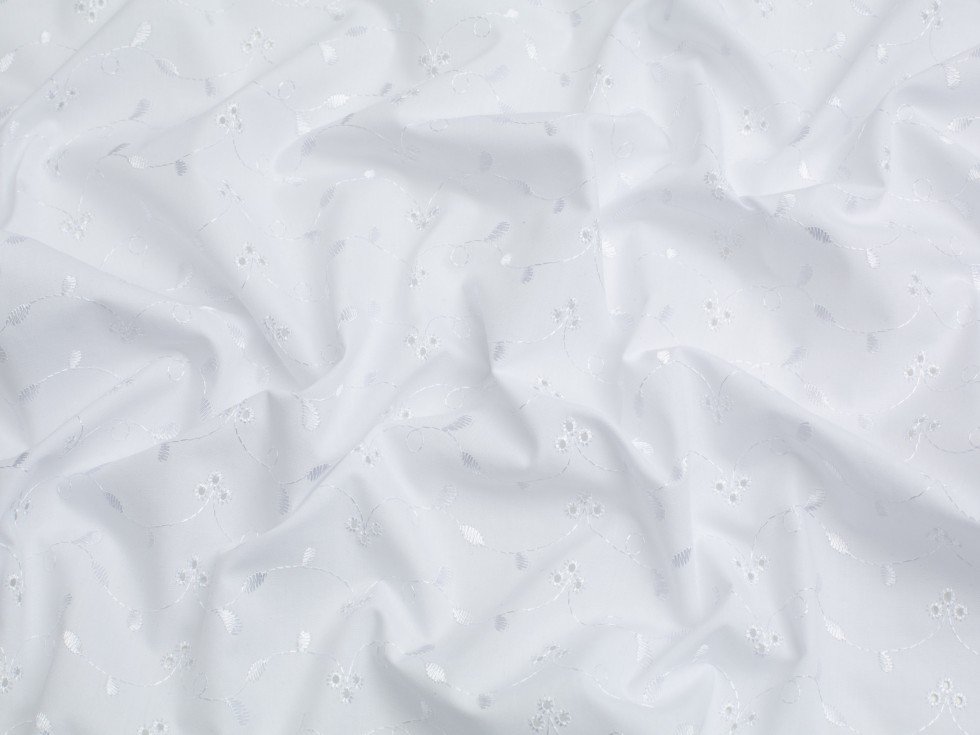
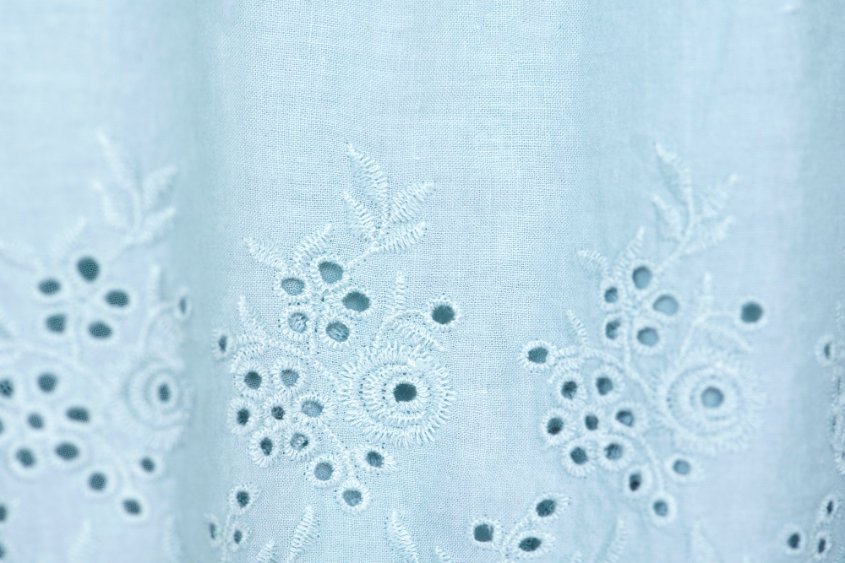
Broderie anglaise is a type of whitework embroidery that features decorative cutout patterns, typically floral designs, bounded by intricate stitching. The name translates from French as “English embroidery,” though the technique actually originated in 16th-century Eastern Europe, likely in what is now the Czech Republic.
The defining feature of broderie anglaise is its eyelets (small round or oval holes) that are cut into the fabric and then carefully overstitched with buttonhole or satin stitches. These openwork details create a delicate, lacy appearance while maintaining the fabric’s structural integrity.
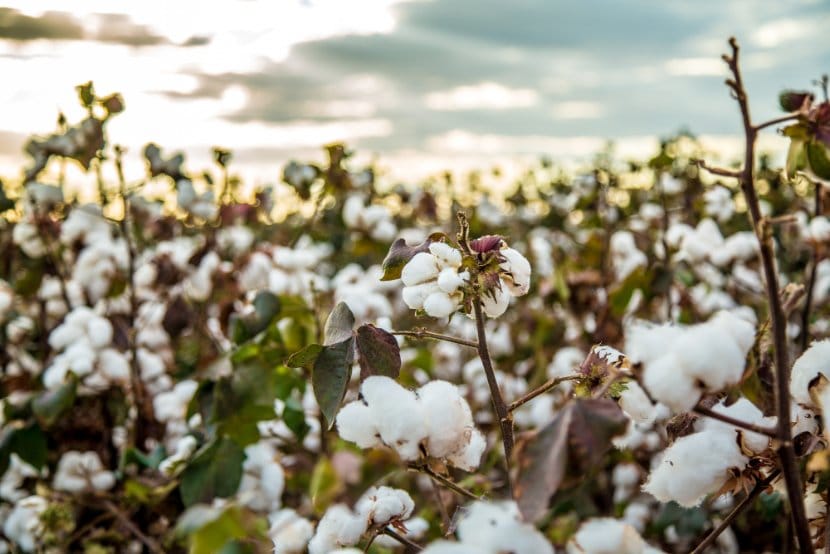
Most broderie anglaise fabrics today are made from 100% cotton, though you’ll also find cotton blends with viscose, linen, or polyester. The base fabric is typically a lightweight cotton lawn, voile, or batiste, which provides the perfect foundation for the embroidered details.
Broderie anglaise is also known as eyelet fabric, Swiss embroidery, or madeira embroidery, depending on the region and specific style variations.
Is Broderie Anglaise the Same as Eyelet?
Yes, broderie anglaise and eyelet fabric refer to the same thing. In North America, you’ll commonly hear it called “eyelet fabric,” while “broderie anglaise” is the term used in Europe and other parts of the world. Both describe fabric with embroidered holes as the main decorative element.
What Does Broderie Mean?
The word “broderie” is French for “embroidery.” When you see terms like “broderie perse” (Persian embroidery) or “Swiss broderie,” they all refer to different styles of embroidered needlework.
History and Heritage
While broderie anglaise became famous in England during the Victorian era (1840-1880), its roots trace back much further. The technique likely developed in Eastern European countries during the 16th century, where skilled artisans created intricate whitework embroidery by hand.
The craft gained its English association because of its explosive popularity in 19th-century Britain. Victorian women used broderie anglaise extensively for undergarments, children’s clothing, and decorative household linens. The delicate patterns symbolized refinement and domestic skill.
Before the 1870s, all broderie anglaise was painstakingly created by hand, with needleworkers spending hours punching holes and overstitching edges. The invention of machine embroidery revolutionized production, making the fabric accessible to a broader audience.
Today, nearly all commercial broderie anglaise is machine-made, though hand embroidery traditions continue in some regions. Modern production uses laser-guided technology to recreate historic patterns with precise accuracy. You can learn more about embroidery styles and their history at the Victoria and Albert Museum.
Is Broderie Anglaise French?
The name is French, but the technique itself is not specifically French. “Broderie anglaise” literally means “English embroidery” in French, referring to how popular this style became in England. According to Encyclopedia Britannica, the actual origins lie in Eastern Europe during the 16th century. Similar techniques appeared across multiple cultures, including Indian chikankari embroidery.
Types and Variations
Broderie anglaise comes in several styles, each suited to different projects and preferences.
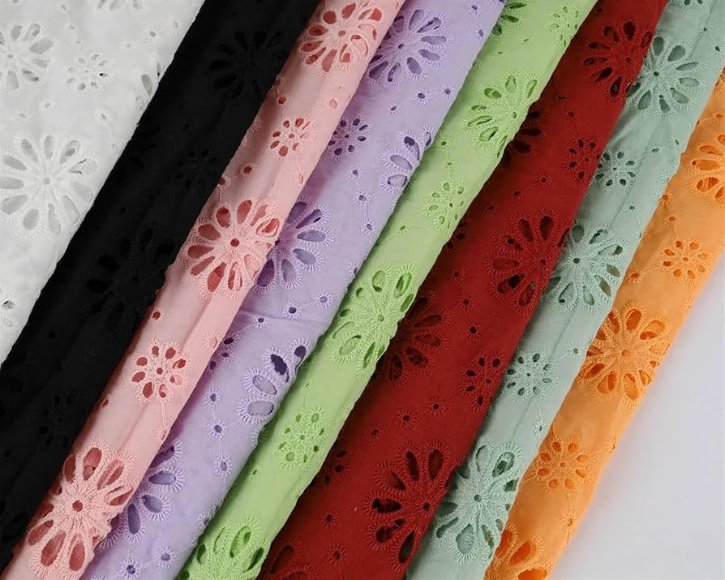
Color Variations and Patterns
While classic white remains the most popular choice, modern broderie anglaise is available in a rainbow of colors. You’ll find everything from soft pastels to vibrant jewel tones.
Popular color options include:
- White: Traditional and versatile, perfect for summer dresses and heirloom projects
- Ivory and cream: Softer alternatives to bright white, ideal for vintage-inspired pieces
- Pastels: Light pink, baby blue, mint green, and lavender for delicate children’s wear
- Bold colors: Navy, coral, sage green, and even black for contemporary fashion
- Printed bases: Some broderie anglaise features colored embroidery on printed fabric backgrounds
Pattern styles vary from tiny scattered eyelets to large floral medallions. Common designs include:
- Small geometric patterns with evenly spaced eyelets
- Floral motifs with leaves and vines
- Scalloped borders along one or both selvages
- All-over designs covering the entire fabric surface
- Border prints with embroidery concentrated along one edge
Fabric Composition
The base fabric determines how your broderie anglaise will behave during sewing and wearing.
| Composition | Characteristics | Best For |
|---|---|---|
| 100% Cotton | Breathable, natural drape, may wrinkle easily | Summer dresses, children’s wear, baby clothes |
| Cotton-Polyester Blend | Wrinkle-resistant, more structure, less breathable | Travel clothing, easy-care garments |
| Cotton-Viscose Blend | Soft drape, slight sheen, delicate | Flowing dresses, blouses |
| Cotton-Linen Blend | Textured, crisp, very breathable | Structured garments, home decor |
Most cotton fabrics used for broderie anglaise are lightweight, ranging from 2-5 oz per square yard. The embroidery thread is often synthetic (polyester) even when the base is cotton, providing durability and color fastness.
What Fabric Has Holes in It?
Several fabric types feature decorative holes, but they differ from broderie anglaise:
- Broderie anglaise: Holes are created by cutting fabric and overstitching edges
- Cutwork embroidery: Similar to broderie anglaise but with more elaborate patterns and larger cutout areas
- Eyelet lace: Can refer to both broderie anglaise and other hole-punched fabrics
- Mesh or netting: Holes are part of the weave structure, not embroidered
- Laser-cut fabric: Modern technique using lasers to create precise holes
What is the Difference Between Cutwork and Broderie Anglaise?
Both techniques involve cutting holes in fabric and finishing the edges, but cutwork embroidery typically features larger, more complex patterns with extensive surface embroidery connecting the cutout areas. Broderie anglaise tends to have smaller, more uniform eyelets with simpler connecting stitches. Think of cutwork as the more elaborate cousin of broderie anglaise.
How to Choose Broderie Anglaise
Selecting the right broderie anglaise for your project involves considering several factors:
Fabric Width
Common widths range from 44 to 58 inches (110-150 cm). Wider fabrics reduce seams in larger projects like dresses or skirts. Narrower widths work well for trim, collars, and small accessories.
Pattern Scale
Match pattern size to your project. Large-scale embroidery makes a statement on dresses and skirts, while smaller patterns suit children’s clothing and delicate blouses. Consider how pattern placement will work with your garment pieces.
Border Features
Many broderie anglaise fabrics have decorative scalloped edges along one or both selvages. These pre-finished edges eliminate hemming on sleeves, hems, and necklines. Plan your pattern layout to take advantage of these details.
Quality Indicators
Look for these signs of well-made broderie anglaise:
- Tight, even stitching around all eyelets
- No loose threads or fraying edges
- Smooth, consistent base fabric without pulls
- Clear pattern definition
- Symmetrical designs
Purchase an extra half yard beyond your pattern requirements. Broderie anglaise patterns can make layout tricky, and having extra fabric gives you flexibility for pattern placement and potential mistakes. Use our Fabric Yardage Calculator to determine exactly how much you need.
Complete Sewing Guide
Sewing with broderie anglaise requires some specific techniques, but don’t let that intimidate you. With the right approach, you’ll achieve professional results.
Machine Settings and Tools
Proper machine setup prevents common problems like puckering, skipped stitches, and fabric damage.
Needle Selection
Use a fresh, sharp universal or microtex needle in size 70/10 or 80/12. A sharp point pierces cleanly through the embroidered areas without snagging threads. Replace your needle if you notice any skipped stitches or pulling.
Thread Choice
Select high-quality cotton or polyester thread that matches your fabric color. The thread will show through the eyelets, so color matching matters more than with opaque fabrics.
Stitch Length
Set your machine to a shorter stitch length of about 2.0-2.5mm. This creates more stitches per inch, which helps prevent the fabric from tearing around the holes. The extra stitches also catch more of the fabric between eyelets for stronger seams.
Presser Foot
A standard presser foot works fine, but a walking foot can help prevent puckering, especially on lightweight fabrics. The walking foot feeds the top and bottom layers evenly, reducing shifting.
Tension
Test your tension on scrap fabric before starting your project. You may need to slightly reduce upper tension to prevent puckering. The delicate embroidery can pull if tension is too tight.
Quick Reference: Machine Settings
- Needle: 70/10 or 80/12 sharp
- Thread: Cotton or polyester, color-matched
- Stitch length: 2.0-2.5mm
- Presser foot: Standard or walking foot
- Tension: Standard or slightly reduced
Need help? Check our Needle & Fabric Compatibility Chart for more guidance.
Pre-Sewing Preparation
Identifying Right and Wrong Sides
Look closely at your fabric before cutting. The embroidered areas are slightly raised and smoother on the right side. On the wrong side, you may see rougher stitching, loose thread ends, or a more zigzag appearance to the overcast stitches.
Once you determine which side is which, mark your pattern pieces or use pins to keep track. It’s easy to get confused when all your pieces are cut out.
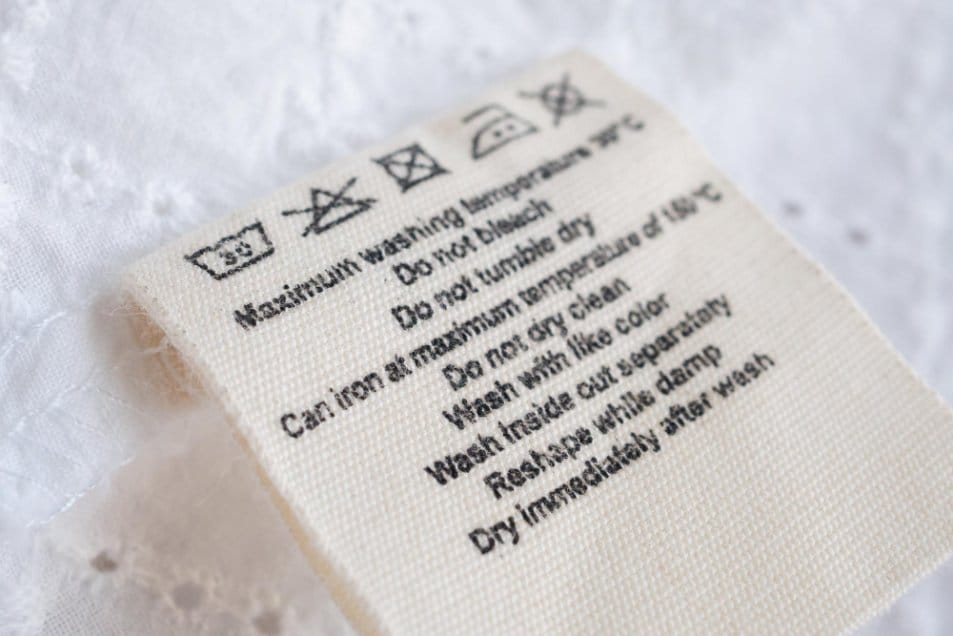
Pre-Washing
Always pre-wash broderie anglaise before cutting. Wash it the same way you plan to care for the finished garment. Most cotton broderie anglaise can be machine washed at 40°C (104°F). This prevents shrinkage after you’ve sewn your project.
Hang to dry or use a low tumble dryer setting. Remove while slightly damp to minimize wrinkles. Don’t skip this step, even if you’re eager to start sewing.
Pattern Placement Tips
Strategic pattern placement makes the difference between a homemade look and a professional finish.
Using Scalloped Edges
If your fabric has scalloped borders, plan to use them as finished edges on hems, sleeves, or necklines. Trace your pattern pieces onto tissue or Swedish tracing paper so you can see through to the fabric underneath. This lets you position scallops exactly where you want them.
Matching Patterns
For garments with visible seams, try to match embroidery patterns across seam lines. This takes extra fabric but creates a more polished look. Pin patterns together before cutting to see how they’ll align.
Avoiding Awkward Placement
Be mindful of where large embroidered motifs fall on the body. You don’t want a big floral medallion centered on your chest or rear. Use that tissue paper trick to preview placement before cutting.
Seam Finishing Techniques
Because the fabric has holes, your seam allowances will be visible. Choose finishing methods that look tidy from both sides.
French Seams
French seams enclose raw edges completely, making them invisible from both sides. They work beautifully for lightweight, unlined broderie anglaise garments.
To sew a French seam:
- Place fabric pieces wrong sides together
- Sew a scant 1/4-inch seam
- Trim to about 1/8 inch
- Press seam to one side
- Fold fabric right sides together, enclosing the raw edges
- Sew again at 3/8 inch from the fold
- Press seam to one side
French seams work best on straight seams and gentle curves. They can be bulky on heavier fabrics or tight curves.
Serged or Overlocked Seams
If you’re lining your garment, a serged seam with matching thread works well. The serging won’t show through as much with a lining underneath. Make sure to use thread that matches your fabric color closely.
After serging, thread the tail ends back up through the serged edge with a hand sewing needle. This prevents them from showing through the eyelets.
Bound Seams
For an elegant finish, bind seam allowances with lightweight bias binding in a matching or contrasting color. This works particularly well on unlined jackets or vests.
Flat-Felled Seams
While less common on delicate fabrics, flat-felled seams can work on heavier broderie anglaise. They create a neat finish visible from both sides, similar to jeans construction.
Special Techniques for Darts and Curves
Sewing Darts in Sheer Fabric
Standard darts look bulky through broderie anglaise. Instead, try French-seamed darts:
- Mark your dart on the wrong side
- Fold fabric wrong sides together along dart center
- Sew 1/4 inch from the edge, tapering at the dart point
- Trim to 1/8 inch
- Open fabric and press dart to one side
- Refold right sides together
- Stitch again, enclosing the raw edge
This creates a narrow, neat dart that doesn’t show through the fabric.
Lining and Underlining
Do You Need to Line Broderie Anglaise?
It depends on your project and desired level of coverage. Lightweight broderie anglaise is often semi-sheer, especially in white or light colors. Lining provides modesty and can simplify construction.
Consider lining when:
- The fabric is very sheer
- You want full coverage
- The garment will receive frequent wear
- You’re making children’s clothing
- The fabric is delicate and needs protection
You can skip lining for:
- Overlay tops worn over camisoles
- Skirts worn with slips
- Home decor items
- Items where sheerness is desired
Best Lining Fabrics
Choose lightweight, breathable linings that complement broderie anglaise’s delicate nature:
- Cotton voile: Soft, breathable, washable
- Cotton lawn: Smooth, lightweight, takes dye well
- Cotton batiste: Fine weave, very soft
- Silk habotai: Luxurious feel for special garments
- Rayon lining: Affordable, smooth, good drape
Avoid heavy or stiff linings that will compete with the fabric’s natural drape.
Lining vs. Underlining
Lining and underlining are different techniques:
Lining: A separate layer sewn independently and attached at edges. The lining and fashion fabric move independently.
Underlining: A support layer basted to each pattern piece before construction. The two layers are treated as one throughout sewing.
Underlining works well with broderie anglaise because it provides built-in modesty without adding bulk. When underlining, you don’t need French seams since the underlining hides seam allowances.
Interfacing
If your pattern requires interfacing for collars, cuffs, or button bands, attach it to the underlining or lining fabric, never directly to broderie anglaise. The heat and adhesive can damage delicate embroidery and create visible marks.
Use lightweight sew-in interfacing or organza for the most invisible support.
Marking Techniques
Traditional marking methods can cause problems on broderie anglaise.
What to Avoid
- Chalk: Gets embedded in embroidered textures and is difficult to remove completely
- Water-soluble pens: May not wash out entirely, especially from synthetic embroidery thread
- Carbon paper: Can leave permanent marks
Best Marking Methods
- Tailor’s tacks: Thread loops that pull out easily after sewing
- Clips or notches: Small cuts in seam allowances to mark positions
- Thread tracing: Running stitches that mark lines and pull out after use
- Pins: For temporary marking during fitting
Always test any marking tool on a scrap of your fabric first.
Watch this comprehensive masterclass on sewing with broderie anglaise fabric, covering everything from pre-washing to finishing techniques:

Project Ideas and Patterns
Broderie anglaise suits many project types. Here are some popular options and pattern recommendations.
Beginner-Friendly Projects
Start with simple patterns if you’re new to sewing broderie anglaise:
- Simple A-line skirts: Minimal shaping and straight seams make these perfect first projects
- Pillowcases: Practice your seaming and hemming on a practical home item
- Tiered sundresses: Gathered tiers hide any fitting issues and require only straight stitching
- Drawstring shorts: Take advantage of scalloped edges for instant hem finishes
- Simple tank tops: Minimal seams and easy construction
Intermediate Projects
Once you’re comfortable with the basics, try these:
- Fitted blouses: Add darts and shaped seams for a polished look
- Wrap dresses: The classic silhouette looks stunning in broderie anglaise
- Children’s dresses: Perfect for special occasions like christenings or flower girl duties
- Midi skirts with pockets: Practical and stylish
- Overlay tops: Wear over camisoles for a romantic layered effect
Advanced Projects
For experienced sewers:
- Structured jackets: Requires careful interfacing and lining techniques
- Wedding or formal dresses: Showcase the fabric’s romantic qualities
- Matching sets: Coordinate tops and bottoms with pattern placement
- Detailed bodices: Include boning, fitted linings, and precise construction
What to Make with Broderie Anglaise Fabric
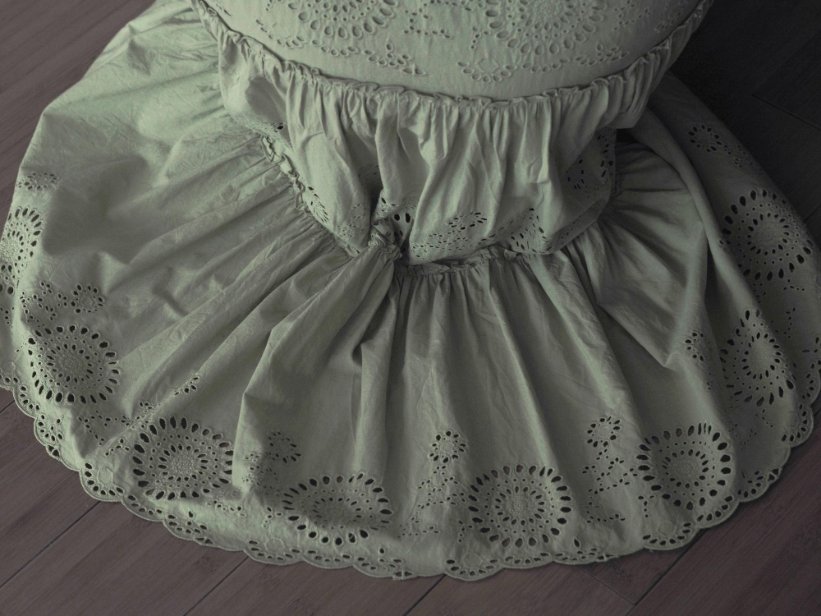
Beyond clothing, broderie anglaise works beautifully for:
- Home decor: Curtains, cushion covers, table runners, and duvet covers
- Accessories: Hair bows, headbands, and scrunchies
- Baby items: Receiving blankets, burp cloths, and bibs
- Crafts: Decorative bunting, gift bags, and fabric journals
Pattern Recommendations
Look for patterns with these features when choosing designs for broderie anglaise:
- Minimal darts or shaped seams (unless you’re experienced)
- Gathered or flowing silhouettes that complement the fabric’s drape
- Opportunities to showcase scalloped edges
- Simple construction without complicated closures
- Designs that work well lined or underlined
Not sure where to start? Try our Interactive Sewing Project Planner to find patterns that match your skill level and available time.
Care and Maintenance
Proper care keeps your broderie anglaise projects looking beautiful for years.
How to Wash Broderie Anglaise
Most cotton broderie anglaise is machine washable, but gentle care preserves the embroidery.
Machine Washing
Follow these steps for best results:
- Sort by color: Wash whites separately from colored items
- Use a delicates bag: Protect garments from snagging in the machine
- Choose gentle cycle: Select a delicate or hand-wash cycle
- Water temperature: Use cool to warm water (30-40°C or 86-104°F)
- Mild detergent: Skip harsh chemicals and fabric softeners
- Avoid bleach: Even on white items, bleach can damage embroidery threads
Never use fabric softener on broderie anglaise. It clogs the delicate embroidery and reduces the fabric’s natural breathability.
Hand Washing
For delicate or special items, hand washing is safest:
- Fill a clean sink or basin with cool water
- Add a small amount of gentle detergent
- Submerge the item and gently swish for a few minutes
- Let soak for 10-15 minutes
- Rinse thoroughly in clean cool water until no soap remains
- Gently press water out (don’t wring or twist)
Drying
How you dry broderie anglaise affects how much ironing you’ll need later:
- Air drying: Best method. Hang garments on padded hangers or lay flat on clean towels
- Line drying: Works well, but keep out of direct sunlight to prevent fading
- Tumble drying: Use only low heat if necessary. Remove while slightly damp
- Avoid: High heat, which can damage synthetic embroidery threads and cause shrinkage
How to Iron Broderie Anglaise
Ironing requires care to avoid flattening the embroidery.
The Golden Rule
Always iron broderie anglaise on the wrong side. This prevents crushing the raised embroidery and keeps the decorative texture intact.
Step-by-Step Ironing
- Set up: Place a thick, clean towel on your ironing board
- Position fabric: Lay garment face down on the towel
- Temperature: Use low to medium heat (check your fabric’s care label)
- Press cloth: Place a thin cotton cloth between iron and fabric
- Press, don’t slide: Lift and place the iron rather than dragging it
- Work in sections: Move systematically across the garment
- Steam carefully: If using steam, keep the iron moving to avoid water spots
The towel underneath creates a cushioned surface that allows the embroidery to sink in slightly, preventing it from getting flattened.
Iron while the fabric is still slightly damp for easier wrinkle removal. If it’s completely dry, use a spray bottle to lightly mist it first.
What to Avoid
- High heat, which can melt synthetic embroidery threads
- Ironing on the right side, which flattens the texture
- Leaving the iron in one spot too long
- Using starch, which can leave visible residue in the eyelets
Storage Tips
Proper storage prevents damage between wears:
- Clean before storing: Never store soiled items, as stains set over time
- Fold carefully: Avoid creasing embroidered areas when possible
- Use padded hangers: For dresses and blouses to maintain shape
- Avoid plastic bags: Natural fibers need air circulation
- Store in cool, dry place: Away from direct sunlight and humidity
- Add protection: Use acid-free tissue paper for heirloom pieces
For more detailed fabric care guidance across different materials, check our Fabric Care Calculator.
Common Problems and Solutions
Even experienced sewers encounter challenges with broderie anglaise. Here’s how to solve the most common issues.
Problem: Fabric Puckers When Sewing
Causes: Tension too tight, stitch length too long, pulling fabric while sewing
Solutions:
- Reduce upper thread tension slightly
- Decrease stitch length to 2.0-2.5mm
- Use a walking foot or even-feed foot
- Place tissue paper under fabric while sewing, then tear away
- Let the feed dogs do the work without pulling
Problem: Needle Catches or Snags Embroidery
Causes: Dull or damaged needle, wrong needle type
Solutions:
- Replace with a fresh sharp needle (size 70/10 or 80/12)
- Use a microtex or universal sharp point
- Slow down your sewing speed through embroidered areas
- Check that your needle is inserted correctly
Problem: Fabric Tears Along Seam Lines
Causes: Stitch length too long, not enough stitches catching fabric between eyelets
Solutions:
- Use shorter stitch length (2.0-2.5mm)
- Reduce tension if too tight
- Avoid pulling or stretching fabric while sewing
- Reinforce stress points with extra stitching
Problem: Seam Allowances Show Through Eyelets
Causes: Using wrong seam finish for sheer fabric, thread color mismatch
Solutions:
- Switch to French seams for cleaner finish
- Use matching thread color for all seam work
- Consider lining or underlining the garment
- Trim seam allowances closer (but not too close!)
Problem: Chalk or Marker Won’t Come Out
Causes: Marking tool embedded in embroidery texture
Solutions:
- Switch to tailor’s tacks for future marking
- Try gentle brushing with soft toothbrush
- Wash in cool water with mild detergent
- For stubborn marks, spot treat before washing entire garment
Problem: Fabric Frays Excessively
Causes: Loose weave base fabric, cutting with dull scissors
Solutions:
- Use sharp fabric scissors or rotary cutter
- Cut with pinking shears to reduce fraying
- Sew seams promptly after cutting
- Apply fray check to edges if needed (test first)
- Handle fabric gently during construction
Problem: Pattern Doesn’t Match Across Seams
Causes: Didn’t plan for pattern matching when cutting
Solutions for next time:
- Use tissue paper overlay to see pattern placement
- Pin patterns in place before cutting
- Purchase extra fabric for pattern matching
- Take photos of fabric layout before cutting
Is Broderie Anglaise in Style in 2025?
Yes, broderie anglaise continues to be fashionable in 2025. The fabric experiences cyclical popularity, and we’re currently in a strong trend period for romantic, feminine details in fashion.
Recent fashion shows feature broderie anglaise in both traditional white and bold contemporary colors. Designers pair it with modern silhouettes like wide-leg pants, oversized shirts, and structured blazers, moving beyond the purely romantic aesthetic.
The trend toward sustainable fashion also boosts broderie anglaise popularity. As a natural fiber textile with artisan-quality details, it appeals to consumers seeking quality over quantity. Many people view broderie anglaise garments as investment pieces that work across multiple seasons.
Social media platforms show increased interest in sewing and DIY fashion, with broderie anglaise projects trending among home sewers. The fabric’s versatility lets creators make everything from casual summer tops to statement pieces for special occasions.
How is Broderie Anglaise Made?
Modern broderie anglaise production combines traditional techniques with advanced technology.
Industrial Production
Most commercial broderie anglaise follows this process:
- Base fabric preparation: High-quality cotton lawn, voile, or batiste is selected and pre-treated
- Design programming: Patterns are digitized into computer files that control embroidery machines
- Embroidery: Multi-head machines stitch the decorative patterns onto the base fabric
- Cutting: Precise cutting tools (sometimes laser-guided) create the eyelet holes
- Finishing: Edges are overstitched to prevent fraying and create clean borders
- Quality control: Fabric is inspected for flaws, loose threads, and pattern consistency
- Final treatment: May include washing, pressing, or special finishes
High-end producers use Swiss or Italian machinery known for precision and quality. These machines can create intricate patterns with thousands of stitches per minute while maintaining consistent tension and spacing.
Hand-Made Broderie Anglaise
Traditional hand embroidery still exists, though it’s rare and expensive. The process involves:
- Transferring design onto fabric
- Outlining shapes with running stitches
- Punching holes with an awl or sharp tool
- Overcast stitching around each hole
- Adding connecting embroidery stitches
- Creating scalloped edges (if desired)
Hand-made pieces take many hours to complete and command premium prices.
Frequently Asked Questions
Conclusion
Broderie anglaise combines historical craftsmanship with modern versatility, making it a valuable addition to any sewing repertoire. This delicate embroidered fabric, with its characteristic eyelet patterns, offers endless creative possibilities for both clothing and home decor projects.
Success with broderie anglaise comes down to understanding its unique properties. The openwork structure requires specific sewing techniques like French seams and careful seam finishing, while the delicate nature demands gentle handling and proper care. Taking time to pre-wash your fabric, choose the right needle and thread, and adjust your machine settings prevents most common problems.
Pattern placement makes a significant difference in your finished project. Use those scalloped borders strategically, match patterns across seams when possible, and think carefully about where embroidered motifs will fall on the body. These small considerations separate homemade-looking garments from professional results.
Lining decisions depend on your project goals. While not always necessary, underlining or lining provides coverage, simplifies construction, and can extend your garment’s lifespan. Choose lightweight, breathable fabrics that complement rather than compete with the broderie anglaise.
Proper care preserves your finished projects. Always iron on the wrong side to protect the raised embroidery, wash gently in cool water, and avoid harsh chemicals. With correct maintenance, broderie anglaise garments remain beautiful for years, even becoming cherished heirloom pieces.
The fabric’s current popularity in 2025 fashion means you’ll find abundant inspiration and resources. Whether you’re drawn to traditional white eyelet for summer dresses or bold colored versions for contemporary designs, broderie anglaise adapts to your style. Start with simple projects like gathered skirts or pillowcases, then progress to more complex garments as your confidence grows.
Remember that working with broderie anglaise is a skill that improves with practice. Your first project might have some learning moments, but each piece you create teaches you more about handling this special fabric. Don’t let its delicate appearance intimidate you. With the techniques covered in this guide, you have everything you need to create beautiful, professional-quality projects.
For more sewing guidance, explore our beginner’s guide to sewing and dress-making tutorials. Happy sewing!