Master the Foundation of All Sewing: From Setup to Professional Results
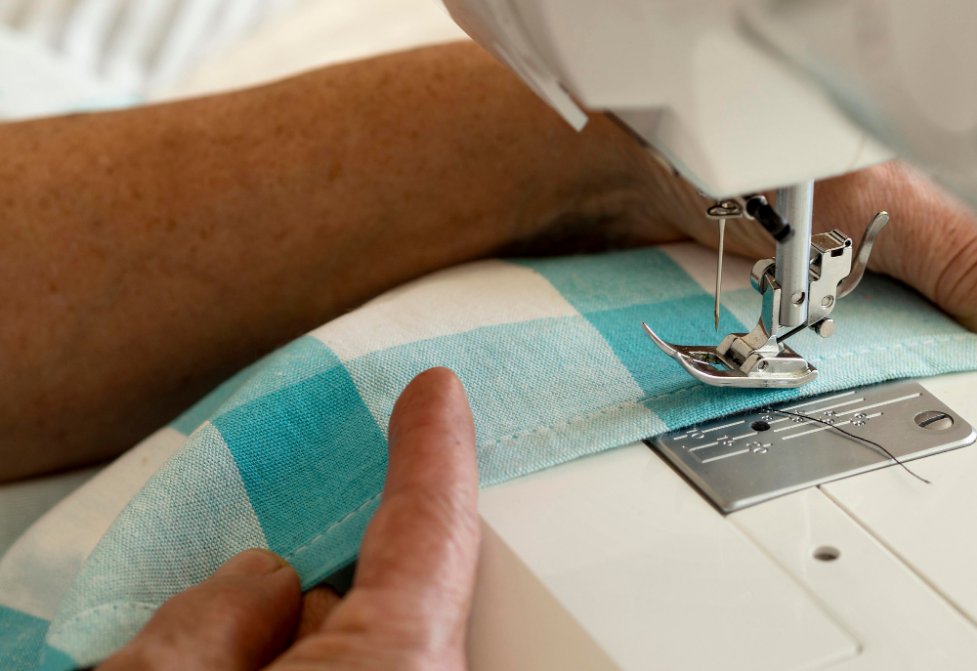
Learning to sew a straight stitch is the foundation of all sewing projects. A straight stitch creates a simple line of evenly-spaced stitches by pushing the needle up and down through the fabric in a straight path. Mastering this basic technique will help you create strong seams and neat hems for everything from simple repairs to complex garments.
Whether you’re using a sewing machine or sewing by hand, getting your stitches straight takes practice and the right approach. The key is maintaining even spacing between stitches and keeping your line straight. You can make perfect straight stitches by using guides on your machine or drawing guidelines on your fabric.
When sewing by hand, you’ll want to space your stitches evenly and keep them the same length. Pull the thread with consistent tension to create neat, professional-looking results that will hold your seams securely.
Table of Contents
Key Takeaways
- Straight stitches form the basis for strong seams and professional-looking projects
- Proper machine setup and tension settings ensure even, consistent stitches
- Using guides and marking lines helps maintain straight, accurate stitching
- Regular maintenance prevents common stitching problems
- The right presser foot makes all the difference for beginners
Understanding Straight Stitch Basics
The straight stitch forms the foundation of machine sewing and creates strong, reliable seams. You’ll use this essential stitch for most of your sewing projects, from simple repairs to complex garments.
What is a Straight Stitch?
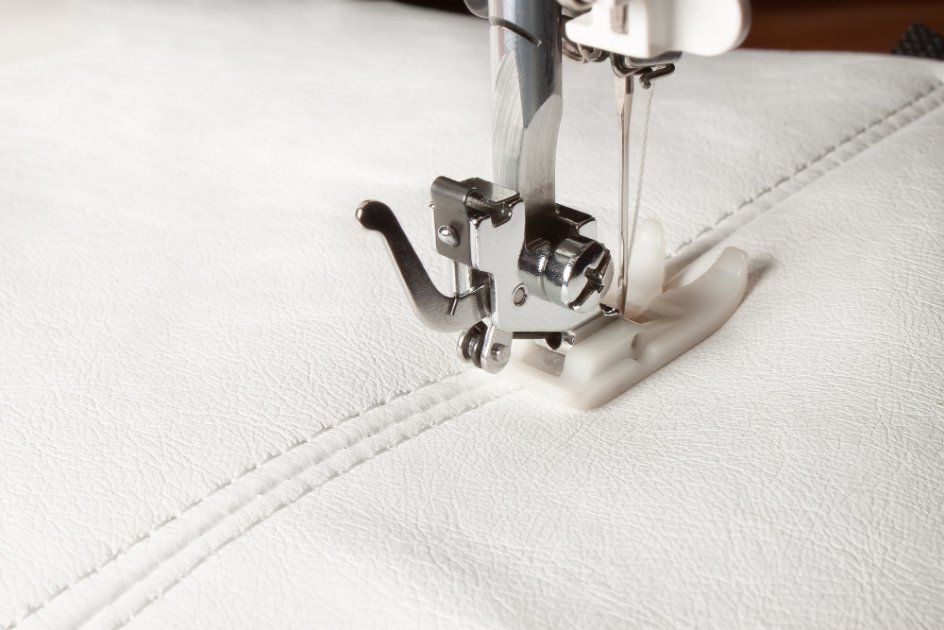
A straight stitch is a basic line of stitches that creates a flat, secure seam by moving forward in a straight line. It consists of evenly spaced single stitches that lock together on the top and bottom of your fabric.
The stitch forms when your machine’s needle moves up and down, creating a top thread and a bottom thread that interlock in the middle of your fabric layers. Think of it like drawing a dotted line – each dot represents where the needle enters and exits the fabric.
According to Singer’s official sewing guide, mastering proper tension and stitch length is crucial for achieving professional results, especially when working with different fabric weights.
Basic straight stitch settings:
- Stitch length: Usually between 2.0-2.5mm for standard sewing
- Thread tension: Typically between 3-5 on most machines
- Needle position: Center position for most fabrics
Why Straight Stitches Matter
Straight stitches are fundamental to almost every sewing project you’ll tackle. They create the strongest and most stable seams for joining fabric pieces together.
You’ll use straight stitches for:
- Constructing garment seams
- Topstitching edges
- Creating darts and pleats
- Basic repairs and mending
- Quilting projects
- Simple hems
Your straight stitch skills directly affect the quality of your finished projects. Clean, even stitching gives your work a professional look, while uneven stitches can make items appear homemade.
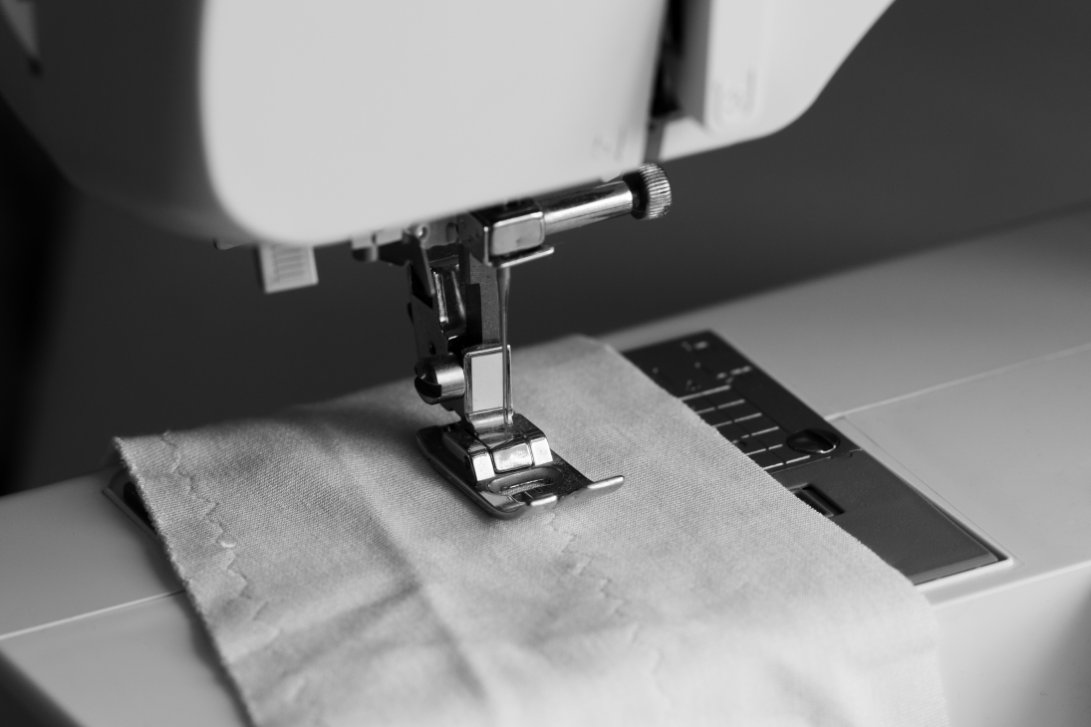
Setting Up Your Sewing Machine
Getting your sewing machine ready is key to making perfect straight stitches. The right setup makes a big difference in how your finished project looks.
Choosing the Right Sewing Needle
Different fabric types need specific needles for the best results. Here’s a quick reference chart:
| Fabric Type | Needle Size | Best For |
|---|---|---|
| Lightweight (silk, chiffon) | 70/10 | Delicate fabrics |
| Medium-weight (cotton, polyester) | 80/12 | Most everyday sewing |
| Heavy-weight (denim, canvas) | 90/14 | Thick materials |
| Knits and stretch fabrics | Ball point 70/10-90/14 | Prevents runs |
Always check that your needle is straight and sharp. A bent or dull needle can damage your fabric and create uneven stitches. Replace your needle every 8-10 hours of sewing or after every 2-3 projects.
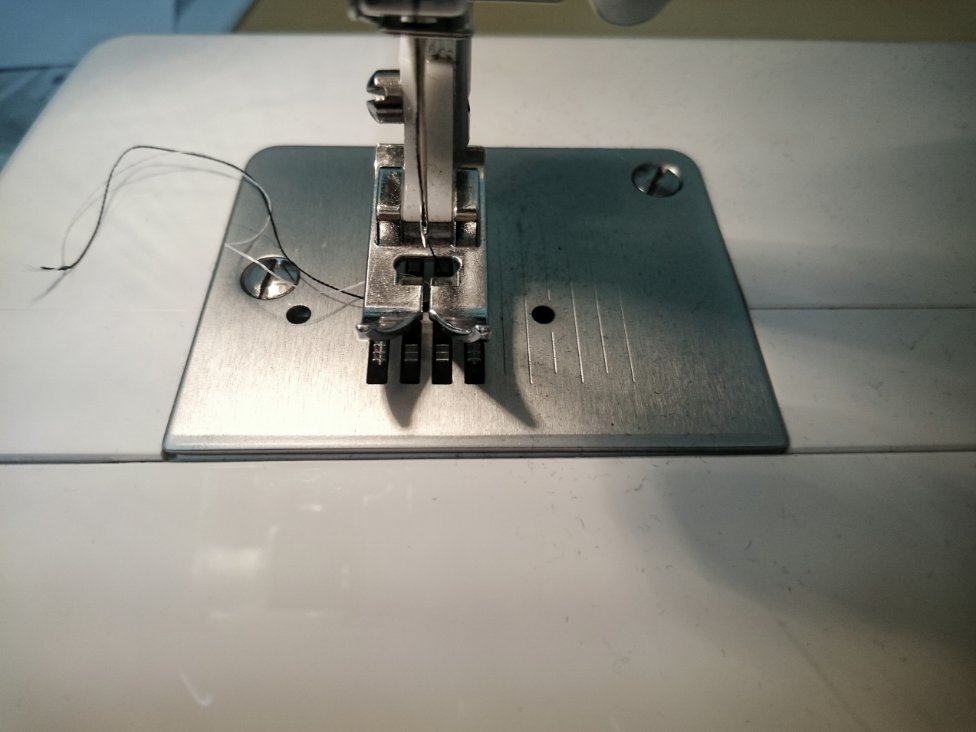
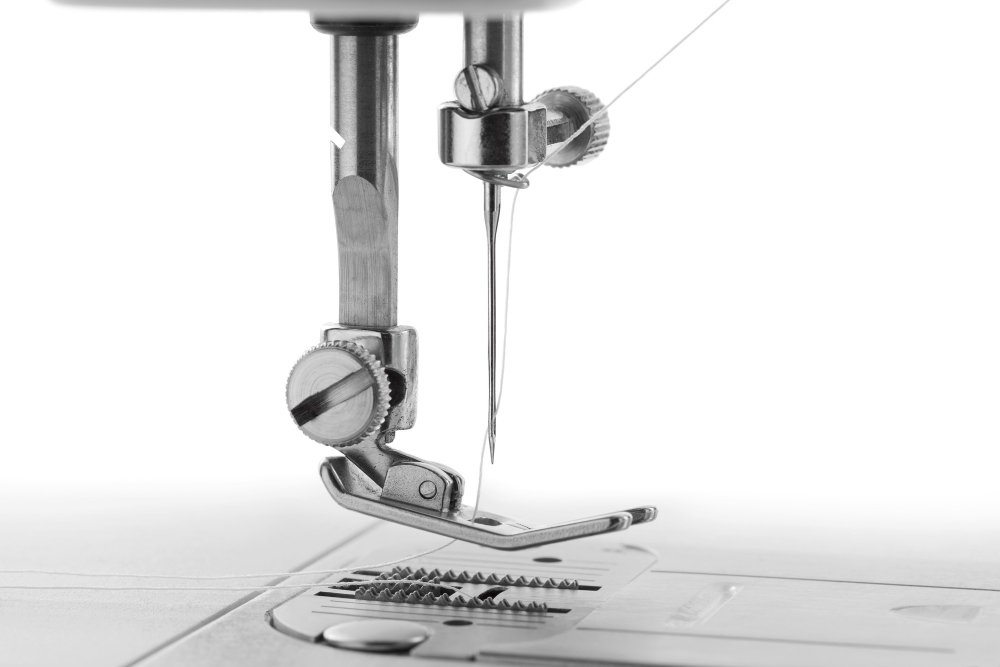
Machine Threading and Setup
Step-by-step threading process:
- Place your thread spool on the top pin
- Guide the thread through the upper thread guides
- Pull the thread down through the tension disks
- Hook it around the take-up lever
- Thread the needle from front to back
- Pull both the top and bottom threads toward the back of your machine
Make sure there are no knots or tangles in your thread path. Improper threading is one of the most common causes of stitching problems.
Essential Machine Settings for Straight Stitching
Basic settings to check:
- Set your machine to straight stitch mode (usually marked as “1”)
- Adjust your thread tension to 4-5 for balanced stitches
- Check that your presser foot pressure matches your fabric weight
- Use the speed control if your machine has one
Start slow until you feel comfortable with the stitch formation. You can always increase speed as your confidence grows.
Fabric Preparation and Handling
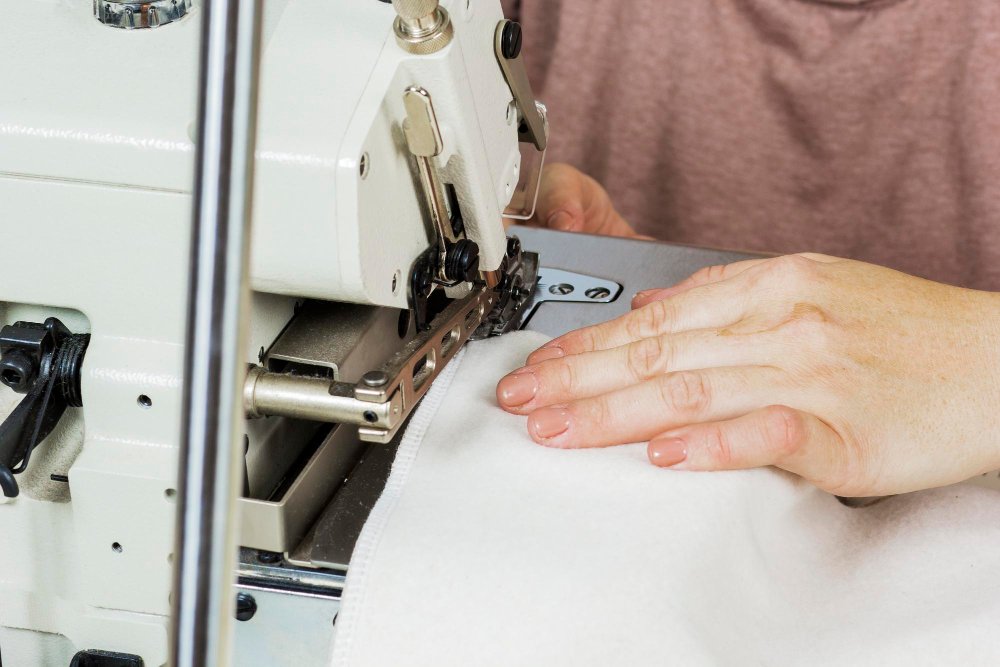
Proper fabric setup creates the foundation for perfect straight stitches. A well-prepared fabric edge and clear markings will help you maintain accurate seams throughout your project.
Selecting the Right Practice Fabric
Choose stable, medium-weight fabrics like cotton or linen when you’re learning to sew straight stitches. These materials are easier to control and won’t slip under your presser foot.
Best beginner fabrics:
- Quilting cotton
- Lightweight canvas
- Cotton broadcloth
- Linen blends
Fabrics to avoid while learning:
- Slippery silks
- Stretchy knits
- Very thick materials
- Fabrics with loose weaves
Woven fabrics work better than knits for practicing straight stitches. They hold their shape and don’t stretch or distort while sewing.
Preparing Your Fabric
Check that your fabric is wrinkle-free before starting. Iron it on the appropriate heat setting to create a smooth surface for stitching.
Preparation steps:
- Trim your fabric edges with sharp scissors to remove any frayed or uneven areas
- If your fabric frays easily, consider using pinking shears or a zigzag stitch along the edge
- Press any folds or creases out of your fabric
- Test your settings on a scrap piece first
Marking Your Seam Allowance
Use a ruler and fabric chalk to mark your seam allowance guides clearly. Standard seam allowances are 5/8 inch from the fabric edge.
Quick marking tools:
- Fabric chalk or washable markers
- Masking tape guides
- Magnetic seam guides
- Built-in seam guides on your sewing machine
Draw small dots or dashes along your seam line rather than continuous lines. This prevents visible marks from showing through on your finished project.
How to Sew a Straight Stitch Step by Step
Perfect straight stitches come from proper fabric control and machine handling. Follow these detailed steps for consistently straight seams.
Positioning Your Hands
Proper fabric handling starts with positioning your hands correctly. Place your right hand at the 3 o’clock position and your left hand at 9 o’clock position on either side of the presser foot.
Keep your fingers spread gently to maintain even tension across the fabric width. Don’t pull or push the fabric – let the feed dogs do the work. Your hands should act as gentle guides, applying light pressure to keep the fabric flat and aligned.
Starting Your Seam
Step-by-step process:
- Position the fabric under the presser foot with the needle up
- Lower the presser foot to secure the fabric
- Lower the needle into the fabric at your starting point
- Backstitch 3-4 stitches by pressing the reverse button while sewing
- Release the reverse and continue forward
Guiding the Fabric Through the Machine
Set your machine to a medium speed for better control. Fast speeds often lead to wobbly stitches, while very slow speeds can create uneven tension.
Key techniques:
- Maintain steady pressure on the foot pedal
- Watch the edge of your fabric align with the seam guide on your needle plate
- Focus your eyes about 1 inch ahead of the needle, not directly at it
- Keep both hands gently guiding the fabric without forcing it
Finishing Your Seam
When you reach the end of your seam:
- Stop with the needle down in the fabric
- Backstitch 3-4 stitches to secure the end
- Raise the needle to its highest position
- Lift the presser foot
- Pull the fabric away from the machine gently
- Cut the threads leaving about 3-inch tails
Sewing Machine Settings for Perfect Straight Stitches
Getting your machine settings right is crucial for consistent, professional-looking stitches. Here’s what you need to know about each setting.
Stitch Length Settings
The stitch length controls how far your fabric moves between each needle penetration. For most straight stitching, you’ll want a length between 2.0 and 3.0mm.
| Stitch Length | Best Use | Fabric Type |
|---|---|---|
| 1.5-2.0mm | Delicate work, curves | Lightweight fabrics |
| 2.5mm | Standard seaming | Most cotton fabrics |
| 3.0-3.5mm | Topstitching, thick fabrics | Heavy materials |
| 4.0-5.0mm | Basting, gathering | Temporary stitching |
Thread Tension Explained
Thread tension controls how tightly the upper and lower threads pull against each other. Proper tension creates balanced stitches that look the same on both sides of your fabric.
Signs of incorrect tension:
- Too tight: Fabric puckers, thread breaks frequently
- Too loose: Loops on the fabric surface, weak seams
- Unbalanced: Different appearance on top vs. bottom of fabric
Most machines work well with tension set between 3-5. Always test on a fabric scrap before starting your project.
Needle Position Settings
Many modern machines allow you to adjust where the needle falls within the presser foot opening. This is helpful for:
- Edgestitching: Move needle closer to fabric edge
- Topstitching: Adjust for precise stitch placement
- Working with guides: Align needle with seam guides
Common Straight Stitch Problems and Solutions
Even experienced sewers encounter problems with their straight stitches. Here’s how to diagnose and fix the most common issues.
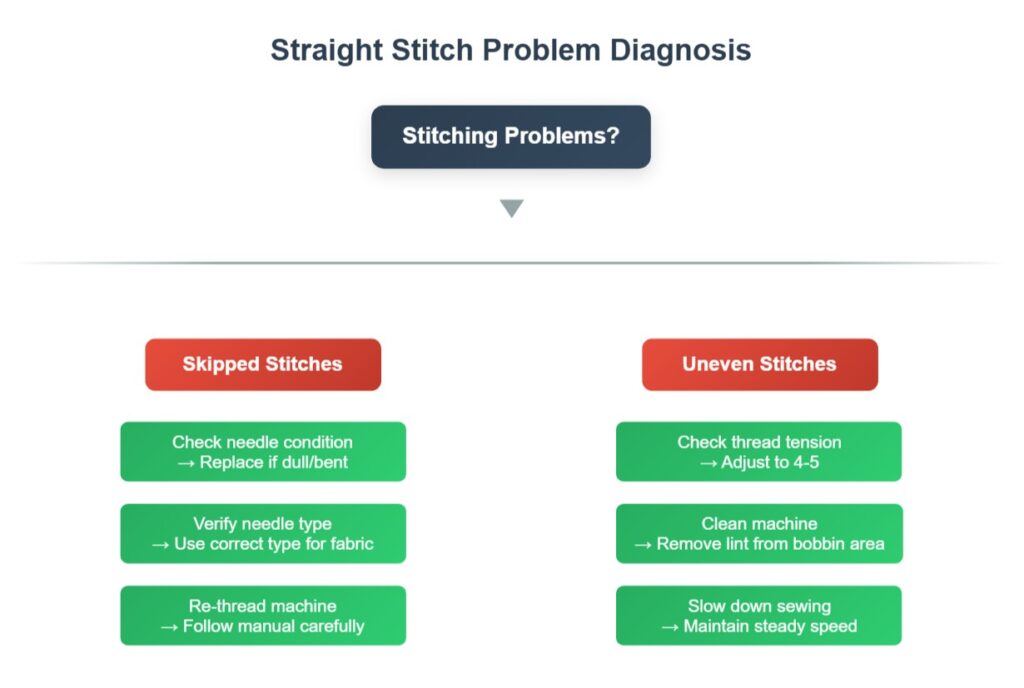
Troubleshooting Flowchart
When your straight stitches aren’t cooperating, don’t panic. Most sewing problems have simple solutions that you can fix at home without professional help. The key is identifying what’s actually causing the issue rather than guessing.
Use this visual troubleshooting guide to quickly diagnose your stitching problems. Start by identifying which category matches what you’re seeing, then work through the suggested solutions in order. Most issues resolve with the first or second fix.
Work through these solutions systematically – don’t try multiple fixes at once, as this makes it harder to identify what actually solved the problem. Test each adjustment on a fabric scrap before continuing with your project.
If you’ve tried all the suggested solutions and problems persist, your machine may need professional servicing. Issues like timing problems or internal mechanical wear require expert attention and aren’t suitable for DIY fixes.
Remember that prevention is always better than troubleshooting. Regular cleaning, using quality thread, and changing needles frequently prevents most of these problems from occurring in the first place. For detailed maintenance instructions, check our sewing machine maintenance guide.
Skipped Stitches
Skipped stitches create gaps in your seam line and weaken the overall strength of your stitching.
Common causes and fixes:
- Dull or bent needle – Replace with a new, sharp needle
- Wrong needle type – Use ballpoint for knits, universal for wovens
- Improper threading – Re-thread following your manual exactly
- Incorrect needle size – Match needle size to thread weight
- Machine timing issues – Take to a professional for service
Uneven or Loose Stitches
Uneven stitches make your seams look unprofessional and can affect the durability of your project.
Solutions to try:
- Adjust thread tension gradually until stitches balance
- Clean your machine thoroughly, especially the bobbin area
- Check bobbin threading – ensure bobbin is inserted correctly
- Slow down your sewing – maintain consistent speed
- Use quality thread – cheap thread creates more problems
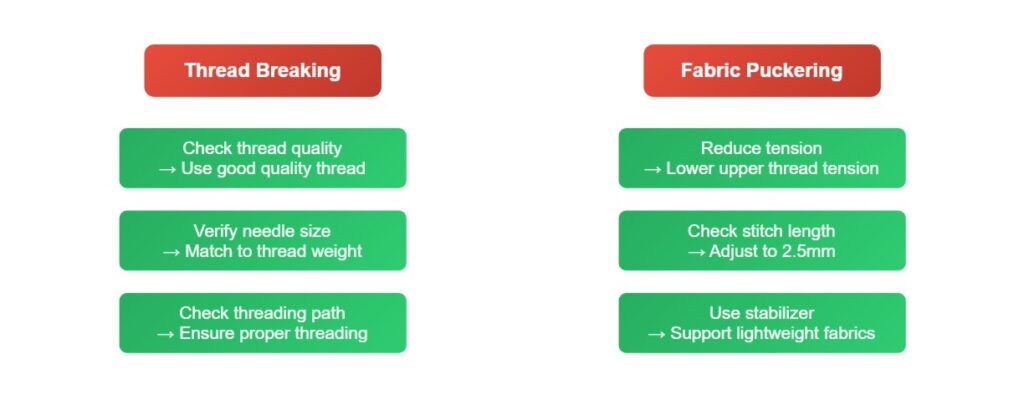
Fabric Puckering
Puckering occurs when your fabric bunches up along the seam line, creating an unprofessional appearance.
Prevention methods:
- Reduce upper thread tension slightly
- Use appropriate stitch length (2.5mm for most fabrics)
- Add stabilizer under lightweight or stretchy fabrics
- Check presser foot pressure – may be too high
- Ensure proper needle size – too large can cause puckering
For more detailed troubleshooting, check our comprehensive sewing machine troubleshooting guide.
Essential Presser Feet for Straight Stitching
The right presser foot can make the difference between frustration and success when learning to sew straight stitches. Here are the most helpful feet for beginners.
All-Purpose Foot vs. Straight Stitch Foot
All-Purpose Foot:
- Wide opening accommodates zigzag stitches
- Good for general sewing tasks
- Standard with most machines
- Can cause fabric to be pulled down on delicate materials
Straight Stitch Foot:
- Small needle hole prevents fabric pull-down
- Better stitch quality on lightweight fabrics
- Prevents skipped stitches
- Only works with straight stitches
Walking Foot for Multiple Layers
A walking foot is invaluable when sewing through multiple layers or working with challenging fabrics. It prevents layers from shifting and creates more even stitches.
When to use a walking foot:
- Quilting multiple layers
- Sewing thick fabrics like denim or canvas
- Working with slippery fabrics
- Matching plaids or stripes
- Preventing fabric distortion
Edge Guide and Quarter-Inch Feet
These specialized feet help maintain consistent seam allowances without constantly watching your fabric edge.
Edge guide foot features:
- Built-in ruler or guide
- Adjustable for different seam widths
- Perfect for topstitching
- Helps maintain straight lines
Learn more about different presser feet in our detailed sewing machine presser feet guide.
Advanced Straight Stitch Techniques
Once you’ve mastered basic straight stitching, these advanced techniques will help you achieve professional-looking results.
Topstitching and Edgestitching
Topstitching adds both decorative appeal and functional strength to your projects. It’s visible stitching that runs parallel to seams or edges.
Topstitching tips:
- Use a slightly longer stitch length (3.0-3.5mm), as professional sewers recommend in Threads Magazine’s expert techniques guide, which helps create more visible and durable decorative stitching
- Choose thread that either matches or contrasts with your fabric
- Maintain consistent distance from the edge (usually 1/4″ to 3/8″)
- Press seams before topstitching for crisp lines
Edgestitching runs very close to a seam or fold, usually 1/8″ or less from the edge. Use an edge guide foot for the most consistent results.
Creating Perfect Hems with Straight Stitching
A simple hem with straight stitching is one of the most common finishing techniques you’ll use.
Step-by-step hemming:
- Measure and mark your hem allowance (usually 1-2 inches)
- Fold the raw edge under 1/4″ and press
- Fold again to create the hem and press
- Pin in place every 3-4 inches
- Stitch close to the inner fold with a straight stitch
For more hemming techniques, see our guide on how to sew a hem.
Sewing Straight Lines on Curves
Even curved seams require straight stitches. The key is taking your time and adjusting the fabric gradually.
Technique for curves:
- Sew slowly to maintain control
- Stop with needle down to pivot fabric
- Lift presser foot and adjust fabric position
- Continue stitching in small segments
- Clip curves after stitching to reduce bulk
Hand Sewing Straight Stitches
Not everyone has access to a sewing machine, but you can still create beautiful straight stitches by hand with the right technique.
Basic Hand Sewing Setup
What you’ll need:
- Sharp sewing needle (size 8-10 for most fabrics)
- Quality thread in matching or contrasting color
- Small scissors
- Thimble (optional but helpful)
- Ruler and fabric chalk for marking
Running Stitch Technique
The running stitch is the foundation of hand-sewn straight stitches.
Step-by-step process:
- Thread your needle and tie a knot at the end
- Mark your sewing line with chalk and ruler
- Start from the back and bring needle up through fabric
- Move forward 1/8″ and push needle back down
- Bring needle back up 1/8″ ahead of your last stitch
- Continue keeping stitches even in size and spacing
Pro tips for hand sewing:
- Keep stitches small and even (about 1/8″ long)
- Maintain consistent spacing between stitches
- Don’t pull thread too tight – it can pucker the fabric
- Use a thimble to protect your finger when pushing the needle
Backstitch for Stronger Seams
When you need stronger hand-sewn seams, use a backstitch instead of a running stitch.
Backstitch technique:
- Start with a running stitch
- Instead of moving forward, bring needle back to the end of your previous stitch
- Push needle down at the end of the last stitch
- Bring needle up ahead of where you started
- Repeat by going back to connect with your previous stitch
This creates a continuous line of stitching that’s much stronger than running stitches.
Sewing Machine Maintenance for Better Stitches
Regular maintenance is essential for consistent straight stitches. A clean, well-maintained machine produces better results and lasts longer.
Daily Maintenance (After Each Use)
Quick 5-minute routine:
- Remove loose threads from the bobbin area
- Brush lint from the feed dogs and throat plate
- Wipe down the machine exterior
- Cover your machine to protect from dust
Weekly Maintenance Schedule
If you sew regularly, follow this weekly routine:
| Task | Frequency | Why It Matters |
|---|---|---|
| Deep clean bobbin area | Weekly | Prevents lint buildup |
| Oil moving parts | Weekly* | Keeps mechanism smooth |
| Change needle | Every 8-10 hours | Prevents stitching problems |
| Clean tension disks | Weekly | Maintains proper tension |
*Check your manual – some modern machines don’t require oiling
Monthly Deep Cleaning
Comprehensive maintenance:
- Remove throat plate and feed dogs for thorough cleaning
- Vacuum or brush all accessible areas
- Check for worn parts like presser feet or bobbins
- Test all functions including different stitches
- Schedule professional service if needed
Professional Servicing
Take your machine to a professional service center:
- Annually for regular users
- Every 6 months for heavy daily use
- When problems persist despite troubleshooting
- Before major projects to ensure peak performance
For detailed maintenance instructions, visit our sewing machine maintenance guide.
Practice Projects for Beginners
The best way to master straight stitching is through practice projects that gradually build your skills.
Week 1: Paper Practice
Before touching fabric, practice on paper to develop muscle memory.
Paper practice exercises:
- Draw straight lines and sew along them (no thread needed)
- Practice curves and corners
- Work on maintaining steady speed
- Focus on hand positioning and fabric control
Week 2: Simple Fabric Projects
Beginner-friendly projects:
- Pot holders – practice squares and straight seams
- Cloth napkins – simple hems and corners
- Tote bag – basic construction with straight seams
- Pillow cover – envelope closure with straight stitching
Week 3: Intermediate Challenges
Step up the difficulty:
- Simple skirt with elastic waistband
- Curtain panels with rod pockets
- Applique designs using straight stitch attachment
- Quilted place mats with walking foot practice
Progressive Skill Building
Each project should introduce one new element while reinforcing previous skills:
- Basic seaming and finishing
- Corner turning and pivoting
- Topstitching and decorative elements
- Multiple layers and challenging fabrics
Why You Can’t Sew Straight (And How to Fix It)
Many beginners struggle with straight stitching. Understanding the common causes helps you improve quickly.
Common Mistakes and Solutions
Problem: Watching the needle instead of the seam guide Solution: Focus your eyes 1-2 inches ahead of the needle on the seam guide
Problem: Going too fast for your skill level Solution: Slow down and gradually increase speed as you improve
Problem: Forcing or pulling the fabric Solution: Let the feed dogs do the work – your hands should only guide
Problem: Inconsistent pressure on the foot pedal Solution: Practice maintaining steady pressure, like driving a car
Problem: Poor machine setup or maintenance Solution: Check threading, tension, and clean your machine regularly
Building Muscle Memory
Straight stitching is a motor skill that improves with practice. Like learning to drive, it becomes automatic with repetition.
Practice strategies:
- Start slow and focus on accuracy over speed
- Practice regularly – 15 minutes daily beats 2 hours weekly
- Use practice fabric – don’t worry about wasting material
- Stay relaxed – tension in your shoulders affects your stitching
The Difference Between Straight Stitch and Backstitch
Understanding the visual and functional differences between these two fundamental stitches will help you choose the right technique for each project. While both create lines of stitching, their construction and strength vary significantly.
The main difference lies in how the stitches connect. A straight stitch (also called running stitch when done by hand) moves forward in a simple over-under pattern, while a backstitch creates overlapping connections by going backward to meet the previous stitch.
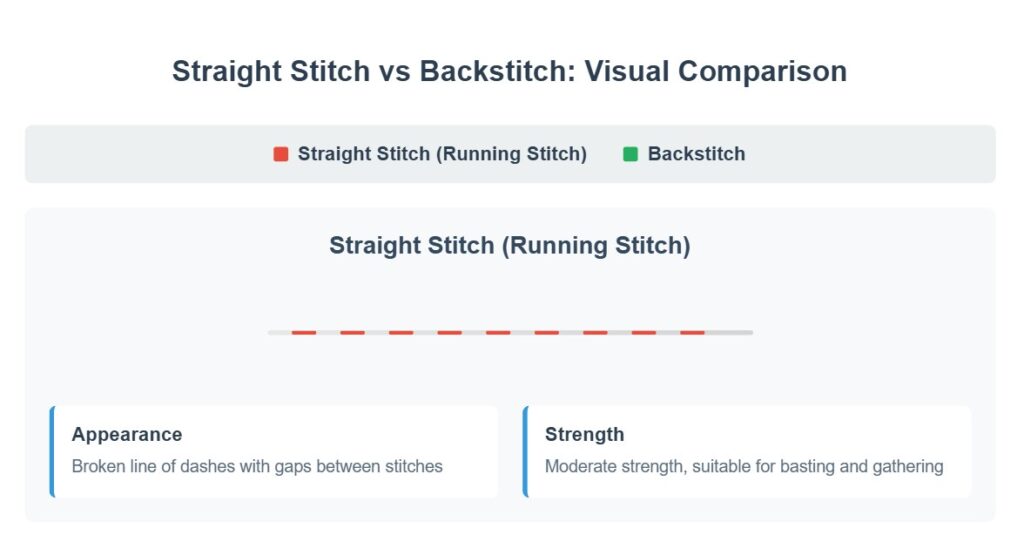
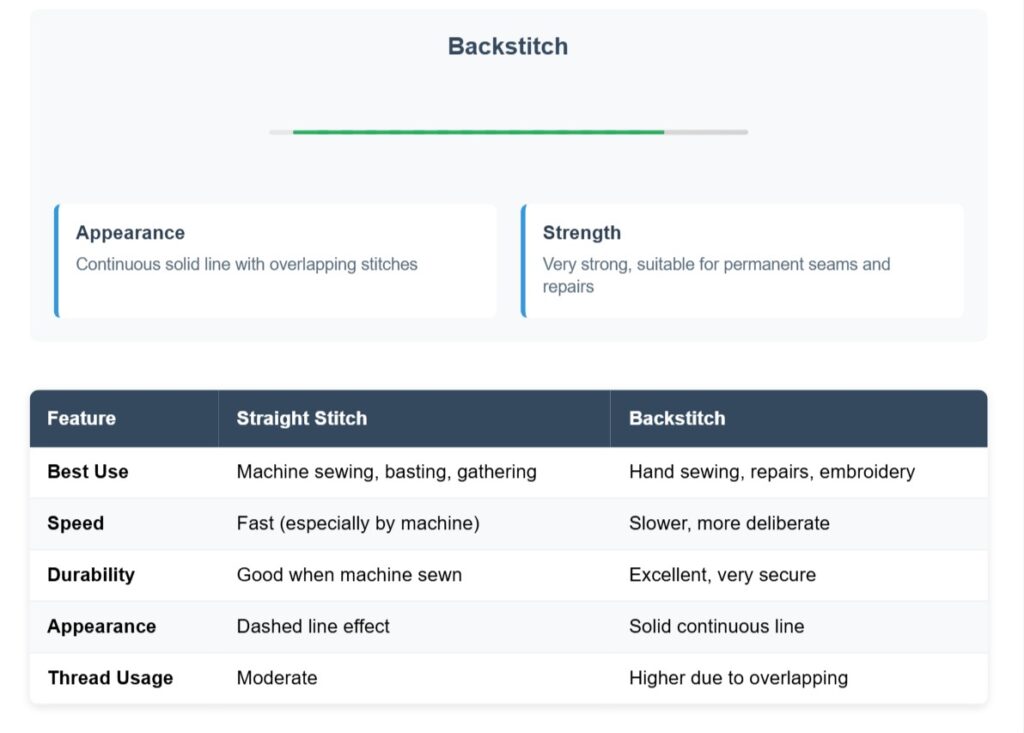
As you can see from the comparison, backstitches create a much stronger seam because each stitch overlaps with the previous one, eliminating gaps that could weaken under stress. This is why backstitches are preferred for hand-sewn repairs and areas that need extra durability.
Machine straight stitches achieve similar strength through the interlocking of upper and lower threads, making them ideal for most sewing projects. For hand sewing, choose straight stitches for temporary work like basting, and backstitches for permanent seams that need to withstand wear and washing.
When starting out, focus on mastering the machine straight stitch first, as it forms the foundation for nearly all sewing projects. You can always add hand backstitching skills later for repairs and detail work.
Machine vs. Hand Stitching Comparison
Machine straight stitches create strength through interlocking upper and lower threads, forming a secure seam that’s ideal for garment construction and home decor projects. The consistent stitch length and tension make them perfect for long seams and professional-looking results.
Hand backstitches excel when you need maximum strength from a single thread or when working in tight spaces where a machine can’t reach. They’re essential for:
- Attaching buttons securely
- Repairing seams in finished garments
- Hand embroidery and decorative work
- Sewing curved areas with precision
When to Choose Each Stitch Type
| Situation | Best Choice | Why |
|---|---|---|
| Garment seams | Machine straight stitch | Speed and consistent strength |
| Button attachment | Hand backstitch | Secure hold, precise placement |
| Hem repairs | Hand backstitch | Access to tight spaces |
| Quilting | Machine straight stitch | Even stitches across large areas |
| Embroidery outlines | Hand backstitch | Fine detail control |
| Basting/temporary stitching | Hand straight stitch | Easy to remove later |
Strength and Durability Differences
Machine straight stitches rely on thread interlocking to create strength, making them suitable for most sewing projects. However, if the upper or lower thread breaks, the entire seam can unravel.
Backstitches create overlapping connections that prevent unraveling even if one section breaks. This makes them ideal for high-stress areas like pocket corners, button attachments, and repair work that needs to last.
For beginners, focus on mastering machine straight stitches first. Add hand backstitch techniques later when you encounter repairs or detail work that requires hand sewing precision.
Frequently Asked Questions
What tension should a sewing machine be set on for straight stitch?
Most sewing machines work best with tension set between 3-5 for straight stitching. Start with 4 and adjust up or down based on your results. The goal is balanced stitches that look the same on both sides of your fabric.
Why is my straight stitch bunching or loose?
Loose or bunching stitches usually indicate a tension problem. Check that your machine is threaded correctly, especially through the tension disks. Clean lint from the bobbin area and adjust the upper thread tension gradually until stitches balance.
What is the best stitch length for straight stitching?
For most fabrics, a 2.5mm stitch length works well. Use shorter stitches (1.5-2.0mm) for delicate fabrics or detailed work, and longer stitches (3.0-3.5mm) for topstitching or thick materials.
How do I prepare my sewing machine for straight stitching?
1. Install the correct needle for your fabric type
2. Thread the machine properly following your manual
3. Set stitch length to 2.5mm
4. Adjust tension to 4-5
5. Test on a fabric scrap before starting your project
Why am I not sewing straight?
Common causes include watching the needle instead of the seam guide, sewing too fast, improper hand positioning, or machine maintenance issues. Focus on the fabric edge alignment with your seam guide and maintain steady speed.
What is a straight stitch foot and do I need one?
A straight stitch foot has a small needle hole that prevents lightweight fabrics from being pulled down into the bobbin area. While not essential, it significantly improves stitch quality on delicate materials and prevents skipped stitches.
How do I get a straight edge when sewing?
Use your machine’s seam guides, add masking tape as a guide, or invest in an edge guide foot. Mark your fabric with chalk and ruler for complex projects. Most importantly, keep the fabric edge aligned with your chosen guide throughout sewing.
What’s the difference between a straight stitch and other stitches?
Straight stitches move only forward and backward, while zigzag stitches move side to side. Decorative stitches combine various movements. Straight stitches are used for seaming, hemming, and topstitching, while other stitches serve specialized purposes.
How do I fix skipped stitches in straight stitching?
First, replace your needle with a new one appropriate for your fabric. Re-thread your machine completely, check that the bobbin is inserted correctly, and clean lint from the bobbin area. If problems persist, your machine may need professional service.
Can I use any thread for straight stitching?
Use quality thread appropriate for your fabric weight. All-purpose polyester thread works for most projects. Match thread weight to needle size – heavier threads need larger needles. Avoid old, cheap, or specialty threads when learning.
For more troubleshooting help, check our common sewing mistakes guide.
Conclusion
Mastering the straight stitch is your gateway to successful sewing. While it may seem simple, this fundamental technique requires practice, patience, and proper setup to achieve professional results. The key elements – correct machine settings, proper threading, appropriate needle selection, and consistent fabric handling – work together to create the strong, even stitches that form the backbone of all sewing projects.
Remember that every expert sewer started exactly where you are now. The wobbly lines and tension troubles you might experience are completely normal parts of the learning process. What matters is building good habits from the beginning: maintaining your machine regularly, using quality materials, and practicing consistently.
Your straight stitch journey should progress through these stages:
- Master basic machine setup and threading procedures
- Practice fabric handling techniques with simple materials
- Troubleshoot common problems as they arise
- Experiment with different fabrics and project types
- Maintain your machine for consistent performance
Essential takeaways for success:
- Start with quality, medium-weight cotton fabrics for easier handling
- Keep your machine clean and properly maintained
- Use the right needle type and size for your fabric
- Focus on accuracy before speed – muscle memory develops with practice
- Don’t hesitate to rip out imperfect seams and start over
Investment in your sewing future: Consider purchasing a walking foot and edge guide foot as your first presser foot upgrades. These tools will immediately improve your straight stitch quality and open up new project possibilities. Quality thread and sharp needles are never wasted money – they prevent more problems than any other single factor.
Building confidence through practice: Set aside regular practice time, even if it’s just 15 minutes a few times per week. Use fabric scraps for experimentation, and don’t feel pressure to create perfect projects immediately. Every professional seamstress and tailor has a box of early attempts that didn’t quite work out.
Looking ahead: Once straight stitching becomes second nature, you’ll find that other sewing techniques build naturally on this foundation. Understanding seam allowances, learning to read sewing patterns, and exploring different fabric types all rely on your straight stitch skills.
Final encouragement: Sewing is both a practical skill and a creative outlet that can bring years of satisfaction. Whether you’re mending clothes, creating home decor, or designing garments, the straight stitch will be your constant companion. Embrace the learning process, celebrate small victories, and remember that every stitch brings you closer to the projects you envision creating.
The journey from beginner to confident sewer is different for everyone, but it always starts with that first straight line. Take your time, be patient with yourself, and enjoy discovering the meditative rhythm of the sewing machine. Before long, you’ll find yourself automatically reaching for the right tools, adjusting tension without thinking, and creating straight, professional-looking seams that you can be proud of.
Your future sewing adventures await – and they all begin with mastering this simple but essential straight stitch.