From your first pair of scissors to your first finished project: everything you actually need to get started
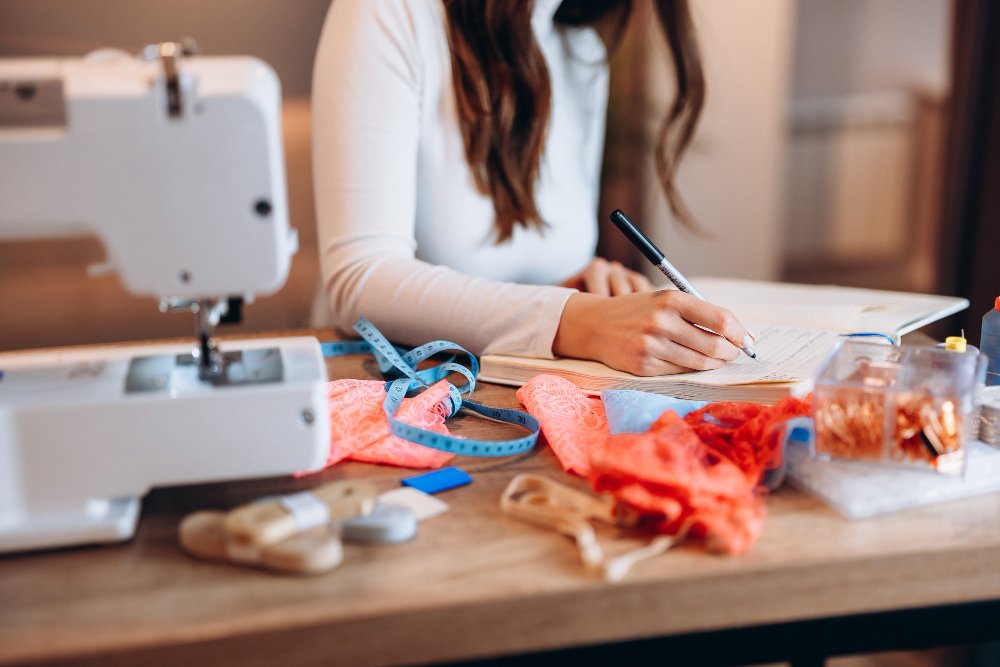
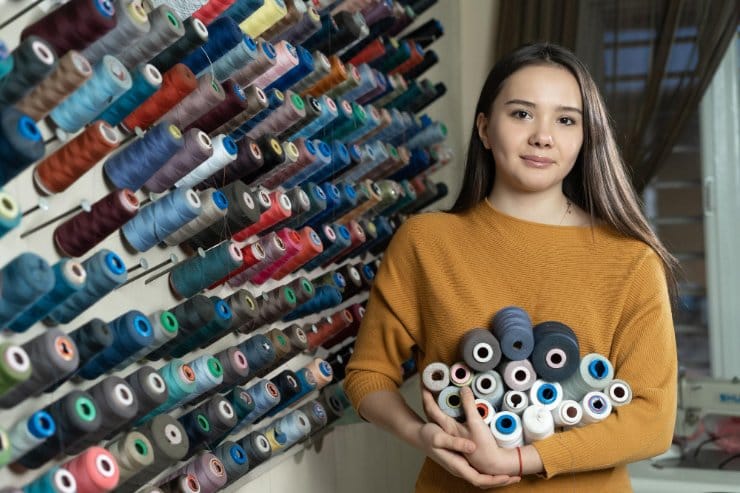
Picture this: you’ve decided to learn how to sew. You walk into a craft store, look around, and suddenly you’re surrounded by walls of thread, rows of scissors, drawers full of needles, and gadgets you’ve never seen before. Five minutes in, you’re overwhelmed and questioning all your decisions.
Sound familiar? You’re not alone. Almost every beginner feels the same way.
Here’s the good news: you don’t need much to get started. In fact, just a small handful of well-chosen supplies will get you through most beginner projects.
This guide walks you through exactly what to buy, what to skip for now, how much to budget, and how to set yourself up for success from day one.
⚡ The Quick Answer
To start sewing, you need these 11 essentials: fabric scissors, pins, needles, thread, a measuring tape, marking tool, seam ripper, iron, cutting mat, rotary cutter, and a sewing machine.
You can get started for as little as $50 with hand tools, or around $150–$300 once you add a beginner machine. Read on for the full breakdown.
✓ Use Our Free Sewing Supplies Checklist GeneratorDo You Need a Sewing Machine to Start?
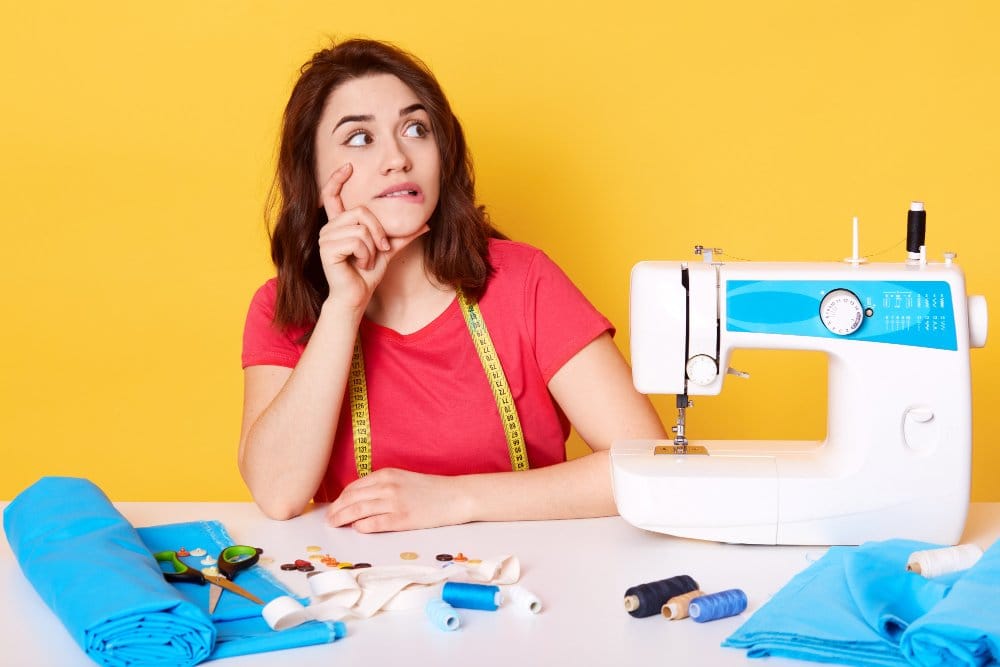
This is one of the most common questions beginners ask, and it’s a smart one to ask before spending money.
The short answer: no, you don’t need a machine right away. But for most people, getting one sooner rather than later makes everything much easier and more enjoyable.
- No machine cost upfront
- Great for repairs and small fixes
- Portable, so you can sew anywhere
- Good for learning the basics
- Slow for larger projects
- Harder to maintain even stitches
- Much faster and more consistent
- Opens up more project types
- Better results for clothing and bags
- Learning curve at first
- Upfront cost ($100–$300 for a beginner model)
- Needs occasional maintenance
If you’re just testing the waters or working on small repairs, hand sewing is a perfectly fine place to begin. But if you’re serious about learning to make clothes, bags, or home items, a sewing machine will save you a lot of time and frustration.
You don’t need to buy a machine on day one. Start with basic hand tools, try a couple of simple projects, and buy a machine once you know sewing is something you want to stick with.
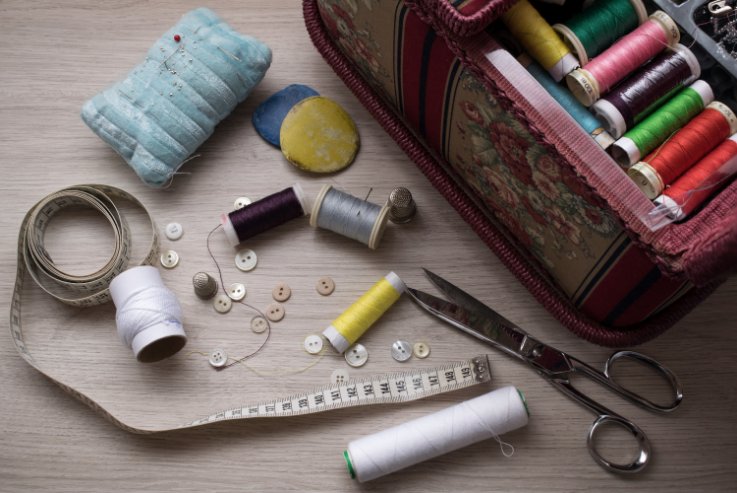
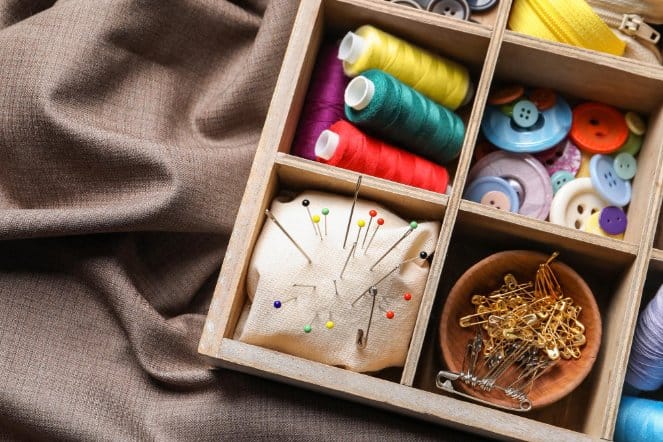
What Every Beginner Actually Needs

Before we go through each tool in detail, here’s your master list. These are the items that will take you from zero to your first finished project.
| Category | Essential Items | Priority |
|---|---|---|
| Cutting | Fabric scissors, seam ripper, small embroidery scissors | ⭐ Must-have |
| Cutting (advanced starter) | Rotary cutter + self-healing mat | ✔ Recommended |
| Measuring | Flexible measuring tape, clear ruler, seam gauge | ⭐ Must-have |
| Marking | Tailor’s chalk or fabric marker | ⭐ Must-have |
| Thread & Needles | All-purpose thread (basic colors), machine needles, hand needles | ⭐ Must-have |
| Notions | Pins + pin cushion, safety pins | ⭐ Must-have |
| Pressing | Iron + ironing board | ⭐ Must-have |
| Machine | Entry-level sewing machine | ✔ Recommended |
The good news is that most of these items are inexpensive. The sewing machine is the biggest investment, and even that doesn’t have to cost a fortune when you’re just starting out.
How Much Should You Budget?

You don’t need to spend a lot to get started. Here’s a realistic breakdown based on three starting points.
Money-Saving Tips
- Buy fabric scissors first. Use whatever scissors you already have for cutting paper patterns.
- Start with thread in just four colors: black, white, navy, and brown. They work with most fabrics.
- Check your local classifieds, Facebook Marketplace, or charity shops for second-hand machines. Many are barely used.
- A local fabric or craft store often runs weekly sales. Sign up for their emails before you shop.
- Don’t buy a sewing kit with every gadget under the sun. Cheap pre-packed kits often include low-quality tools that make learning harder, not easier.
Setting Up Your Sewing Space

You don’t need a dedicated sewing room. A kitchen table, good lighting, and a nearby power outlet is all you need to start.
That said, setting up your space thoughtfully will make a real difference in how much you enjoy sewing. Here’s what to keep in mind.
Safety First
Sewing involves sharp tools and electrical equipment. A few simple habits keep things safe from the start.
- Keep your fingers at least 1 inch (2.5 cm) away from the needle at all times when the machine is running.
- Always unplug your machine before changing needles or cleaning it.
- Never sew over pins. Remove them as you go to avoid breaking needles or damaging your machine.
- Store sharp tools like scissors and rotary cutters in cases or with blade guards when not in use.
- Keep a small first aid kit nearby. Needle pricks happen to everyone.
- Set your machine at a comfortable height, roughly at elbow level when you’re seated.
- Good lighting is non-negotiable. Natural light is best; add a desk lamp for detail work.
- Run power cords along walls, not across walkways.
Choosing Your First Sewing Machine
Your sewing machine is the biggest decision you’ll make when starting out. You don’t need a fancy model. What you need is something reliable, easy to thread, and simple to operate.
Here’s what to look for in a beginner machine:
- An automatic needle threader (saves time and frustration)
- A drop-in bobbin system (much easier than front-loading bobbins)
- At least a straight stitch and a zigzag stitch
- Adjustable stitch length and width
- Adjustable sewing speed (great when you’re still learning)
- A free arm for sewing sleeves and cuffs
Brands like Brother and Singer both offer solid beginner machines in the $100–$250 range. Both are widely available worldwide and publish free beginner guidance directly on their sites. If you’re not sure which model to choose, our Sewing Machine Buying Guide for Beginners walks you through the key decisions.
Smart Storage for Your Supplies
Keeping your supplies organized makes sewing more enjoyable and saves you time hunting for things mid-project.
- Use small clear containers or zip bags for notions like buttons, pins, and safety pins.
- A dedicated thread rack keeps your colors visible and tangle-free.
- A pegboard above your work area lets you hang scissors, rulers, and other tools where they’re easy to grab.
- Keep a separate pair of scissors just for paper. Label them clearly so no one “borrows” your fabric scissors.
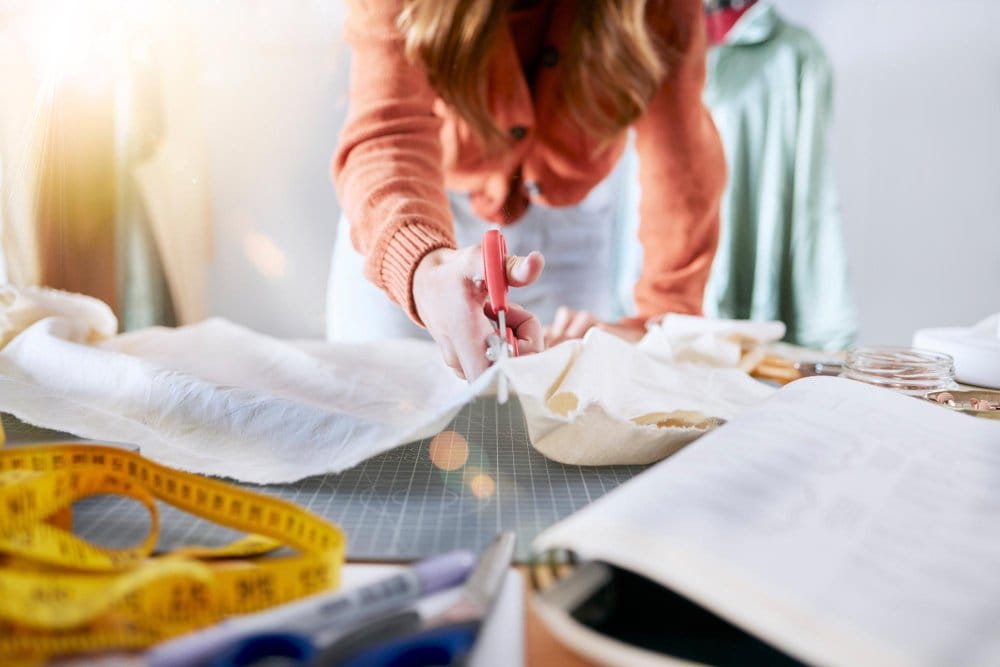
Cutting Tools
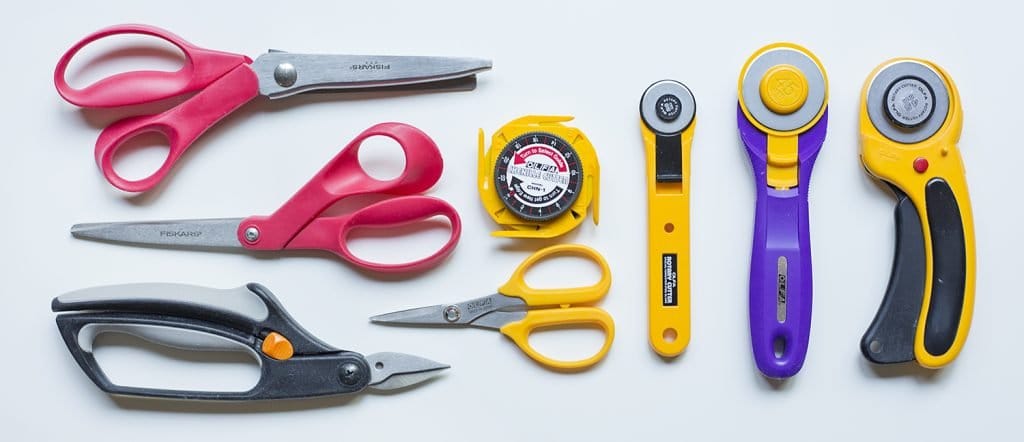
Poor cuts lead to poor results. This is the one area where spending a little more makes a real, visible difference in your finished projects.
Fabric Scissors: Your Most Important Purchase
Good fabric scissors are the single best investment you can make as a beginner. They create clean, precise cuts without fraying the edge of your fabric.
Look for scissors with 8–10 inch (20–25 cm) blades, a comfortable handle, and a precise, sharp tip. Brands like Gingher, Fiskars, and Kai are popular choices worldwide and are widely available.
Rotary Cutter and Self-Healing Cutting Mat
A rotary cutter looks like a pizza wheel for fabric. Paired with a self-healing cutting mat and a clear acrylic ruler, it lets you make perfectly straight cuts quickly and accurately.
This combo is especially useful for quilting, but it’s handy for garments too. For a beginner setup:
- A 45mm rotary cutter covers most projects
- An 18″ x 24″ (45 x 60 cm) self-healing mat is a good starting size
- A 6″ x 24″ (15 x 60 cm) clear acrylic ruler helps you cut straight lines
For more on cutting technique, see our complete guide to fabric cutting.
Small Scissors for Thread Trimming
Keep a small pair of embroidery scissors or thread snips right next to your sewing machine. You’ll use them constantly to clip threads between seams. Look for a curved blade that lets you trim threads flush with the fabric without the tip poking into the fabric.
Measuring and Marking Tools

Accurate measuring is what separates a project that comes out right from one that doesn’t. These tools are inexpensive and absolutely worth having.
Measuring Tape
A flexible, retractable measuring tape (60 inches / 150 cm) is non-negotiable. It measures curved surfaces and body measurements, which a rigid ruler cannot do. Look for one marked in both inches and centimeters. For help taking accurate body measurements, use our free Body Measurement Chart.
Clear Acrylic Ruler
A 6-inch (15 cm) or 12-inch (30 cm) clear ruler is ideal for drawing straight lines on fabric. If you’re using a rotary cutter, a longer ruler (6″ x 24″) is more useful.
Seam Gauge
This small 6-inch (15 cm) ruler has a sliding marker that you can set to a specific measurement. It’s perfect for marking consistent hem allowances, pleats, and seam depths.
It’s one of those tools that seems unnecessary until you use it, and then you use it all the time. Check out our guide to choosing the best seam gauges for more options.
Marking Tools
You need a way to transfer pattern markings to your fabric without leaving permanent marks. Your main options are:
- Tailor’s chalk: brushes away easily, available in multiple colors to contrast with your fabric. A classic choice.
- Water-soluble fabric markers: precise and easy to use; marks rinse out with water. Always test on a fabric scrap first.
- Air-erasable pens: marks disappear on their own after a few hours. Good for quick marking, not for longer projects.
- Tracing wheel with tracing paper: rolls along pattern lines and transfers them to fabric. Great for garment making.
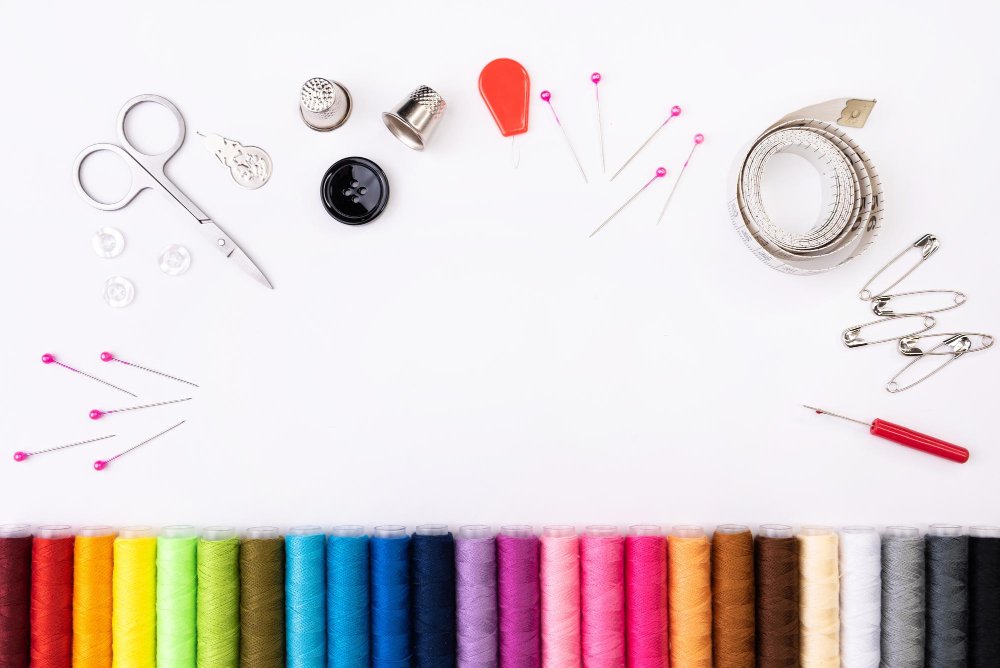
Thread, Needles, and Notions
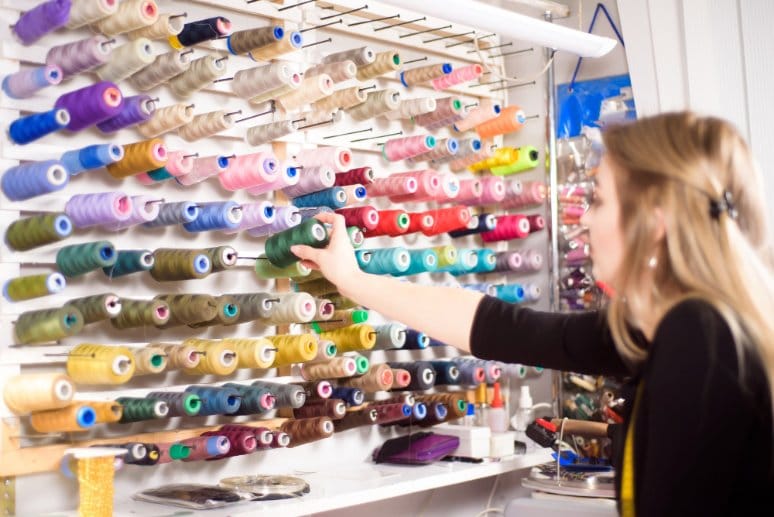
Choosing the Right Thread
Thread is what holds everything together, so don’t go too cheap here. Low-quality thread breaks more often, sheds lint inside your machine, and leads to uneven stitches.
For beginners, all-purpose polyester thread is the best starting point. It’s strong, works on most fabrics, and is easy to find. Start with these basic colors: black, white, navy, and brown or beige. You can match to fabric later as you take on specific projects.
Reputable brands available worldwide include Gutermann, Coats, and Mettler. Any of these will serve you well. For more detailed guidance, see our article on how to choose the right thread for your project.
| Thread Weight | Best For | When to Use It |
|---|---|---|
| 50-weight | General sewing | Most beginner projects. Use this as your default |
| 40-weight | Heavier fabrics, topstitching | Denim, canvas, decorative top stitching |
| 60-weight | Delicate work | Lightweight fabrics, fine details |
Understanding Needle Types and Sizes
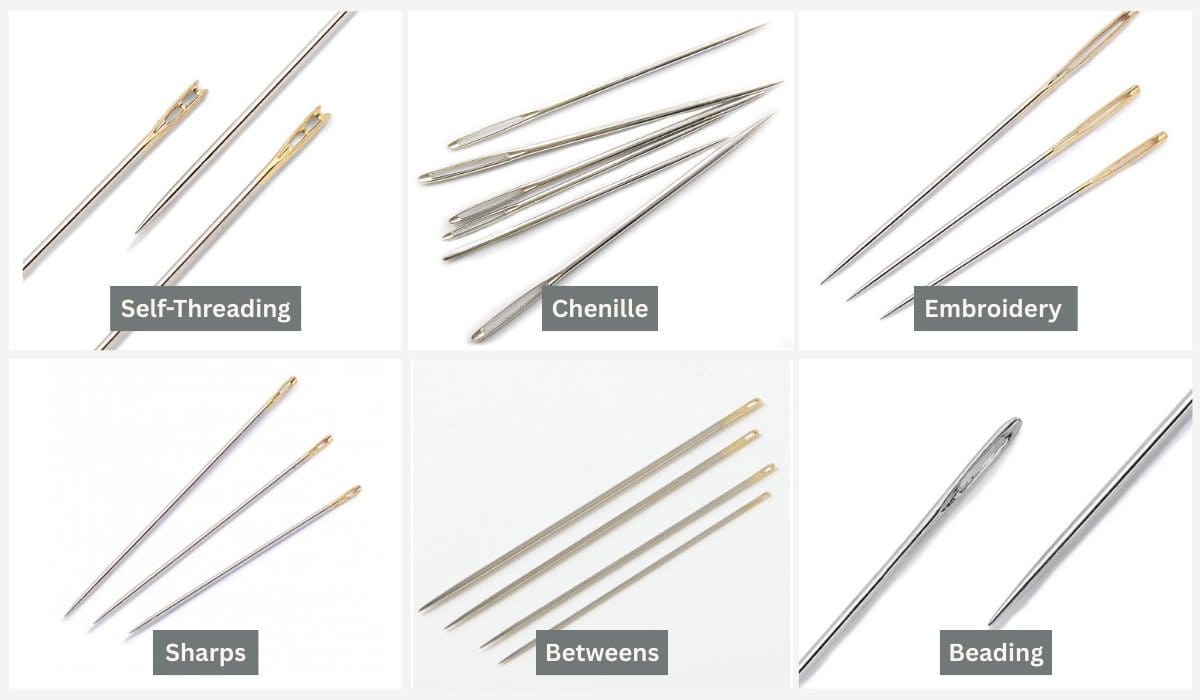
Using the wrong needle is one of the most common reasons for sewing problems. Needles come in different types for different fabrics, and different sizes for different thicknesses.
Needle sizes use two numbers, for example, 80/12. The first number is the European size, the second is American. The higher the number, the thicker the needle.
| Needle Type | Sizes to Start With | Best For |
|---|---|---|
| Universal | 70/10, 80/12 | Most woven fabrics, your everyday default |
| Ball Point | 70/10, 80/12 | Knit and stretchy fabrics |
| Denim / Jeans | 90/14, 100/16 | Heavy fabrics like denim and canvas |
| Microtex / Sharp | 60/8, 70/10 | Fine fabrics like silk and chiffon |
| Stretch | 75/11, 90/14 | Elasticated or highly stretchy fabrics |
Change your needle after every 6–8 hours of sewing, or after completing each project. A dull needle causes skipped stitches, fabric damage, and uneven results. A new needle costs very little.
Not sure which needle to use? Try our Needle and Fabric Compatibility Chart for instant recommendations across more than 30 fabric types. For deep technical detail on needle anatomy, point shapes, and sizing standards, Schmetz’s needle guide covers every needle type, size, and fabric application in one place.
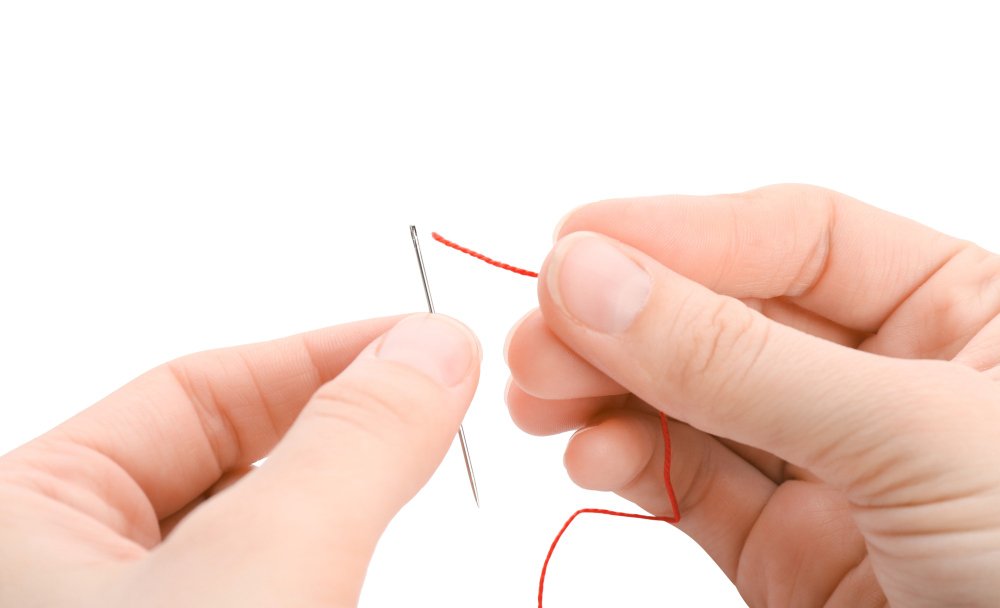
Hand Sewing Needles
Even if you’re mainly machine sewing, you’ll hand sew more than you expect, covering finishing touches, closing gaps, and attaching buttons. Keep a pack of assorted hand sewing needles. Sharp needles (called “sharps”) in sizes 8–10 cover most tasks. For a full how-to, see our guide on how to thread a needle.
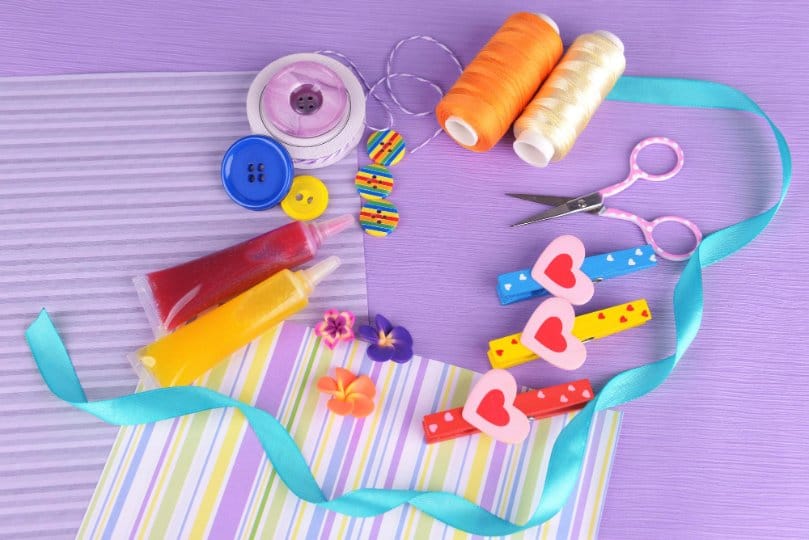
Must-Have Notions
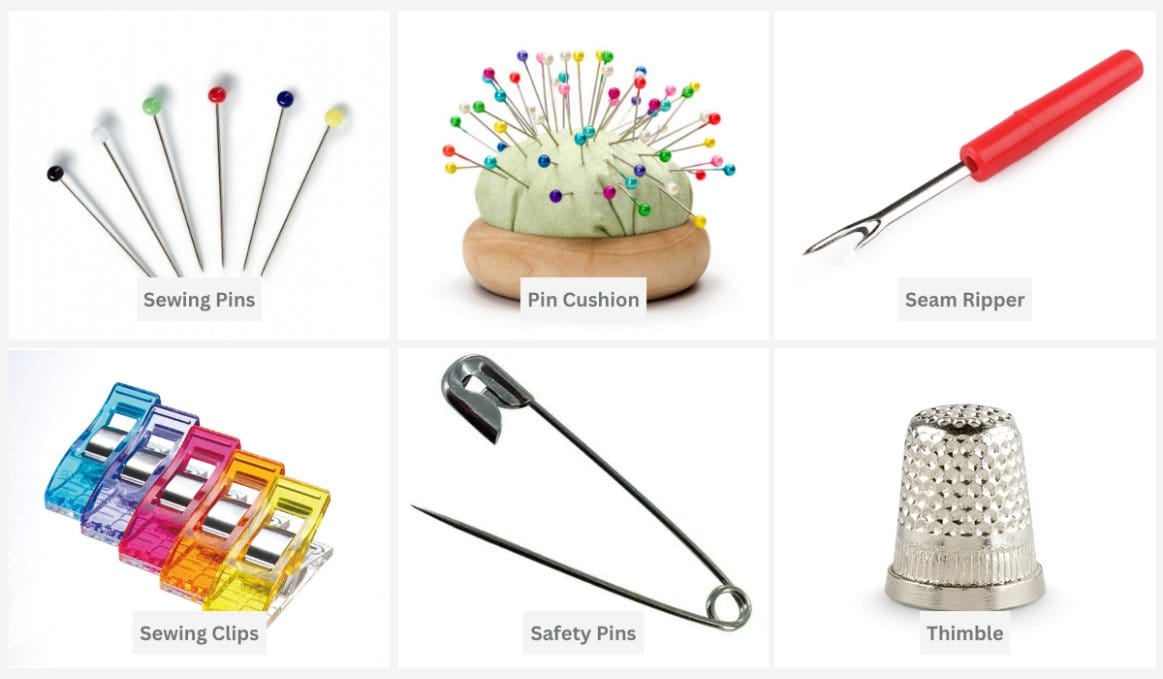
| Item | What It Does | Tips |
|---|---|---|
| Pins | Hold fabric pieces together before sewing | Use glass-head pins, as they won’t melt under an iron |
| Pin Cushion | Keeps pins organized and close to hand | Magnetic cushions make picking up pins quick and easy |
| Seam Ripper | Removes stitches cleanly without damaging fabric | You’ll use this more than you think. Keep a spare |
| Sewing Clips | An alternative to pins for thick, vinyl, or pile fabrics | Also great for holding bag linings in place before sewing |
| Safety Pins | Threading elastic, temporary basting, quick repairs | Keep a few different sizes handy |
| Thimble | Protects your finger while hand sewing | Especially useful with thick fabrics or multiple layers |
Working with Fabric

Choosing the right fabric as a beginner makes everything easier. The wrong fabric at the wrong time is frustrating and can make even a simple project feel impossible.
The core rule: start with fabrics that don’t slip, don’t stretch much, and don’t fray too easily.
Best Fabrics for Beginners
Cotton fabric is the most beginner-friendly option out there. It’s predictable, easy to press with an iron, and widely available. For more on fabric types, see our full guide to natural and synthetic fabrics.
Always Pre-Wash Your Fabric
Before you cut a single piece, wash and dry your fabric the same way you plan to care for the finished item. Fabric, especially cotton, can shrink significantly in the wash. Pre-washing prevents your finished project from coming out smaller than expected after its first launder.
It also softens the fabric, making it easier to work with. Learn more in our cotton care guide.
Using Interfacing
Interfacing is a backing material that adds shape and stiffness to areas like collars, cuffs, waistbands, and bag panels. You fuse it to the wrong side of your fabric with a hot iron.
As a beginner, choose a fusible (iron-on) interfacing that’s slightly lighter in weight than your main fabric. Always test a small piece first to check that the iron temperature is right and that it bonds without puckering.
What About Specialty Fabrics?
As your skills grow, you’ll come across specialty fabrics that look beautiful but need more careful handling. One you’ll likely encounter is burnout chiffon.
Burnout chiffon is a sheer, lightweight fabric created using a chemical process that “burns away” part of the fibre to create raised, velvet-like patterns against a sheer background. The result is stunning, but because it’s both delicate and slippery, it’s one of the trickier fabrics to cut and sew accurately.
Burnout chiffon requires a very fine needle (Microtex 60/8 or 70/10) and extremely slow machine speeds. A walking foot or tissue paper placed under the fabric helps prevent it from slipping while you sew.
Leave it for when you’ve built some confidence with simpler fabrics first. Our full guide to burnout chiffon fabric covers everything you need to know when you’re ready.
The same caution applies to other chiffon types. silk chiffon, for instance, is beautiful but notoriously difficult to handle for beginners.
Supplies by Goal: Garments, Quilting, and Home Décor
The 11 essentials covered earlier apply to almost everyone. But what you add beyond that depends on what you want to make. Here is a quick breakdown by project type so you can shop with a clear purpose.
| Goal | Core Extras to Add | Notes |
|---|---|---|
| Garment sewing | Dress form or mannequin, tailor’s ham, sleeve roll, point turner, hand needles, interfacing, zipper foot | Pressing is critical for garments. A tailor’s ham lets you press curved seams like darts and shoulders so they hold their shape. |
| Quilting | Quilting ruler set, walking foot, free-motion foot, extra-long pins, quilting thread (40-weight), batting | Accuracy matters more in quilting than most sewing. A walking foot feeds multiple layers evenly and is worth buying early. |
| Home décor | Heavy-duty thread, denim or upholstery needles (100/16+), zipper foot, piping foot, longer cutting mat | Curtains, cushions, and bags use heavier fabrics. Make sure your machine can handle the weight before starting large projects. |
| Repairs and alterations | Hand needle variety pack, seam ripper, iron-on hem tape, fabric glue, safety pins in multiple sizes | You can handle most household repairs without a machine at all. These supplies handle 90% of common mending jobs. |
Advanced Tools Worth Adding as You Grow
The old rule is to buy tools when a specific project demands them, not before. But a few tools consistently earn their place once you move past beginner projects.
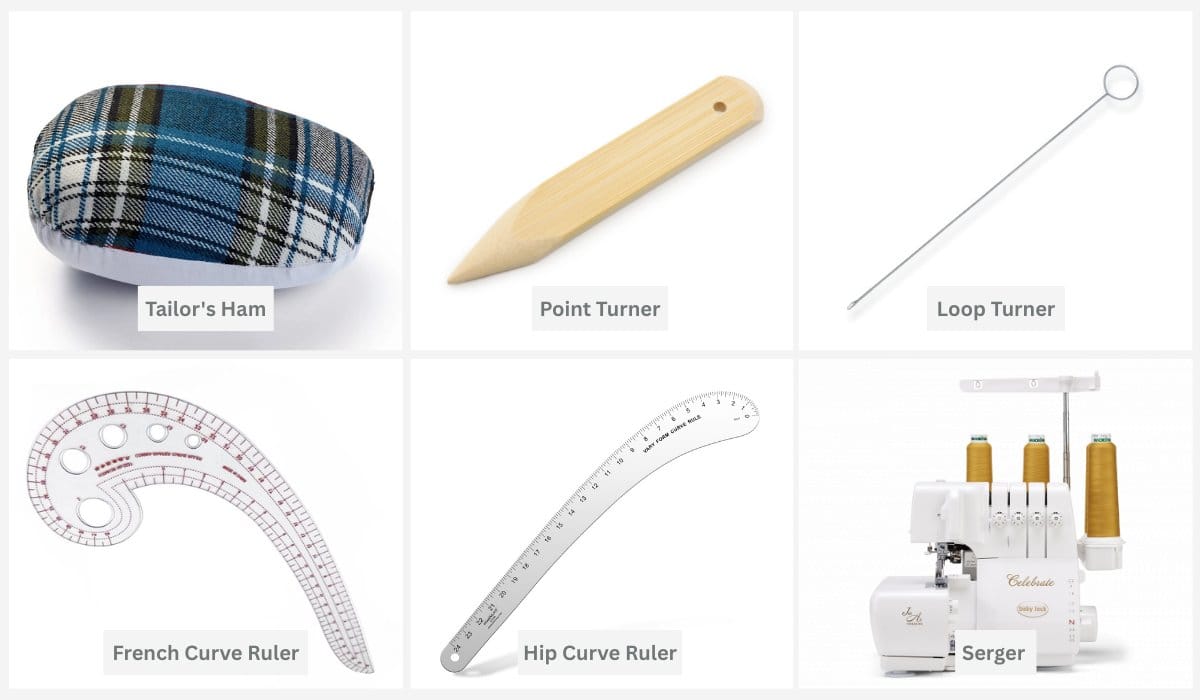
- Tailor’s ham: a firm, egg-shaped cushion used for pressing curved seams. It is essential for anything fitted, including darts, sleeves, and collars.
- Sleeve roll: similar to a tailor’s ham but elongated. Used for pressing sleeves and narrow tube shapes without crushing the opposite side.
- Point turner: a small tool for pushing fabric corners out cleanly in collars, cuffs, and bags. A knitting needle works in a pinch, but a proper point turner is more precise.
- Loop turner: makes turning narrow fabric tubes right side out much easier. Used for spaghetti straps, belt loops, and fabric ties.
- French curve ruler: a curved drafting tool for drawing smooth curved seams in pattern making and alterations. Not essential for beginners but very useful once you start adjusting patterns.
- Hip curve ruler: a longer version of the French curve, used for drafting smooth hip and waist curves on skirts and trousers.
- Serger (overlock machine): a separate machine that trims and finishes seam edges in one pass. Not essential to start, but if you sew regularly it speeds up finishing work significantly and gives a professional look inside your garments.
Hand Sewing Basics
Even if you’re mostly machine sewing, hand stitching comes up regularly, from finishing seams and attaching buttons, closing openings, or repairing a tear. These three stitches will handle most of what you’ll need.
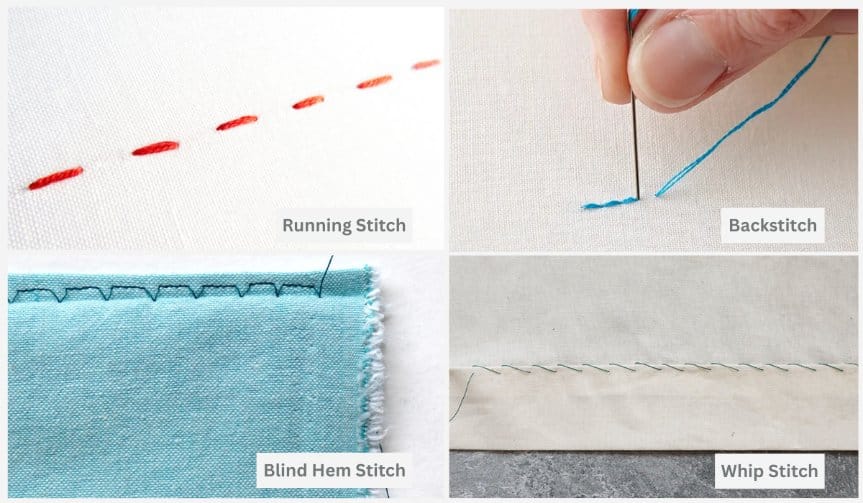
| Stitch | What It’s For | How to Do It |
|---|---|---|
| Running Stitch | Basting, gathering fabric | Push the needle up and down through the fabric in a straight line with even spacing |
| Backstitch | Strong seams by hand | Stitch forward, then bring needle back behind the last stitch before moving forward again |
| Blind Hem Stitch | Invisible hems on garments | Work between fabric layers, catching only a thread or two of the outer fabric |
| Whip Stitch | Joining edges, closing openings | Wrap thread diagonally over the edge of the fabric with each stitch |
Want to learn how to sew on a button properly? Check out our guide on how to sew a button. It’s one of the most useful hand sewing skills you can have.
Beginner Sewing Glossary
Sewing has its own language, and not knowing the terms can make tutorials confusing. Here are the words you’ll come across most often.
- Seam Allowance
- The gap between the edge of your fabric and the line you sew. Most patterns use 5/8 inch (1.5 cm). See our full guide to seam allowances.
- Notions
- All the small sewing supplies and accessories other than the fabric and machine, such as pins, thread, buttons, zippers, and elastic.
- Selvedge
- The finished, non-fraying edge on either side of a roll of fabric. Always cut parallel to the selvedge unless a pattern tells you otherwise.
- Grain Line
- The direction of threads running through woven fabric. The straight grain runs parallel to the selvedge. Most pattern pieces need to be placed on the straight grain.
- Bias
- The diagonal direction of fabric, at 45 degrees to the grain line. Fabric cut on the bias stretches and drapes differently.
- Basting
- Temporary stitches used to hold pieces in place before final sewing. Usually done with a long stitch length so the stitches are easy to remove later.
- Interfacing
- A backing fabric applied to the wrong side of your main fabric to add stiffness or shape. Often fusible (iron-on).
- Bobbin
- The small spool of thread that sits inside the machine, below the needle plate. The bobbin thread and the top thread interlock to form a stitch.
- Presser Foot
- The small attachment on your machine that holds the fabric flat while you sew. Different feet are used for different tasks. See our presser feet guide.
- Hem
- A folded and sewn edge at the bottom of a garment or curtain to give it a clean, finished look. Our guide to sewing perfect hems walks you through the process.
- Topstitching
- Decorative or functional stitching visible on the right side of the fabric, like the stitching along the pockets and seams of jeans.
- Right Side / Wrong Side
- The right side is the finished, printed, or visible side of the fabric. The wrong side is the back. Patterns usually instruct you to place fabric pieces right sides together.
Mistakes Beginners Make When Buying Supplies
Most beginners make at least one of these mistakes. Knowing about them ahead of time saves you money and saves your projects.
Buying the cheapest scissors available
Cheap scissors crush fabric fibres instead of cutting them cleanly. This leads to fraying edges and uneven cuts before you’ve even started sewing. Buy one good pair and keep them protected.
Using household scissors on fabric
Even if they feel sharp, kitchen or craft scissors aren’t designed for fabric. They’ll dull quickly on fabric and leave ragged edges that make every step harder.
Buying too many supplies before starting
It’s tempting to stock up on everything before your first project. But you don’t know yet what you’ll actually use. Start with the essentials and add tools as you need them.
Ignoring needle type and size
Using the wrong needle causes broken threads, skipped stitches, and fabric damage. It’s a small thing that makes a big difference. Always match your needle to your fabric.
Skipping the iron
Many beginners skip pressing seams because it feels like extra work. But pressing as you sew is one of the biggest differences between projects that look homemade and ones that look polished.
Not pre-washing fabric
Fabric shrinks. If you skip pre-washing and then launder your finished project, it may come out smaller, puckered, or distorted. Always wash new fabric before cutting.
Starting with a difficult fabric
Silky, stretchy, or sheer fabrics are genuinely hard to work with. Starting on them when you’re still learning will make the experience much more frustrating than it needs to be.
Not changing needles often enough
Sewing machine needles are meant to be replaced regularly. A needle that’s been in there for months causes all sorts of stitching problems. A new needle is one of the cheapest fixes in sewing.
Where to Buy Sewing Supplies
You can find sewing supplies in more places than you might think, and you don’t need to live near a specialist sewing store to get quality tools.
| Where to Shop | Good For | Things to Know |
|---|---|---|
| Dedicated fabric and craft stores | Fabric selection, notions, machines, classes | Staff are often knowledgeable and can help beginners choose. Watch for weekly sales. |
| Large general retailers | Basic supplies, beginner kits, entry-level machines | Convenient and affordable for everyday items. Quality varies. |
| Online retailers | Everything, especially specialty items and bulk thread | Great for price comparison. Read reviews and check return policies before buying machines. |
| Second-hand markets and classifieds | Sewing machines, large scissors, specialty tools | Can be excellent value. Test machines before buying if possible. |
| Sewing machine dealers | Machines, advice, lessons, servicing | Usually offer demonstrations and after-purchase support. Worth visiting for your first machine. |
For globally available brands, these are reliable choices wherever you are in the world: Gutermann (thread), Schmetz (needles), Fiskars (scissors and rotary cutters), Olfa (rotary cutters and cutting mats), Brother and Singer (sewing machines).
Your First Projects
Choosing the right first project is just as important as choosing the right supplies. Start too simple and it’s boring. Start too complicated and it’s discouraging.
The sweet spot for most beginners is a project that involves straight seams, minimal shaping, and no complicated closures.
Great First Projects
- Pillowcases: straight seams, no shaping, instant results. Perfect for project one.
- Tote bags: introduces you to interfacing, handles, and simple construction. Very satisfying to finish.
- Scrunchies: tiny, quick, and use almost no fabric. A great way to practice machine handling.
- Simple A-line skirt: your first step into garment sewing. Mostly straight lines with a simple elastic waistband.
- Hemming existing clothes: practical, low stakes, and teaches you the technique you’ll use constantly.
Browse our full list of easy sewing projects for beginners, or explore our beginner-friendly sewing patterns to find something that excites you.
🎯 Take the Sewing Skill Quiz: Find Projects That Match Your LevelReading a Sewing Pattern
Most beginner projects come with a pattern, either printed on tissue paper or as a downloadable PDF you print at home. At first glance, patterns look complicated, but they follow a consistent logic once you know what you’re looking at.
Our guide on how to read a sewing pattern breaks the whole process down in plain language.
Sewing Supplies for Kids
Teaching a child to sew is a wonderful thing to do. But the tools matter. Standard sewing supplies, especially rotary cutters and sharp pins, are not appropriate for younger children.
Here’s what to look for when setting up sewing supplies for a child:
- Blunt-tipped needles for hand sewing: specifically designed for children. They’re sometimes called “tapestry needles.”
- Child-sized fabric scissors: spring-loaded models require less grip strength and are easier for small hands.
- Plastic-head pins: more visible and slightly less dangerous than metal pins for younger learners.
- Plastic canvas or felt fabric: easier for beginners because the edges don’t fray and the material stays flat.
- A sewing stiletto or awl: instead of guiding fabric with fingers, a stiletto lets kids guide fabric safely without getting fingers near the needle.
- Skip the rotary cutter: wait until children are in their early teens and can handle sharp tools responsibly.
Many sewing machine brands offer machines designed or recommended for children from around age 8–10, with slower speed controls and simpler threading. Always supervise young sewers, especially near a machine.
Building Your Skills Over Time
Nobody sits down at a sewing machine for the first time and produces a perfect garment. Skills build up in layers over months of practice. Here’s a realistic picture of the journey.
Months 1–3: Building the Foundation
Focus on sewing straight seams, using your iron as you go, reading patterns, and finishing simple projects like bags and pillowcases. Get comfortable with your machine.
Months 3–9: Expanding Your Skills
Start sewing garments. Tackle curved seams, basic zippers, buttonholes, and simple fitting. Try different fabric types beyond basic cotton.
Months 9–18: Getting Confident
Work on more fitted garments, pattern adjustments, and structured items. Experiment with specialty fabrics and more complex construction techniques.
18+ Months: Advanced Sewing
Draft your own patterns, work with difficult fabrics, master tailoring techniques, and develop your own style and preferences.
Ways to Keep Learning
- Local sewing classes or workshops: nothing beats in-person feedback from an experienced teacher.
- Online video tutorials: YouTube has an enormous library of free sewing content for every level.
- Sewing books: a well-chosen book is a long-term reference you’ll return to again and again.
- Sewing communities: online forums, local sewing groups, and social media communities where you can ask questions, share projects, and get support.
Sewing Machine Maintenance Basics
A sewing machine that’s looked after well can last decades. Neglect it and it’ll frustrate you with problems that are entirely preventable. Here’s the basic routine to follow.
| How Often | What to Do |
|---|---|
| After every project | Remove the bobbin, brush out lint from the bobbin area with the small brush that came with your machine |
| Every 6–8 hours of sewing | Change your needle, even if it doesn’t look damaged |
| Monthly (if you sew regularly) | Oil the moving parts as directed in your machine’s manual. Not all machines need oiling, so check first. |
| Once a year | Have the machine serviced by a professional. Think of it like a car service. It keeps everything running smoothly. |
Always cover your machine when not in use to keep dust out. Store it at room temperature, not in a garage or attic where temperature and humidity changes can affect the mechanics.
For a visual walkthrough of how to clean a sewing machine properly, watch this step-by-step guide:
▶ How To Clean Your Sewing Machine — click to play
For a full maintenance plan, see our sewing machine maintenance guide.
Troubleshooting Common Issues
Every beginner runs into machine problems. Here are the most common ones and what usually causes them.
| Problem | Most Likely Cause | First Fix to Try |
|---|---|---|
| Thread breaking | Poor threading, wrong tension, or damaged needle | Re-thread the machine completely from scratch, then change the needle |
| Skipped stitches | Wrong needle type, dull needle, or incorrect threading | Change needle and re-thread, making sure the thread is seated in every guide |
| Fabric puckering | Tension too tight, wrong needle size, or poor fabric support | Reduce upper tension slightly; check needle size for your fabric weight |
| Thread bunching underneath | Bobbin incorrectly threaded or inserted | Remove, re-wind, and re-insert the bobbin; re-thread the top |
| Machine jamming | Thread caught under needle plate, or bent needle | Turn off the machine, remove fabric carefully, check for broken needle pieces |
| Uneven stitches | Uneven feeding, wrong presser foot, or inconsistent speed | Sew more slowly and evenly; check that the presser foot is fully engaged |
For a full walkthrough of machine issues, visit our sewing machine troubleshooting guide or use our Sewing Machine Problem Diagnosis Tool for instant help. Singer also publishes a detailed general troubleshooting reference covering threading, tension, bobbin, and stitch problems across most machine types.
Frequently Asked Questions
A good beginner kit includes fabric scissors, a flexible measuring tape, straight pins with a pin cushion, hand sewing needles, a seam ripper, small thread scissors, tailor’s chalk or a fabric marker, and basic thread in black, white, navy, and brown.
Once you have these, you can tackle most starter projects. Add a sewing machine when you’re ready to go further.
For a reliable beginner machine, budget between $150 and $300 (roughly £120–£240 or AUD $230–$450). This range gets you a machine with automatic needle threading, a drop-in bobbin, and adjustable stitch settings, all of which make learning much easier. Avoid machines under $80–$100, as they tend to be poorly built and will frustrate you quickly.
All-purpose polyester thread is the best starting point. It works with most fabrics and machines, and it’s strong enough for most projects. Brands like Gutermann, Coats, and Mettler are reliable choices available in most countries. Start with basic colors (black, white, navy, and brown) and build your collection as you take on specific projects.
Technically yes, but you’ll regret it. Household scissors aren’t sharp enough for clean fabric cuts, which means ragged edges, more fraying, and frustration with every project. Fabric scissors are one of the best investments you can make. Buy one good pair and keep them strictly for fabric only.
Change your needle every 6–8 hours of sewing, or after every project, whichever comes first. Signs that your needle needs changing include skipped stitches, a slight popping sound as the needle enters the fabric, or visible damage to the stitching.
Machine needles are very inexpensive, so there’s no reason to push a worn one too long.
Medium-weight quilting cotton is widely considered the best fabric for beginners. It doesn’t slip, stretch, or fray too much, and it presses beautifully with an iron.
It responds well to standard needle sizes and tension settings, and it’s widely available and usually affordable. Once you’re comfortable with cotton, you can branch out to cotton blends, flannel, and lightweight denim.
You can make a simple project, like a pillowcase or tote bag, within your first day or two of learning. Basic garment sewing usually takes a few months of regular practice.
By the six-month mark, most people who sew consistently can tackle most beginner and intermediate patterns. There’s always more to learn, but you’ll reach a usable skill level much faster than most people expect.
No. A serger (also called an overlocker) is useful for finishing seam edges professionally, but it’s absolutely not necessary for beginners. Your sewing machine’s zigzag stitch does a perfectly fine job of finishing seams until you’re ready to invest in more equipment. Most people sew happily for years before adding a serger to their setup.
It can be, but it doesn’t have to be. Starting costs are manageable: $50–$100 for hand tools, or $150–$300 with a machine. Once you have the basics, ongoing costs are mostly fabric, thread, and patterns.
Many people find that sewing saves money over time by letting them repair and alter clothes instead of replacing them. You can also make high-quality items for a fraction of what they’d cost to buy finished.
Burnout chiffon is a sheer, lightweight fabric created using a chemical process that removes part of the fibre to create a raised, velvet-like pattern against a transparent background. It looks gorgeous but is genuinely tricky to work with.
It slips, shifts, and requires careful pinning, slow machine speeds, and a very fine needle. It’s not a fabric for beginners.
Start with stable cottons, build your confidence, and save burnout chiffon for when you’re comfortable handling slippery fabrics. Our full burnout chiffon guide covers everything when you’re ready.
Conclusion
Getting started with sewing doesn’t require a room full of tools or a big budget. What it does require is a few quality basics, a little patience, and the willingness to learn from your mistakes, because everyone makes plenty of them at first.
The supplies covered in this guide are everything you need to go from complete beginner to confident sewist. Start with the essentials, add tools as your projects call for them, and resist the temptation to buy everything at once.
Your fabric scissors will be the single most-used tool you own. Your iron will be a close second. And your seam ripper? You’ll become very well acquainted.
Above all, just start. Pick a project, gather your basics, and make something, even if it’s imperfect. Every experienced sewist has a collection of early disasters they look back on fondly. Yours will be the foundation for everything that comes next.
Key Takeaways
- You only need 11 supplies to get started. Don’t over-buy before your first project.
- Invest in quality fabric scissors before anything else. It’s the tool that makes the most difference.
- Budget $150–$300 for a complete beginner setup including a reliable entry-level machine.
- Always pre-wash fabric before cutting. This prevents shrinkage surprises after you’ve finished.
- Match your needle to your fabric every time. It’s a small habit with a big impact on results.
- Start with medium-weight cotton. Leave slippery, stretchy, or sheer fabrics for later.
- Press your seams as you sew. An iron is not optional. It’s what makes projects look finished.
- Change your machine needle regularly. A worn needle causes more problems than almost anything else.
- Learn three or four hand stitches. You’ll need them even as a primarily machine sewer.
- Build skills gradually. One project at a time, each one a little more challenging than the last.
Explore more on Clothing Digest: The Complete Beginner’s Guide to Sewing • Easy Projects for Beginners • How to Read a Sewing Pattern
The information in this article is intended for general educational purposes only. Product prices mentioned are approximate and may vary by retailer, region, and time. Clothing Digest does not endorse any specific brand or product. Tool and supply recommendations are based on widely accepted beginner sewing guidance and general market availability. Always follow the safety instructions provided with your specific tools and sewing machine. If you have concerns about using sharp tools or electrical equipment, consult the manufacturer’s guidance or seek in-person instruction from a qualified sewing teacher. Clothing Digest is not responsible for any outcomes arising from the use of information in this article.