Master Professional Seam Grading: Reduce Bulk, Improve Drape, and Create Couture-Quality Finishes
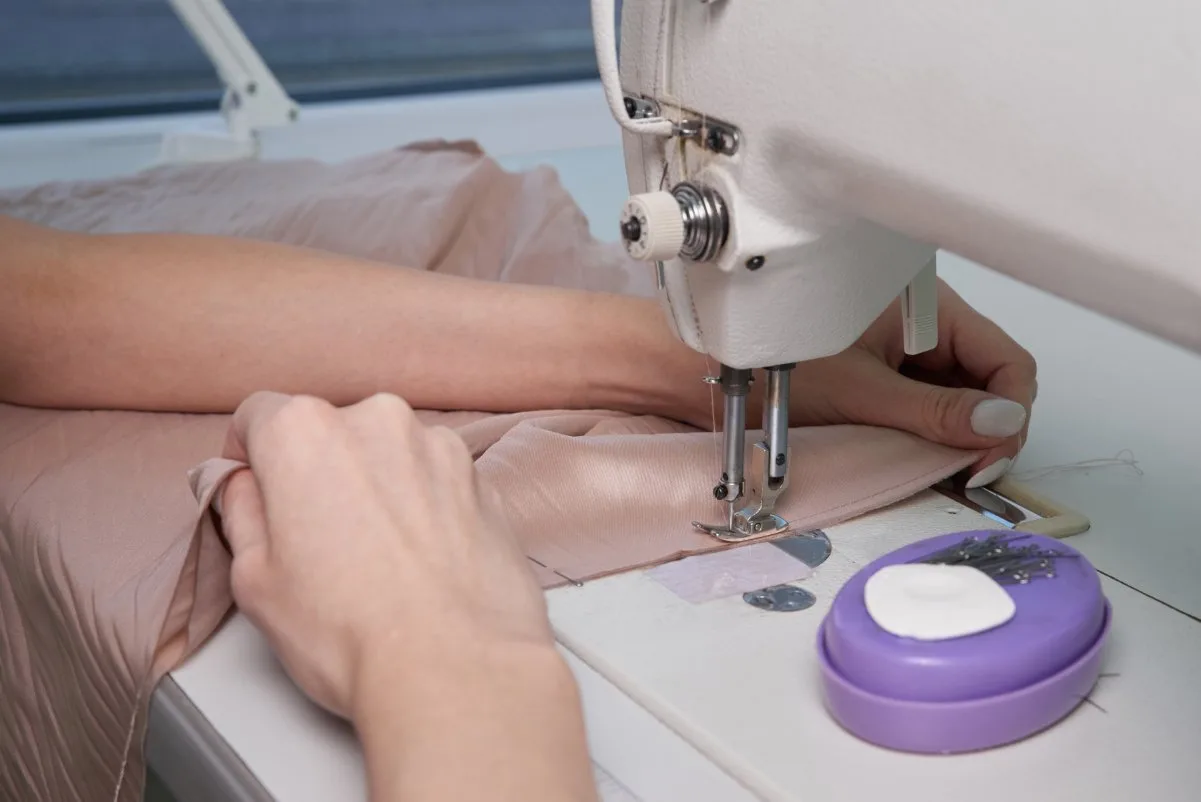
Ever wondered why your homemade clothes don’t look quite as polished as store-bought ones? The secret often lies in a simple technique called seam grading. This method transforms bulky, amateur-looking seams into smooth, professional finishes that make your garments drape beautifully and last longer.
Grading seam allowances means cutting fabric layers at different widths within your seams. Instead of leaving all layers the same size, you trim them to create a stepped effect. This eliminates bulk and prevents ridges from showing through your finished garment.
Table of Contents
What is Grading a Seam Allowance? {#what-is-grading}
Grading a seam allowance involves trimming each fabric layer to a different width, creating a staggered effect. Think of it like stairs – each layer becomes progressively shorter, eliminating the thick ridge that forms when multiple fabric layers stack on top of each other.
What Does It Mean to Grade a Seam Allowance?
When you grade seams, you’re essentially creating different levels within your seam allowance. The layer closest to the garment’s right side stays the longest, while inner layers get progressively shorter. This technique:
- Reduces bulk in thick fabrics
- Prevents seam ridges from showing through
- Improves garment drape and comfort
- Creates professional-looking finishes
The Difference Between Trimming and Grading
Many sewers confuse trimming with grading, but they serve different purposes:
Trimming cuts all seam allowance layers to the same shorter width. Use this for:
- Reducing overall seam width
- Preparing for binding or facing
- Working with very lightweight fabrics
Grading cuts each layer to a different width. Use this for:
- Multiple fabric layers
- Heavy fabrics like wool or denim
- Enclosed seams in collars and cuffs
Understanding Seam Allowance Basics {#seam-allowance-basics}
Before diving into grading techniques, let’s cover seam allowance fundamentals that will make your grading more effective.
What is a Reasonable Seam Allowance?
Standard seam allowances vary by project type and fabric:
| Project Type | Standard Allowance | When to Use |
|---|---|---|
| Garment construction | 5/8″ (15mm) | Most clothing patterns |
| Home decor | 1/2″ (12mm) | Curtains, pillows |
| Quilting | 1/4″ (6mm) | Piecing blocks |
| Delicate fabrics | 3/8″ (10mm) | Silk, chiffon |
| Heavy fabrics | 3/4″ (20mm) | Coats, upholstery |
How to Mark Seam Allowances
Accurate seam allowances start with proper marking:
- Use pattern markings: Most commercial patterns include seam allowances
- Add your own: When working with self-drafted patterns, add allowances after creating your pattern pieces
- Mark with tools: Use fabric markers, chalk, or sewing machine guides for accuracy
- Double-check measurements: Measure from your cutting line to ensure consistency
How Much Should You Add for Seam Allowance?
When adding seam allowances to patterns:
- Straight seams: Add the full allowance width parallel to the seamline
- Curved seams: Add allowance perpendicular to the curve at multiple points
- Corners: Extend allowances past the corner point for easier sewing
- Special techniques: French seams need double the standard allowance
Essential Tools for Grading {#essential-tools}
The right tools make grading faster and more accurate. Here’s what you’ll need:
Cutting Tools Comparison
| Tool | Best For | Precision Level | Cost |
|---|---|---|---|
| Duck-bill scissors | Curved seams | High | $$$ |
| Embroidery snips | Delicate fabrics | High | $$ |
| Pinking shears | Straight edges | Medium | $$ |
| Rotary cutter | Long straight seams | High | $$ |
Essential Equipment Checklist
Must-Have Tools:
- Sharp fabric scissors
- Seam ripper
- Measuring ruler
- Fabric markers
- Pressing iron
Helpful Additions:
- Specialty presser feet
- Seam gauge
- Cutting mat
- Point turner
Professional sewing experts recommend investing in quality cutting tools, as precision makes the difference between amateur and couture results. The initial investment in proper scissors and measuring tools pays dividends in every project you complete.
Quick Reference Guide
Use this comprehensive guide as a quick reference while working on your projects. Save or bookmark this infographic for easy access during your sewing sessions.
Seam Grading Guide
Professional techniques for reducing bulk and creating smooth finishes
👁 Before vs After Grading
Before Grading
Bulky, uneven seams
After Grading
Smooth, professional finish
1 Basic Steps
- Complete your seam construction
- Press seam open or to one side
- Trim outer layer to full width
- Cut middle layer to 3/8″
- Trim inner layer to 1/4″
- Press final seam direction
🔧 Essential Tools
📐 Standard Measurements
🧵 Fabric Types
Grade aggressively
Standard grading
Grade conservatively
💡 Pro Tips
Now let’s dive into the detailed step-by-step process for grading your seam allowances.
Step-by-Step Grading Instructions {#step-by-step}
Follow this systematic approach for professional grading results every time.
Basic Grading Process
Step 1: Prepare Your Garment
- Complete your seam construction
- Press the seam open or to one side as intended
- Lay the garment flat with seams accessible
- Identify which direction the seam will be pressed
Step 2: Plan Your Grading
- Count the number of fabric layers
- Decide which layer stays longest (usually the one facing the garment exterior)
- Plan your cutting sequence from shortest to longest
Step 3: Cut the Layers
For a standard two-layer seam:
- Leave the outer layer at full width (5/8″)
- Trim the inner layer to 1/4″ (6mm)
For three or more layers:
- Leave the outermost layer full width
- Trim the middle layer(s) to 3/8″ (10mm)
- Cut the innermost layer to 1/4″ (6mm)
Step 4: Check Your Work
- Layers should create a stepped effect
- No layer should be visible when the seam is pressed
- All cuts should be parallel to the original seamline
How to Sew Accurate Seam Allowances
Accurate seams make grading more effective:
- Use consistent seam guides: Sewing machine feet with measurements help maintain accuracy
- Practice consistent speed: Sew at a steady pace for straight lines
- Pin strategically: Place pins perpendicular to seamlines
- Check measurements frequently: Stop and measure if your seam starts wandering
For more detailed sewing techniques, check out our beginner’s guide to sewing.
Advanced Grading Techniques {#advanced-techniques}
Master these advanced methods for complex sewing projects and professional results.
Grading Curved Seams
Curved seams need special attention to lie flat:
For Concave Curves (necklines, armholes):
- Grade the seam allowances first
- Clip into the seam allowance every 1/2″ to 3/4″
- Clips should extend to within 1/8″ of the seamline
- Don’t clip through your stitching
For Convex Curves (collar edges, patch pockets):
- Grade the seam allowances
- Cut small triangular notches instead of straight clips
- Remove fabric wedges to reduce bulk
- Space notches closer together on tighter curves
Managing Multiple Seam Intersections
When several seams meet (like at waistlines), use these techniques:
Triangle Trimming Method:
- Trim seam allowances to different lengths before they intersect
- Cut diagonal corners where seams cross
- This creates a diamond-shaped opening that reduces bulk significantly
Techniques used by industry professionals often involve multiple steps that ensure both durability and appearance meet commercial standards. This layered approach to complex intersections prevents the bulk issues that plague many home-sewn garments.
Layered Approach:
- Grade each seam individually first
- When seams intersect, trim the crossing seam allowances even shorter
- Press in opposite directions when possible
Special Considerations for Different Fabrics
Different fabric types require adapted grading techniques:
Heavy Fabrics (Wool, Denim, Canvas):
- Grade more aggressively (larger differences between layers)
- Consider serging or pinking edges to prevent fraying
- Use bias tape for very bulky seams
Delicate Fabrics (Silk, Chiffon, Lace):
- Grade conservatively to avoid weakening seams
- Use pinking shears to reduce fraying
- Consider French seams for enclosed edges
Stretchy Fabrics: Check our guide on stretchy fabrics for specific techniques, but generally:
- Use slightly wider seam allowances
- Grade carefully to maintain stretch
- Consider serged finishes
Fabric-Specific Grading Tips {#fabric-specific-tips}

Working with Natural Fibers
Cotton Fabrics: Cotton responds well to standard grading techniques. The natural fibers press easily and hold their shape after grading.
Wool Care: When working with wool, grade carefully as the fabric can felt if overpressed. Use a press cloth and steam rather than direct heat.
Linen Projects: Linen benefits from aggressive grading due to its natural stiffness. The fabric softens with wear, so generous grading prevents future bulk issues.
Synthetic Fabric Considerations
Polyester Blends: Polyester fabrics can be slippery to grade. Use sharp tools and work slowly for accuracy.
Synthetic Care Tips: Different synthetic fabrics require different approaches. Learn more in our synthetic fabric care guide.
How to Calculate Seam Allowance for Special Techniques {#special-techniques}
French Seams
French seams require special calculation:
- First seam: Use half your desired final seam allowance
- Second seam: Use the remaining allowance
- Example: For a 5/8″ finish, sew first at 3/8″, trim to 1/8″, then sew final seam at 1/4″
Flat Felled Seams
Popular for jeans and sturdy garments:
- Start with 5/8″ seam allowance
- Trim one layer to 1/4″
- Fold the longer layer over the shorter one
- Topstitch in place
Bound Seams
When binding seam allowances:
- Trim both layers to 1/4″
- Encase raw edges in bias tape
- Stitch through all layers
Common Mistakes and Troubleshooting {#troubleshooting}
What to Do with Seam Allowance After Sewing
After completing your seams, proper finishing prevents fraying and extends garment life:
Finishing Options:
- Pinking: Cut with pinking shears for a zigzag edge
- Serging: Use an overlock machine for professional edges
- Binding: Encase raw edges in bias tape
- Turn and stitch: Fold under and topstitch
How to Make Seams Less Bulky
If your seams still feel thick after grading:
- Press more aggressively: Use steam and pressure
- Trim closer: Reduce seam allowances further
- Use bias binding: Replace wide seam allowances with bound edges
- Consider seam alternatives: French seams or flat felled seams may work better
Common Grading Errors
Cutting Too Close to Stitching:
- Always leave at least 1/8″ between cuts and seamline
- Use seam sealant if you accidentally cut too close
Uneven Layer Widths:
- Measure each layer as you cut
- Use a seam gauge for consistency
Wrong Layer Placement:
- The layer against the garment exterior should be longest
- This prevents shorter layers from showing through
How to Neaten Seam Allowances {#neatening}
Professional seam finishing makes the difference between homemade and couture:
Edge Finishing Techniques
For Fraying Fabrics:
- Serged edges: Professional and durable
- Pinked edges: Quick and effective for light fraying
- Bound edges: Elegant for visible seam allowances
For Non-Fraying Fabrics:
- Clean cut: Simply trim with sharp scissors
- Pinked edge: Adds a decorative touch
- Raw edge: Acceptable for enclosed seams
Pressing for Professional Results
Proper pressing is crucial after grading:
- Press seams open first: This sets the stitching
- Grade the allowances: Work with seams still open
- Press final direction: According to pattern instructions
- Use appropriate heat: Match iron temperature to fabric type
FAQ {#faq}
What is 0.7 seam allowance?
A 0.7cm seam allowance (approximately 1/4″) is commonly used in metric pattern systems. This narrow allowance works well for:
• Quilting projects
• Lightweight fabrics
• Enclosed seams that will be graded
How much to trim seam allowance?
Trimming amounts depend on your project:
• General rule: Trim to half the original width for single layers
• Grading: Each layer should be 1/8″ to 1/4″ shorter than the previous
• Heavy fabrics: More aggressive trimming (up to 1/2″ differences between layers)
What is the general rule for making seams?
Follow these fundamental seam rules:
1. Maintain consistent seam allowance width
2. Match fabric grain lines
3. Pin strategically for accuracy
4. Press as you go
5. Finish raw edges to prevent fraying
How to grade a sewing pattern between sizes?
Pattern grading (different from seam grading) involves:
1. Identify key measurement points
2. Draw lines between size lines
3. Blend curves smoothly
4. Maintain design proportions
5. Test fit before cutting final fabric
For detailed pattern techniques, see our pattern reading guide.
Is grading the same as cut and fill?
No, these are different concepts:
• Seam grading: Cutting fabric layers to different widths
• Cut and fill: Earthwork term for moving soil to level ground
• Pattern grading: Scaling patterns to different sizes
How to flat fell a seam?
Flat felled seams create strong, finished edges:
1. Sew seam with wrong sides together
2. Trim one seam allowance to 1/4″
3. Fold longer allowance over shorter one
4. Press flat and topstitch
This technique is commonly used in jeans and work shirts for durability.
What is the difference between shredding and grading?
In sewing contexts:
Grading: Cutting seam allowances to different lengths for bulk reduction
Shredding: Usually refers to fabric deterioration or intentional fraying for distressed effects
How do you finish a seam allowance?
Seam allowance finishing prevents fraying and adds durability:
Machine Methods:
• Serging/overlocking
• Zigzag stitching
• Straight stitching with fold
Hand Methods:
• Pinking
• Hand overcasting
• Bound edges with bias tape
Choose based on fabric type, visibility, and durability needs.
Conclusion
Mastering seam grading transforms your sewing from amateur to professional level. This essential technique reduces bulk, improves drape, and creates the polished finish that distinguishes well-made garments from homemade projects.
Key Takeaways
Essential Principles:
- Grade any seam with multiple fabric layers
- Always leave the layer facing the garment exterior longest
- Maintain at least 1/8″ between cuts and stitching lines
- Press properly after grading for best results
Tool Investment Priorities:
- Sharp fabric scissors for clean cuts
- Quality pressing equipment for professional finishes
- Measuring tools for accuracy
- Specialty scissors for curved work
Fabric-Specific Adaptations:
- Heavy fabrics need more aggressive grading
- Delicate fabrics require conservative trimming
- Stretchy materials need special consideration
- Natural and synthetic fibers may behave differently
Practice Recommendations
Start with simple projects using basic cotton fabrics before moving to challenging materials. Practice on sample seams before working on your actual garment. Keep detailed notes about what works for different fabric combinations.
Remember that grading is just one part of professional construction. Combine it with proper seam allowance understanding, accurate cutting, and careful pressing for truly couture results.
These techniques form the foundation of professional garment construction taught in fashion design education programs worldwide. Mastering them connects your home sewing practice with established industry standards.
Next Steps
Build on your grading skills by exploring related techniques:
With consistent practice and attention to detail, grading will become second nature, elevating every project you complete. The time invested in learning this technique pays dividends in the professional appearance and longevity of your handmade garments.