Your Step-by-Step Guide to Machine and Hand Stitching, Settings, Troubleshooting, and Building Real Skills That Last
Key Takeaways
- The straight stitch is the foundation of almost every sewing project you’ll ever make
- Your stitch length, thread tension, and needle choice all depend on your fabric type
- Watching your seam guide instead of your needle is the single biggest game-changer for beginners
- Quality thread brands like Gutermann, Coats & Clark, and Mettler give you far better results than cheap alternatives
- A seam ripper is not a sign of failure – it’s a tool every sewist uses
- Regular machine maintenance prevents most stitching problems before they start
Why the Straight Stitch Is the One Skill You Need First
The straight stitch is the most basic stitch a sewing machine makes, but mastering it is what separates frustrating sessions from successful projects. Whether you’re mending a torn seam, hemming a pair of jeans, or making something from scratch, this one stitch does most of the work. With home sewing growing in popularity around the world, now is a great time to get it right from the start.
This guide covers everything from your very first stitch to more advanced techniques like topstitching and hemming. You’ll learn exactly why certain problems happen, how to fix them, and how to set your machine for different fabrics. By the end, you’ll feel genuinely confident at your machine.
Ready? Let’s get started.
What Is a Straight Stitch?
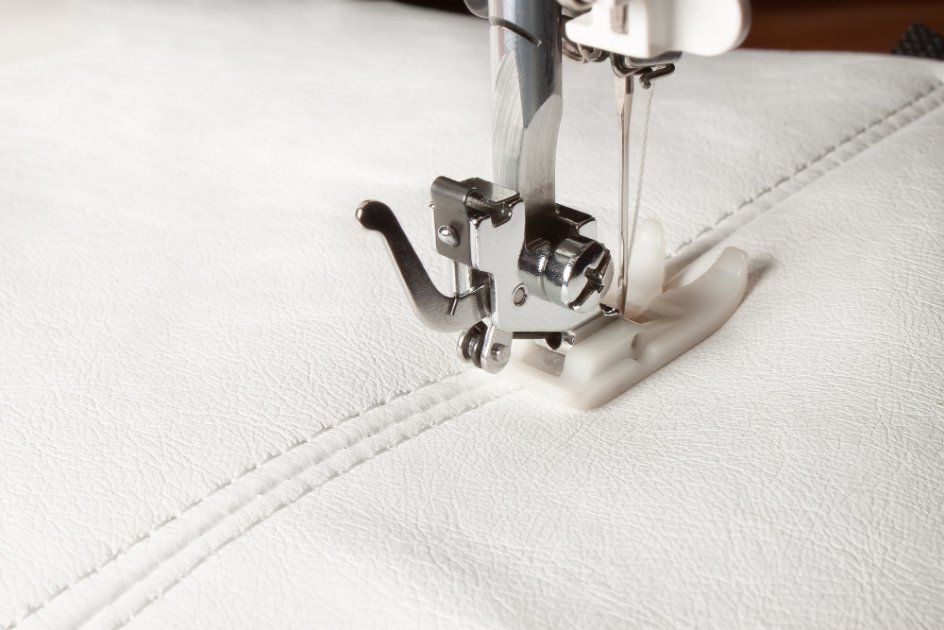
A straight stitch is a simple, continuous line of stitching where your machine needle moves up and down through the fabric in a forward direction. The top thread and the bobbin thread interlock in the middle of your fabric layers, creating a secure seam.
Think of it like connecting two dots with a ruler. Each individual stitch is one dot, and when they link together in an even line, you get a strong, clean seam that holds your fabric together.
You’ll use the straight stitch for all of these:
- Joining fabric pieces together (garment construction)
- Topstitching along edges for a clean, finished look
- Sewing hems on pants, skirts, and shirts
- Creating darts and pleats
- Inserting zippers (the stitch that runs right alongside the zipper tape)
- Basting (temporary stitching) to hold things in place
- Basic repairs and mending on everyday clothing
- Quilting projects
On most machines, the straight stitch is labeled as “Stitch 1” or shown as a simple straight line on the stitch selector. If your machine has a dial, it’s usually the first setting.
Quick Sewing Glossary for Beginners
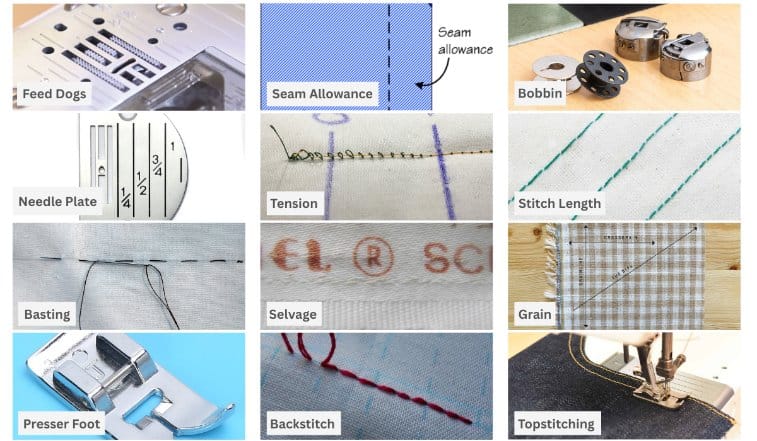
Before diving in, here’s a quick reference for terms you’ll see throughout this guide. Don’t worry about memorizing them all right now. You can come back to this section whenever something sounds unfamiliar.
For a complete breakdown of all the fabric types you’ll encounter as you sew more, check out our guide to common fabric types and their uses.
Your Pre-Sewing Checklist (Do This Before You Start)
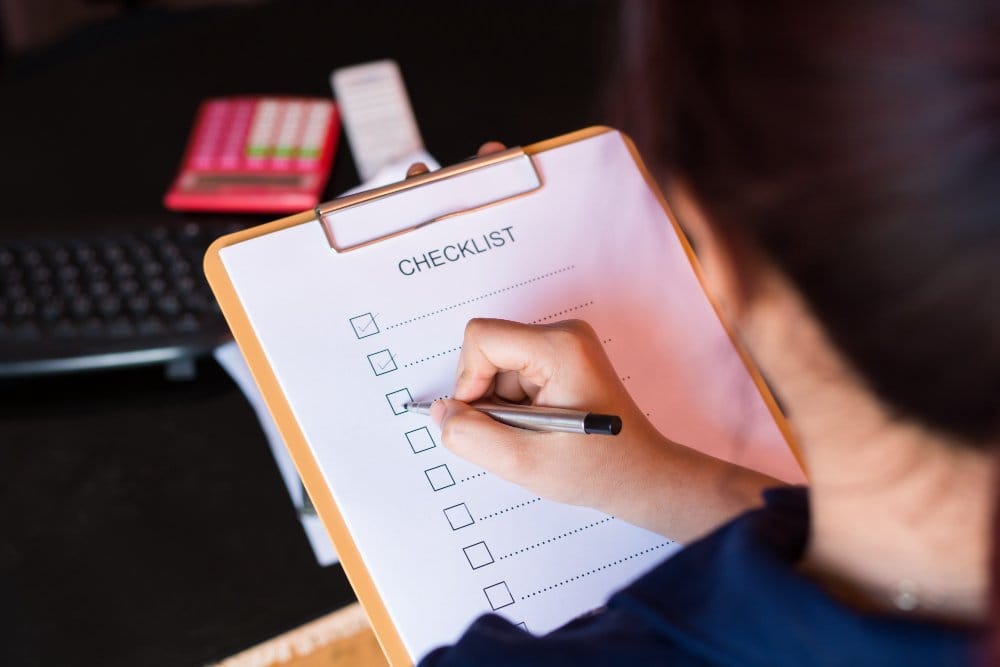
Taking two minutes to check these things before you sew saves you from unraveling, skipping stitches, and a lot of frustration.
10-Point Machine Ready Checklist
- Machine is set to straight stitch mode (usually “Stitch 1”)
- Top thread is threaded correctly through all guides and the needle
- Bobbin is inserted in the correct direction (check your manual)
- Needle is straight, not bent or dull (change it if in doubt)
- Needle is appropriate for your fabric type and weight
- Stitch length is set (start at 2.5mm for most fabrics)
- Tension is set to 4 or 4.5 as a starting point
- Presser foot is attached and lowered
- Fabric is pressed and free of wrinkles
- Test stitching done on a scrap piece of the same fabric
Pro habit: Always keep a few scraps of the fabric you’re working with right next to your machine. Test your settings on the scrap first, every single time. It takes 30 seconds and saves hours of frustration.
Setting Up Your Sewing Machine
Choosing the Right Needle
Your needle choice depends on what fabric you’re working with. Using the wrong needle is one of the most common causes of skipped stitches and damaged fabric. Here’s a clear chart to help you pick the right one:
| Fabric Type | Needle Size | Needle Type | Examples |
|---|---|---|---|
| Lightweight | 70/10 | Universal or Sharp | Silk, chiffon, organza |
| Medium-weight | 80/12 | Universal | Quilting cotton, linen, polyester |
| Heavy-weight | 90/14 | Denim or Sharp | Denim, canvas, twill |
| Very heavy | 100/16 or 110/18 | Denim or Heavy-Duty | Upholstery, multiple denim layers |
| Stretch/knit fabrics | 75/11 or 80/12 | Ballpoint or Stretch | Jersey, spandex, cotton knit |
| Microfiber | 70/10 or 80/12 | Microtex / Sharp | Microfiber, performance wear |
Replace your needle often. A dull or slightly bent needle is invisible to the eye but causes real stitching problems. Change it every 8 to 10 hours of sewing, or after every 2-3 projects. Needles are inexpensive – don’t wait until you can hear the problem.
For a full needle and fabric compatibility reference, use our free Needle and Fabric Compatibility Chart tool.
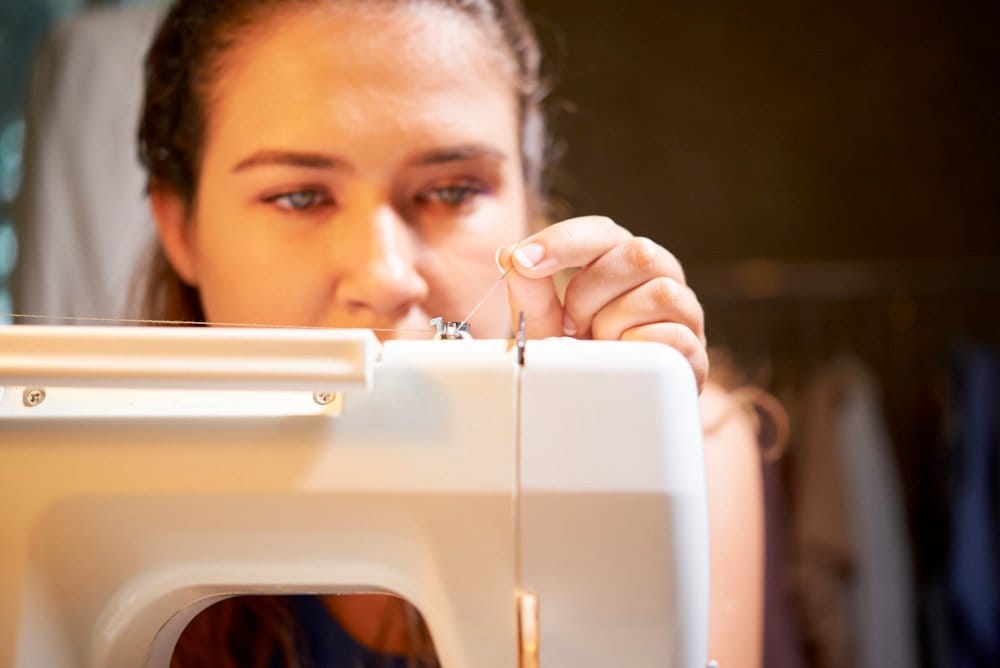
Threading Your Machine Correctly
Improper threading is the single most common cause of tension problems and skipped stitches. When in doubt, re-thread completely from scratch. Follow these steps:
- 1Thread spool on the pin
Place your thread spool on the top spool pin. Make sure it unwinds in the correct direction for your machine (check your manual).
- 2Guide through upper thread path
Lead the thread through all the numbered guides at the top of your machine from left to right.
- 3Through the tension discs
Pull thread down and through the tension discs. You should feel a slight resistance. If you don’t, it’s not seated properly.
- 4Around the take-up lever
Hook the thread around the take-up lever (the moving arm near the top of the needle area). This is the step most beginners miss.
- 5Through the needle
Thread the needle from front to back. Pull about 4-5 inches of thread through and let it hang toward the back of the machine.
- 6Load and thread the bobbin
Insert the bobbin correctly, then hold the top thread and turn the handwheel toward you to catch the bobbin thread. Pull both threads back and to the left.
For a detailed walkthrough, our guide to threading a needle covers every method that works.
Not sure if your machine is set up right? Try our free Sewing Machine Problem Diagnosis Tool for instant troubleshooting.
Use the ToolMachine-Specific Tips: Brother, Singer & Janome
Different brands have slightly different setups. Here’s what to know for three of the most popular beginner machines – widely used across the globe:
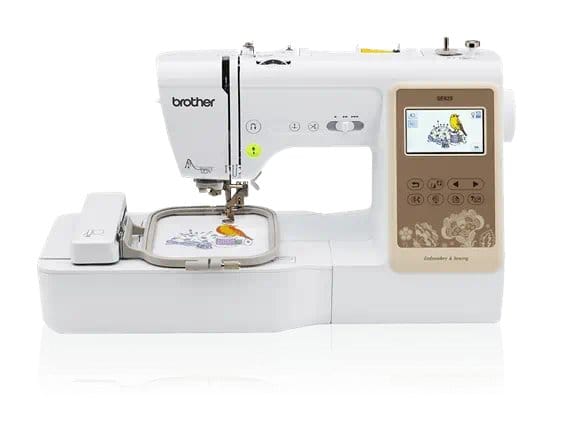
Brother CS6000i / SE625
- Straight stitch is labeled “Stitch #1” on the LCD screen
- Uses a drop-in top-load bobbin – very easy for beginners
- Built-in threading guide on the needle clamp makes threading easier
- Speed control slider on the front – always start it at the slowest setting
- Default tension of 3.5-4 works well for most cotton fabrics
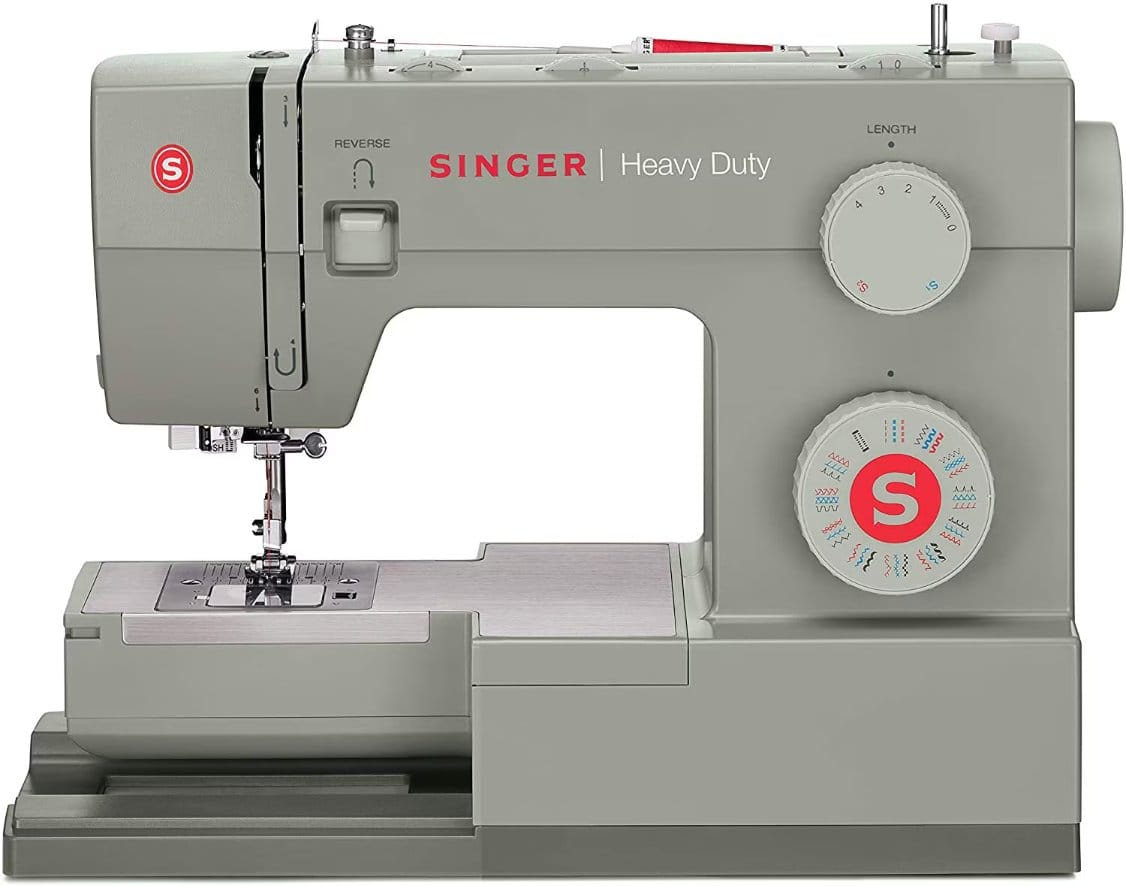
Singer Heavy Duty 4452
- Straight stitch is the first option on the stitch selection dial
- Front-loading bobbin – insert counterclockwise with thread trailing left
- Very powerful motor – go especially slow when learning
- Tension dial on the front, start at 4 and adjust from there
- Handles denim and thick fabrics better than most beginner machines
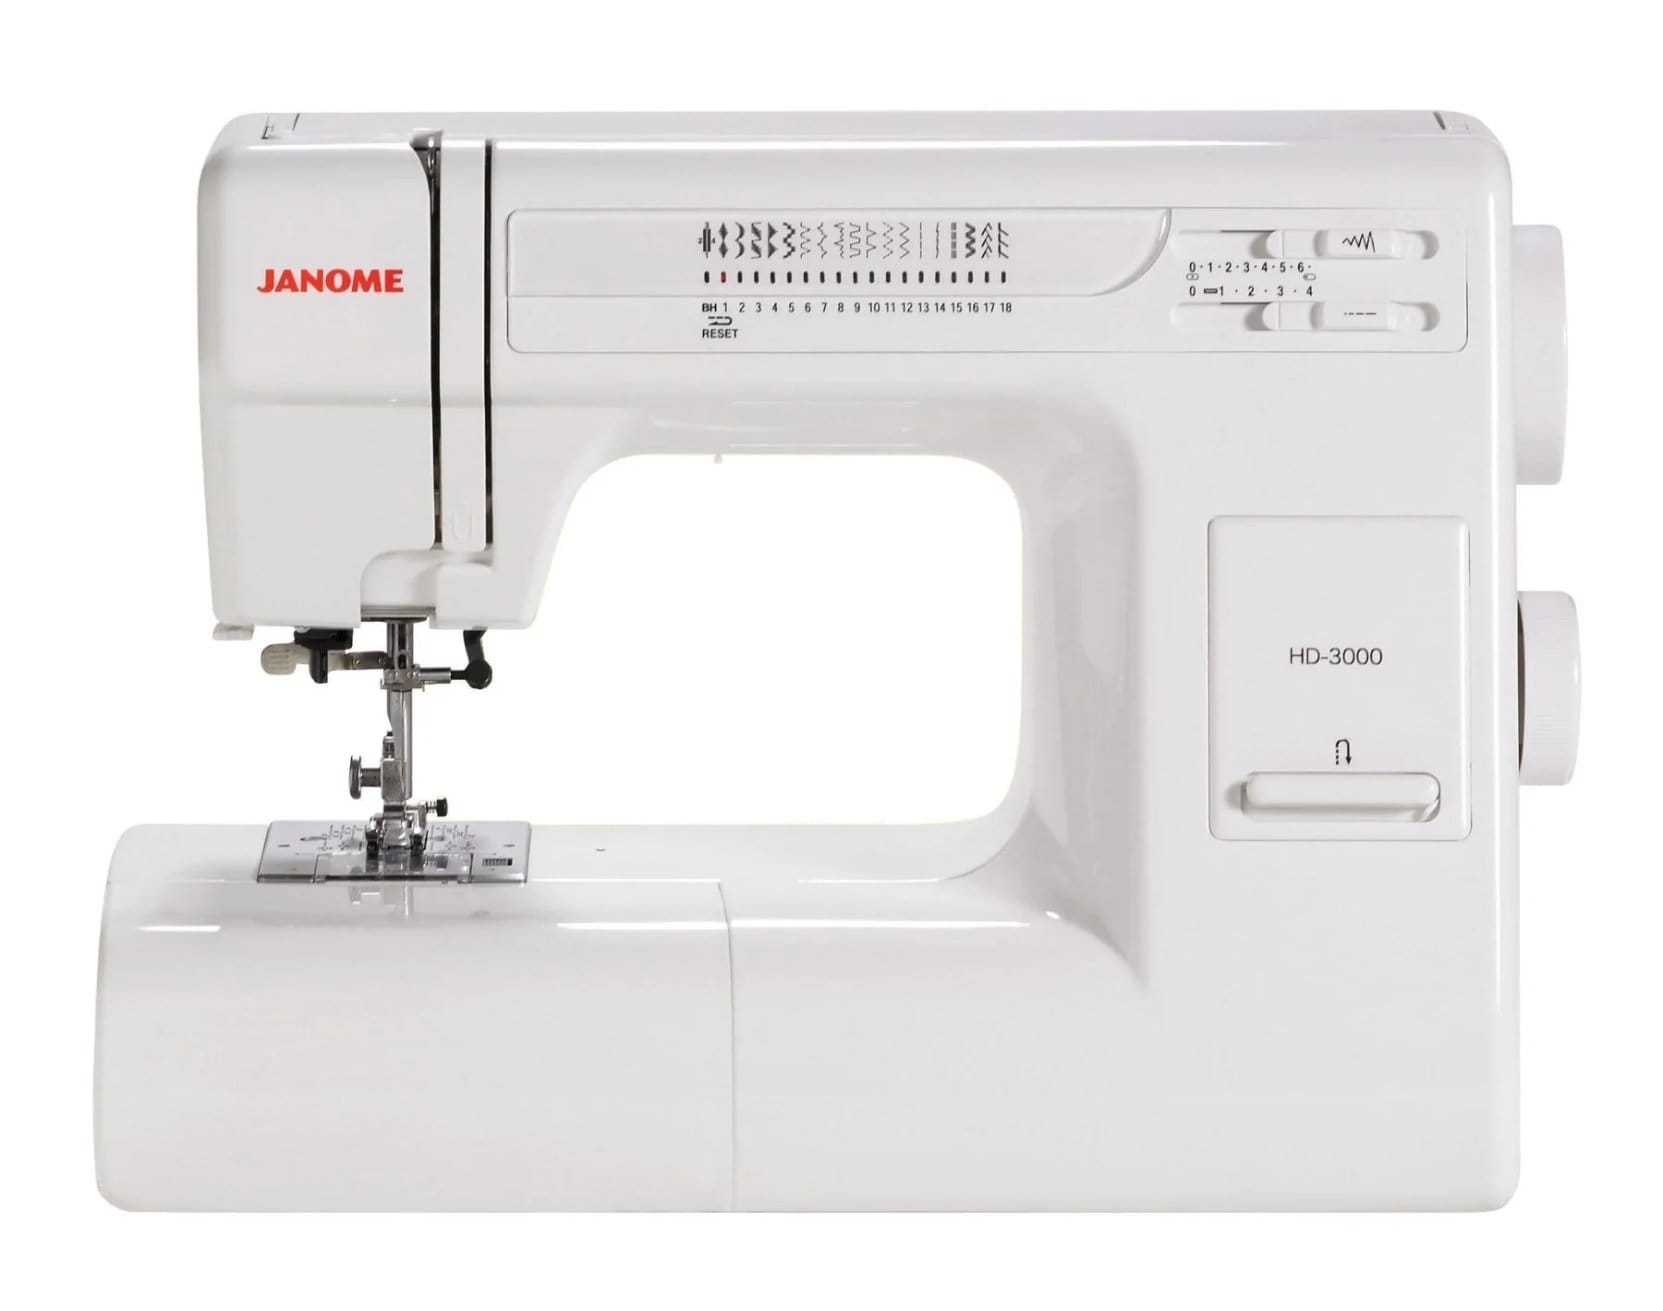
Janome HD1000 / HD3000
- Front-loading horizontal bobbin – thread it clockwise
- Stitch length dial is on the front face of the machine
- Start with tension at 4 for standard straight stitching
- Sturdy, all-metal construction makes it very stable while sewing
- Thread cutter built into the machine on the left side
No matter what machine you have, always refer to your machine’s manual first for threading and bobbin loading. Every model is slightly different. Can’t find your manual? Most brands have digital versions free to download on their website. Singer’s official stitch reference guide is a handy place to start if you own a Singer machine.
If you’re still shopping for your first machine, our sewing machine buying guide will help you choose the right one for your budget and goals.
Fabric Preparation and Handling
Best Practice Fabrics for Beginners
When you’re just starting, your fabric choice makes a huge difference. Stable, medium-weight woven fabrics are much easier to control than stretchy or slippery ones.
Start with these
- Quilting cotton (the gold standard for beginners)
- Cotton broadcloth or cotton poplin
- Lightweight canvas
- Linen blends
- Cotton muslin (great for practice)
Avoid until you’re confident
- Slippery silks and satins
- Jersey or stretchy knit fabrics
- Velvet or velour
- Very thick upholstery fabrics
- Open-weave or very loosely woven fabrics
Understanding how different fabrics behave is a skill that comes with time. For a deeper look at fabric types, check out our guide to common fabric types.
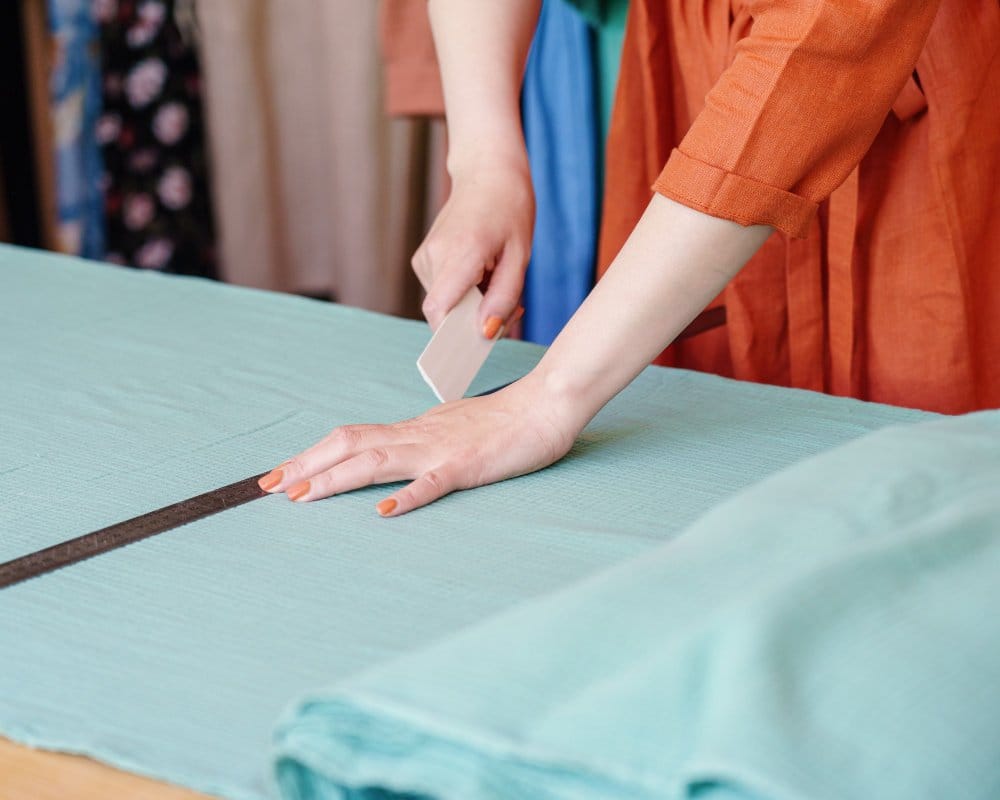
Preparing Your Fabric
A few minutes of prep before you sew makes the whole process smoother:
- Pre-wash your fabric. Most cotton fabrics shrink 3-5% in the first wash. Wash and dry your fabric before cutting to prevent the surprise of a finished item that’s suddenly too small.
- Press out wrinkles. Wrinkled fabric leads to crooked stitches. Iron your fabric on the appropriate heat setting before you start.
- Trim any frayed or uneven edges. Start with clean edges for more accurate seams.
- Cut fabric on grain. Aligning your pieces with the fabric grain means your finished item will hang and fit correctly.
Marking Your Seam Allowance
The most common seam allowance for clothing is 5/8 inch (15mm), though 1/4 inch (6mm) is standard in quilting and some European patterns use 1.5cm. Use one of these methods to stay on track:
- Use your machine’s guide marks. The engraved lines on your needle plate show standard seam allowances. Line your fabric edge up with the 5/8″ mark and keep it there as you sew.
- Tape method. Place a strip of masking tape or painter’s tape on your needle plate at the seam allowance distance from the needle. Easy, cheap, and effective.
- Magnetic seam guide. A magnetic guide clips to your needle plate and gives your fabric a physical edge to follow. Great for consistent results. (Note: avoid using magnetic guides on computerized machines near the display screen.)
- Fabric chalk or washable marker. Draw your stitching line directly on the fabric for complex shapes.
Our complete guide to seam allowances explains every allowance width and when to use each one. You can also use our free Seam Allowance Calculator to convert between inches and metric.
Fabric-Specific Settings: The Complete Chart
This is the chart every beginner needs and almost no one else gives you. Your stitch length, tension, needle, and thread should change based on your fabric. Here’s the full breakdown:
| Fabric | Stitch Length | Tension | Needle | Thread Type |
|---|---|---|---|---|
| Quilting cotton | 2.5mm | 4 | 80/12 Universal | All-purpose polyester or cotton |
| Linen | 2.5-3.0mm | 4-4.5 | 80/12 or 90/14 Universal | All-purpose polyester |
| Denim | 3.0mm | 4-5 | 90/14 or 100/16 Denim | Heavy-duty polyester or topstitch thread |
| Canvas / Heavy twill | 3.0-3.5mm | 4.5-5 | 100/16 or 110/18 Denim | Heavy-duty or upholstery thread |
| Lightweight chiffon / organza | 1.5-2.0mm | 2.5-3 | 65/9 or 70/10 Sharp | Fine polyester thread |
| Silk | 1.5-2.0mm | 2.5-3 | 70/10 Sharp or Microtex | Fine silk or polyester thread |
| Cotton jersey / knit | 2.5mm | 3.5-4 | 75/11 Ballpoint or Stretch | Polyester (has some stretch) |
| Polyester satin / charmeuse | 2.0mm | 3-3.5 | 70/10 or 80/12 Sharp | Fine polyester thread |
| Fleece | 3.0mm | 3.5-4 | 80/12 Ballpoint | All-purpose polyester |
| Velvet | 2.0-2.5mm | 3.5 | 80/12 Sharp | Polyester thread in matching color |
These are starting points, not strict rules. Always do a test stitch on a scrap of your actual fabric. Move tension up or down by 0.5 at a time and test again until your stitch looks balanced on both sides.
Looking for more information on a specific fabric? Browse our detailed guides on cotton fabric, silk chiffon, and denim fabric.
The #1 Mistake Beginners Make (And How to Fix It)
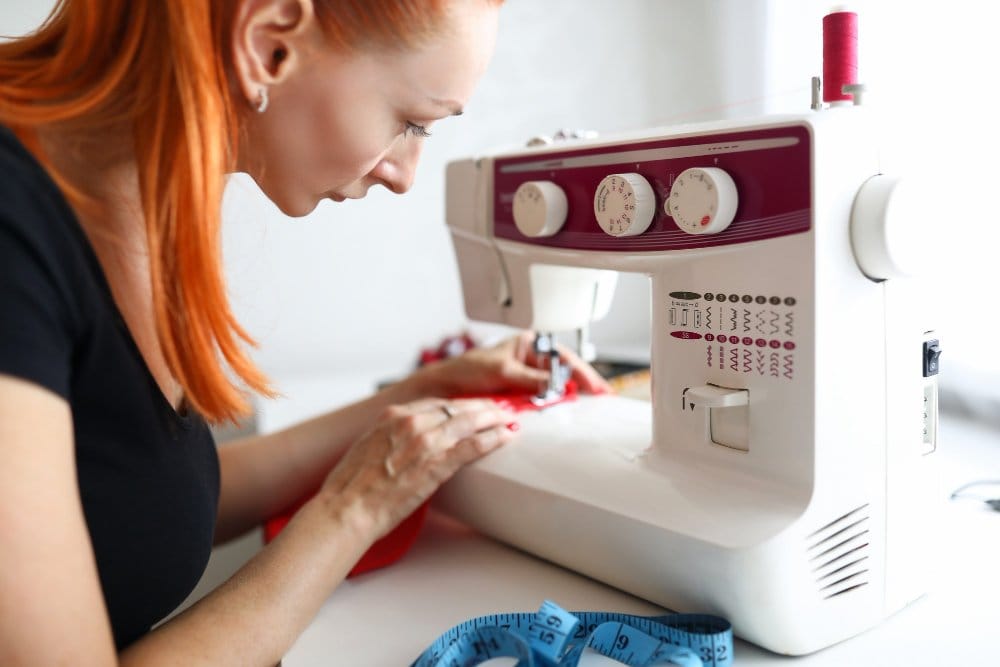
Here’s something counterintuitive that most beginners never hear until it’s explained to them: you should not be watching the needle when you sew.
It feels natural to watch the needle. It’s moving, it’s doing the work, and your brain wants to focus on it. But here’s the problem: if your eyes are on the needle, your fabric edge is wandering. By the time you notice your seam is crooked, you’ve already sewn three inches in the wrong direction.
Instead, fix your eyes on the seam guide lines on your needle plate, or on the tape guide you’ve placed there. Your only job is to keep the edge of your fabric lined up with that guide. Let the machine do everything else.
This one change will make your stitching dramatically straighter. Most sewists remember the exact moment they switched from watching the needle to watching the guide – and how much of a difference it made right away.
Where Exactly Should You Look?
Place your focus about 1 to 1.5 inches in front of the presser foot, directly on your seam guide. Think of it like driving a car: you look at the road ahead, not at your tires. The further ahead you look, the straighter you drive. The same logic applies here.
If your machine has multiple seam guide lines, the most commonly used for clothing patterns is 5/8 inch (15mm). Quilters typically use 1/4 inch (6mm). European and UK patterns often use 1.5cm. Your pattern will always specify which seam allowance to use.
Sewing Clips vs. Pins: What Works Better
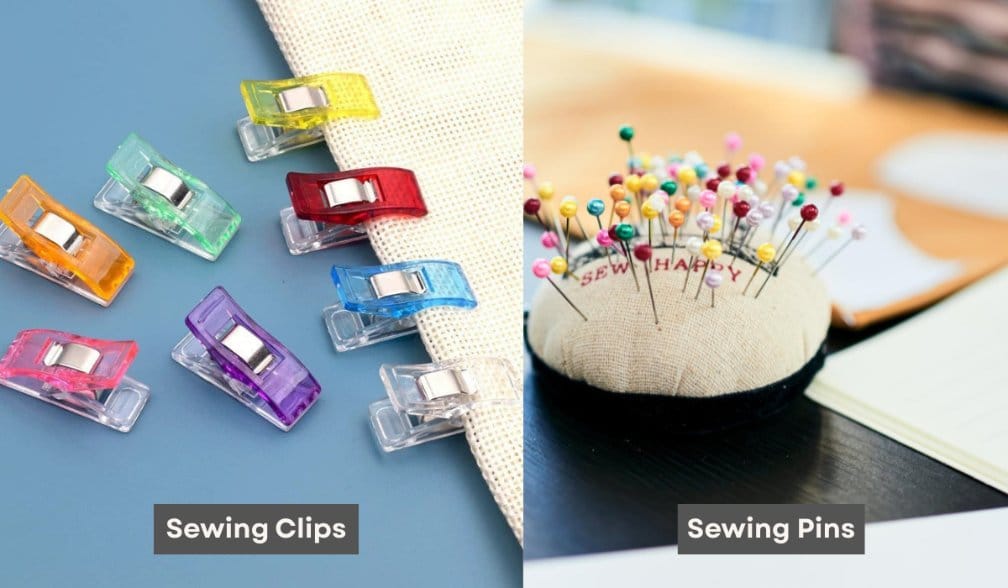
Most sewing guides still talk about pins as the main way to hold fabric together before sewing. And pins work fine. But sewing clips – sometimes called “Wonder Clips” – have become a go-to for many sewists in recent years, and for good reason.
Straight Pins
- Inexpensive and widely available
- Great for flat seams and long straight edges
- Must be removed as you sew (never sew over pins)
- Can distort fabric if pushed in at the wrong angle
- Easy to lose on the floor
Sewing Clips
- No risk of breaking your needle (no metal to sew over)
- Great for thick fabrics and multiple layers
- Easy to open and close with one hand
- Won’t distort fabric at the edge
- Ideal for curves, corners, and delicate fabrics
If you’re a beginner, try both. Use pins for long straight seams and clips for corners, curves, and thicker fabrics. Many sewists use them together depending on what they’re working on.
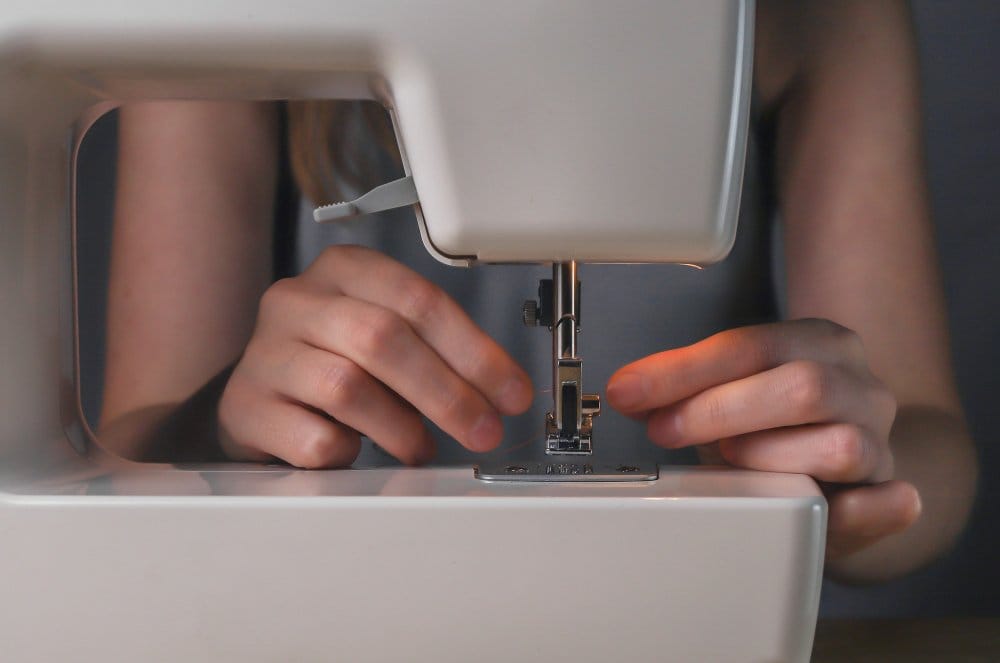
How to Sew a Straight Stitch Step by Step

Video tutorial: Watch the full straight stitch process from fabric placement to finishing stitches.
Here’s the complete process, from placing your fabric under the needle to clipping your threads at the end.
- 1Position your fabric
Place the fabric layers right sides together under the presser foot. Align the edge of your fabric with your chosen seam guide. Make sure the needle is in the UP position before sliding fabric under the foot.
- 2Lower the presser foot
Use the presser foot lever (usually on the back right of the machine) to lower the foot onto the fabric. This engages the tension discs and keeps the fabric stable.
- 3Lock your starting stitch
Sew forward 3-4 stitches, then press and hold the reverse button to backstitch 3-4 stitches. This locks the beginning of your seam so it doesn’t pull out. Release reverse and continue forward.
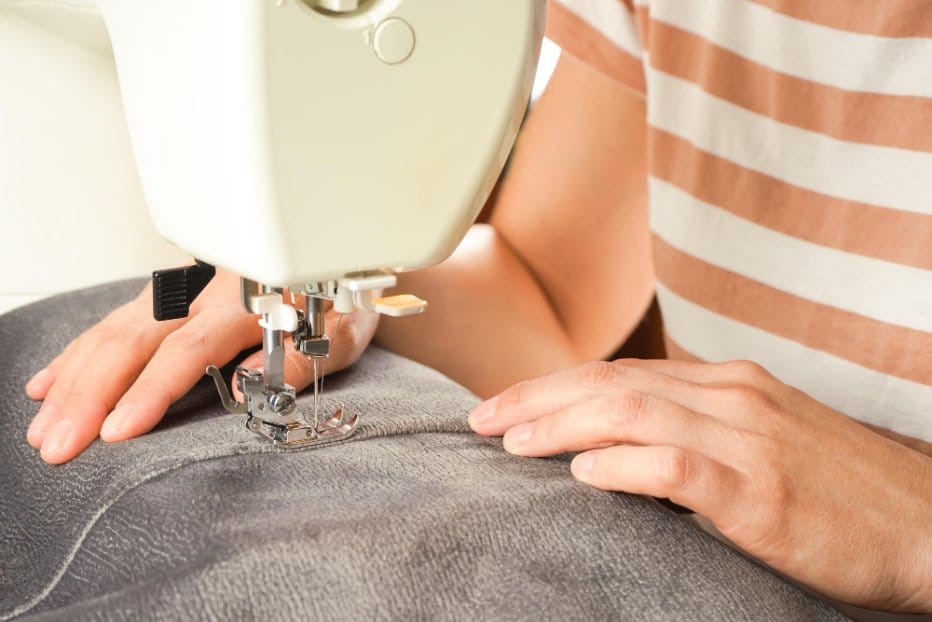
- 4Guide the fabric (don’t force it)
Place your right hand gently at 3 o’clock and your left hand at 9 o’clock. Keep your fingers spread lightly to maintain even tension. The feed dogs do the pulling – your job is just to guide, not push.
- 5Watch your seam guide, not the needle
Keep your eyes on the seam guide line and the edge of your fabric. Maintain steady, gentle pressure on the foot pedal. Sew at a comfortable medium speed.
- 6Pivot around corners
When you reach a corner, stop with the needle down in the fabric. Lift the presser foot, rotate your fabric to the new direction, lower the foot, and continue sewing.
- 7Lock your ending stitch
When you reach the end of your seam, backstitch 3-4 stitches again to secure the thread. Raise the needle to its highest point.
- 8Remove and clip threads
Lift the presser foot, slide your fabric out toward the back-left of the machine, and clip the top and bobbin threads leaving 3-inch tails. Done!
Machine Settings Deep Dive
Straight Stitch Settings at a Glance
The zero-length stitch trick: Some sewists set their stitch length to 0mm at the very start and end of a seam instead of backstitching. This sews several stitches in exactly the same spot, creating a dense knot of thread that anchors the seam just as well. It’s worth trying if your machine supports it.
Thread Tension Explained
Tension is how tightly the upper and lower threads pull against each other as they interlock inside the fabric. Get it right and your stitch looks the same on both sides. Get it wrong and you’ll see loops on one side or puckered fabric.
| What You See | What It Means | What to Do |
|---|---|---|
| Loops on the top of the fabric | Upper tension is too low | Increase the upper tension number |
| Loops on the bottom of the fabric | Upper tension is too high | Decrease the upper tension number |
| Stitch looks the same on both sides | Tension is balanced | You’re good to go |
| Fabric puckering along the seam | Tension is too high or stitch too short | Lower tension, lengthen stitch |
| Thread breaking frequently | Tension is far too tight | Lower tension, check threading |
Change one thing at a time. If your stitch has a problem, adjust only one setting and test again. Changing multiple things at once makes it impossible to know what fixed (or broke) the issue.
Common Problems and How to Fix Them

Almost every sewing problem has a simple cause. Use this flowchart to diagnose what’s going wrong before you panic or call a repair shop.
Straight Stitch Problem Solver
Need help with a machine issue? Use our Sewing Machine Troubleshooting Checklist for a step-by-step fix guide.
Fix It NowFor even more in-depth troubleshooting, our full sewing machine troubleshooting guide covers every common issue with step-by-step fixes.
Thread Quality Matters More Than You Think
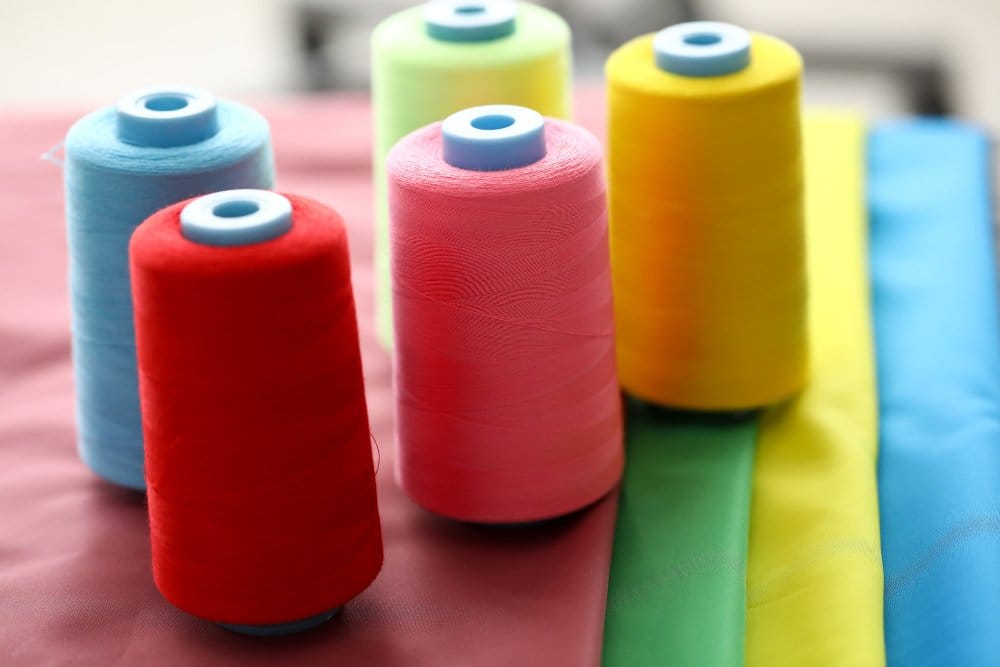
Here’s something most beginner guides skip over entirely: the quality of your thread directly affects the quality of your stitch.
Cheap thread from the dollar store or a no-name brand often causes skipped stitches, tension problems, and constant thread breaks. It’s not your machine. It’s not your technique. It’s the thread. Cheap thread is often inconsistent in thickness, has weak fibers, and sheds lint rapidly – which clogs your machine’s tension discs and bobbin area.
These thread brands are consistently recommended by experienced sewists and are widely available at fabric and craft stores worldwide:
| Brand | Best For | Why It’s Good |
|---|---|---|
| Gutermann | General sewing, garments | Consistent thickness, very low lint, sold in fabric stores worldwide. A reliable everyday choice. |
| Coats & Clark | All-purpose home sewing | Affordable, reliable, great color range. Popular in North America and widely distributed globally. |
| Mettler | Quilting, precision sewing | Very fine and strong, excellent for detailed work and delicate fabrics. Made in Switzerland, sold worldwide. |
| Sulky | Decorative topstitching, embroidery | Brilliant colors, great for decorative straight stitch work. Available internationally. |
For most beginners, all-purpose polyester thread is the best choice. It works on almost every fabric, has good strength, and is easy to find. Cotton thread is a good option for natural fiber projects, but polyester has a slight stretch to it which helps seams absorb stress without breaking.
Match your thread weight to your needle size. Fine thread on a heavy needle or heavy thread on a fine needle will cause problems. When in doubt, the standard 50-weight thread on a 80/12 needle handles most everyday sewing.
Our guide to choosing the right thread for your project goes into even more detail, including specialty threads for different techniques.
Not sure which thread to use for your project? Try the free Thread Calculator for personalized recommendations.
Get Thread RecommendationPresser Feet Guide for Straight Stitching
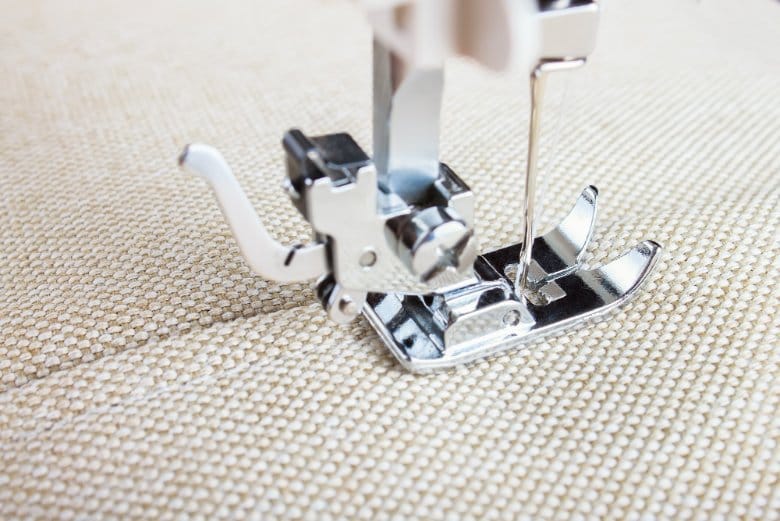
The presser foot you use has a real impact on how your straight stitch comes out, especially with certain fabric types. Your machine comes with an all-purpose foot, but there are a few others worth knowing about.
| Presser Foot | What It Does | Best Used For |
|---|---|---|
| All-Purpose Foot | Comes standard with your machine. Wide opening handles most stitches. | General sewing on medium-weight woven fabrics |
| Straight Stitch Foot | Has a small, round needle hole that stops fabric from being pulled down | Lightweight fabrics, delicate materials, preventing skipped stitches |
| Walking Foot | Has its own feed mechanism to move the top and bottom layers evenly | Thick fabrics, multiple layers, quilting, stripes and plaids |
| Quarter-Inch Foot | Has a built-in guide at exactly 1/4 inch (6mm) from the needle | Quilting, precise edgestitching |
| Edge Guide Foot | Has an adjustable guide arm to maintain even distance from fabric edge | Topstitching, hems, any work that needs parallel lines |
If you’re going to buy one additional foot as a beginner, make it a walking foot. It makes sewing multiple layers dramatically easier and reduces puckering on tricky fabrics.
Not sure which foot to use for your current project? Our Presser Foot Selector Tool helps you pick the right one in seconds.
Find Your FootOur full sewing machine presser feet guide includes photos, descriptions, and tips for using over 20 different foot types.
Using a Seam Ripper (Your New Best Friend)
Let’s talk about something most beginner guides treat as an afterthought: the seam ripper. If you’re learning to sew, you will use this tool. A lot. And that’s completely normal.
Even experienced sewists rip out seams. It’s not a sign that you failed. It’s a sign that you’re paying attention and you care about the finished result. Every straight seam that gets ripped and re-sewn is teaching you something, and your next seam will be better for it.
How to Use a Seam Ripper Correctly
- Slide, don’t stab. Insert the pointed end under a stitch, then glide the curved blade forward to cut the thread. Don’t stab aggressively – you risk cutting the fabric.
- Cut every 3-4 stitches on one side of the seam, then gently pull the thread from the other side. It pulls out in long sections and saves time.
- Work slowly on delicate fabrics. The ripper blade is sharp. Take your time, especially on fine or lightweight materials.
- Clean up thread bits with tape or a lint roller after ripping. Loose threads can clog your machine if you sew over them.
Keep your seam ripper close to your machine while you sew. Not in a drawer. Right next to you. This mindset shift alone will make you a more confident beginner, because you know you can always fix a mistake.
Advanced Techniques: Topstitching, Hems, and Curves
Topstitching and Edgestitching
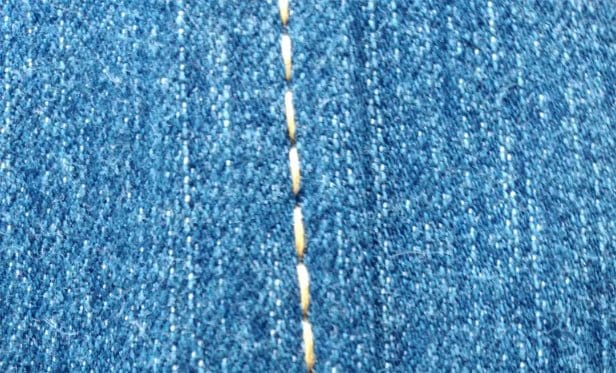
Topstitching is visible stitching on the outside (right side) of a garment that runs parallel to a seam or edge. You see it on jeans, shirt collars, and jacket fronts. It adds a clean, professional look while also reinforcing the seam beneath it.
For topstitching, use a slightly longer stitch length (3.0-3.5mm). This makes the individual stitches more visible and gives a professional finish. You can use a matching thread for a subtle look or a contrasting thread for a decorative effect.
According to guidance from Threads Magazine’s topstitching guide, topstitching works best when you press your seams thoroughly before you start, and keep your stitching a consistent distance from the edge – typically 1/4 inch (6mm) or 3/8 inch (10mm) for most garments.
Edgestitching is similar but runs very close to the edge – usually within 1/16 to 1/8 of an inch (1-3mm). It’s used to keep facings, hems, and collar edges lying flat. Use an edge guide foot for the most consistent results.
Creating Perfect Hems
Sewing a clean hem is one of the most practical skills you can build. Here’s the basic approach for a straight hem:
- Measure and mark your hem allowance (typically 1 to 2 inches / 2.5 to 5cm for clothing, though this varies by pattern and style).
- Fold the raw edge under 1/4 inch (6mm) and press with an iron.
- Fold up to your hem allowance mark and press again. This double fold prevents fraying.
- Pin or clip in place every 3-4 inches (7-10cm).
- Stitch close to the inner fold, keeping your stitch length at 2.5-3.0mm.
Our guide to sewing perfect hems covers every hem style in detail, from basic folds to blind hems and rolled hems. You can also use our Hem Calculator Tool to work out exact hem allowances for any garment.
Sewing Straight Lines on Curved Seams
Even on curved seams, your individual stitches are straight – you just change the angle of the fabric slightly as you go. The key is to slow down and make frequent small adjustments.
- Reduce your sewing speed significantly on curves.
- Stop with the needle down in the fabric when you need to readjust.
- Lift the presser foot, pivot the fabric slightly, lower the foot, and continue.
- After stitching, clip the curved seam allowance (on concave curves) or notch it (on convex curves) so it lies flat when pressed.
Sewing Straight Stitches on Special Fabrics
Some fabrics need a little extra attention when you’re sewing a straight stitch. Here’s what you need to know about the ones that come up most often.
Sewing on Denim
Denim is heavy, dense, and sometimes unyielding – especially when you’re sewing through multiple layers at seams or pockets. Use a denim needle (90/14 or 100/16), a longer stitch (3.0mm), and heavy-duty polyester thread. A walking foot helps a lot with multiple denim layers. If your machine struggles at thick seam junctions, stop and turn the handwheel by hand to ease the needle through.
For a full guide to this fabric’s properties, see our detailed article on denim cotton fabric.
Sewing on Slippery or Delicate Fabrics
Silk, chiffon, satin, and other smooth fabrics like to slide and shift while you sew. A few things help:
- Pin or baste more frequently than you would on cotton.
- Place tissue paper under the fabric – both act as a stabilizer and can be torn away after sewing.
- Use a straight stitch foot (small needle hole) to prevent the fabric from being pulled into the machine.
- Go slowly and keep both hands lightly supporting the fabric on either side of the foot.
- Use a shorter stitch length (1.5-2.0mm) for better seam control.
What Is Burnout Chiffon Fabric – and How Do You Sew a Straight Stitch on It?
Burnout chiffon is a stunning, semi-sheer fabric with a pattern created by chemically dissolving parts of the fiber to reveal a velvet-like design against a sheer background. The result is a fabric with two distinct textures: soft, raised velvet areas and open, transparent chiffon sections.
It’s used in eveningwear, blouses, scarves, and formal garments. The contrast of the velvet pattern against the sheer background gives it a luxurious appearance. It drapes beautifully and catches light in a very distinctive way.
Sewing a straight stitch on burnout chiffon takes care, because the fabric is both delicate and multi-textured:
- Needle: Use a 65/9 or 70/10 Sharp or Microtex needle to avoid snagging the velvet areas.
- Stitch length: Keep it short at 1.5-2.0mm for better control on the sheer sections.
- Tension: Start at 2.5-3 and test on a scrap. The two-texture nature of the fabric can affect how thread tension behaves.
- Baste first. Hand-baste your seams before machine stitching to keep layers stable. Pins often leave marks on the velvet areas.
- Use tissue paper or a stabilizer underneath the fabric while stitching. Tear it away carefully after.
- Press carefully. Never iron directly on the velvet sections – it will crush the pile and leave permanent marks. Always use a velvet board or press from the wrong side over a towel.
Burnout chiffon is not a fabric for first-day sewists, but once you’re comfortable with your straight stitch on cotton and linen, it’s absolutely achievable with patience. Learn more about this fabric in our dedicated burnout chiffon fabric guide.
Sewing Knit and Stretch Fabrics
Here’s an important note: a standard straight stitch does not stretch with knit fabrics. If you sew a straight stitch seam on jersey or spandex, the seam will likely break when the fabric stretches because the thread has no give. For knit fabrics, use a zigzag stitch, a stretch stitch, or a twin needle instead. If you must use a straight stitch on knit, stretching the fabric very slightly as you feed it through can add a little elasticity to the seam.
Hand Sewing Straight Stitches
Not everyone has a sewing machine, and there are situations where hand sewing is simply the better tool – like finishing a seam inside a garment, attaching a button, or making quick repairs on the go.
What You’ll Need
- Sharp hand-sewing needle (size 7-9 for most fabrics)
- Thread that matches your fabric
- Small scissors
- A thimble (optional, but very helpful)
- Fabric chalk and ruler for marking a stitching line
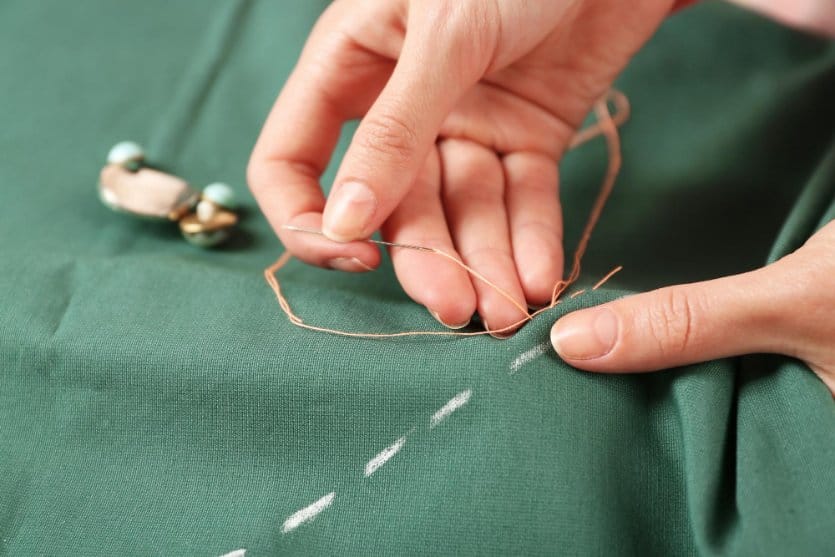
Running Stitch (Basic Hand Straight Stitch)
This is the hand equivalent of a machine straight stitch. It’s used for gathering, basting, and light construction.
- Thread the needle and tie a knot at the end of the thread.
- Mark a straight line on your fabric with chalk and a ruler.
- Bring the needle up through the fabric from the back at your starting point.
- Push the needle back down about 1/8 inch (3mm) ahead along your line.
- Bring it back up another 1/8 inch (3mm) ahead, creating a dashed-line pattern.
- Continue, keeping your stitches even in length and spacing.
- Finish with a knot or a few backstitches on the wrong side.
Backstitch (Stronger Hand Sewing)
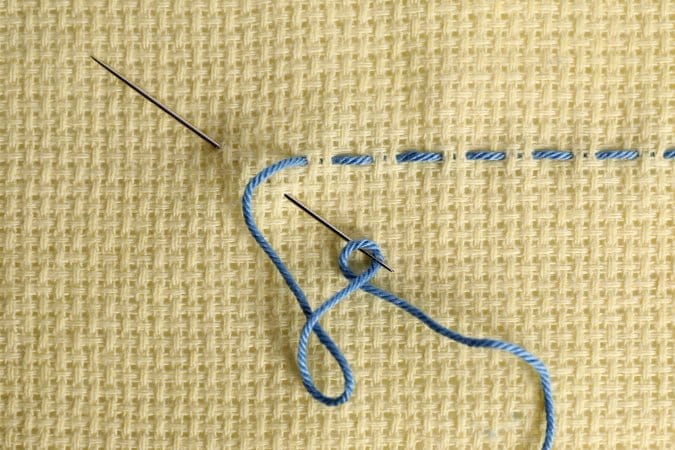
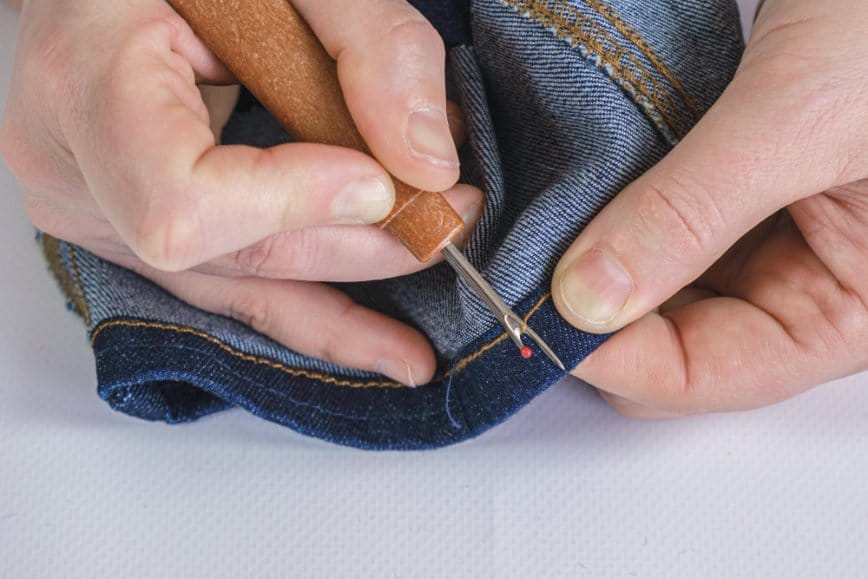
For a hand-sewn seam that needs to hold under stress – like a repair on a pair of jeans or reattaching a pocket – use a backstitch instead. The backstitch is stronger because each stitch overlaps with the last, leaving no gaps.
- Start with a running stitch forward.
- Instead of continuing forward, bring the needle back to the end of your last stitch and insert it there.
- Bring the needle up ahead of your starting point – further than the stitch you just made.
- Repeat: go back to the end of the last stitch, come up ahead.
- On the right side, this looks like a solid continuous line. On the wrong side, you’ll see overlapping stitches.
The backstitch is your go-to for any hand-sewn seam that needs to be permanent and durable. It comes close to the strength of a machine stitch.
Sewing Machine Maintenance

A clean, well-maintained machine produces better stitches and lasts for years longer than a neglected one. Lint buildup is the most common cause of tension problems, and it happens faster than you’d think.
| When | Task | Why It Matters |
|---|---|---|
| After every session | Remove loose threads from bobbin area. Brush out lint from feed dogs and throat plate. Cover the machine. | Prevents lint from building up and affecting tension and feed |
| Every 2-3 projects | Change the needle. Clean under the throat plate with a brush. | Dull needles cause skipped stitches without you realizing it |
| Weekly (regular sewists) | Deep clean the bobbin area. Oil moving parts (if your machine requires it – check your manual). | Keeps the machine mechanism smooth and quiet |
| Annually | Professional service and timing check | Catches internal wear issues before they become expensive problems |
Never use canned air to blow lint out of your machine. It drives lint deeper into the mechanism. Use a small soft brush (often included with your machine) to gently sweep lint out instead.
For a complete step-by-step maintenance routine, our sewing machine maintenance guide walks you through everything. You can also generate a custom schedule with our free Sewing Machine Maintenance Schedule Calculator.
Watch: Sewing Machine Maintenance – Oil and Clean (YouTube Tutorial)Practice Projects: A 3-Week Plan
The fastest way to build muscle memory with the straight stitch is through regular, intentional practice. Here’s a progression that takes you from complete beginner to genuinely confident – one week at a time.
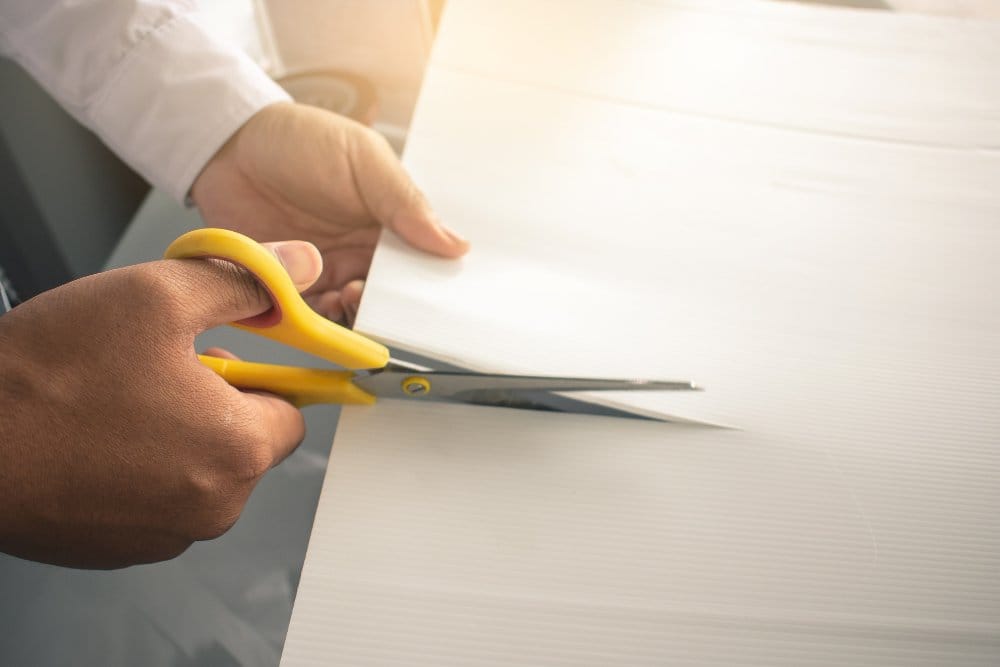
Week 1: Paper and Scrap Practice
Before you cut into any actual fabric, spend time on paper. Take a sheet of lined paper and sew along the lines with no thread in the machine. This drills the muscle memory of guiding fabric without wasting material. Then move to folded scrap fabric and practice: straight seams, stopping and pivoting at corners, and maintaining consistent speed.
By the end of the week, aim for seams that stay within 1/8 inch of your seam guide for the full length.
Week 2: Simple Real Projects
Now you’re ready for real fabric. These projects are designed so that even imperfect straight stitches result in something usable:
- Cloth napkins – simple squares with hems on all four sides. Great for practicing corners.
- Drawstring bag – two rectangles of fabric with a casing at the top. Straight seams only.
- Pot holders – practice sewing through multiple layers and achieving consistent edge stitching.
Week 3: Step Up the Challenge
These projects introduce new elements while still relying on the straight stitch as the main technique:
- Pillowcase with an envelope closure – introduces topstitching and parallel stitching lines.
- Simple tote bag – multiple layers, boxed corners, and visible topstitching on handles.
- Hemmed curtain panel – long, straight hems over a large area. Great for building speed and consistency.
For more project ideas that are perfect for beginners, browse our collection of easy sewing projects for beginners and beginner-friendly sewing patterns. For even more inspiration, The Spruce Crafts’ sewing section has a wide range of free beginner tutorials, and Craftsy’s sewing classes are worth exploring when you’re ready to go deeper with structured video instruction.
Find out where you are in your sewing journey with our free Sewing Skill Assessment Quiz.
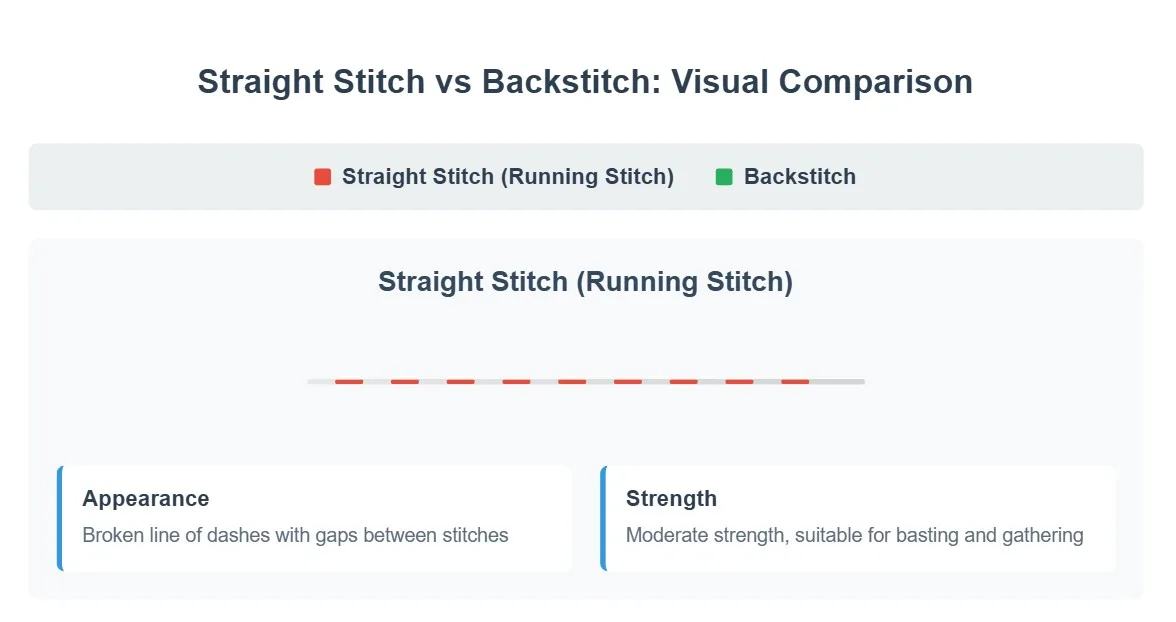
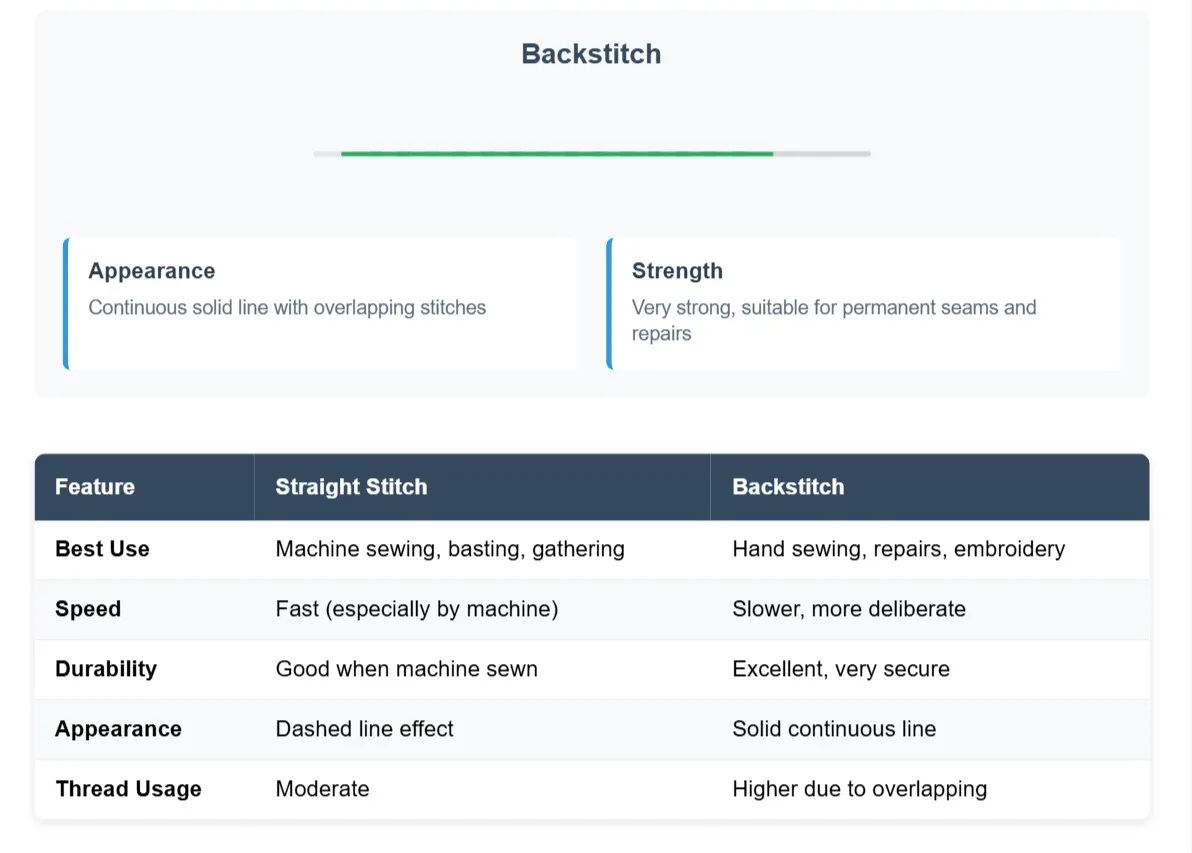
Take the QuizStraight Stitch vs. Backstitch: What’s the Difference?
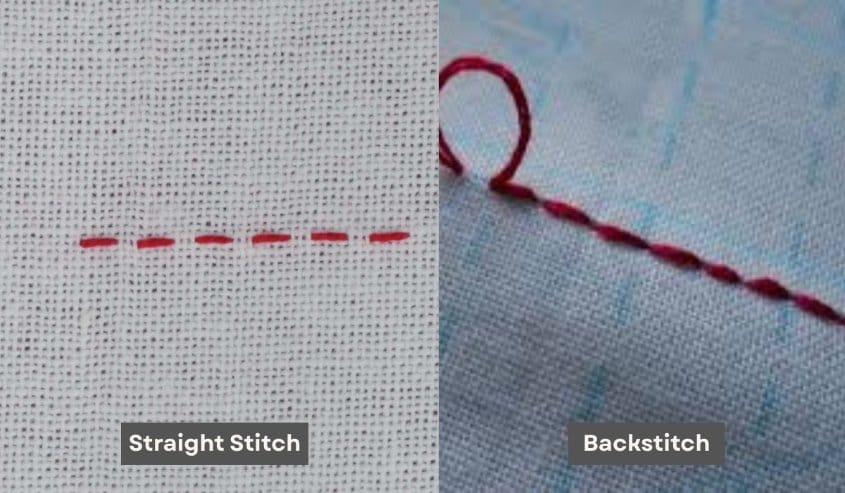
The straight stitch and the backstitch are both foundational, but they work differently and serve different purposes. Here’s the comparison you need.
| Feature | Machine Straight Stitch | Hand Backstitch |
|---|---|---|
| How it works | Upper and lower threads interlock in the middle of fabric | Each stitch overlaps the previous one going backward |
| Speed | Fast – great for long seams | Slow – better for detail work |
| Strength | Very strong for woven fabrics | Very strong – doesn’t unravel even if one stitch breaks |
| Best use | Garment seams, hems, topstitching, quilting | Repairs, attaching buttons, tight spaces the machine can’t reach |
| Weakness | If thread breaks, the whole seam can unravel | Time-consuming for long seams |
For most construction work, the machine straight stitch is your main tool. Use the hand backstitch for repairs, button attachment, and anywhere your machine physically cannot reach. See our guide to sewing machine stitches for a broader comparison of all stitch types.
Common Mistakes and How to Avoid Them
| The Mistake | Why It Happens | The Fix |
|---|---|---|
| Watching the needle instead of the seam guide | Instinctive – the needle is the moving part | Train yourself to look at the guide, not the needle |
| Sewing too fast | Wanting to get it done; excitement | Slow down. Accuracy comes before speed. Speed comes with practice. |
| Pulling or pushing the fabric | Trying to help the machine | Let the feed dogs work. Your hands guide, they don’t pull. |
| Skipping the backstitch at beginning and end | Not knowing why it matters | Always backstitch 3-4 stitches at both ends of every seam |
| Not testing settings on a scrap first | Eagerness to start the real project | Always test on scrap fabric first. Always. |
| Using a dull or wrong needle | Not realizing needles need changing | Change your needle every 8-10 hours of sewing |
| Sewing on unwashed fabric | Not knowing fabric shrinks | Pre-wash all fabric before cutting and sewing |
Building Muscle Memory
Straight stitching is a motor skill. Like learning to ride a bike or touch-type, it gets easier and more automatic with repetition. You don’t have to think about every seam guide line after a few dozen hours of practice – it just happens.
The most effective practice habit is short and consistent. Fifteen minutes of deliberate practice three or four times a week beats a single three-hour session on the weekend. Your brain builds the connections between sessions, not during them.
Set a small goal each session – finish one seam perfectly, practice pivoting at corners, work on maintaining consistent speed. Small, focused goals build the skill faster than general “practice.”
Your Sewing Learning Path
Once you’re comfortable with the straight stitch, here’s the natural order for building your skills. Each step introduces new elements while leaning on everything you’ve already learned.
When you’re ready for the next step, our guide to reading a sewing pattern is the best place to go. It breaks down pattern symbols, grain lines, and notation in a way that actually makes sense. You can also start with a full garment project through our guide on how to sew a dress from scratch.
To get started with the right tools from day one, see our essential sewing supplies for beginners list and our complete beginner’s guide to sewing.
Why This Skill Matters Right Now
Here’s a perspective that doesn’t get talked about enough: knowing how to sew a straight stitch is genuinely useful in today’s world.
The fast fashion industry produces enormous amounts of waste. Clothes get thrown out because of a torn seam, a popped button, or a hem that came loose. These are things a basic straight stitch can fix in under 10 minutes. A shirt with a split seam doesn’t have to go to landfill. A pair of jeans with a frayed hem can be re-hemmed and worn for another three years.
Learning to sew is one of the most direct ways to participate in the slow fashion movement – the idea that clothing should last longer, be repaired when damaged, and be chosen thoughtfully rather than replaced constantly. For more on this growing movement, see our article on fast fashion vs. slow fashion.
Beyond repair, knowing the straight stitch opens the door to making your own clothes, which gives you control over fabric quality, fit, and style in a way that off-the-rack clothing simply can’t match. And in 2026, with home sewing more popular than it’s been in decades globally, there’s a whole worldwide community of sewists sharing projects, techniques, and encouragement online.
The straight stitch isn’t just a beginner technique. It’s the foundation of a genuinely useful, creative, and increasingly relevant skill.
Frequently Asked Questions
A straight stitch moves only forward and backward in a single straight line. It creates the strongest seam on woven fabrics but has no stretch. A zigzag stitch moves side to side while advancing forward, which gives the thread flexibility. Zigzag is used for finishing raw edges to prevent fraying, sewing on stretch and knit fabrics, and creating decorative effects. For most seam construction on woven fabrics, the straight stitch is the right choice. For knit fabrics or seam finishing, zigzag is the better tool. Your sewing machine will have both, and knowing when to use each is one of the key skills to build early on.
Start with tension at 4 for most fabrics. If you see loops on the top of your fabric, increase the tension number. If you see loops on the bottom, decrease it. Always test on a scrap of the same fabric before sewing your actual project. Lighter fabrics like chiffon typically need lower tension (2.5-3), while heavier fabrics like denim may need slightly higher (4.5-5).
Bunching underneath almost always means a threading problem. The most common cause is threading the machine with the presser foot down, which prevents the thread from seating properly in the tension discs. Unthread everything, raise the presser foot, and re-thread from scratch. Also check that your bobbin is inserted in the correct direction.
For most medium-weight woven fabrics like quilting cotton, 2.5mm is the standard starting point. Use 1.5-2.0mm for lightweight or delicate fabrics, and 3.0-3.5mm for topstitching or thick fabrics like denim. For temporary basting stitches, use 4.0-5.0mm so they’re easy to remove later.
The most common reason is watching the needle instead of the seam guide. Fix your eyes on the line on your needle plate and keep your fabric edge aligned with it. Other causes include sewing too fast, pulling or pushing the fabric instead of letting the feed dogs work, and not having a clear guide to follow. Add a piece of masking tape to your needle plate as a guide if you’re struggling.
Skipped stitches are almost always caused by a needle issue. Try changing to a fresh needle first – a dull or slightly bent needle is the number one cause. Also check that you’re using the right needle type for your fabric (ballpoint for knits, sharp for wovens). If skipping continues after a needle change and re-threading, your machine may have a timing issue that needs professional attention.
The standard all-purpose foot that comes with your machine works for most fabrics. However, a straight stitch foot (which has a smaller round needle hole) is very useful for lightweight and delicate fabrics because it prevents the fabric from being pulled down into the machine. A walking foot is recommended for sewing through multiple thick layers or for quilting.
A standard straight stitch on knit fabric will likely break when the seam is stretched, because the thread has no give. For knit and stretch fabrics, use a zigzag stitch, a stretch stitch (if your machine has one), or a twin needle. If your machine only has a straight stitch, stretch the fabric very slightly as you feed it through to build some elasticity into the seam.
Any thread will technically sew a straight stitch, but quality matters. Low-quality or old thread causes breakage, uneven tension, and excess lint buildup in your machine. For everyday sewing, all-purpose polyester thread from brands like Gutermann, Coats & Clark, or Mettler gives you reliable results. Match the thread weight to your fabric – standard 50-weight polyester thread works for most projects.
First, use the engraved seam guide lines already on your needle plate – they’re there for this purpose. If you need a visual you can’t miss, place a strip of masking tape at your desired seam allowance distance from the needle. You can also draw a stitching line directly on your fabric with washable chalk or a disappearing-ink marker. For precise work, a magnetic seam guide is a great investment.
Topstitching is a straight stitch sewn on the right side (outside) of a garment, parallel to a seam or edge. It’s both decorative and functional. The main technical difference is that topstitching uses a slightly longer stitch length (3.0-3.5mm) to make the stitches more visible, and it’s sometimes done with a heavier or contrasting thread for a decorative effect. The technique for sewing it is identical to a regular straight stitch.
Conclusion
The straight stitch sounds simple, and in a way it is. But simple doesn’t mean unimportant. Almost every sewing project you’ll ever make starts with this stitch, and the habits you build now – testing your settings, using your seam guide, going slowly, maintaining your machine – will carry through every project you tackle, from a basic pillowcase to a tailored blazer.
Here’s what really matters as you move forward:
- Stop watching the needle. This single change will improve your stitching faster than anything else.
- Start slow. Accuracy now builds speed later. Speed that you rush into stays sloppy forever.
- Test on scraps every time. It takes 30 seconds and saves hours of frustration.
- Use quality thread and change your needle often. These are the cheapest fixes to the most common problems.
- Keep your machine clean. A clean machine stitches beautifully. A lint-filled machine fights you the whole time.
- Use your seam ripper without guilt. Ripping a seam and re-sewing it is not failure. It’s how every sewist gets better.
The fabric-specific settings chart in this guide is one of the most practical references you’ll come back to again and again. Save it, screenshot it, or print it and tape it near your machine. Knowing the right stitch length and needle for denim vs. chiffon vs. cotton takes the guesswork out of setup and lets you focus on the actual sewing.
When you’re ready to take the next step, look at our pattern reading guide, explore our beginner project ideas, or go deeper into seam finishing techniques with our guides on French seams, flat-fell seams, and bound seam finishing.
Most importantly: start. Pick up a scrap of fabric, sit down at your machine, and sew a line. Then sew another. That’s how every confident sewist started – with a single wobbly seam and the decision to try again.
You’ve got everything you need right here. Now go make something.