Master Every Hemming Technique with Step-by-Step Instructions, Expert Tips, and Professional Troubleshooting
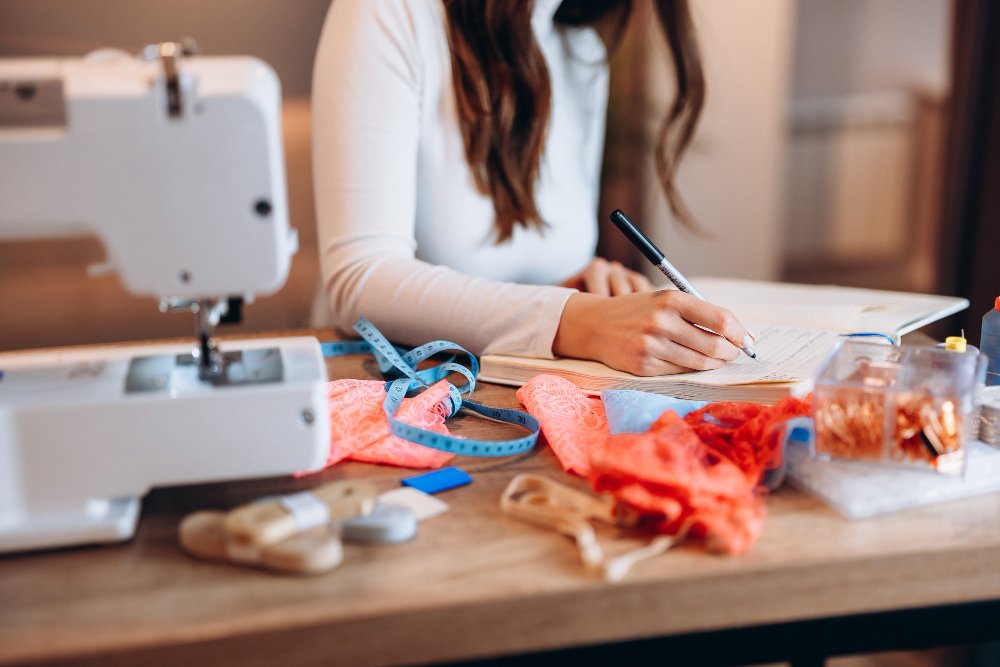
Learning to sew a hem is one of the most valuable skills in your sewing toolkit. A well-executed hem transforms your projects from homemade-looking to professionally finished. Whether you’re shortening pants, finishing a dress, or adding a polished edge to home decor items, mastering different hemming techniques will elevate your sewing game.
A hem is simply the bottom edge of fabric folded up toward the wrong side and stitched in place. This creates a clean, finished edge while preventing fraying and adding structure to your garment. The best part? You don’t need advanced skills to create beautiful hems that rival store-bought clothing.
Table of Contents
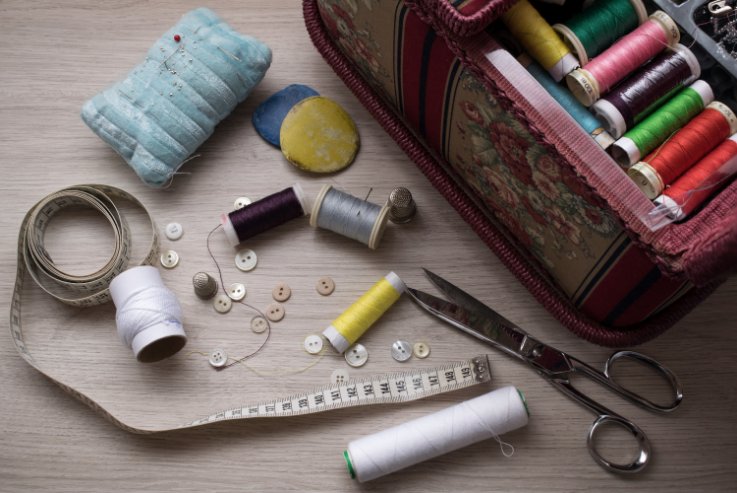
What You’ll Need: Essential Tools and Materials
Before diving into techniques, gather these basic supplies. Having the right tools makes hemming much easier and more enjoyable.
Essential Tools
- Sewing machine or sewing machine for beginners
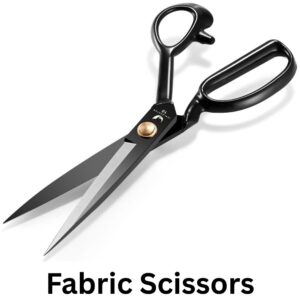
- Sharp fabric scissors
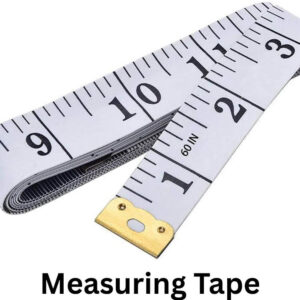
- Measuring tape or ruler
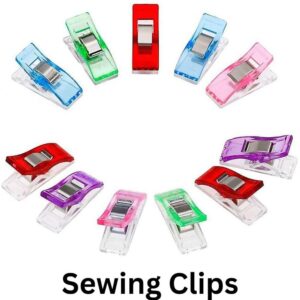
- Straight pins or sewing clips
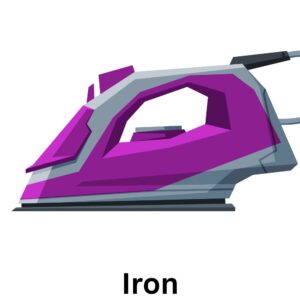
- Iron and ironing board
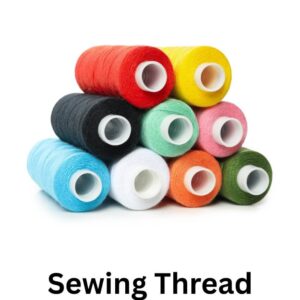
- Thread that matches your fabric
- Seam ripper (for fixing mistakes)
To make hemming calculations easier and ensure perfect results every time, consider using our interactive hemming tools. Our hem calculator tool helps you determine exact fabric allowances for any project, while our fabric type selector recommends the best hemming technique for your specific material.
Helpful Extras
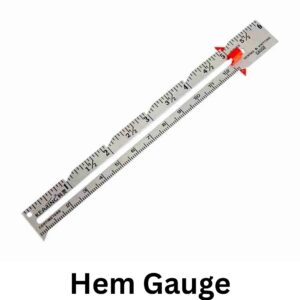
- Hem gauge or ruler
- Various presser feet (blind hem foot, rolled hem foot)
- Tailor’s chalk or fabric marker
- Thimble for hand sewing
- Pin cushion
If you’re new to sewing or hemming, identifying the right tools can feel overwhelming when you’re standing in a craft store or browsing online. The visual guide below shows each essential tool clearly labeled, so you’ll know exactly what to look for and how each item should appear. Having the right tools makes hemming significantly easier and more enjoyable, while using incorrect or poor-quality substitutes can lead to frustrating results.


Don’t feel like you need to purchase everything at once. Start with the essentials – good scissors, measuring tape, pins, thread, and an iron – then gradually add specialized tools as your skills and projects become more advanced. Quality matters more than quantity; one excellent pair of fabric scissors will serve you better than a drawer full of dull, cheap alternatives. Many sewers find that investing in good tools upfront actually saves money in the long run because they last longer and produce better results.
Now that you know what tools you need and can identify them easily, let’s move on to preparing your fabric for hemming.
Choosing the Right Thread
Match your thread color as closely as possible to your fabric. For hand sewing, use a single strand for lightweight fabrics and double strand for heavier materials. Polyester thread works well for most projects, while cotton thread is ideal for natural fabrics.
Understanding Fabric Types and Hem Choices
Selecting the right hemming technique starts with understanding your fabric’s weight and characteristics. Different fabric weights behave differently when folded and stitched, and using the wrong technique can result in bulky, unprofessional-looking hems or even damage to delicate materials. This visual guide will help you quickly identify your fabric type and choose the most appropriate hemming method.

Use this guide as your starting point, but remember that fabric behavior can vary even within the same weight category. When in doubt, always test your chosen technique on a fabric scrap first. This simple step can save you from having to redo an entire hem and helps you achieve the best possible results for your specific fabric.
For personalized recommendations based on your specific fabric characteristics, try our interactive fabric selector tool which matches your material to the perfect hemming technique.
Different fabric types require different hemming approaches. Understanding your fabric helps you choose the best technique.
Lightweight Fabrics
- Examples: Chiffon, silk, voile, organza
- Best techniques: Rolled hems, narrow hems, French seams
- Considerations: These fabrics fray easily and can be slippery to work with
Medium-Weight Fabrics
- Examples: Cotton, linen, lightweight wool
- Best techniques: Double-fold hems, single-fold hems
- Considerations: Most forgiving for beginners
Heavy Fabrics
- Examples: Denim, canvas, thick wool
- Best techniques: Single-fold hems, bound hems
- Considerations: May require special needles and adjusted machine settings
Stretch Fabrics
- Examples: Jersey, spandex blends, stretchy fabrics
- Best techniques: Twin needle hems, zigzag stitches, coverstitch
- Considerations: Need stitches that can stretch with the fabric
For comprehensive guidance on professional hemming standards, New Mexico State University’s Extension program provides detailed technical specifications for various hem finishes and construction standards. Their research-backed guidelines cover everything from bias tape applications to Hong Kong finishes, making it an excellent reference for achieving industry-standard results.
Step-by-Step Hem Preparation
Proper preparation is crucial for professional-looking results. Take time with these steps, and your actual sewing will be much easier.
Measuring and Marking
- Try on the garment or lay the item flat on its intended surface
- Mark your desired length with pins every few inches
- Add your hem allowance (typically 1/2 to 2 inches depending on the project)
- Use a measuring tape to ensure consistency all around
Need help calculating the exact hem allowance for your project? Our hem allowance calculator takes the guesswork out of measurements and ensures professional results.
Cutting to Size
- Mark your cutting line with chalk or fabric marker
- Use sharp scissors for clean cuts
- For curved hems, make small notches in the seam allowance to help the fabric lay flat
- Cut slowly and steadily for the best results
Before you start cutting fabric, it’s essential to plan your hem allowance correctly. Different garment types require different hem depths to achieve the best drape, durability, and professional appearance. Using the wrong hem allowance can make even perfect stitching look amateurish, while the right measurements create that polished, store-bought finish you’re aiming for.
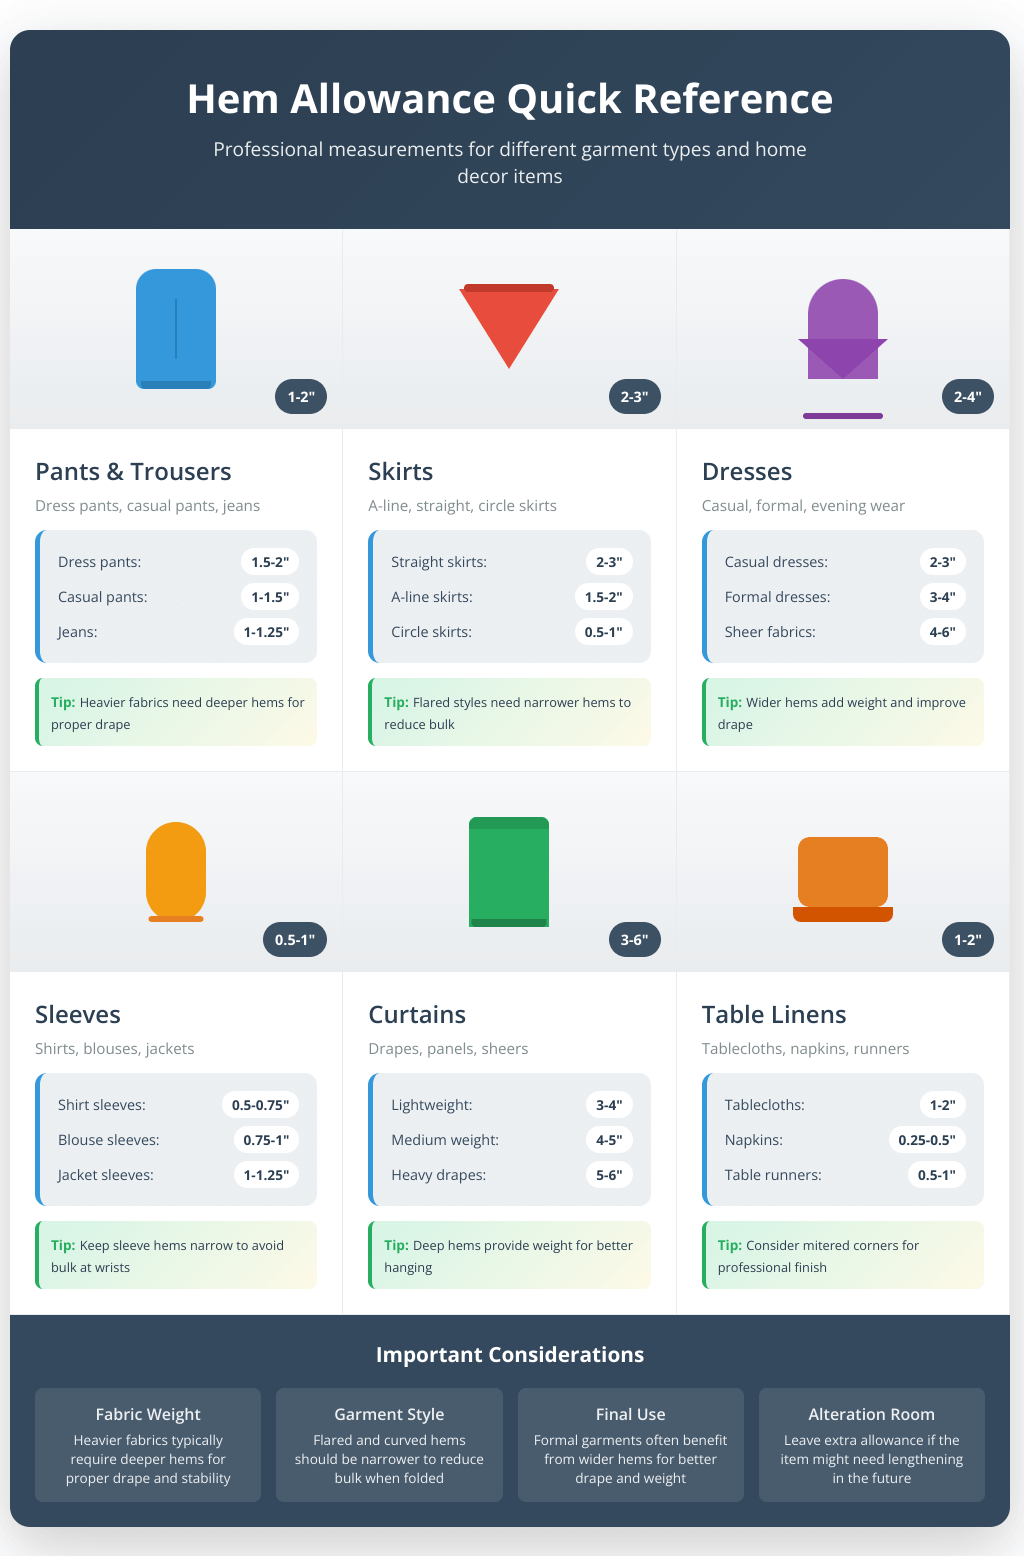
Keep this chart handy when planning your projects – it takes the guesswork out of hem planning and helps ensure professional results every time. Remember that these measurements are starting points; you can always adjust based on your specific fabric, personal preference, and the garment’s intended use. When in doubt, err on the side of leaving slightly more allowance, as you can always trim excess fabric, but you can’t add it back once it’s cut.
The Critical Pressing Step
Never skip pressing! This step makes the difference between amateur and professional-looking hems.
- First, fold the raw edge up 1/4 inch and press
- Then fold again to your desired hem depth and press firmly
- Use steam for better results, but test on a scrap first
- For thick fabrics, use a tailor’s ham to press curved areas
Hemming Techniques: From Basic to Advanced
Before we explore each hemming technique in detail, let’s compare the different types of stitches you can use. Each stitch has distinct characteristics that make it better suited for certain projects, skill levels, and fabric types. Understanding these differences will help you choose the most appropriate technique for your specific needs and achieve professional results.
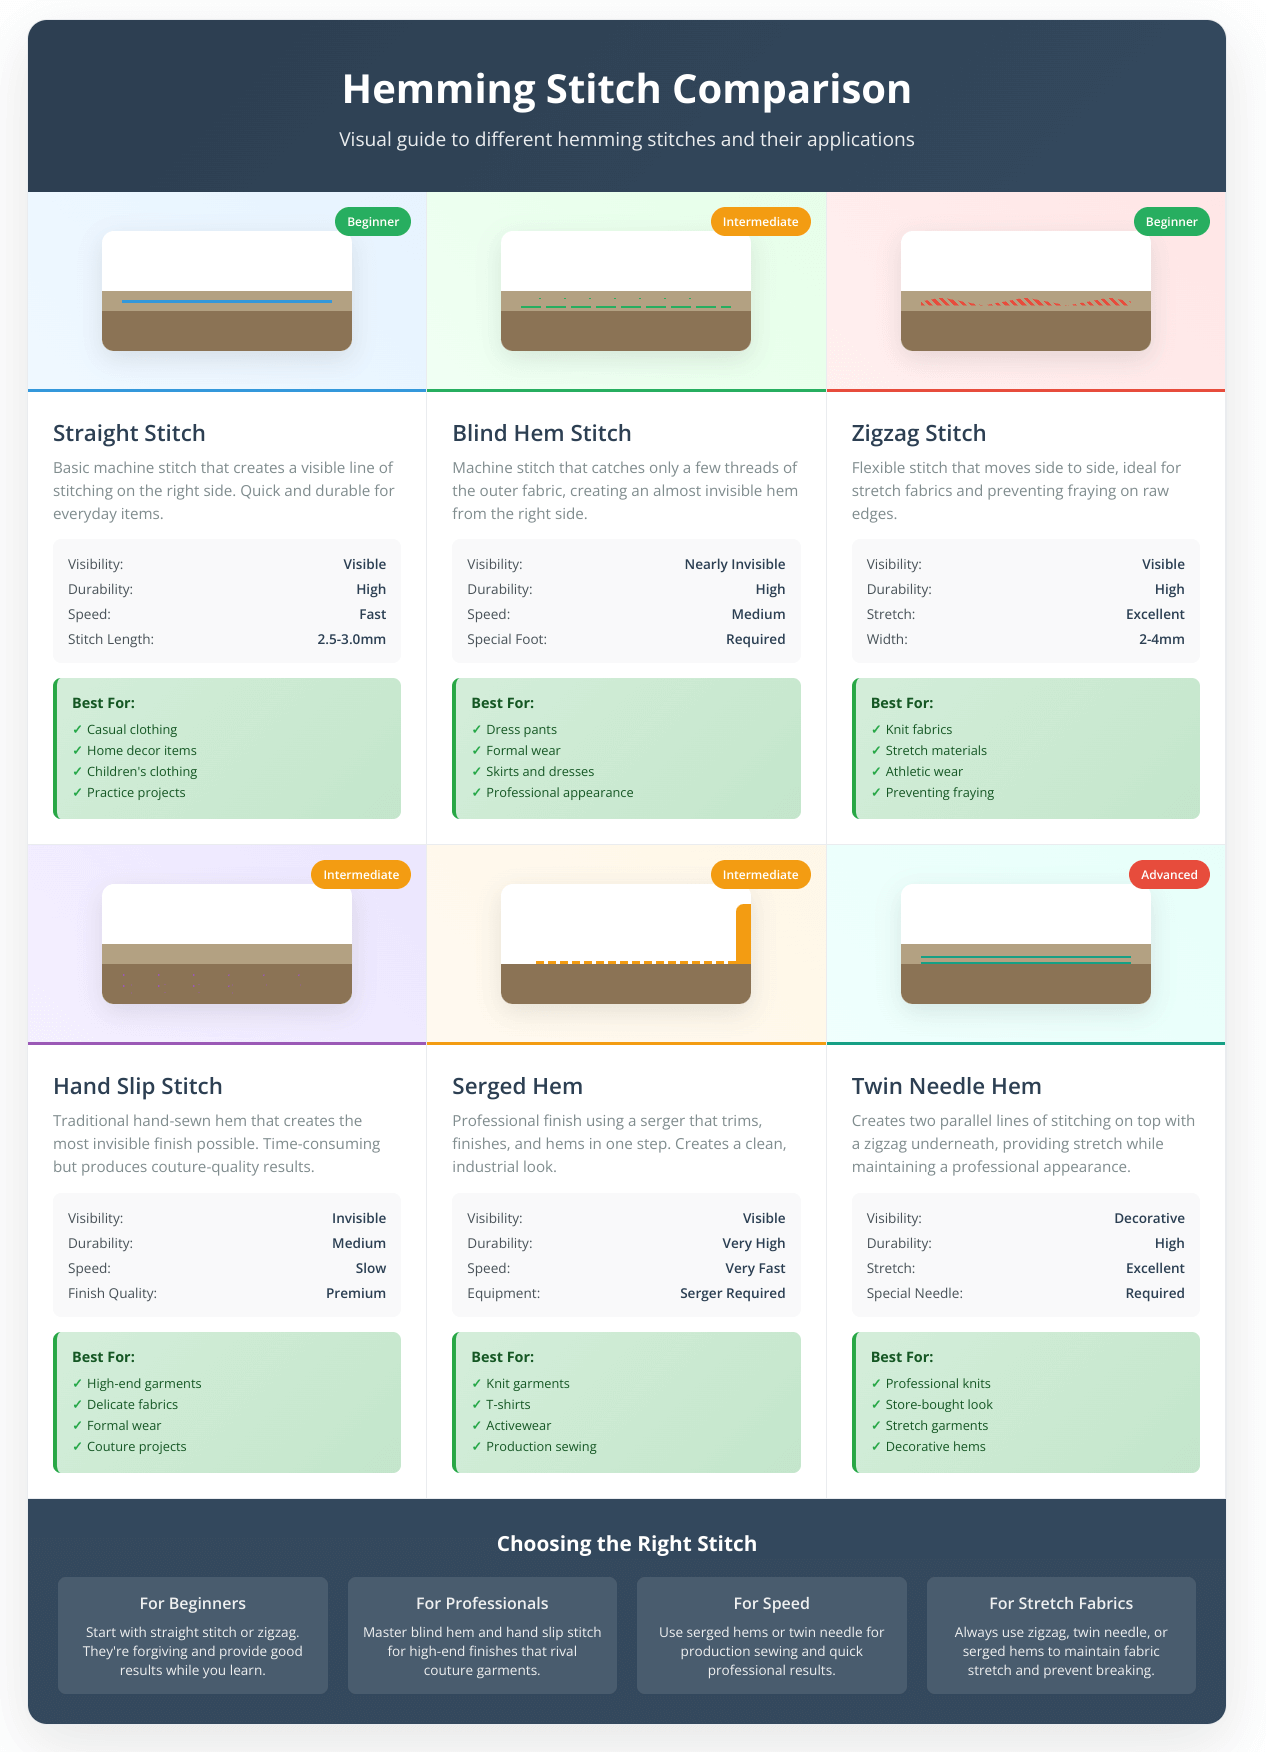
This comparison gives you a quick overview of your options, but don’t feel overwhelmed by the choices. Most sewers start with straight stitch and gradually add techniques to their repertoire as they gain experience. Focus on mastering one or two methods well rather than trying to learn everything at once. Now let’s dive into the step-by-step instructions for each technique.
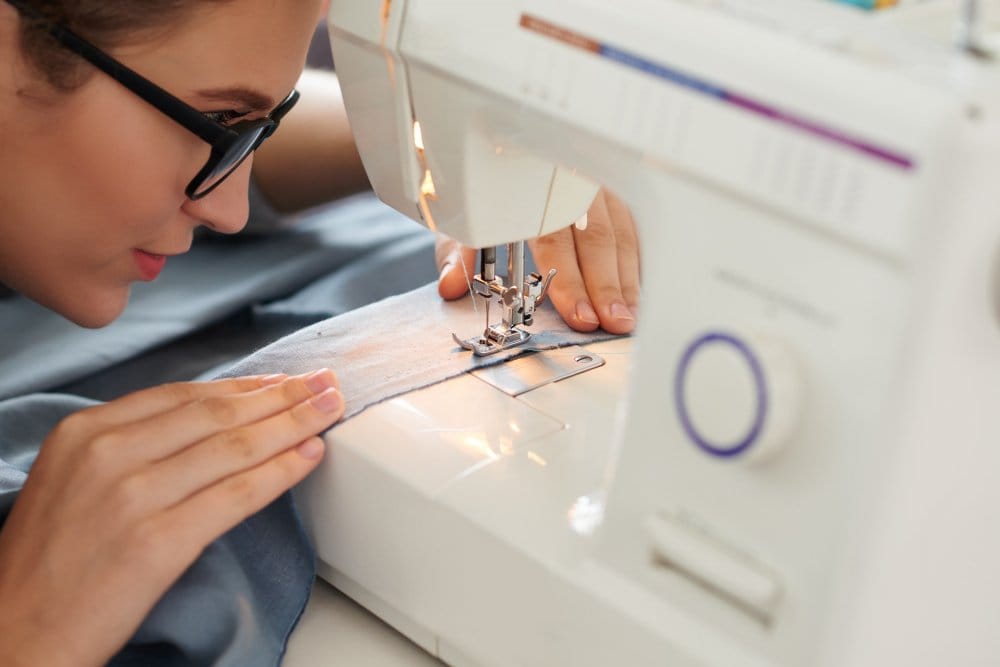
Machine Stitched Hems
Basic Straight Stitch Hem
This is your go-to method for most projects. It’s quick, durable, and works on almost any fabric.
Steps:
- Prepare and press your hem as described above
- Set your machine to a straight stitch, 2.5-3.0mm length
- Position the folded edge about 1/8 inch from your presser foot
- Sew slowly, keeping your stitches parallel to the fold
- Backstitch at the beginning and end for security
When to use: Casual clothing, home decor items, practice projects
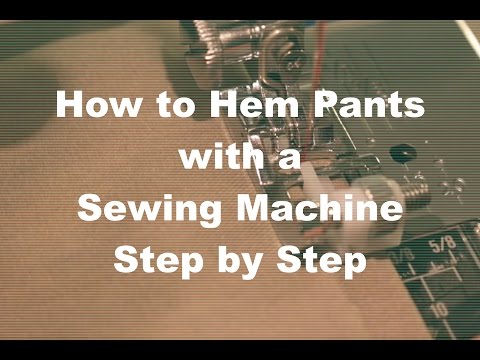
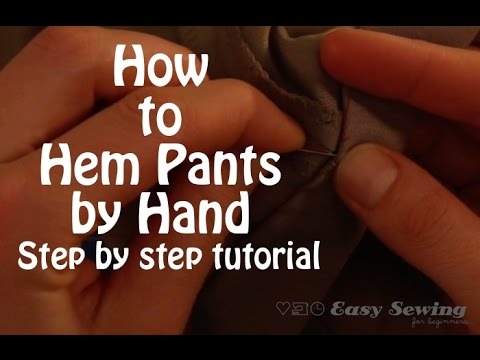
The straight stitch hem is your foundation technique – once you master this, you’ll have the confidence to tackle any hemming project. While the steps above give you the complete process, seeing the technique in action makes all the difference for visual learners.

As you can see in the demonstration, the key to success is taking your time with each step and maintaining consistent seam allowances. Practice this technique on fabric scraps first – the muscle memory you develop will make your actual projects much smoother.
Blind Hem with Machine
Creates an almost invisible hem that’s perfect for dress pants and formal wear.
What you need: Blind hem foot and blind hem stitch on your machine
Steps:
- Fold and press your hem normally
- Fold the hem back on itself, leaving about 1/4 inch of the hem edge exposed
- Attach your blind hem foot
- Select the blind hem stitch
- Sew slowly, letting the needle catch just a thread or two of the main fabric
- Press when finished
The blind hem stitch might seem intimidating, but it’s actually quite manageable once you understand how your machine’s blind hem foot works. This tutorial will show you the setup process and stitching technique step by step.
The blind hem foot does most of the work for you – the key is proper fabric folding and letting the machine guide the process. Once you’ve mastered this technique, you’ll wonder why you ever struggled with visible hem stitches.
Hand Sewn Hems
Slip Stitch (Nearly Invisible)
This hand technique creates the most invisible hem possible.
Steps:
- Thread your needle with a single strand of matching thread
- Tie a small knot at the end
- Pick up just one or two threads from the main fabric
- Take a small stitch through the folded edge of the hem
- Continue alternating between the main fabric and hem edge
- Keep stitches loose enough to allow fabric movement
Hand hemming creates the most professional, invisible finish possible, but the technique can feel tricky at first. This video breaks down the slip stitch method so you can see exactly how to create those nearly invisible stitches.
Notice how small and evenly spaced the stitches are – this is what creates that professional, couture-level finish. Remember, hand hemming takes practice, so don’t worry if your first attempts aren’t perfect. Each project will improve your technique.
Catch Stitch (Flexible Hem)
Perfect for stretchy fabrics or garments that need flexibility.
Steps:
- Work from left to right
- Take a small stitch in the hem edge
- Move diagonally up and take a tiny stitch in the main fabric
- Move diagonally down and take the next stitch in the hem
- Continue this zigzag pattern
- Keep stitches loose for flexibility
Running Stitch (Simple and Quick)
The easiest hand stitch for beginners.
Steps:
- Make small, even stitches through both layers
- Keep stitches about 1/4 inch apart
- Maintain consistent stitch length
- This stitch will be visible, so use matching thread
Specialized Hem Techniques
Rolled Hems
Perfect for lightweight fabrics and delicate edges.
Method 1: By Hand
- Trim fabric edge cleanly
- Roll the edge very narrowly (about 1/8 inch)
- Hand stitch with tiny running stitches
- Continue rolling and stitching as you go
Method 2: With Rolled Hem Foot
- Attach rolled hem foot to your machine
- Fold about 1/2 inch of fabric and insert into the foot’s scroll
- Sew slowly, letting the foot do the rolling
- Guide fabric gently, don’t pull
Raw Edge Hems (Trendy Finish)
Popular in modern fashion for a casual, edgy look.
Steps:
- Cut fabric edge cleanly with sharp scissors
- Apply fray check solution if desired
- Leave edge unfinished or add decorative topstitching
- Best for fabrics that don’t fray heavily
Bound Hems
Great for heavy fabrics or when you want a contrasting edge.
Steps:
- Cut bias tape or create your own binding
- Fold binding over the raw edge
- Stitch through all layers
- Creates a neat, enclosed edge
Troubleshooting Common Hemming Problems
Even experienced sewers encounter hemming challenges from time to time. The key to improvement is learning to identify these common issues so you can address them quickly and effectively. The visual guide below shows the three most frequent hemming problems and their telltale signs, making it easier to diagnose issues in your own work.
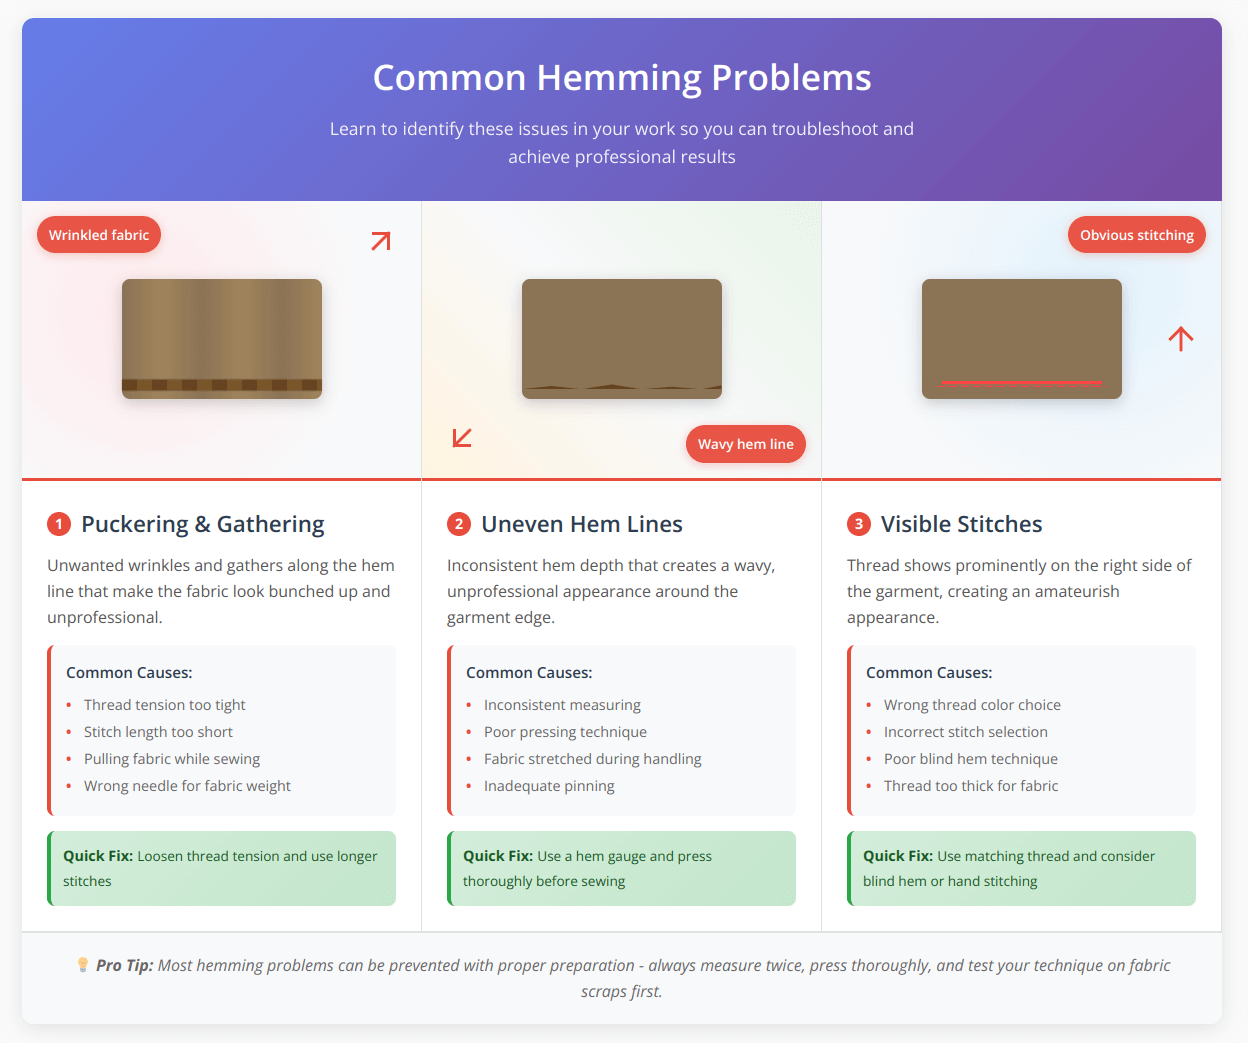
As you can see from the examples above, each problem has distinct visual characteristics. Puckering creates a wrinkled, gathered appearance along the hem line. Uneven hems show up as wavy, inconsistent edges that don’t hang straight. Visible stitches are exactly what they sound like – thread that stands out prominently against the fabric instead of blending in seamlessly. Now let’s look at the specific causes and solutions for each of these issues.
For quick reference while working on your projects, download our printable hemming guides featuring measurement charts, fabric guides, and troubleshooting tips you can keep in your sewing space.
Here’s how to fix the most common issues:
Problem: Puckering or Gathering
Causes:
- Thread tension too tight
- Stitches too long
- Fabric not properly pressed
Solutions:
- Check your sewing machine troubleshooting guide
- Reduce thread tension
- Use shorter stitch length
- Re-press hem before sewing
Problem: Uneven Hem
Causes:
- Inconsistent measuring
- Fabric cut unevenly
- Poor pressing
Solutions:
- Measure multiple points around the garment
- Use a hem gauge for consistency
- Re-cut if necessary
- Press thoroughly before sewing
Problem: Visible Stitches
Causes:
- Wrong thread color
- Incorrect stitch choice
- Poor technique
Solutions:
- Use matching thread
- Switch to blind hem or slip stitch
- Practice on scraps first
Problem: Hem Coming Undone
Causes:
- Insufficient backstitching
- Thread too weak
- Wrong stitch for fabric type
Solutions:
- Always backstitch at beginning and end
- Use stronger thread
- Choose appropriate stitch for your fabric
Problem: Bunching at Curves
Causes:
- Too much fabric in the hem allowance
- Not enough ease clips
Solutions:
- Grade seam allowances for less bulk
- Make small clips in curved areas
- Use a narrower hem allowance
Sometimes written instructions aren’t enough when you’re facing a hemming challenge. These video demonstrations show real-time problem-solving, so you can see exactly how to handle common issues like puckering, uneven edges, and thick seams.

Fabric-Specific Hemming Guide
Cotton and Cotton Blends
- Best methods: Double-fold hems, straight stitch
- Tips: Pre-wash to prevent shrinkage, press with high heat
- Common uses: Shirts, casual pants, home decor
Denim
- Best methods: Single-fold hem with topstitching
- Tips: Use heavy-duty thread, consider keeping original hem
- Special considerations: May need to flatten thick seams with a hammer
Hemming jeans presents unique challenges due to the thick fabric and existing topstitching. This tutorial addresses these specific issues and shows you how to achieve that store-bought look at home.

Working with denim requires patience and the right tools, but the results are worth it. Notice how the tutorial emphasizes pressing and using appropriate needles – these details make the difference between amateur and professional-looking results.
Knits and Jersey
- Best methods: Twin needle, zigzag stitch, coverstitch
- Tips: Don’t stretch while sewing, use ballpoint needles
- Avoid: Straight stitches that can break when stretched
Silk and Delicate Fabrics
- Best methods: Hand-sewn slip stitch, rolled hems
- Tips: Use sharp needles, press with low heat and pressing cloth
- Special considerations: May need French seams for sheer fabrics
Linen
- Best methods: Similar to cotton, can use decorative stitches
- Tips: Expect some natural wrinkling, press with high heat and steam
- Style notes: Raw edges can be left for casual look
Tools and Feet for Better Hemming

Essential Presser Feet
Blind Hem Foot
- Creates nearly invisible hems
- Works with blind hem stitch on your machine
- Essential for dress pants and formal wear
Rolled Hem Foot
- Available in different sizes (2mm, 4mm, 6mm)
- Perfect for lightweight fabrics
- Creates professional narrow hems quickly
Edge Stitch Foot
- Helps maintain consistent seam allowances
- Great for topstitching close to edges
- Useful for various hem styles
Specialty Tools
Hem Gauge
- Adjustable measuring tool
- Ensures consistent hem depth
- Especially helpful for curved hems
Tailor’s Ham
- Curved pressing surface
- Essential for pressing shaped garments
- Helps create professional curves
Point Turner
- Creates sharp corners
- Useful for square hems
- Helps achieve crisp edges
Quick Fixes and No-Sew Alternatives
Sometimes you need a hem fixed immediately, don’t have access to a sewing machine, or simply prefer not to sew. The good news is that there are several effective alternatives that can solve your hemming problems quickly and efficiently. This visual guide breaks down your options by urgency, permanence, and skill level, helping you choose the best solution for your specific situation.
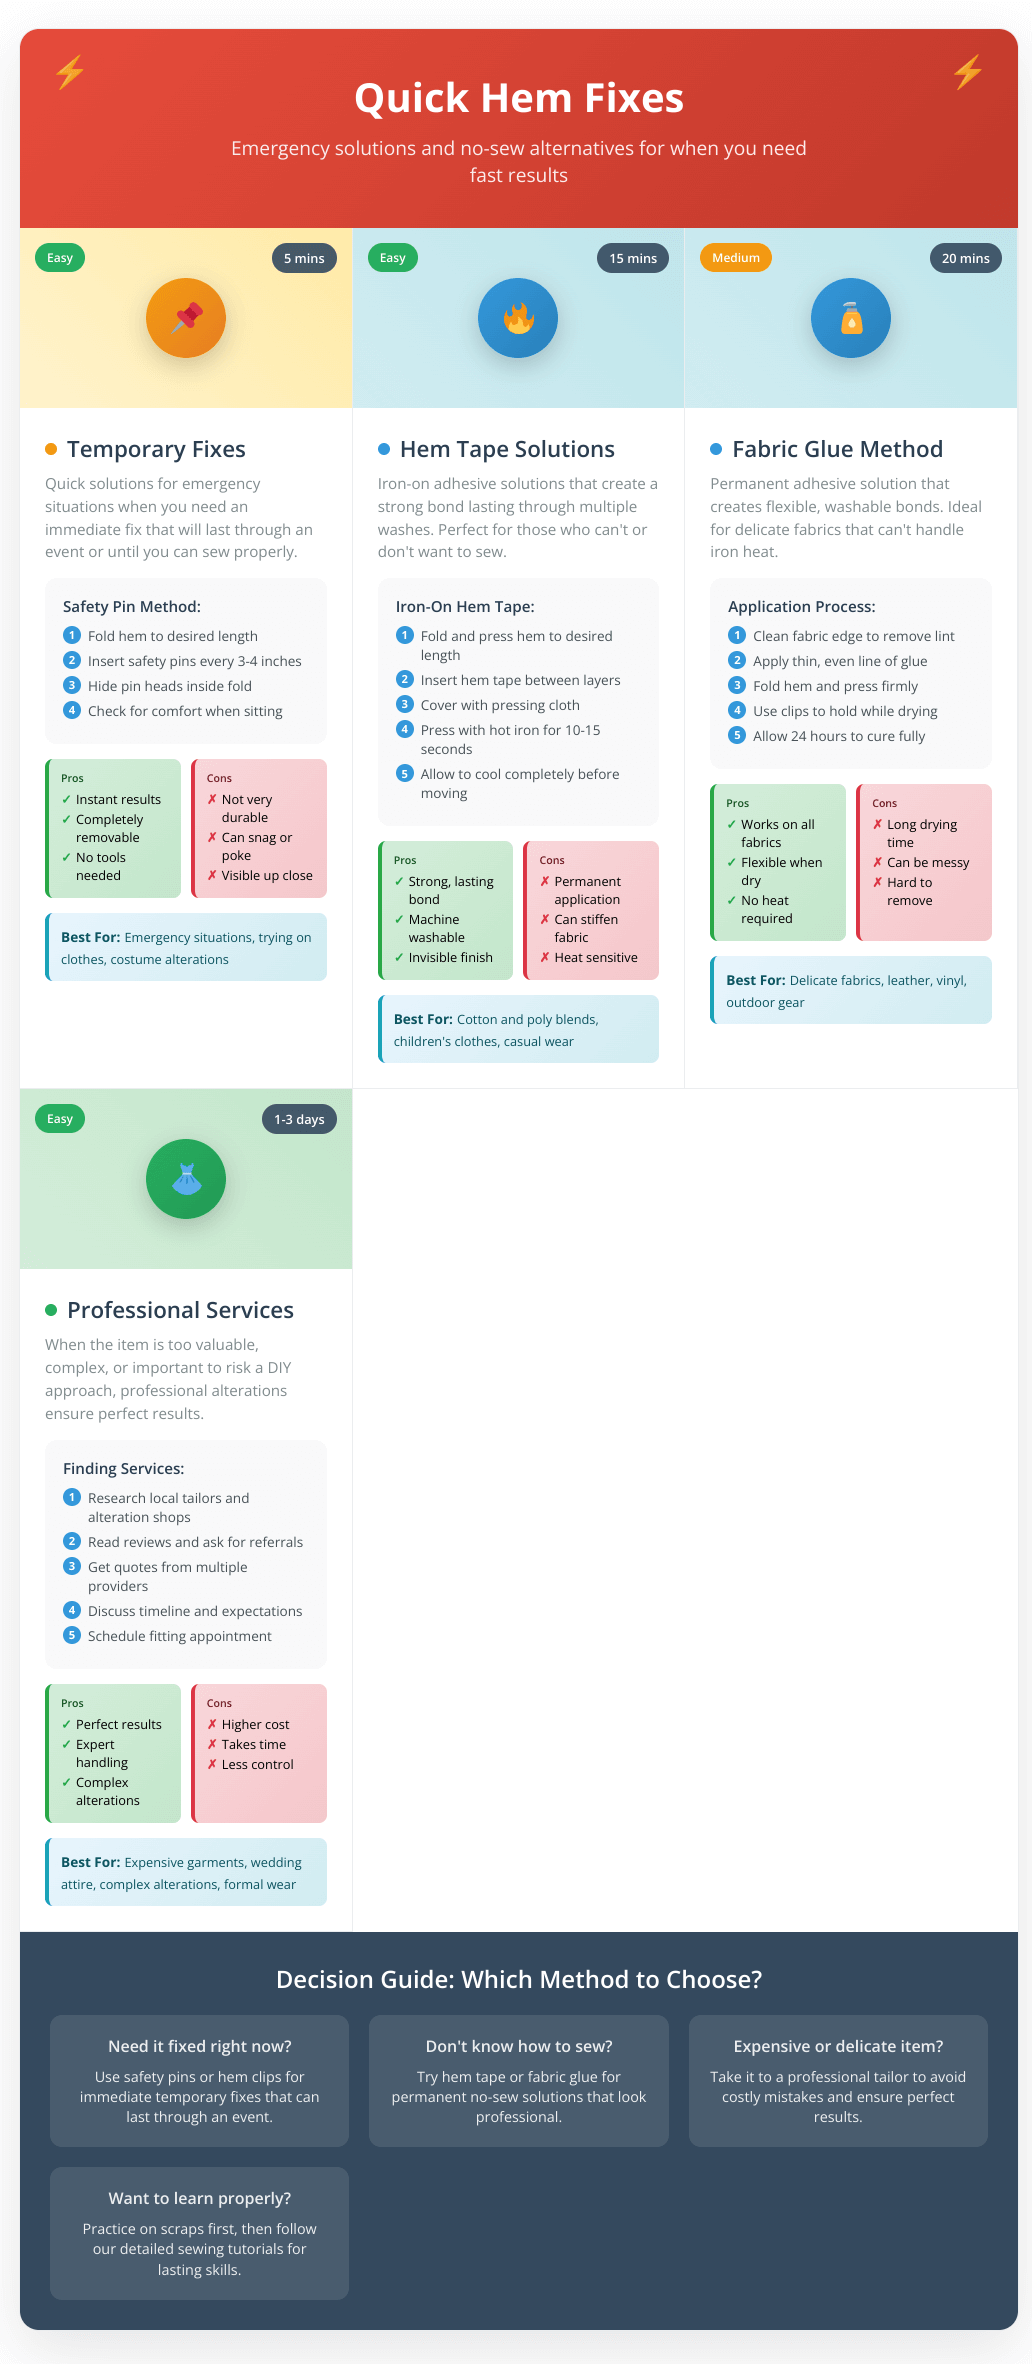
Each method has its place in your hemming toolkit. Temporary fixes are perfect for emergencies and trying on clothes, while hem tape and fabric glue provide permanent solutions without sewing skills. Professional services ensure perfect results for valuable or complex items. Remember, these alternatives don’t replace learning proper hemming techniques, but they’re invaluable when sewing isn’t practical or possible. Choose the method that best fits your timeline, budget, and the importance of the garment.
Temporary Hemming Solutions
Hem Tape
- Iron-on adhesive strips
- Good for quick fixes
- Not permanent but holds through several washings
Safety Pins
- Hidden pinning technique
- Useful for trying on garments
- Quick solution for emergency repairs
Fabric Glue
- Permanent fabric adhesives
- Good for non-washable items
- Creates strong, flexible bond
Professional Alternatives
If sewing isn’t an option, consider:
- Local tailors for complex alterations
- Dry cleaners who offer alteration services
- Online hemming services for basic adjustments
Advanced Techniques for Professional Results
Weighted Hems
Add small weights or chain to hems for better drape:
- Sew weights into the hem fold
- Especially good for coats and flowing dresses
- Creates elegant movement and hang
Utah State University’s Extension program demonstrates practical applications of weighted hem techniques in their bordered hem skirt construction guide. Their method shows how adding a coordinating fabric band creates both visual interest and functional weight to improve garment drape—a principle you can apply to many hemming projects for enhanced results.
Lettuce Edge Hems
Decorative wavy edge for knits:
- Use a narrow zigzag stitch
- Stretch fabric while sewing
- Creates a ruffled, lettuce-like edge
Picot Hems
Delicate scalloped edge:
- Use a picot foot or create by hand
- Perfect for baby clothes and lingerie
- Adds feminine touch to edges
Coverstitch Hems
Professional finish for knits:
- Requires coverstitch machine or serger
- Creates parallel lines of stitching
- Standard in ready-to-wear clothing
Hemming Different Garment Types

Pants and Trousers
- Maintain proper fit and proportions
- Consider shoe heel height
- Preserve original hem when possible for jeans
Skirts and Dresses
- Hang garment 24 hours before hemming
- Use proper undergarments when measuring
- Consider the drape and movement of the fabric
Sleeves
- Narrow hems work best for most sleeves
- Consider cuff style and function
- Allow ease for movement
Curtains and Home Decor
- Account for fabric settling
- Use deep hems for weight and stability
- Consider lining for better drape
Creating Your DIY Hem Gauge
Save money and customize your hemming tool:
Materials needed:
- Cardboard or sturdy paper
- Ruler
- Pencil
- Scissors
Steps:
- Cut cardboard at least 3 times wider than your desired hem
- Mark various hem depths (1/4″, 1/2″, 3/4″, 1″)
- Draw straight lines between marks
- Cut along one line to create a guide edge
- Use by aligning fabric edge with the cut and folding along marked lines
Maintenance and Care
Sewing Machine Maintenance
Keep your machine in top condition for better hemming:
- Clean lint regularly
- Oil moving parts as recommended
- Replace needles frequently
- Check tension settings periodically
Caring for Hemmed Garments
- Press hems carefully during garment care
- Avoid pulling or stretching hem areas
- Store hanging garments properly
- Check hems periodically for loose threads
Frequently Asked Questions
How to sew a hem for beginners?
Start with the basic straight stitch method on medium-weight cotton fabric. Fold the edge twice, press well, and sew 1/8 inch from the inner fold. Practice on scraps first to build confidence.
What stitch should I use for a hem?
For most hems, use a straight stitch (2.5-3.0mm length). For stretchy fabrics, use a zigzag or twin needle. For invisible hems, use a blind hem stitch with the appropriate foot.
How to hand sew a seamless hem?
Use the slip stitch technique: alternate tiny stitches between the main fabric (catching only 1-2 threads) and the hem fold. Keep stitches loose and use matching thread for the most invisible result.
What are the 5 basic steps in hemming?
1. Measure and mark the desired length
2. Cut fabric with appropriate hem allowance
3. Fold and press the hem
4. Pin or baste in place
5. Sew using your chosen method
How to do a quick hem without a sewing machine?
Use hem tape (iron-on adhesive), fabric glue, or the running stitch by hand. For truly temporary fixes, try safety pins hidden inside the fold or hem clips.
How to easily hem pants for beginners?
Try on pants with proper shoes, mark length with pins, add 1-2 inch hem allowance, cut excess fabric, fold twice and press, then sew with a straight stitch.
Can I hem with a straight stitch?
Yes! Straight stitch is the most common and versatile hem stitch. Use it for most fabrics except very stretchy materials that need zigzag or specialty stitches.
What is an alternative to sewing a hem?
Try iron-on hem tape, fabric glue, no-sew hem clips, or take items to a professional tailor. These work well for quick fixes or when sewing isn’t possible.
How to neatly sew a hem?
Press thoroughly before sewing, use matching thread, maintain consistent seam allowances, and finish with proper pressing. Take your time and practice on scraps first.
How to do an invisible hem on a sewing machine?
Use a blind hem foot and blind hem stitch. Fold the hem back on itself, exposing just the hem edge, then let the machine’s zigzag catch only a thread or two of the main fabric.
How to finish off raw edges of fabric?
Options include: folding twice (double-fold hem), serging/overlocking, zigzag stitching, using pinking shears, applying fray check, or binding with bias tape.
What is the difference between a hem and a seam?
A hem finishes the edge of a single piece of fabric, while a seam joins two pieces of fabric together. Hems are typically at garment edges like sleeves and bottom edges.
How to hem without a hemming foot?
Use your regular presser foot and straight stitch. Mark your seam allowance and sew slowly and carefully. An edge guide foot can also help maintain consistent spacing.
How to make a raw hem not fray?
Apply fray check solution, use a zigzag stitch along the edge, serge the edge, or apply bias tape binding. Some fabrics naturally don’t fray much.
Which stitch is commonly used for hemming?
The straight stitch is most common for regular hems. Zigzag for stretch fabrics, blind hem for invisible finishes, and overlock/serger for professional edges.
Helpful Hemming Resources
Make your hemming projects easier with our free interactive tools:
- Hem Calculator – Calculate perfect fabric allowances for any garment type
- Fabric Selector – Get personalized technique recommendations for your specific fabric
- Printable Guides – Download professional reference charts for your sewing room
Conclusion
Mastering the art of hemming opens up endless possibilities for creating professional-looking garments and home decor items. From the basic straight stitch hem that every beginner should learn to advanced techniques like coverstitch and weighted hems, these skills will serve you throughout your sewing journey.
Remember that practice makes perfect. Start with simple projects using medium-weight cotton fabrics before moving on to challenging materials like silk or stretch knits. Don’t be afraid to make mistakes – they’re part of the learning process, and a seam ripper can fix most hemming errors.
Key Takeaways:
- Always press your hems before and after sewing for professional results
- Match your hemming technique to your fabric type and project needs
- Invest in quality tools like a good iron, sharp scissors, and appropriate presser feet
- Practice different techniques on scraps before working on your final projects
- Don’t rush – careful preparation leads to better results
Final Recommendations:
- Keep a variety of threads in your most-used colors for quick projects
- Maintain your sewing machine regularly for consistent stitch quality
- Build your skills gradually from basic straight stitches to more complex techniques
- Create a reference notebook with your favorite techniques and measurements
- Join online sewing communities for tips, troubleshooting, and inspiration
Whether you’re hemming your first pair of pants or creating couture-level finishes, these techniques will help you achieve the polished, professional look that makes handmade items truly special. Happy sewing!