Master the art of enclosed seams with this complete step-by-step guide to creating luxury-quality finishes on lightweight fabrics
Quick Summary: French seams create a professional, enclosed finish that completely hides raw edges inside the seam. Perfect for delicate fabrics like silk and chiffon, this technique involves sewing the seam twice – first with wrong sides together, then with right sides together – to trap raw edges between the layers.
Table of Contents
- What Are French Seams?
- Benefits and When to Use French Seams
- Essential Tools and Materials
- Seam Allowance Basics
- Best Fabrics for French Seams
- Step-by-Step French Seam Tutorial
- Advanced French Seam Techniques
- Troubleshooting Common Problems
- French Seam Alternatives and Comparisons
- Professional Finishing Tips
- Frequently Asked Questions
Key Takeaways
- French seams enclose raw edges completely, preventing fraying and creating a professional finish
- Best suited for lightweight to medium-weight fabrics like silk, chiffon, cotton voile, and linen
- Requires at least 5/8″ (1.5cm) total seam allowance to accommodate the two-step sewing process
- Essential for sheer fabrics where interior seam finishes would be visible from the outside
- Takes more time than regular seams but eliminates the need for serging or overlocking
What Are French Seams?
French seam construction completely encloses raw fabric edges for a professional finish
French seams are a type of enclosed seam finish that completely hides raw fabric edges within the seam construction. Unlike regular seams that leave raw edges exposed on the inside of a garment, French seams create a clean, finished appearance on both the right and wrong sides of your project.
The technique involves sewing each seam twice using a specific sequence: first with wrong sides together at a narrow seam allowance, then trimming and folding to sew again with right sides together. This two-step process creates a “fabric sandwich” that traps all raw edges inside the seam.
Historical Background
French seams originated in 16th-century Europe during the height of luxury garment construction. French seamstresses developed this technique to achieve the refined, polished finishes that became synonymous with high-quality European tailoring. The method was particularly valued for creating garments where both the exterior and interior needed to look impeccable.
Today, French seams remain a hallmark of couture sewing and are considered an essential skill for anyone serious about garment construction. You’ll find them used extensively in luxury lingerie, high-end blouses, and unlined jackets where interior construction is visible.
How French Seams Hide Raw Edges
The magic of French seams lies in their construction method. When you sew the first seam with wrong sides together, the raw edges are positioned on the outside. After trimming and folding, the second seam completely encases these raw edges between the fabric layers.
This enclosed construction serves multiple purposes:
- Prevents fraying: Raw edges are protected from washing and wear
- Creates durability: Double rows of stitching provide extra strength
- Maintains drape: Less bulk than serged seams on lightweight fabrics
- Professional appearance: Interior looks as polished as the exterior
Benefits and When to Use French Seams
French seams provide superior finishing for sheer fabrics where interior construction shows through
Advantages of French Seams
French seams offer several compelling advantages that make them worth the extra time and effort:
| Advantage | Description | Best For |
|---|---|---|
| Superior Durability | Double-stitched construction creates extra strength | Items that need frequent washing like bedding and children’s clothes |
| Professional Appearance | Interior looks as polished as exterior | Unlined garments, luxury items, sheer fabrics |
| Fray Prevention | Completely encloses raw edges | Fabrics prone to fraying like linen and loosely woven cottons |
| No Special Equipment | Uses only a regular sewing machine | Home sewers without sergers or overlock machines |
| Maintains Drape | Less bulk than serged finishes | Lightweight and flowing garments |
Disadvantages of French Seams
While French seams offer many benefits, they also have some limitations:
- Time-consuming: Requires twice the sewing time of regular seams
- Fabric limitations: Not suitable for heavy or thick fabrics
- Skill requirement: Demands precision in trimming and pressing
- Seam allowance needs: Requires wider seam allowances than some patterns provide
- Limited to straight and gentle curves: Difficult on tight curves or complex shapes
When to Choose French Seams
French seams are your best choice in these situations:
Sheer Fabrics
Essential for chiffon, organza, and voile where seam finishes show through the fabric
Luxury Garments
Silk blouses, high-end lingerie, and couture pieces that demand perfect interior finishing
Unlined Items
Jackets, vests, and dresses where interior seams are visible during wear
Baby Clothes
Gentle on sensitive skin and durable enough for frequent washing
Home Textiles
Pillowcases, lightweight curtains, and table linens that need professional finishing
Historical Reproductions
Period garments that require authentic construction methods
When NOT to Use French Seams
Avoid French seams in these scenarios:
- Heavy fabrics: Denim, canvas, thick wool create too much bulk
- Stretch knits: French seams remove necessary stretch
- Tight curves: Armholes with significant curves, princess seams
- Limited seam allowance: Patterns with 3/8″ or less allowance
- Speed projects: When time is more important than finish quality

Learn about different seam finishing techniques, including French seams
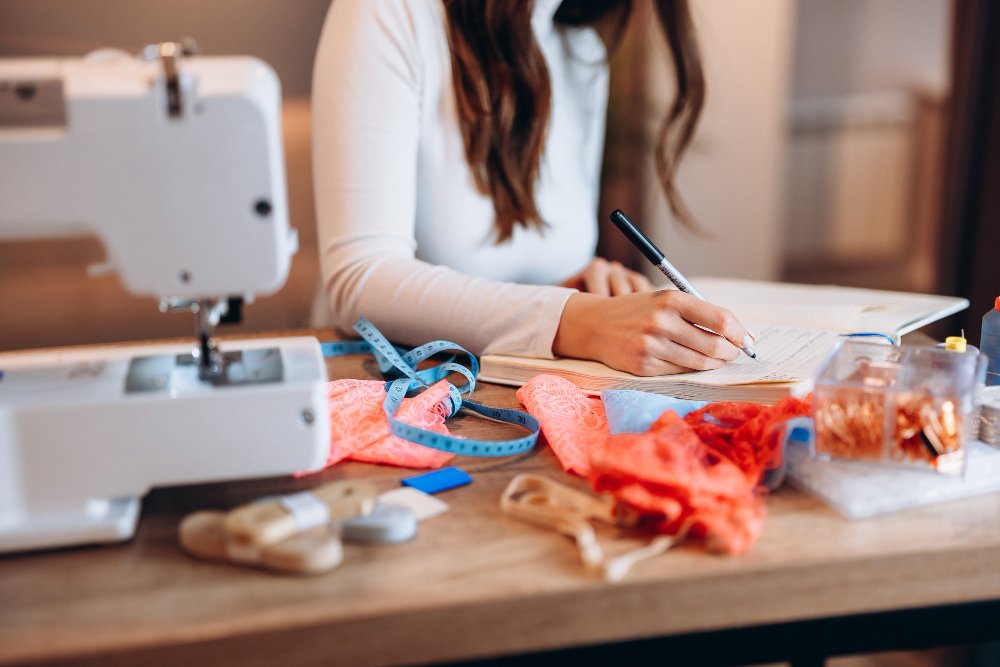
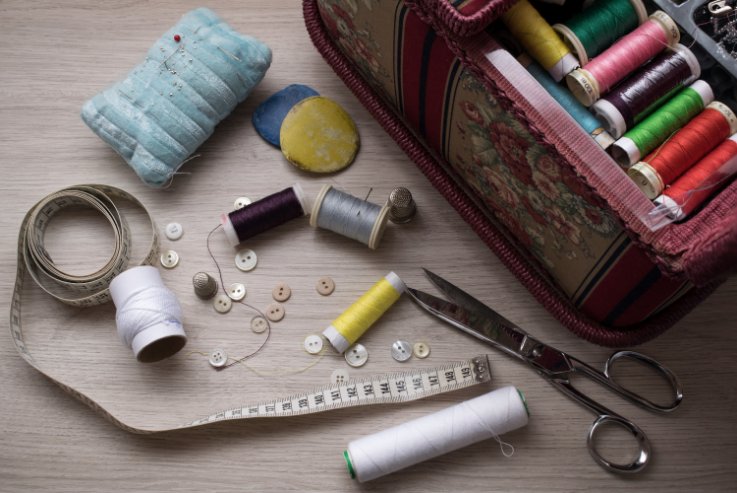
Essential Tools and Materials
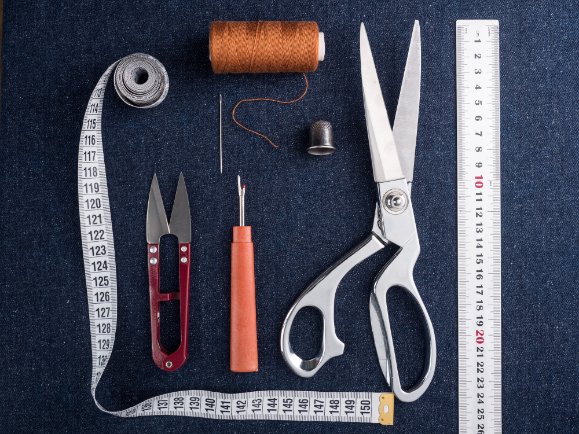
Quality tools make French seam construction easier and more precise
Success with French seams depends heavily on having the right tools and using them properly. While you don’t need specialized equipment, certain tools will make your work more precise and professional.
Required Tools
| Tool | Purpose | Key Features to Look For |
|---|---|---|
| Sharp Fabric Scissors | Clean cutting without fraying | 8-10 inch blades, comfortable grip, sharp points for precision |
| Steam Iron | Crisp pressing at each stage | Variable temperature settings, good steam output, pointed tip |
| Fine Pins | Secure layers without damage | Thin diameter, sharp points, glass or metal heads |
| Quality Thread | Strong, smooth seams | All-purpose polyester or cotton, color-matched to fabric |
| Measuring Tools | Accurate seam allowances | Clear ruler, seam gauge, marking tools |
For thread selection, check our guide on choosing the right thread for your project to ensure optimal results.
Recommended Sewing Machine Setup
While French seams work with any sewing machine, these settings will give you the best results:
- Needle size: 70/10 to 80/12 for lightweight fabrics
- Stitch length: 2.0-2.5mm for most fabrics
- Tension: Normal to slightly reduced for delicate fabrics
- Presser foot: Standard zigzag foot or all-purpose foot
If you’re experiencing issues with your machine, consult our sewing machine troubleshooting guide for solutions to common problems.
Understanding Seam Allowance for French Seams
Seam allowance planning is critical for successful French seams. Unlike regular seams that use the pattern’s specified allowance, French seams require you to split that allowance between two separate sewing operations.
Seam Allowance Requirements
French seams need a minimum total seam allowance of 5/8″ (1.5cm) to work properly. Here’s how to calculate your splits:
| Pattern Seam Allowance | First Seam | Second Seam | Final Result |
|---|---|---|---|
| 5/8″ (1.5cm) | 3/8″ (1cm) | 1/4″ (6mm) | 5/8″ total |
| 1/2″ (1.2cm) | 1/4″ (6mm) | 1/4″ (6mm) | 1/2″ total |
| 3/8″ (1cm)* | 1/8″ (3mm) | 1/4″ (6mm) | 3/8″ total |
*3/8″ allowances create very narrow French seams – practice on scraps first
For detailed guidance on seam allowances, check our comprehensive seam allowance guide which covers adjustment techniques for different pattern types.
UK vs US Seam Allowance Differences
Seam allowance standards vary between countries:
- US patterns: Typically use 5/8″ (1.5cm) standard allowance
- UK/European patterns: Often use 1.5cm (5/8″) or 1cm (3/8″) allowances
- Vintage patterns: May use 1/2″ or other non-standard measurements
Always check your pattern’s seam allowance before starting and adjust if needed for French seam construction.
Best Fabrics for French Seams
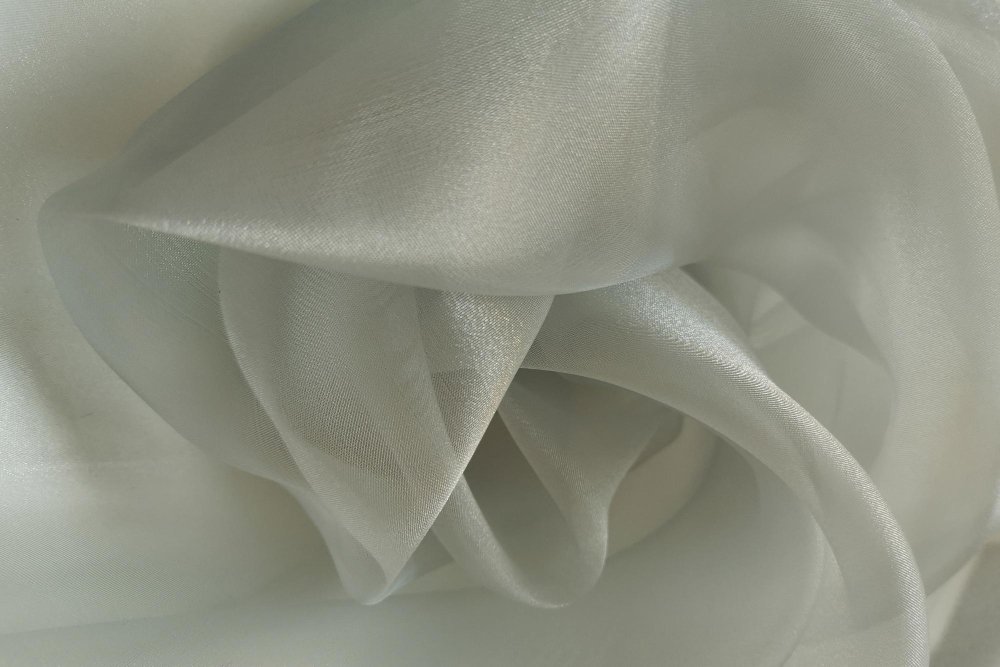
Lightweight fabrics like chiffon, silk, and cotton voile are ideal for French seam construction
Fabric choice dramatically affects your French seam success. The technique works best with fabrics that are lightweight to medium-weight and have a stable weave.
Ideal Fabric Types
Silk
Best for: Blouses, dresses, lingerie
Weight: Lightweight to medium
Why it works: Smooth texture, minimal bulk, professional drape
Cotton Voile
Best for: Summer garments, baby clothes
Weight: Lightweight
Why it works: Soft, breathable, easy to press
Chiffon
Best for: Formal wear, overlays
Weight: Very lightweight
Why it works: Sheer fabric where seam finishing shows through
Linen (Lightweight)
Best for: Summer shirts, table linens
Weight: Light to medium
Why it works: Prone to fraying, benefits from enclosed edges
Cotton Lawn
Best for: Shirts, children’s clothes
Weight: Lightweight
Why it works: Crisp finish, holds press well
Bamboo Fabric
Best for: Baby clothes, undergarments
Weight: Lightweight
Why it works: Soft, antibacterial, gentle on skin
Fabrics to Avoid
These fabric types create problems with French seam construction:
- Heavy fabrics: Denim, canvas, thick wool create excessive bulk
- Stretch knits: Jersey, interlock lose necessary stretch in enclosed seams
- Pile fabrics: Velvet, corduroy trap fibers and create uneven seams
- Loosely woven fabrics: Gauze, cheesecloth may not hold the double stitching
- Slippery synthetics: Some polyesters shift during sewing
For more guidance on fabric selection, explore our guide to common fabric types and their uses.
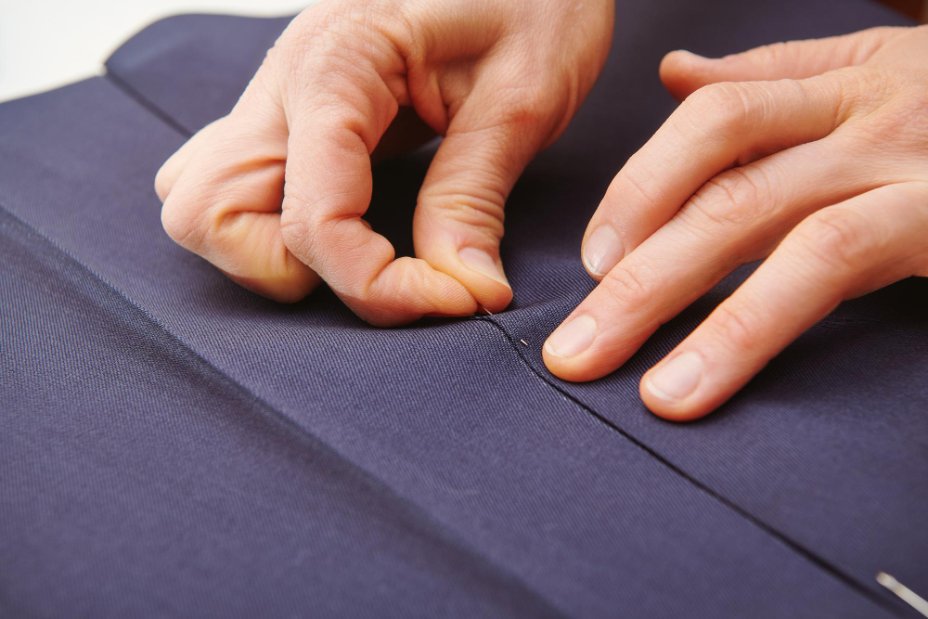
Complete Step-by-Step French Seam Tutorial
Now let’s walk through the complete process of creating perfect French seams. Take your time with each step – precision here leads to professional results.

Follow along with this detailed video tutorial for visual guidance
Step 1: Prepare Your Fabric Pieces
Start by ensuring your fabric pieces are cut accurately with sufficient seam allowance. If working with a pattern that has insufficient allowance, add extra fabric around the edges before cutting.
- Cut your pattern pieces with appropriate seam allowances
- Mark seam lines if helpful, especially for beginners
- Press any wrinkles from the fabric before starting
- Have your tools organized and ready
Step 2: Pin Wrong Sides Together
This step feels backward if you’re used to regular seam construction, but it’s essential for French seams.
- Place fabric pieces with wrong sides facing each other
- Align edges precisely – any misalignment will show in the final seam
- Pin perpendicular to the edge every 2-3 inches
- Double-check that wrong sides are together before proceeding
Step 3: Sew the First Seam
Sew your first seam using the smaller portion of your split seam allowance:
- For 5/8″ total allowance: sew at 3/8″ from the edge
- For 1/2″ total allowance: sew at 1/4″ from the edge
- Use a straight stitch with 2.0-2.5mm stitch length
- Remove pins as you approach them – don’t sew over pins
- Backstitch at the beginning and end to secure
Step 4: Trim the Seam Allowance
This is the most critical step for achieving clean French seams:
- Trim seam allowance to approximately 1/8″ (3mm)
- Cut as close to the stitching line as possible without cutting threads
- Use sharp scissors for clean cuts
- Remove any loose threads or frayed bits
- Trim corners at a diagonal to reduce bulk
Step 5: Press the Seam
Proper pressing creates the crisp edge needed for the second seam:
- Press the seam flat first to set the stitches
- Then press the seam allowance to one side
- Use appropriate heat setting for your fabric
- Press from the wrong side first, then the right side if needed
Step 6: Fold and Pin Right Sides Together
Now you’ll create the “sandwich” that encloses the raw edges:
- Fold the fabric along the seam line so right sides face each other
- The seam should be exactly on the fold edge
- Press this fold to create a sharp crease
- Pin the layers together, keeping the seam on the edge
Step 7: Sew the Final Seam
Complete your French seam with the second row of stitching:
- Sew at the remaining seam allowance distance from the fold
- For 5/8″ total: sew 1/4″ from the fold edge
- For 1/2″ total: sew 1/4″ from the fold edge
- Ensure this seam completely encloses the raw edges from step 4
- Backstitch at beginning and end
Step 8: Final Press
The final press completes your professional French seam:
- Press the seam flat to set the stitches
- Press the seam to one side (usually toward the back of the garment)
- Check both sides to ensure raw edges are completely enclosed
- Steam lightly if needed to achieve a crisp finish
Advanced French Seam Techniques
Once you’ve mastered basic French seams, these advanced techniques will expand your capabilities.
French Seams on Curves

Learn techniques for applying French seams to curved edges
Curved seams require special attention but can be successfully French seamed with these techniques:
- Trim more aggressively: Cut seam allowance to 1/16″ on curves
- Clip curves: Make small clips into the seam allowance (not through stitching)
- Work in sections: Press and pin curved areas in 2-3 inch segments
- Use a pressing ham: Helps maintain the curve while pressing
- Sew slowly: Take your time to maintain smooth curves
French Seam Darts
Darts can be French seamed using a modified technique:
- Mark dart legs on the right side of fabric
- Draw inner dart lines 1/4″ inside the original dart
- Fold dart and sew along inner dart lines
- Trim to 1/8″ and press over a tailor’s ham
- Fold with right sides together and sew final dart line
- Press toward center front or back as pattern indicates
French Seaming Sleeves and Armholes
Armhole French seams work best with minimal ease:
- Complete sleeve underarm seam first using French seam technique
- Gather sleeve cap if pattern requires it
- Pin sleeve to armhole with wrong sides together
- Sew first seam at 3/8″, trim to 1/8″
- Use pressing ham to shape seam while pressing
- Fold and complete final seam at 1/4″
- Press toward sleeve
What is a Mock French Seam?
A mock French seam (also called a false French seam) creates a similar appearance with less work:
- Sew regular seam with right sides together
- Press seam open
- Fold each seam allowance edge under 1/4″
- Press folded edges
- Bring folded edges together and topstitch
While faster than true French seams, mock French seams don’t provide the same strength or complete enclosure.
Troubleshooting Common French Seam Problems
Even experienced sewers encounter challenges with French seams. Here are solutions to the most common issues:
| Problem | Cause | Solution | Prevention |
|---|---|---|---|
| Raw edges showing | Insufficient trimming or uneven seam allowance | Carefully unpick and re-sew with proper trimming | Trim closer to stitching line, measure seam allowances carefully |
| Puckered seams | Too much tension or wrong stitch length | Press with steam, adjust machine settings | Test settings on scraps, use appropriate needle size |
| Bulky seams | Fabric too heavy or inadequate trimming | Grade seam allowances or switch to different finish | Choose appropriate fabrics, trim aggressively |
| Uneven seam width | Inconsistent seam allowance | Use seam guide or mark seam lines | Practice maintaining consistent seam allowance |
| Fraying during construction | Overly aggressive handling | Handle gently, use spray starch for stability | Support fabric weight, minimize handling |
Do French Seams Fray?
Properly constructed French seams should never fray because all raw edges are completely enclosed within the seam. If you notice fraying, it indicates:
- Incomplete enclosure of raw edges
- Damage to the outer seam line
- Extremely loose fabric weave that needs additional stabilization
French Seam Alternatives and Comparisons
Understanding when to use French seams versus other finishing techniques helps you choose the best method for each project.
French Seam vs Flat Fell Seam
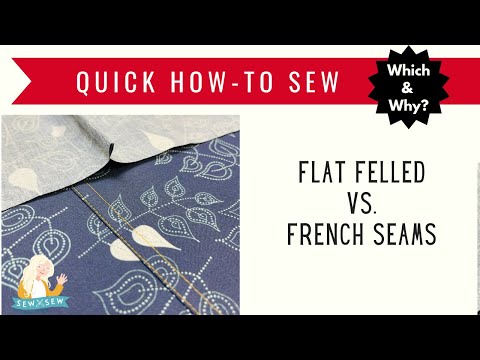
Compare French seams with flat fell seams to choose the right technique
| Aspect | French Seam | Flat Fell Seam |
|---|---|---|
| Appearance | Clean on both sides, minimal bulk | Visible topstitching, more casual look |
| Strength | Very strong, double-stitched | Extremely strong, triple-stitched |
| Best for | Lightweight fabrics, formal wear | Heavy fabrics, workwear, jeans |
| Skill level | Intermediate | Intermediate to advanced |
| Time required | Moderate | High |
How Many Layers Are in a French Fell Seam?
Flat fell seams typically have 3-4 fabric layers at the seam line, compared to French seams which have only 2 layers. This makes flat fell seams stronger but bulkier.
Other Seam Finishing Alternatives
When French seams aren’t suitable, consider these alternatives:
- Hong Kong seam: Bias-bound edges, professional look
- Serged/overlocked: Fast, good for knits and casual wear
- Pinked edges: Quick finish for non-fraying fabrics
- Zigzag stitch: Simple machine finish for most fabrics
- Bias binding: Decorative and functional edge finish
For guidance on seam finishing without specialized equipment, check our guide on perfect hem techniques which covers edge finishing methods.
Professional Finishing Tips
These advanced tips will help you achieve truly professional results with your French seams.
How to Make French Seams Look Professional
- Consistent seam allowances: Use a seam guide or mark lines for accuracy
- Sharp tools: Keep scissors and rotary cutters sharp for clean cuts
- Quality thread: Invest in good thread that won’t break or create lint
- Proper pressing: Press at each stage, don’t skip this step
- Test first: Always test on fabric scraps before starting your project
Speed Tips for Efficient French Seaming
While French seams take time, these tips can improve your efficiency:
- Chain sewing: Sew multiple seams in sequence without cutting threads
- Batch processing: Complete all first seams, then all trimming, etc.
- Sharp rotary cutter: Faster than scissors for trimming long straight seams
- Pressing station setup: Keep iron and pressing tools easily accessible
- Practice: Speed comes naturally with experience
What is a Self-Enclosed French Seam?
A self-enclosed French seam is simply the standard French seam technique – the term emphasizes that the seam encloses itself without requiring additional finishing materials like bias tape or serging.
How to Sew a Seam Without It Showing
Beyond French seams, you can hide seam construction using:
- Lapped seams: Overlap fabric edges and topstitch
- Welt seams: Similar to lapped but with enclosed edges
- Blind seams: Hand-sewn with nearly invisible stitches
- Faced seams: Use facing pieces to hide construction
Special French Seam Applications
French seams have specialized uses beyond basic garment construction that showcase their versatility.
French Seaming Godets and Gores
A godet is a triangular piece of fabric inserted into a seam to add fullness. French seaming godets requires careful planning:
- Cut godet with extra seam allowance for French seam construction
- Mark insertion points on main garment piece
- Pin godet to garment with wrong sides together
- Sew first seam using standard French seam technique
- Trim, fold, and complete second seam
- Press toward garment body
Adding Fullness to Skirts with French Seams
When adding fabric panels to increase skirt fullness, French seams create professional joins:
- Plan panel placement for visual balance
- Cut additional panels with proper seam allowances
- Use French seams to attach new panels
- Match grain lines for consistent drape
- Press all seams in the same direction
Princess Seams vs French Seams
Princess seams are curved fitting seams that can be finished with French seam technique on appropriate fabrics. The curved nature requires extra care with trimming and pressing.
Helpful Tools and Calculators
Take advantage of these interactive tools to perfect your French seam technique:
- Seam Allowance Calculator – Convert between imperial and metric measurements
- Fabric Yardage Calculator – Calculate exact fabric needs for your projects
- Fabric Selector Tool – Find perfect fabrics for French seam projects
- Needle & Fabric Compatibility Chart – Choose the right needle for your fabric
- Sewing Cost Calculator – Budget your French seam projects
Frequently Asked Questions
What is another name for a French seam?
French seams are also called “enclosed seams” or “self-finished seams” because they completely enclose raw edges without additional finishing materials. In some vintage sewing texts, they may be referred to as “run and fell seams,” though this can cause confusion with flat fell seams.
What does a French hem look like?
A French hem (different from a French seam) is a double-folded hem where the raw edge is folded under twice. This creates a clean finish similar to the enclosed edge principle of French seams, but applies to garment hems rather than joining seams.
What is the best stitch to finish a raw edge?
The best edge finish depends on your fabric and equipment. For lightweight fabrics without a serger, French seams provide the most professional finish. Other excellent options include Hong Kong seams (bias-bound edges), zigzag stitching, or overlocking if you have a serger.
When should you not use a French seam?
Avoid French seams on heavy fabrics (denim, canvas), stretch knits, tight curves, or when you have insufficient seam allowance. They’re also not ideal for casual garments where speed is more important than a couture finish.
How to finish seams without a serger?
Several techniques work well without special equipment: French seams for lightweight fabrics, zigzag stitching along raw edges, pinking shears for stable fabrics, Hong Kong seams using bias tape, or bound seams using bias-cut fabric strips.
What is a stay stitch?
A stay stitch is a line of regular stitching sewn just inside the seam line to prevent fabric stretching during construction. It’s particularly important on curved edges like necklines and armholes, and should be done before applying French seam finishing.
What is topstitching in sewing?
Topstitching is decorative stitching visible on the right side of a garment, usually done with heavier thread. While French seams don’t typically include topstitching, you can add decorative topstitching near French seams for design interest.
How to do Hong Kong seam?
Hong Kong seams use bias tape to encase raw edges: sew bias tape to raw edge, fold tape over edge, and stitch in the ditch from the right side. This creates a professional finish similar to French seams but works on any fabric weight.
Can you use French seams on stretch fabrics?
French seams remove stretch from the seam area, making them unsuitable for most knit fabrics. For stretch fabrics, use a serger, zigzag stitch, or stretch-specific seam finishes that maintain elasticity.
How much extra fabric do I need for French seams?
French seams don’t require extra fabric length, but you need adequate seam allowance width. Ensure your pattern has at least 5/8″ seam allowance, or add extra width when cutting if your pattern has narrower allowances.
Conclusion
French seams represent one of the finest achievements in garment construction technique. This centuries-old method transforms simple seam joining into a mark of quality craftsmanship that elevates any project from homemade to professional.
Essential Points to Remember
Throughout this comprehensive guide, we’ve covered the fundamental aspects that make French seams successful:
- Proper fabric selection is crucial – stick to lightweight to medium-weight fabrics for best results
- Seam allowance planning requires at least 5/8″ total allowance split between two sewing operations
- Precision in execution – each step from pinning to final pressing affects the quality of your finished seam
- Tool quality matters – sharp scissors, a good iron, and proper pins make the difference between amateur and professional results
When French Seams Excel
Choose French seams for projects where quality finishing makes a difference: silk blouses that deserve couture-level interior construction, baby clothes requiring gentle seams against sensitive skin, sheer fabrics where regular seam finishes would show through, and heirloom pieces meant to last for generations.
The technique particularly shines in beginner-friendly projects using appropriate fabrics, as it teaches precision while creating professional results that build confidence.
Building Your Skills
Start with simple projects like pillowcases or basic cotton blouses before attempting complex garments. Practice on fabric scraps to perfect your trimming technique and develop consistent seam allowances. As your skills develop, challenge yourself with curved seams and more advanced applications.
Use our Sewing Cost Calculator to budget your French seam projects and plan your fabric purchases effectively.
Consider French seams as part of a broader skill set that includes other quality finishing techniques. Understanding when to use French seams versus flat fell seams, Hong Kong finishes, or simple serging makes you a more versatile and capable sewer.
The Bigger Picture
French seams embody the slow fashion movement’s values: taking time to create quality pieces that last, valuing craftsmanship over speed, and producing garments that rival commercial luxury items. In an era of fast fashion, mastering techniques like French seams connects you to centuries of clothing construction traditions while creating a more sustainable approach to your wardrobe.
Each French seam you sew develops your understanding of fabric behavior, reinforces precision habits, and builds the foundation for advanced techniques. The time investment pays dividends in improved sewing skills across all your projects.
Moving Forward
With French seams in your skill repertoire, you’re ready to tackle more advanced finishing techniques. Explore comprehensive sewing guides to continue building your expertise, and don’t hesitate to experiment with different fabric combinations and applications.
Remember that even experienced sewers continue learning with each project. Embrace the process of continuous improvement, and celebrate the satisfaction that comes from creating beautifully finished garments with your own hands.
Your journey in mastering French seams opens doors to more complex couture techniques and builds the foundation for a lifetime of rewarding sewing projects. Take pride in each perfectly enclosed seam – you’re carrying forward a tradition of excellence that spans centuries of fine garment construction.
Additional Resources
For further learning and reference, these authoritative sources provide additional guidance on French seam construction:
- Seamwork’s French Seam Tutorial – Professional step-by-step guide from respected pattern company
- Closet Core Patterns French Seam Guide – Comprehensive tutorial including advanced techniques for curves and sleeves
- Tilly and the Buttons French Seam Instructions – Clear, beginner-friendly approach from respected UK pattern designers