Learn the professional technique that creates unbreakable seams for jeans, workwear, and tailored garments
Quick Navigation
Key Takeaways
- Flat-felled seams completely enclose raw fabric edges, preventing fraying
- Double stitching provides exceptional durability for high-stress areas
- Originally used in sails and leather goods before becoming a garment standard
- Essential for professional finishes on denim, workwear, and tailored pieces
- Mastery bridges home sewing results with commercial-grade quality
Creating professional-quality clothing requires techniques that balance strength and style. The flat-felled seam stands out as a cornerstone method for crafting garments built to last. Originally developed for sails and leatherwork, this approach now elevates modern projects like denim jeans and tailored shirts.
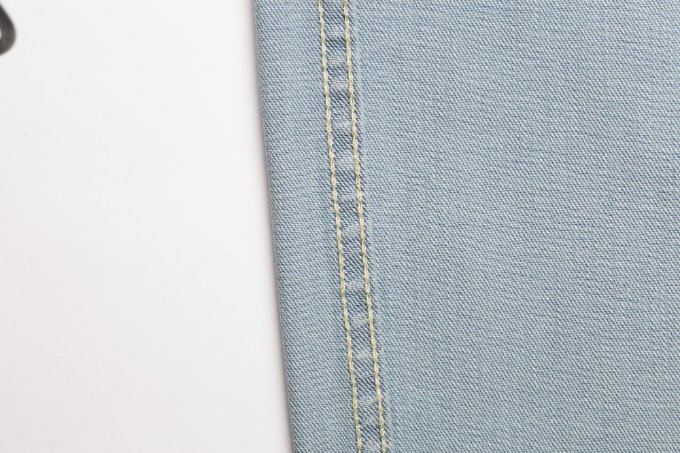
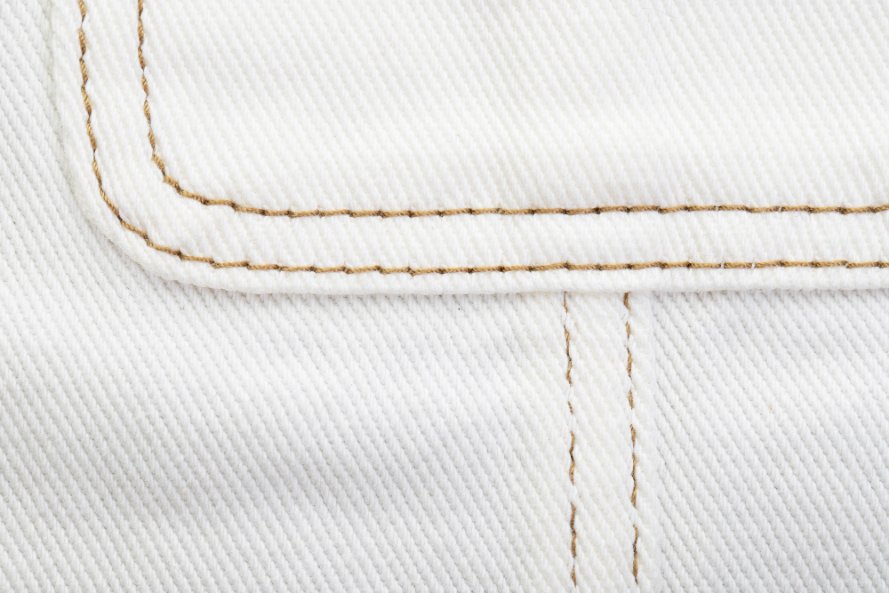
What makes this method unique? Unlike standard seams, it completely encases raw fabric edges. This prevents fraying while adding structural integrity. The result? Clean finishes that handle daily wear without unraveling. Industrial manufacturers rely on it for heavy-duty workwear, but home sewers can achieve similar results with practice.
Understanding Flat-Felled Seams and Their Benefits
The evolution of durable stitching methods took a revolutionary turn when Levi Strauss & Co. reimagined denim construction in the 1890s. Faced with complaints about metal rivets digging into skin, their solution – replacing hardware with layered stitching – created a blueprint for modern workwear. This innovation didn’t just solve comfort issues; it set a new durability standard. Modern sewing educators like Seamwork Magazine continue to teach these time-tested techniques to home sewers.
Origins in Denim and Workwear
Originally crafted for sails and horse tack, this method gained fame through Levi’s iconic jeans. By folding fabric edges twice and securing them with parallel stitches, the design eliminated bulk while locking out fraying threads. The result? Seams that survived gold mines and railroad labor, cementing denim’s reputation as tough-as-nails fabric.
When to Use a Flat Fell Seam
Choose flat-felled seams when you need maximum durability and a professional finish. They’re perfect for:
- Heavy-duty garments like jeans, jackets, and workwear
- Items that will undergo frequent washing
- Unlined garments where both sides of the seam are visible
- High-stress areas like inseams and armholes
- Children’s clothing that needs to withstand active play
Are Flat-Felled Seams Stronger?
Yes, flat-felled seams are among the strongest seam types available. Double-stitched layers do more than hide raw edges – they redistribute stress across the entire seam. Unlike single-line stitches that snap under pressure, this technique creates a flexible yet unyielding bond. You’ll notice the clean finish on both sides of your project, making it ideal for unlined jackets or reversible garments.
Seam Strength Comparison
Flat-Felled Seam
Strength: 95%
Double stitching distributes stress evenly
French Seam
Strength: 75%
Enclosed but single stress point
Basic Straight Seam
Strength: 60%
Single line of stitching
Flat Felled Seam vs French Seam
While both create enclosed seams, they serve different purposes. French seams work best for lightweight fabrics and delicate garments like lingerie or baby clothes. Flat-felled seams excel with medium to heavy fabrics where maximum strength is needed. French seams create a tube-like enclosure, while flat-felled seams lay flat against the fabric for reduced bulk. Leading pattern companies like In the Folds emphasize flat-felled seams for their strength and professional appearance in modern garment construction.
Industrial applications prove its strength, but home sewers benefit equally. Whether reinforcing knee patches or tailoring crisp shirts, the enclosed edges resist wear from washing and movement. It’s why premium brands still rely on this centuries-old method for high-stress areas like inseams and armholes. Modern sewing machine manufacturers like Singer offer specialized flat-fell feet that make this technique more accessible to home sewers.
Essential Tools, Materials, and Preparation
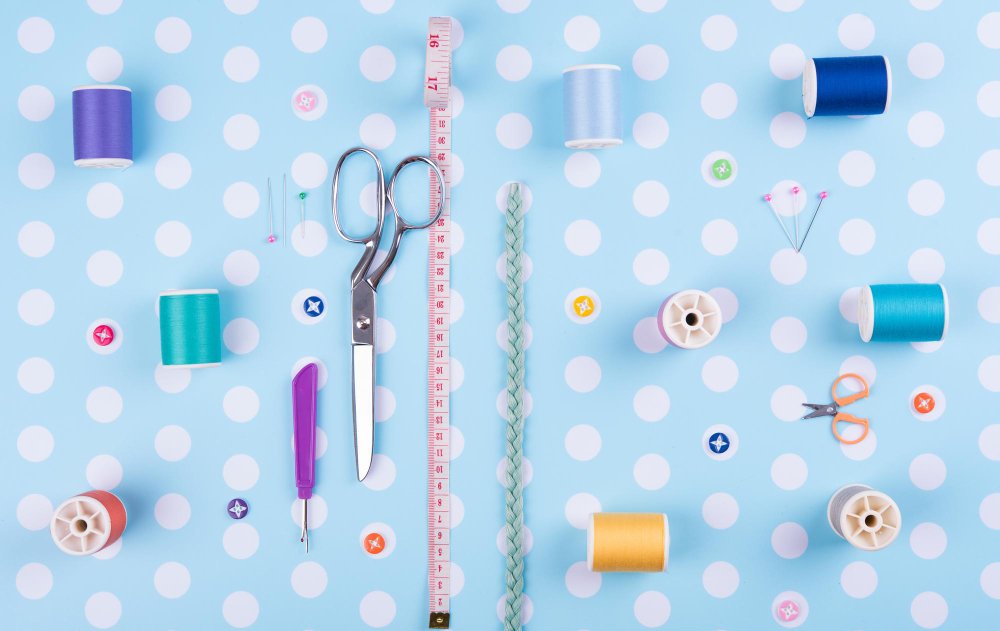
Proper preparation separates amateur projects from polished garments. Success begins with selecting quality tools and understanding how fabric choices impact your workflow.
Gathering Your Tools and Fabrics
Start with sharp fabric scissors for clean cuts. A 5/8″ seam allowance requires precise trimming – dull blades create jagged edges that complicate folding. Use a transparent ruler to verify measurements before marking with chalk or water-soluble pens.
| Tool | Purpose | Pro Tip |
|---|---|---|
| Microtex Needle | Pierces heavy fabrics | Replace every 2 projects |
| Walking Foot | Feeds layers evenly | Essential for denim |
| Seam Gauge | Measures allowances | Lock at 5/8″ |
| Sharp Fabric Scissors | Clean, precise cuts | Dedicated fabric-only use |
| Iron & Pressing Mat | Creates crisp folds | Steam setting for best results |
What Fabrics Work Best for Flat Felled Seams?
Medium to heavy-weight woven materials like denim, twill, or canvas are optimal. Cotton, linen, and sturdy blends respond well to this technique. For lightweight fabrics such as silks or thin cottons, reduce the allowance width and press thoroughly to avoid puckering. Learn about different fabric types and their uses to make better project choices.
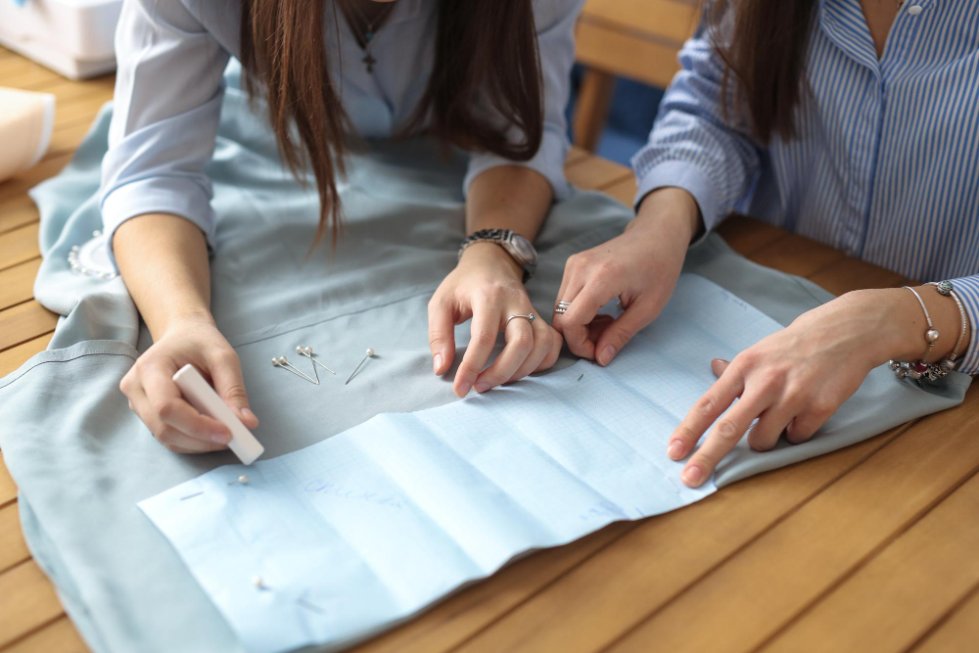
Prepping Patterns and Seam Allowances
Most commercial patterns use 5/8″ allowances. If yours differs, trace the original and adjust using grid paper. Mark notches at 1/8″ depth – longer cuts weaken the structure. For delicate fabrics, skip cutting notches entirely. Use temporary markers instead.
Pre-wash materials to prevent shrinkage. Press fabrics with steam before cutting to eliminate wrinkles that distort measurements. Always test stitches on scraps first – this reveals tension issues before working on your final piece.
Your Flat-Fell Seam Guide: Step-by-Step Techniques
Precision stitching transforms fabric into long-lasting garments with clean lines. Whether reinforcing denim jeans or crafting tailored shirts, mastering these methods ensures your creations withstand repeated use.

Video: Learn the basic flat-felled seam technique step by step
How to Do a Flat Felled Seam Step by Step
Align and Pin Fabric Pieces
Place fabric pieces with right sides together for the classic method. Pin along the edge, ensuring perfect alignment. This initial positioning determines your final seam direction.
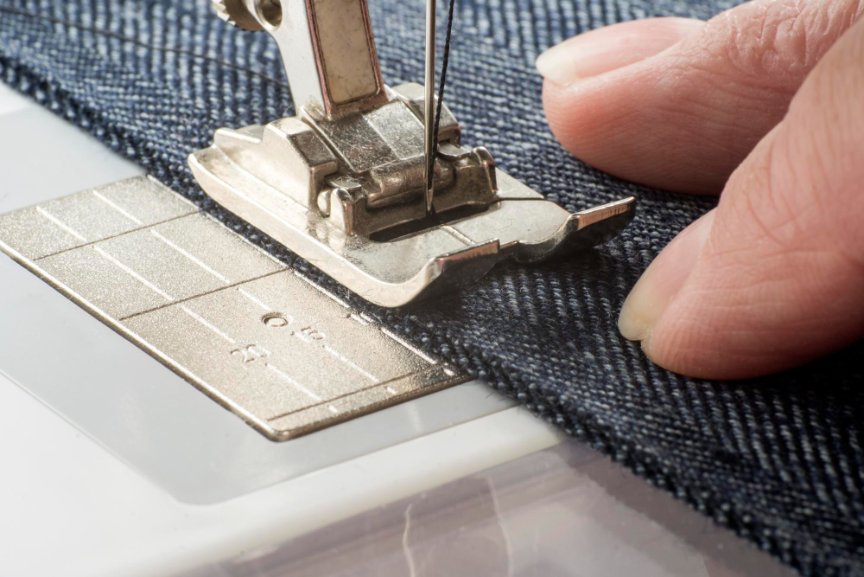
Sew Initial Seam
Stitch using a 5/8″ seam allowance with a straight stitch. Maintain consistent speed and tension for even stitching. Use quality thread that matches your fabric weight.
Trim One Seam Allowance
Trim one side to half width (approximately 1/4″). This creates the layered effect that prevents bulk. Choose the side that will be hidden when pressed.
Press Toward Trimmed Edge
Press the seam allowance toward the trimmed side using steam. This creates the foundation for the fold. Ensure the press is completely flat.
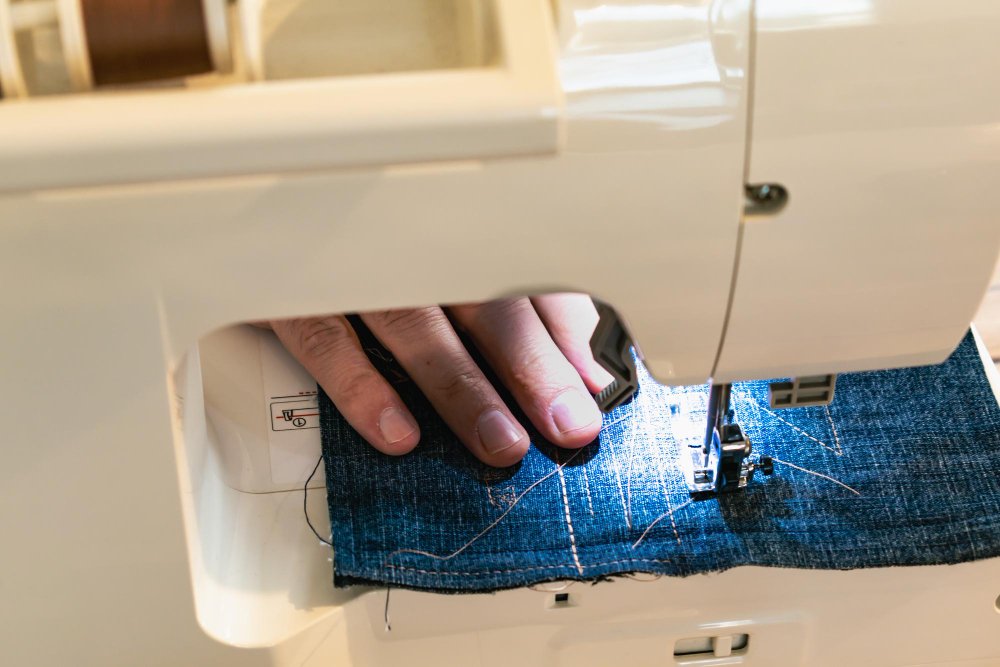
Fold and Encase
Fold the longer side over the trimmed edge, creating a clean enclosure. The raw edge should be completely hidden inside this fold.
Final Topstitch
From the wrong side, edgestitch close to the fold. This final line of stitching secures everything in place and creates the signature flat-fell appearance.
Track Your Progress
How to Make a Flat Fell Seam (Alternative Method)
For beginners or when working with challenging fabrics, try starting with wrong sides together. This creates two visible lines of topstitching on the right side, which some prefer for the authentic workwear look. The process remains the same, but your final appearance will differ.
How to Sew a Mock Flat Felled Seam
For lightweight materials or when time is limited, the mock flat-felled seam offers similar appearance with less bulk. Sew pieces right sides together at 5/8″. Trim one allowance and finish edges before pressing toward the trimmed side. Topstitch from the visible side using a 3/8″ allowance. This method reduces bulk in silks or linens while maintaining durability.
How to Use a Flat Fell Foot
A flat fell foot attachment guides fabric automatically, eliminating guesswork. Position the foot so the guide rides along your first seam. The foot folds and positions fabric as you sew, creating consistent results. Adjust your needle position to align with the foot’s guide for perfect topstitching every time. Check your presser feet guide for compatibility with your machine.
Seam Allowance Guidelines
What is the Seam Allowance for a Flat Fell?
The standard seam allowance for flat-felled seams is 5/8″ (1.6cm). This provides enough fabric for trimming and folding without creating excessive bulk. For thicker fabrics like heavy denim or canvas, you might need up to 3/4″ allowance to accommodate the additional layers.
How Much Seam Allowance to Add for a Flat Felled Seam?
When drafting patterns or adjusting existing ones, add an extra 1/8″ to 1/4″ beyond your normal seam allowance. This compensates for the fabric consumed in the folding process. For beginner-friendly projects, stick with 5/8″ and adjust as you gain experience.
What’s the Best Seam Allowance for Beginners?
New sewers should start with 5/8″ allowances for practice. This size offers enough fabric to work with while learning the folding technique. As skills improve, you can experiment with narrower allowances for different effects or fabric weights.
What is the General Rule for a Seam Allowance?
The general rule is to use consistent allowances throughout your project. Standard allowances are 5/8″ for garments and 1/2″ for home decor items. For flat-felled seams specifically, ensure you have enough fabric to trim one side and still create a proper fold. Check our seam allowance troubleshooting guide for common issues.
Seam Allowance Converter
Convert between metric and imperial measurements for perfect seam allowances
Convert NowTroubleshooting Common Issues
Expert Tips and Problem-Solving
Handle curves like sleeves by starting at wider sections. Adjust fabric every inch to maintain alignment. If stitches pucker, reduce tension or switch to a sharper needle. Test stitches on scraps first. Press each fold with steam for crisp edges that survive washing cycles.
Fixing Uneven Stitching
Uneven tension or inconsistent folding often causes irregular topstitching. Press each step thoroughly with steam, and use clips (not pins) to hold folds in place before stitching. Slow down when sewing over thick layers. Check your machine troubleshooting guide for tension adjustments.
Preventing Skipped Stitches
Use a denim or topstitching needle (size 90/14 or 100/16) and increase stitch length slightly. Hold the fabric taut while guiding it under the presser foot, and consider using a walking foot attachment for consistent feeding.
Working with Stretchy or Slippery Fabrics
Knits typically require stretch-friendly stitches, so flat-felled seams aren’t recommended for most stretchy fabrics. For silks, opt for narrower allowances and press with a low-heat iron. Basting first helps keep slippery fabrics aligned.
Project Applications and Uses
What Projects Use Flat Felled Seams Often?
Classic applications include:
- Jeans and Denim: Inseams, side seams, and yoke attachments
- Work Shirts: Side seams and sleeve attachments
- Jackets and Coats: Structural seams requiring durability
- Bags and Totes: Handle attachments and main seams
- Home Decor: Pillow covers and curtains for longevity
- Children’s Clothing: Any garment needing extra durability
Beginner Project Ideas
Start with simple beginner sewing projects to practice the technique:
- Tote bags with flat-felled side seams
- Simple aprons with durable ties
- Pillow covers for practice
- Basic work shirts with minimal fitting
Advanced Techniques and Variations
Curved Seam Applications
While flat-felled seams work best on straight edges, they can be adapted for gentle curves like armholes. Clip the trimmed seam allowance at regular intervals to reduce bulk and allow smooth curving. Use narrower allowances (1/4″ or less) and a shorter stitch length for better control.

Video: Learn techniques for sewing curved seams with precision
What is Topstitching in Sewing?
Topstitching refers to visible stitching on the right side of a garment, often using contrasting or heavier thread. In flat-felled seams, topstitching serves both functional and decorative purposes – it secures the seam while adding visual interest. Use topstitching thread (heavier weight) for the best appearance.
Hand-Sewn Flat Felled Seams
For historical accuracy or when machine access is limited, flat-felled seams can be hand-sewn using a running stitch followed by a felling stitch. This traditional method requires patience but produces beautiful, nearly invisible seams when done with matching thread.
What is a Felling Stitch?
A felling stitch is a small, angled hand stitch used to secure folded seam allowances in place. It catches just a few threads of the base fabric, making it nearly invisible from the right side. This stitch was essential in historical garment construction before sewing machines became common.
Industrial vs Home Methods
Professional garment factories use specialized flat-fell machines that complete the entire process in one pass. Home sewers achieve similar results through the multi-step process outlined above. While factory methods are faster, home techniques often produce superior results due to individual attention to each step.
Seam Finishing Alternatives
Why Choose Flat Felled Over Overlock?
Someone would use a flat-felled seam rather than simply overlocking for several reasons:
- Superior Strength: Flat-felled seams distribute stress across a wider area
- Professional Appearance: Creates the iconic look of quality garments
- Durability: Withstands repeated washing and wear better than serged edges
- Reversible Finish: Both sides look neat and finished
- No Special Equipment: Can be done on any straight-stitch machine
Which Seam is the Strongest?
Flat-felled seams are among the strongest available, followed closely by French seams. The double stitching and stress distribution make flat-felled seams ideal for high-stress applications like jeans and workwear. They consistently outperform single-stitched and serged seams in durability tests.
What is the Best Stitch to Finish a Raw Edge?
The best edge finish depends on your fabric and project goals:
- Flat-felled seams: Maximum durability and professional look
- French seams: Delicate fabrics and lightweight garments
- Serged/Overlocked: Quick finishing for casual wear
- Hong Kong finish: Luxury appearance for unlined garments
- Pinked edges: Basic finishing for stable fabrics
Why is it Called Hong Kong Finish?
The Hong Kong finish gets its name from the high-end tailoring industry in Hong Kong, where this technique was popularized for luxury garments. It involves binding raw edges with bias strips of lightweight fabric, creating an elegant finish often seen in expensive coats and jackets.
What is a Staystitch?
Staystitching is a line of regular stitching done within the seam allowance to prevent stretching or distortion of curved or bias edges. Applied before joining pieces together, it maintains the original shape during construction. This is especially important for necklines, armholes, and other curves.
What is a Seam Ripper in Sewing?
A seam ripper is a small tool with a sharp, curved blade designed to safely remove stitches without damaging fabric. Essential for correcting mistakes, it has a pointed tip for getting under individual stitches and a protective ball to prevent fabric tears. Quality seam rippers can save hours of frustration when alterations are needed.
How to Sew an Invisible Seam?
For truly invisible seams, use the ladder stitch (blind stitch) for hems or the hand-felled method with matching thread. The key is catching only a few threads of the main fabric with each stitch. While flat-felled seams aren’t invisible, they create a neat, professional appearance on both sides.
What is a French Fell Seam?
A French fell seam is another name for a run-and-fell seam, typically used in shirt construction. It’s sewn with right sides together (unlike denim flat-fells which start wrong sides together) and shows only one line of topstitching on the exterior. This creates a cleaner look for tailored garments.
What are the Pros and Cons of Flat Fell Seams?
Pros: Maximum durability, professional appearance, prevents fraying, comfortable against skin, works for reversible garments. Cons: Time-consuming, requires skill and practice, uses more thread, difficult on curves, adds slight bulk to lightweight fabrics.
Frequently Asked Questions
Start with cotton fabric and 5/8″ seam allowances. Practice on scraps first, focusing on clean pressing at each step. Use contrasting thread initially so you can see your stitching clearly. Take your time with the folding step – this is where most beginners struggle.
Classic flat-felled seams fold both fabric layers together and require more precise pressing. Faux flat-felled seams topstitch one folded edge over the other, making them easier for beginners but potentially less durable. Faux versions work better with thick materials that resist tight folding.
Yes, but it requires careful clipping and pressing to reduce bulk. Use narrower allowances (1/4″ or less) and a shorter stitch length for better control. Clip the trimmed seam allowance at regular intervals to help it curve smoothly. Test the technique on scrap fabric first.
No, they’re different techniques. French seams create a tube-like enclosure and work best on lightweight fabrics. Flat-felled seams lay flat against the fabric and excel with medium to heavy materials. Both enclose raw edges but serve different purposes and fabric weights.
Benefits include maximum durability through double stitching, complete raw edge enclosure preventing fraying, professional appearance on both sides, comfort against skin, and suitability for reversible garments. They’re perfect for high-stress areas and frequent washing.
Start by sewing pieces right sides together with 5/8″ allowance. Trim one side to 1/4″, press toward trimmed edge, fold longer allowance over to encase raw edges, then topstitch close to the fold. The key is precise trimming and thorough pressing at each step.
Helpful Interactive Tools
Sewing Skill Assessment
Find your skill level and get personalized project recommendations
Take AssessmentProject Cost Calculator
Budget your sewing projects including fabric, notions, and time
Calculate CostsRelated Sewing Techniques
Caring for Flat-Felled Seams
Garments with flat-felled seams typically last longer with proper care. Wash in cool water to prevent thread shrinkage, and avoid fabric softeners that can weaken the stitching. When pressing finished garments, use a press cloth to protect the topstitching from iron shine.
For denim care, turn garments inside out before washing to preserve the topstitching appearance. The enclosed raw edges mean these seams rarely need repair, but if damage occurs, the entire seam section usually needs reconstruction.
Conclusion
Mastering flat-felled seams transforms your sewing projects from temporary fixes to enduring creations. While this technique demands careful attention and practice, its built-in durability eliminates frustrating repairs down the line. You’ll create polished edges that rival factory-made garments using tools you already own.
The methods you’ve learned offer versatility across fabric types and garment styles. Whether reinforcing denim jackets or crafting delicate blouses, these approaches adapt to your creative vision. Your finished pieces will maintain crisp lines through countless washes and wears, justifying the extra time invested in proper construction.
Remember these essential points as you practice:
- Start simple: Practice on straight seams with medium-weight cotton before attempting curves or difficult fabrics
- Invest in quality tools: Sharp scissors, proper needles, and good pressing equipment make the process significantly easier
- Test first: Always create samples with your actual project fabric to check tension and appearance
- Press at every step: Crisp pressing is the secret to professional-looking results
- Be patient: Speed comes with practice; focus on accuracy over efficiency initially
By investing time in this foundational technique, you elevate both the appearance and longevity of handmade items. Each stitch becomes a strategic choice rather than just a functional step. Your wardrobe now holds pieces that showcase professional craftsmanship while standing up to daily use.
Consider expanding your skills with related techniques like French seams for delicate work or explore machine troubleshooting to perfect your stitching. With flat-felled seams in your repertoire, you’re well-equipped to tackle ambitious projects with confidence.
Final Recommendations
- Start your flat-fell journey with a simple tote bag or pillow cover
- Keep a seam gauge handy for consistent measurements
- Document your successful settings for different fabric weights
- Join online sewing communities to share results and get feedback
- Gradually work up to complex projects like jeans or tailored shirts