The Complete 2025 Starter Guide: Essential Tools, Safety Tips, and Budget Breakdown for New Sewers
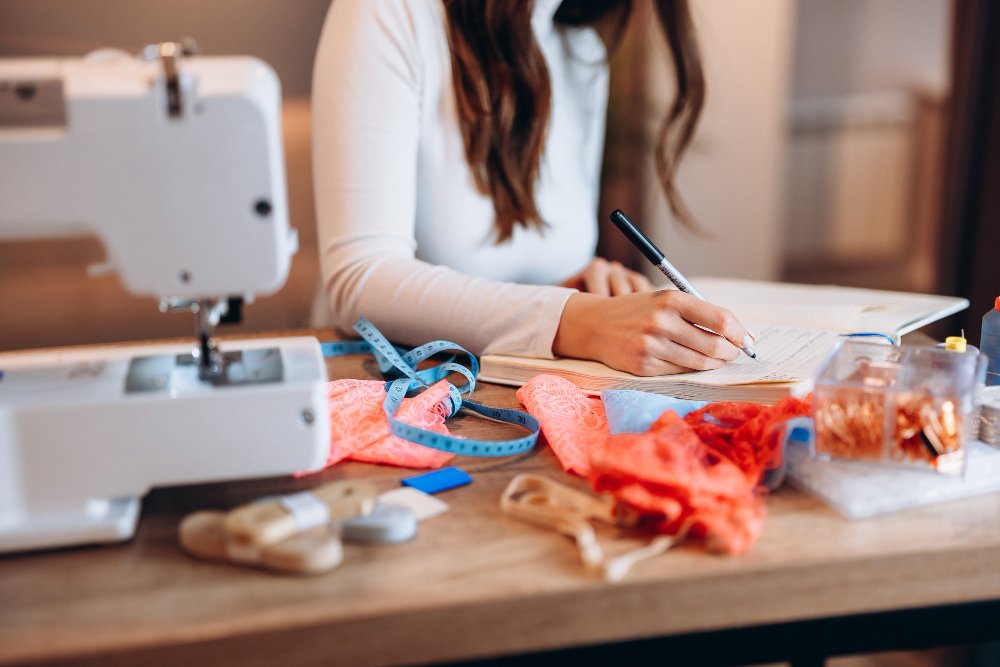
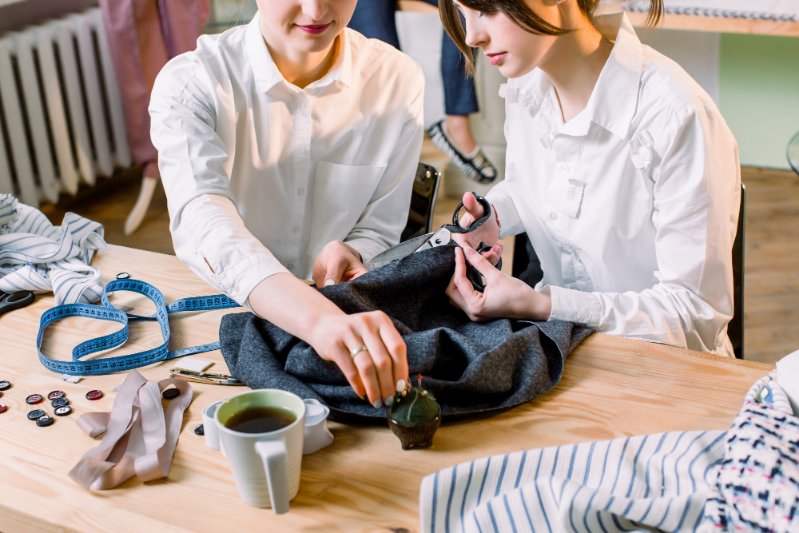
Starting a sewing journey can feel overwhelming when looking at all the tools and supplies available. Beginners might wonder what items are truly needed versus what’s just nice to have. The good news is that just 11 essential sewing supplies can get anyone started: scissors, pins, needles, thread, measuring tools, marking tools, iron, cutting mat, rotary cutter, seam ripper, and a sewing machine.
Getting started with sewing doesn’t have to break the bank. Many basic sewing tools can be found at local craft stores or online retailers. With these fundamental items, new sewers will be ready to tackle most beginner-friendly projects and build skills progressively.
Table of Contents
What Does a Beginner Need to Start Sewing?
New sewers need three main categories of supplies: cutting tools, measuring equipment, and basic notions. The most important thing is starting with quality basics rather than buying everything at once. A simple starter kit with sharp scissors, measuring tape, pins, needles, and thread can handle many initial projects.
Not sure which projects match your current skill level? Try our Sewing Project Difficulty Matcher to discover beginner-friendly projects that will build your confidence without overwhelming you.
Budget Guide: How Much to Spend on Sewing Supplies
Understanding costs helps beginners plan their purchases wisely. Here’s a realistic breakdown for getting started:
| Budget Level | Cost Range | What’s Included |
|---|---|---|
| Starter Kit | $50-$100 | Basic hand tools, fabric scissors, measuring tape, pins, needles, thread |
| Beginner Machine Setup | $150-$300 | Starter kit plus entry-level sewing machine |
| Complete Setup | $300-$500 | Quality tools, reliable machine, storage solutions |
Money-Saving Tips
- Start with essential tools only
- Buy fabric scissors first, use household scissors for patterns
- Purchase thread in basic colors: black, white, navy, brown
- Look for machine bundles that include accessories
- Check local sewing shops for used machines with warranties
Planning Your Purchase Strategy:
Use our Interactive Sewing Supplies Checklist to organize your shopping list by budget level and calculate total costs before you buy. This tool helps prevent overspending and ensures you don’t forget essential items.
Setting Up a Safe Sewing Space
Creating a well-organized, safe sewing space allows for efficient and secure work. The setup needs good lighting, comfortable seating, and easy access to tools.
Safety First: Essential Precautions
Sewing involves sharp tools and electrical equipment, making safety crucial for enjoyable crafting.
Critical Safety Rules:
- Keep fingers at least 1 inch away from the needle at all times
- Always unplug the machine before changing needles or making adjustments
- Never sew over pins – remove them as you go
- Store sharp tools in secure containers when not in use
- Ensure proper lighting to prevent eye strain and accidents
- Keep a basic first aid kit nearby with bandages and antiseptic
Workspace Safety:
- Use proper lighting – natural light plus task lighting for detail work
- Set up machines at elbow height when seated to prevent strain
- Keep power cords along walls to prevent tripping
- Store rotary cutters with safety guards engaged
- Maintain clear walkways around the sewing area
Choosing Your First Sewing Machine
The sewing machine serves as the heart of any sewing space. For beginners, the right machine should be simple to operate while offering room to grow.
Budget-Friendly Recommendations for 2025:
- Under $150: Brother XM2701 – 27 stitches, automatic needle threader
- $150-$250: Brother CS7000X – 70 stitches, computerized features
- $200-$300: Brother ST371HD – Heavy-duty construction, reliable performance
For additional guidance on selecting the right machine features, Singer’s comprehensive sewing basics guide provides detailed explanations of essential functions that every beginner should understand.
Essential Features for Beginners:
- Automatic needle threader
- Drop-in bobbin system
- Basic straight and zigzag stitches
- Adjustable speed control
- Free arm for sleeves and cuffs
Place the machine on a sturdy table at elbow height when seated. This prevents back and neck strain during long sewing sessions. Make sure to set up near natural light and add task lighting for detail work.
Organizing Sewing Supplies
Create dedicated zones for cutting, ironing, and storage. Keep frequently used items within arm’s reach of the sewing station.
Smart Storage Solutions:
- Clear containers for small notions
- Pegboards for hanging tools
- Thread racks for easy color selection
- Drawer organizers for needles and pins
Set up an ironing board near the sewing machine. A full-size board works best, but mini boards save space in small rooms. Store sharp tools like scissors and pins in secured containers with clear labels for quick identification.
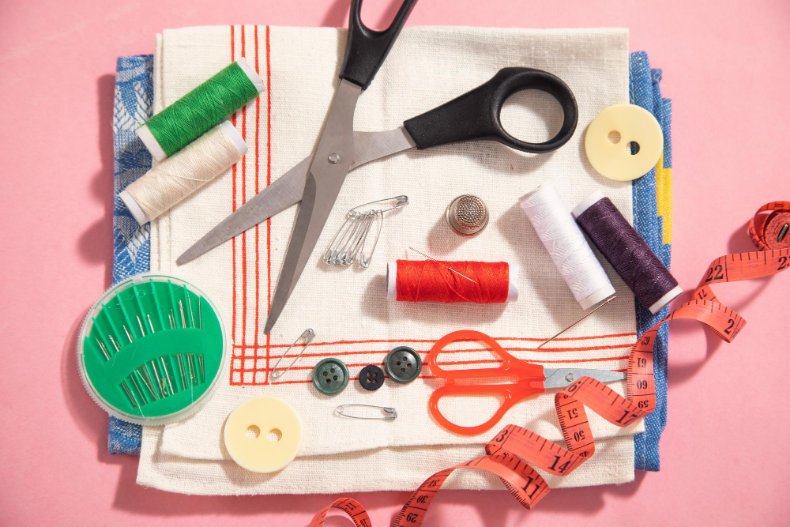
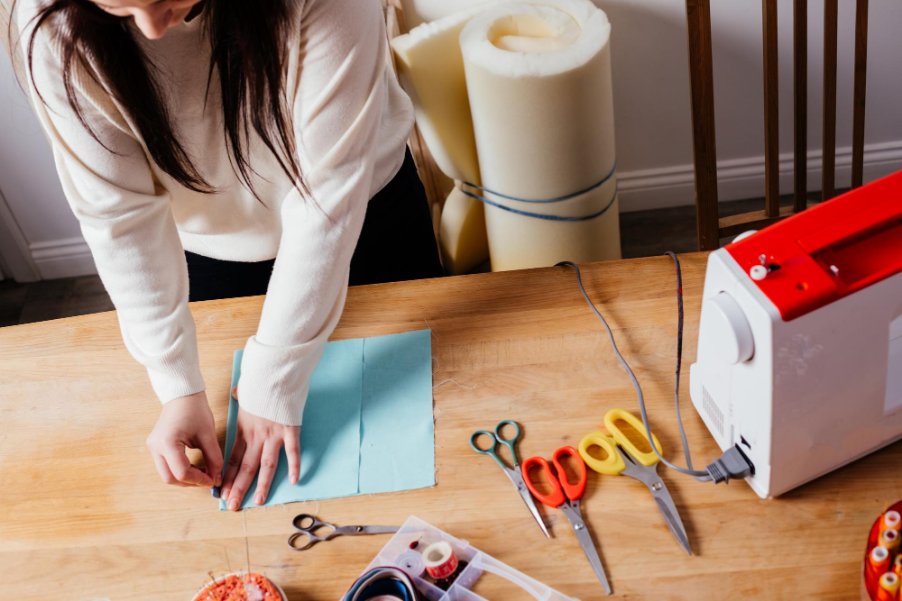
Essential Cutting Tools
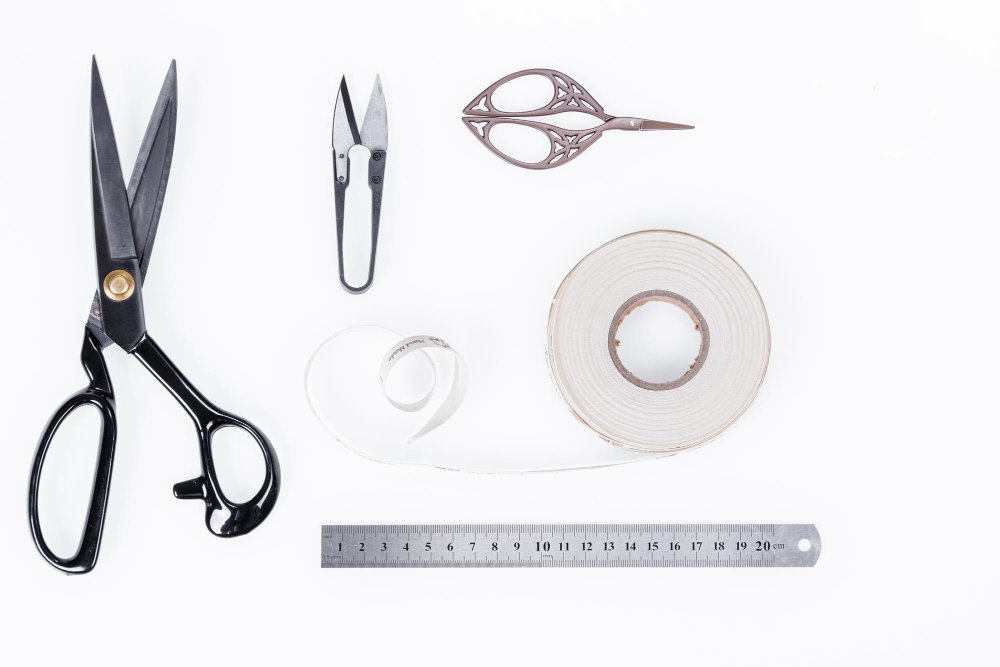
Quality cutting tools make the difference between frustrating, ragged cuts and clean, professional edges.
Fabric Scissors: Your Most Important Investment
High-quality fabric scissors should be the first purchase for any new sewer. These specialized tools create clean cuts that won’t fray fabric edges.
What to Look For:
- 8-10 inch blades for most projects
- Comfortable handles that fit your hand
- Sharp, precise points for detail work
- Durable construction for long-term use
Important Rule: Use fabric scissors only for fabric. Paper and other materials will dull the blades quickly, making them useless for sewing projects.
Rotary Cutters and Cutting Mats
A rotary cutter paired with a self-healing cutting mat makes straight cuts quick and precise. The mat protects work surfaces and helps rotary cutters last longer.
Beginner Setup:
- 45mm rotary cutter for general use
- 18″ x 24″ self-healing mat minimum
- Clear acrylic ruler for straight lines
Safety Note: Always engage the safety guard when not cutting. Rotary blades are extremely sharp and can cause serious injuries if handled carelessly.
Small Scissors for Detail Work
Small embroidery scissors work well for snipping threads and getting into tight spaces. Keep these near the sewing machine for quick thread trimming between seams.
Measuring and Marking Tools
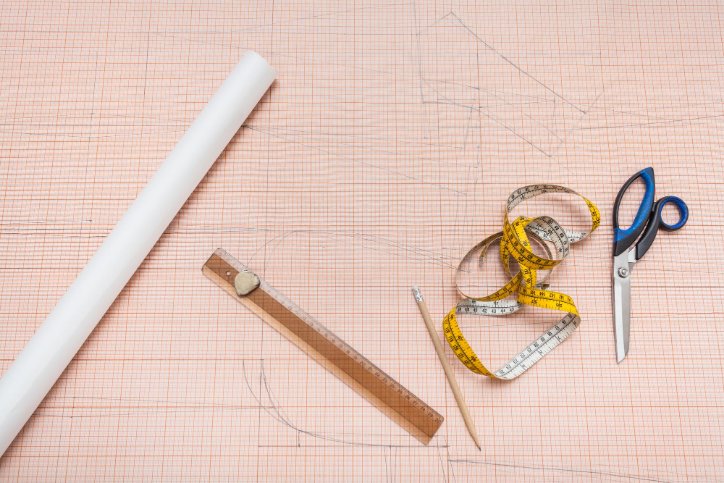
Accurate measurements form the foundation of successful sewing projects. Quality measuring tools prevent costly mistakes and ensure professional results.
Essential Measuring Equipment
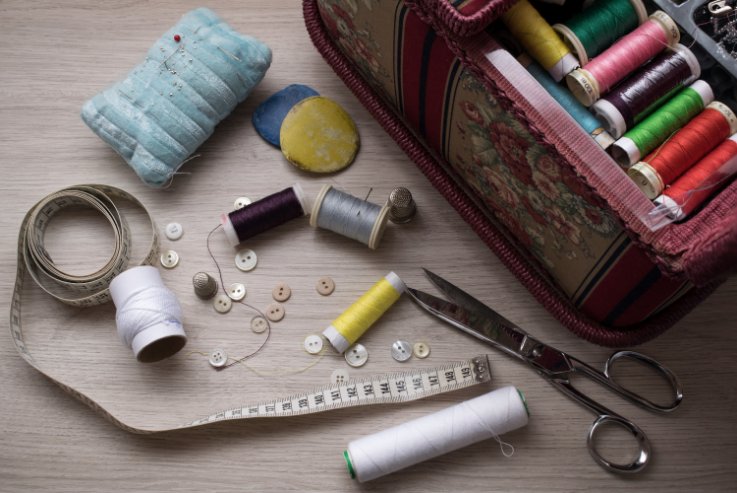
Measuring Tape: Choose a flexible but sturdy tape that measures both inches and centimeters. This allows for measuring curved surfaces and body measurements accurately.
Clear Ruler: A 6-inch or 12-inch clear ruler helps measure and mark straight lines. Look for one with both imperial and metric measurements clearly marked.
Seam Gauge: This 6-inch ruler with a sliding marker helps maintain consistent measurements for hems, pleats, and seam allowances.
Marking Tools for Perfect Accuracy
Tailor’s Chalk: Available in various colors, chalk makes clear, temporary marks on fabric. Choose colors that contrast with the fabric being marked.
Fabric Markers: Water-soluble and air-erasable markers offer precision for detailed pattern markings. Always test on fabric scraps first to ensure marks remove completely.
Tracing Wheel and Paper: This combination transfers pattern markings to fabric. Roll the wheel along pattern lines while tracing paper leaves clear marks on the fabric underneath.
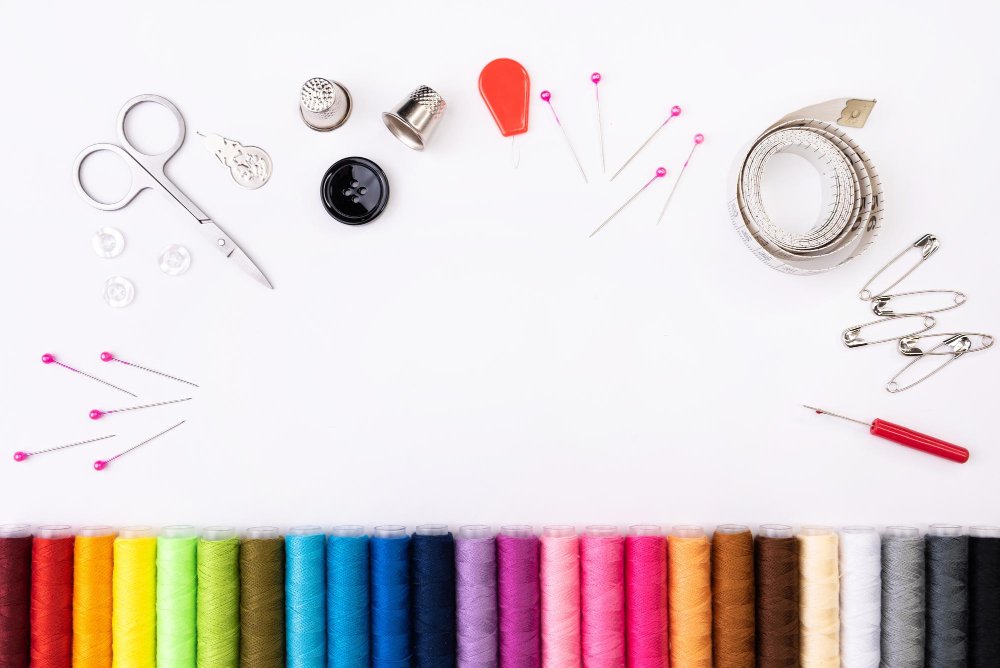
Thread, Needles, and Notions
Understanding the relationship between fabric, thread, and needles ensures successful projects and prevents frustration.
Choosing the Right Thread
All-Purpose Polyester Thread: This versatile option works for most beginner projects. Start with basic colors: black, white, navy, brown, and beige.
What Makes Quality Thread:
- Smooth finish that doesn’t shed lint
- Consistent thickness throughout the spool
- Good tensile strength for durability
- Colorfast properties that won’t bleed
Thread Weight Guide:
- 50-weight: All-purpose for most fabrics
- 40-weight: Heavier fabrics and topstitching
- 60-weight: Lightweight fabrics and delicate work
Understanding Needle Types and Sizes
Needles come in different sizes and types for specific fabrics and projects. The needle size is marked with two numbers: European (60-110) and American (8-18). Larger numbers indicate bigger needles.
Essential Needle Types:
- Universal (70/10, 80/12): Most woven fabrics and everyday sewing
- Ball Point (70/10, 80/12): Knits and stretchy fabrics
- Denim (90/14, 100/16): Heavy fabrics like denim and canvas
- Microtex (60/8, 70/10): Silks and delicate materials
Needle Replacement Schedule: Change needles after 6-8 hours of sewing or when noticing skipped stitches or fabric snags.
Quick Reference Tool:
Confused about which needle to use with your fabric? Our Needle & Fabric Compatibility Chart provides instant recommendations for over 30 fabric types, including specific needle sizes and helpful sewing tips for each material.
Must-Have Notions
Pins: Glass-head pins work best because they’re easy to see and won’t melt under an iron. Keep a variety of lengths for different fabric weights.
Pin Cushion: Choose a weighted cushion that stays put on the work surface. Magnetic pin cushions make it easy to grab pins quickly while sewing.
Seam Ripper: This tool safely removes unwanted stitches without damaging fabric. Look for one with a sharp point and comfortable handle.
Safety Pins: Keep various sizes handy for threading elastic, temporary basting, and quick repairs.
Working with Fabric
Understanding different fabric types helps beginners choose appropriate materials for their skill level and project goals.
Best Fabrics for Beginners
Cotton: Medium-weight cotton is forgiving and easy to handle. It presses well, doesn’t stretch unexpectedly, and works with basic machine settings.
Cotton Blends: These combine cotton’s stability with added durability. Good choices include cotton-polyester blends for everyday garments.
Avoid Initially: Slippery fabrics like silk, stretchy knits, and heavyweight materials like leather or canvas until basic skills are established.
Pre-Treatment and Care
Always pre-wash fabric before cutting. This prevents unwanted shrinkage after projects are complete. Cotton fabric care varies by blend and weight, so check care labels carefully.
Test chosen fabric with a small sample before starting the main project. Check how it handles pins, stitches, and pressing to avoid surprises during construction.
Working with Interfacing
Interfacing adds shape and support to collars, cuffs, waistbands, and bags. Choose between fusible (iron-on) or sew-in types based on fabric weight and project requirements.
Interfacing Guidelines:
- Test on fabric scraps first
- Use lighter interfacing than the main fabric
- Apply with a press cloth to protect fabric and iron
- Follow manufacturer’s temperature and time recommendations
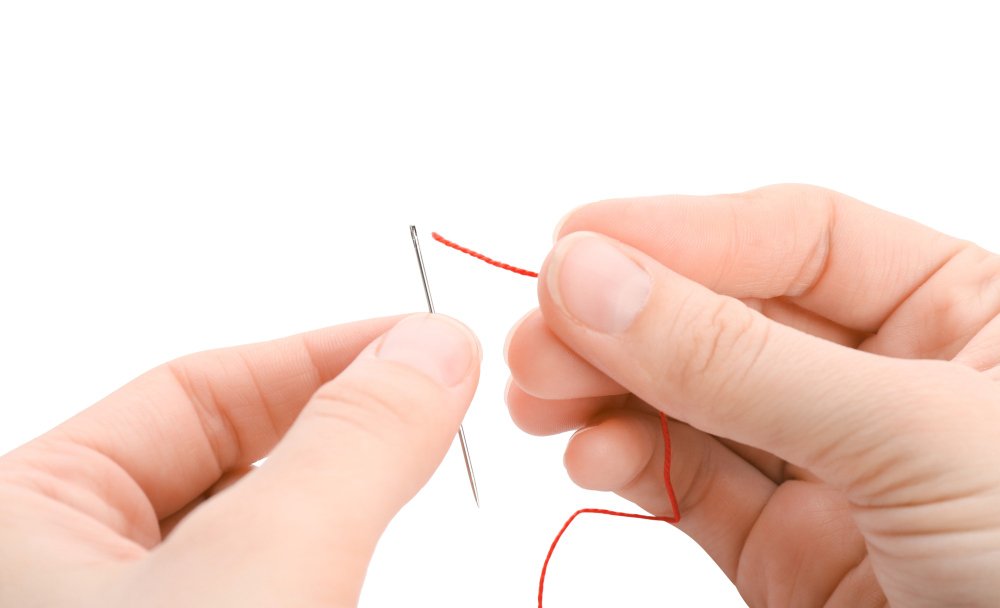
Hand Sewing Essentials
Even machine sewers need hand sewing skills for finishing touches and detailed work that machines can’t reach.
Hand Sewing Needles and Tools
Needle Selection: Hand sewing needles come in various sizes for different fabrics and projects. Choose sharp needles for woven fabrics and ballpoint needles for knits.
Essential Hand Tools:
- Needle threader for easier threading
- Small scissors for thread trimming
- Thimble to protect fingers
- Good lighting for accurate stitching
Basic Hand Stitching Techniques
Running Stitch: The foundation of hand sewing. Push the needle up and down through fabric in a straight line, keeping stitches even.
Backstitch: Creates strong seams. Make a single stitch, then bring the needle back behind it. Push forward twice the stitch length and pull through.
Blind Hem Stitch: For invisible hems. Work between fabric layers to hide the thread while creating secure hems.
Brother’s sewing education center offers detailed video tutorials demonstrating these fundamental hand stitching techniques for visual learners who prefer step-by-step demonstrations.
Beginner Project Ideas
Starting with simple projects builds confidence and teaches fundamental skills without overwhelming new sewers.
What Clothes Should Beginners Sew?
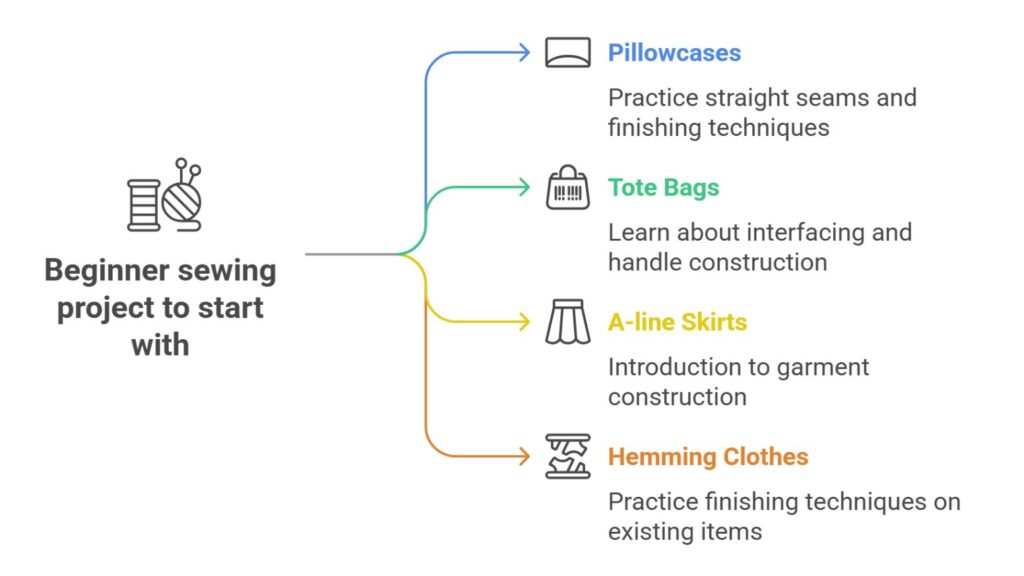
First Projects:
- Pillowcases: Practice straight seams and finishing
- Tote bags: Learn about interfacing and handles
- Simple A-line skirts: Introduction to garment construction
- Hemming existing clothes: Practice finishing techniques
Skills Building Progression:
- Straight seams and basic construction
- Curves and shaped pieces
- Closures like zippers and buttons
- Fitted garments and darts
Find Your Perfect Starting Project:
Take our quick Project Difficulty Assessment to get personalized project recommendations based on your experience level, available time, and learning goals.
Can You Make Money Sewing?
Many beginners wonder about the profit potential in sewing. The answer depends on several factors including skill level, time investment, and market demand.
Is Sewing Clothes Profitable?
Sewing can be profitable, but it requires business skills beyond just technical sewing ability. Successful sewing businesses often focus on:
High-Profit Areas:
- Custom alterations and tailoring
- Specialized items like wedding accessories
- Quilting and home decor items
- Teaching sewing classes
Considerations:
- Time investment versus hourly return
- Material costs and sourcing
- Marketing and customer acquisition
- Competition from mass-produced items
Most Profitable Sewing Projects
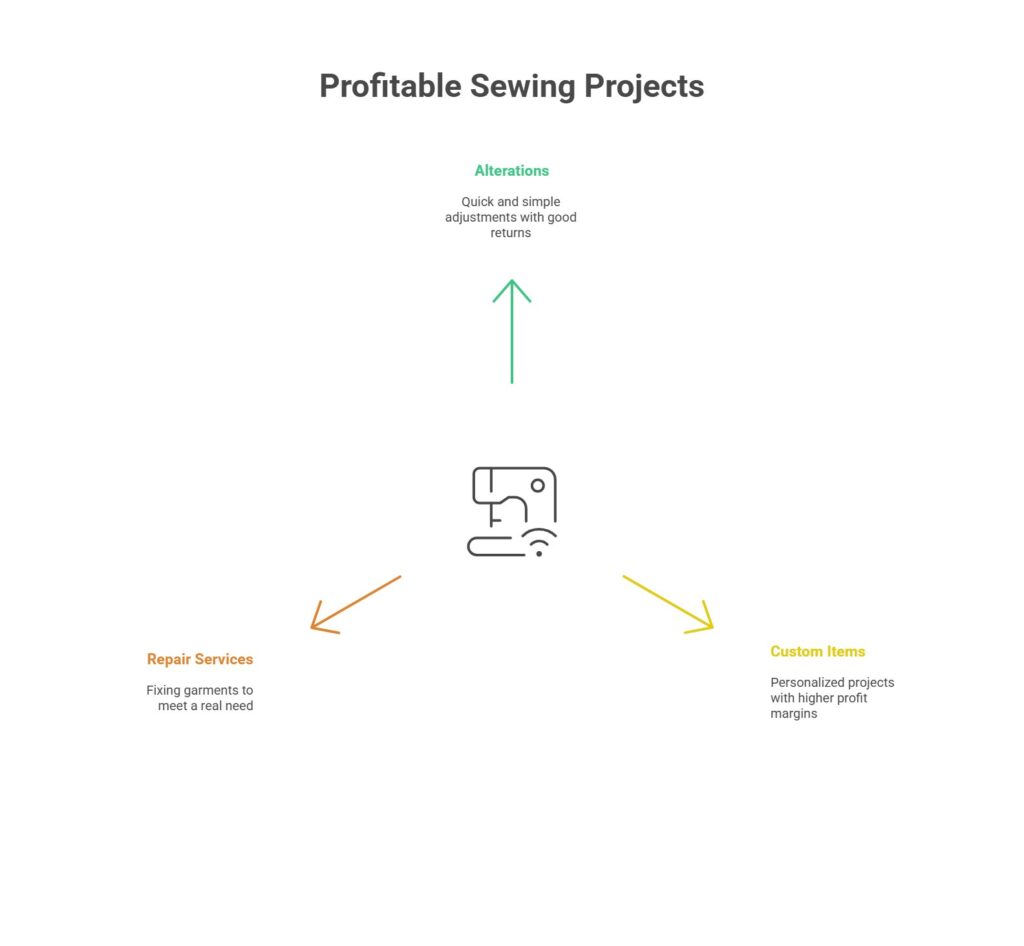
Alterations: Often provide the best return on time invested. Basic hemming and simple adjustments require minimal materials but command good prices.
Custom Items: Personalized projects like monogrammed gifts, custom curtains, or specialty baby items often have higher profit margins.
Repair Services: Fixing beloved garments fills a real need and typically pays well for the time required.
Advanced Tools for Growing Skills
As skills develop, additional tools make projects easier and results more professional.
Specialty Measuring Tools
Sliding Gauge: Marks perfect seam allowances and hems with consistent measurements.
Hip Curve Ruler: Helps draft and alter patterns with smooth, flowing lines for skirts, dresses, and pants.
French Curve: Essential for pattern drafting and alterations involving curved seams.
Professional Finishing Tools
Serger/Overlock Machine: Creates professional seam finishes and prevents fabric fraying. Not essential for beginners but valuable for those sewing regularly.
Point Turner: Creates sharp corners in collars, cuffs, and bags.
Loop Turner: Makes belt loops and spaghetti straps easier to turn right-side out.
Pressing Tools: Tailor’s ham, sleeve roll, and pressing cloths help achieve professional-looking results.
Essential Maintenance and Care
Proper tool maintenance ensures long life and consistent performance from sewing equipment.
Sewing Machine Maintenance
Regular Cleaning:
- Remove lint after each project
- Oil moving parts as recommended
- Change needles regularly
- Keep spare bobbins wound and ready

Professional Servicing: Annual tune-ups keep machines running smoothly and prevent costly repairs.
Tool Care
Scissors: Store in protective covers, avoid cutting paper or non-fabric materials, have professionally sharpened when needed.
Cutting Mats: Store flat, clean with mild soap and water, replace when cuts become permanent.
Pins and Needles: Replace when bent or dull, store in dry conditions to prevent rust.
Troubleshooting Common Issues
Every sewer encounters problems. Understanding common issues and solutions prevents frustration and project disasters.
Machine Problems
Skipped Stitches: Usually caused by wrong needle type, dull needle, or incorrect threading.
Tension Issues: Adjust upper and lower tension gradually. Start with upper tension adjustments.
Jammed Machine: Stop immediately, turn off power, and carefully remove fabric. Check for bent needles or incorrect threading.
Fabric Issues
Puckering: Often caused by wrong needle size, too-tight tension, or fabric not properly supported.
Uneven Stitches: Check machine threading, needle condition, and fabric feeding technique.
Quick Problem Solving:
For instant guidance on needle selection when facing stitching problems, consult our Needle & Fabric Compatibility Chart to ensure you’re using the correct needle type and size for your specific fabric.
Building Skills Progressively
Sewing skills develop through practice and gradually increasing project complexity.
Skill Development Path
Beginner (Months 1-6):
- Master straight seams and basic construction
- Learn to read simple patterns
- Practice with stable, medium-weight fabrics
Intermediate (Months 6-18):
- Tackle curved seams and shaped pieces
- Learn about fitting and adjustments
- Experiment with different fabric types
Advanced (18+ Months):
- Create original designs
- Master complex construction techniques
- Develop personal style and preferences
Continuing Education
Learning Resources:
- Local sewing classes and workshops
- Online tutorials and video lessons
- Sewing books and magazines
- Sewing community groups and forums
Frequently Asked Questions
What should be in a beginner sewing kit?
A complete beginner sewing kit should include fabric scissors, measuring tape, pins with pin cushion, hand sewing needles, seam ripper, small scissors for trimming, marking tools (chalk or washable markers), and basic thread in neutral colors. This foundation handles most initial projects.
How much should a beginner spend on a sewing machine?
Beginners should budget $150-$300 for their first machine. This range provides reliable machines with essential features without overwhelming complexity. The Brother XM2701 ($130-150) and Brother CS7000X ($200-240) offer excellent value for new sewers.
What is the best thread for a sewing machine?
All-purpose polyester thread works best for beginners. It’s strong, versatile, and works with most fabrics. Start with basic colors: black, white, navy, and brown. Quality brands like Gutermann and Coats provide consistent results.
What needle should I use for hand sewing?
Universal sharps in size 8-10 work for most hand sewing projects. Keep a variety pack that includes different sizes and types. Smaller numbers (6-8) work for fine fabrics, while larger numbers (10-12) handle heavier materials.
What’s the difference between expensive and cheap scissors?
Quality scissors stay sharp longer, cut more cleanly, and feel comfortable during extended use. Cheap scissors can crush fabric fibers instead of cutting cleanly, leading to fraying and uneven edges. Good fabric scissors are worth the investment.
How often should I change my sewing machine needle?
Change needles every 6-8 hours of sewing time or after completing each project. Dull needles cause skipped stitches, fabric damage, and poor stitch quality. It’s better to change needles too often than not often enough.
Can I use regular scissors for fabric?
Regular household scissors aren’t designed for fabric and will create ragged, fraying edges. They also dull quickly when used on fabric. Invest in proper fabric scissors and reserve them exclusively for sewing projects.
What’s the most important tool for a beginner?
Sharp fabric scissors make the biggest difference in project success. Clean, accurate cuts set up every subsequent step for success. Poor cuts create problems that persist throughout the entire project.
What tools can help me plan my sewing purchases?
Our Printable Sewing Supplies Checklist breaks down essential items by budget level and calculates total costs. You can also use our Project Difficulty Matcher to find projects suitable for your skill level, and our Needle & Fabric Chart to choose the right needles for any fabric.
Conclusion
Starting a sewing journey requires just 11 essential supplies, but success comes from understanding how to use them safely and effectively. The key is beginning with quality basics rather than buying everything at once. A budget of $150-$300 covers essential tools plus a reliable beginner sewing machine that will grow with developing skills.
Safety should always come first when setting up a sewing space. Keep fingers away from needles, unplug machines during maintenance, and maintain organized, well-lit workspaces. These practices prevent injuries and make sewing more enjoyable.
The most important first purchases are sharp fabric scissors, a quality measuring tape, and basic notions like pins and needles. These tools, combined with a simple sewing machine, handle most beginner projects effectively. As skills develop, additional specialized tools can be added gradually.
Essential Planning Tools:
Before starting your sewing journey, use our comprehensive planning resources: the Sewing Supplies Checklist for budget planning, the Project Difficulty Matcher for finding appropriate first projects, and the Needle & Fabric Chart for technical guidance. These tools work together to set beginners up for success from day one.
Key Takeaways:
- Start with 11 essential tools rather than buying everything at once
- Invest in quality fabric scissors as the most important first purchase
- Budget $150-$300 for a complete beginner setup including machine
- Practice safety protocols from day one to prevent injuries
- Choose stable, medium-weight cotton fabrics for early projects
- Build skills progressively rather than attempting complex projects immediately
Recommendations for Success:
- Take a beginner sewing class to learn proper techniques
- Start with simple projects like pillowcases and tote bags
- Join local or online sewing communities for support and inspiration
- Maintain tools properly to ensure long-term performance
- Be patient with the learning process – skills develop with practice
Remember that every expert sewer started with basic tools and simple projects. The journey from beginner to accomplished sewer happens one project at a time, with each completed item building confidence and skills for the next challenge. With the right foundation of tools, safety knowledge, and realistic expectations, sewing becomes a lifelong source of creativity and satisfaction.