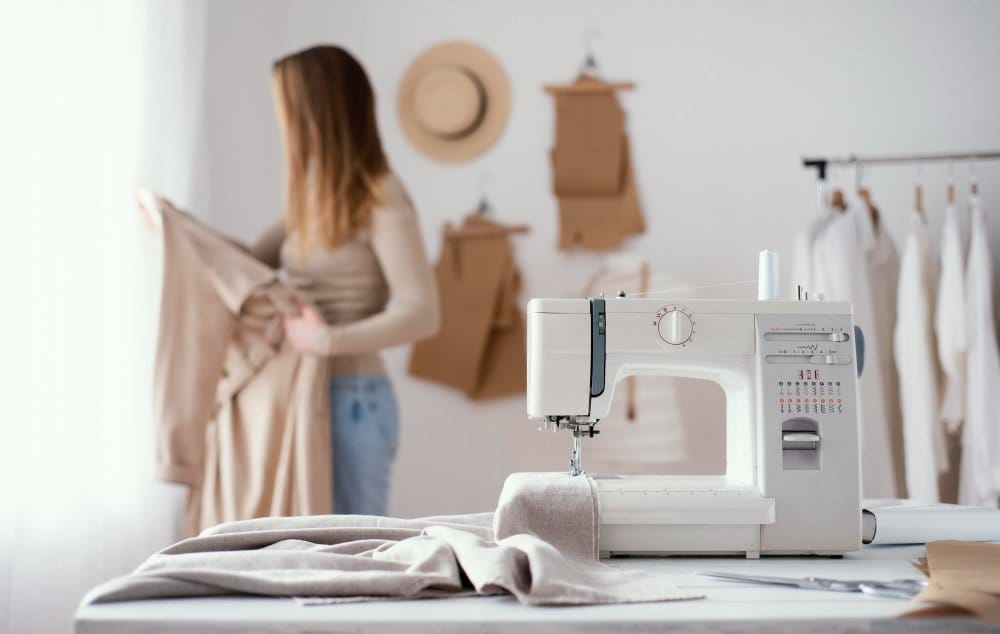
Master Every Stitch: The Complete Guide to Sewing Machine Problems, Solutions & Expert Techniques
Sewing can be incredibly rewarding, but when your machine starts acting up, it can quickly turn into a frustrating experience. Whether you’re dealing with tangled threads, skipped stitches, or mysterious machine noises, knowing how to identify and fix common sewing problems transforms your projects from looking homemade to professionally crafted.
This comprehensive guide covers everything from basic machine setup to advanced troubleshooting techniques. By learning these solutions, you’ll save time, money, and avoid the headache of taking your machine to a repair shop for every small issue.
Table of Contents
Key Takeaways
- Most sewing machine problems stem from improper threading, wrong needle selection, or tension issues
- Regular maintenance prevents 90% of common machine problems
- Using quality thread and correct needle-fabric combinations eliminates many frustrations
- Understanding your machine’s basic functions helps you troubleshoot problems faster
- When to seek professional help vs. what you can fix yourself
Essential Sewing Machine Tools
Solve problems faster with our free interactive tools:
- Troubleshooting Checklist – Step-by-step problem diagnosis
- Needle-Fabric Chart – Perfect needle selection guide
- Maintenance Schedule – Never miss important upkeep tasks
These tools complement the techniques covered in this guide and provide instant, practical solutions.
Understanding Your Sewing Machine
Getting familiar with your sewing machine is the foundation of trouble-free sewing. Many problems occur simply because sewers don’t understand how their machine works or skip basic setup steps.
Setting Up Your Machine Correctly
Start with a stable, flat surface to minimize vibration. Good lighting helps you see what you’re doing and catch problems early. Before each sewing session, clean lint from the bobbin area and oil your machine according to the manual’s instructions.
Check your power cord and foot pedal for damage. Make sure all connections are secure. Your manual is your best resource for machine-specific information, so keep it handy for reference.
For additional troubleshooting support, major manufacturers like Singer provide comprehensive online troubleshooting databases that cover model-specific issues. These manufacturer resources often include video tutorials and step-by-step guides that complement your printed manual.
First Rule of Troubleshooting: Always consult your machine’s manual first. Each model has unique threading paths and maintenance requirements.
Choosing the Right Needle
Using the correct needle prevents most stitching problems. Needles come in various sizes, with the number indicating thickness – the higher the number, the thicker the needle.
Needle Size Chart for Common Fabrics
| Fabric Type | Needle Size | Examples |
|---|---|---|
| Lightweight | 60/8 – 70/10 | Silk, chiffon, voile |
| Medium-weight | 80/12 – 90/14 | Cotton, linen, quilting cotton |
| Heavy | 100/16 – 110/18 | Denim, canvas, upholstery |
| Stretch | 75/11 – 90/14 (ballpoint) | Knits, jersey, lycra |
See the difference needle types make with this visual comparison of needles on various fabrics.

Replace your needle every 8-10 hours of sewing time or when starting a new project. A dull or bent needle causes skipped stitches, thread breaks, and fabric damage.
Choosing the wrong needle is one of the biggest causes of sewing problems. Use our Needle-Fabric Compatibility Chart to instantly find the perfect needle type and size for any fabric. This interactive tool prevents skipped stitches, thread breaks, and fabric damage.
Presser Foot Functionality and Selection
The presser foot holds fabric in place while sewing. Using the wrong foot leads to poor stitch quality and feeding problems. Common presser feet include:
- All-purpose foot: General sewing and straight stitches
- Zipper foot: Installing zippers and piping
- Buttonhole foot: Creating consistent buttonholes
- Walking foot: Quilting and matching patterns
- Blind hem foot: Invisible hems
For more detailed information about presser feet options, check out our comprehensive presser feet guide.
Always lower your presser foot before sewing. When raised, the tension disks are open and thread won’t tension properly.
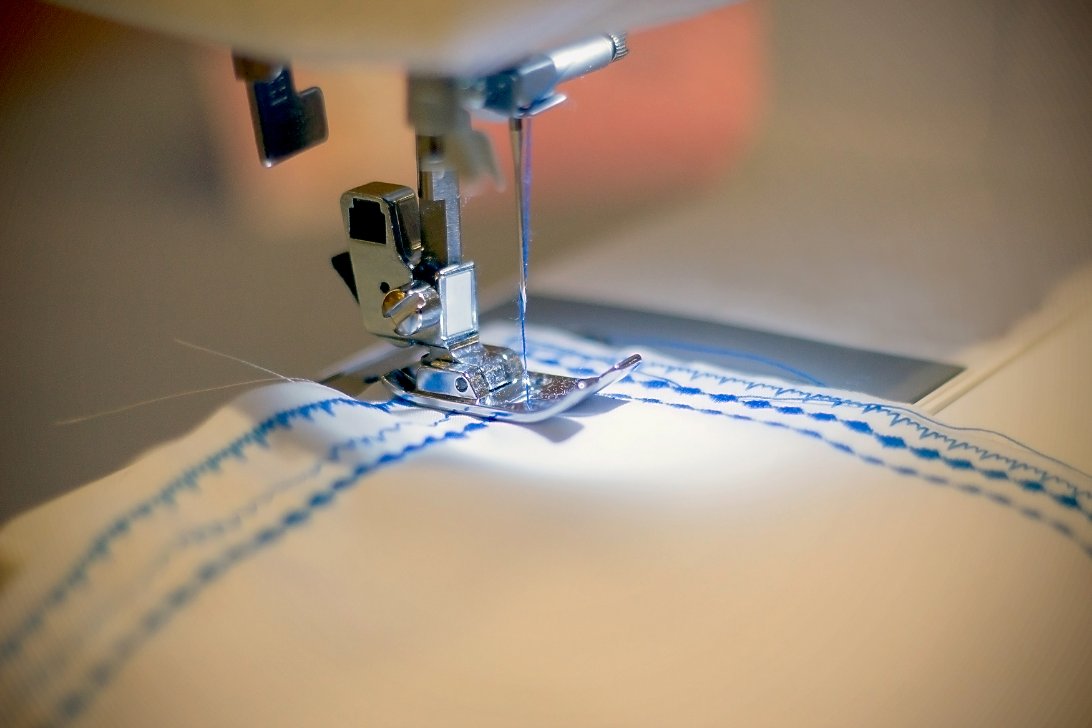
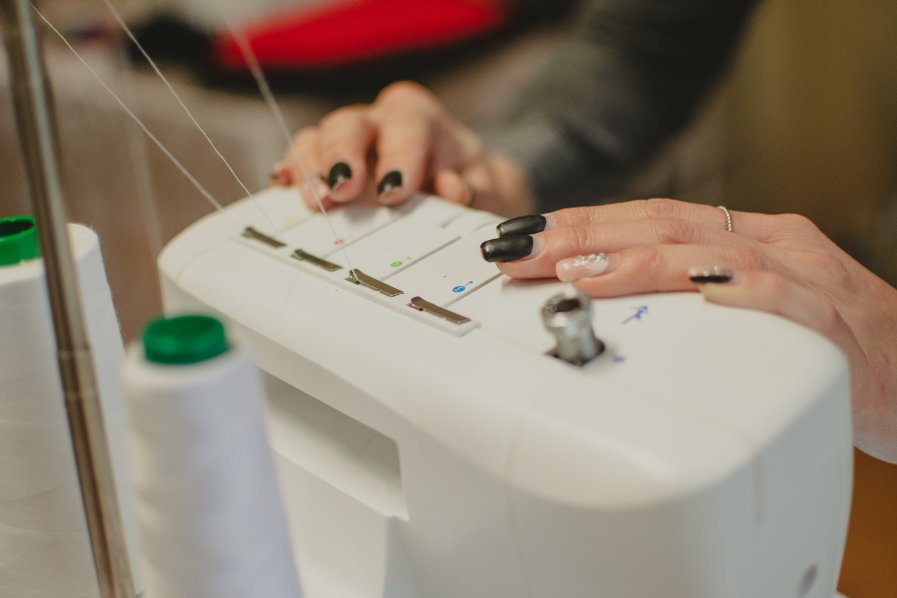
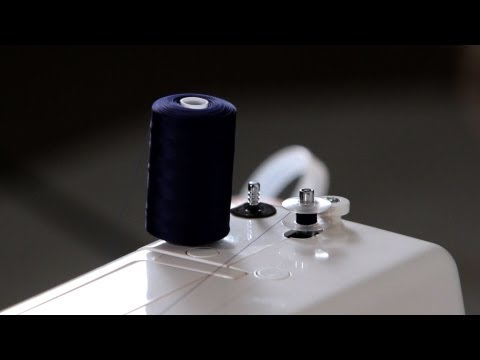
Threading and Tension Basics
Proper threading is essential for quality stitches. Thread your machine with the presser foot up to open the tension disks. Follow your machine’s threading path exactly – most machines thread from right to left.
For a visual demonstration of proper threading technique, this step-by-step video shows the complete threading process for most home sewing machines.

Tension Quick Check: Balanced tension creates stitches where the threads lock in the middle of the fabric. If you see the bobbin thread on top or the top thread underneath, adjust your tension.
Common Sewing Problems and Solutions
Understanding the most frequent sewing machine issues helps you diagnose problems quickly and get back to sewing.
What is the Common Problem in Sewing?
The most common sewing problem is thread bunching (also called “bird nesting”). This happens when threads tangle underneath your fabric, usually due to improper threading or tension issues.
Managing Skipped Stitches
Skipped stitches occur when your needle fails to form complete stitches, leaving gaps in your seam. This problem has several causes:
Check Your Needle: Use the appropriate needle for your fabric. Knits need ballpoint needles; wovens need universal or sharp needles. Replace bent or dull needles immediately.
Verify Threading: Completely rethread your machine, ensuring the thread passes through all guides. Thread with the presser foot up, then lower it before sewing.
Slow Down: Sewing too fast can cause timing issues. Let your machine work at a steady, moderate pace.
Why Does My Bobbin Thread Keep Breaking?
Bobbin thread breaks happen for several reasons:
- Incorrect bobbin insertion: Make sure your bobbin is inserted correctly and turning in the right direction
- Poor thread quality: Cheap thread often has weak spots that break under tension
- Dirty bobbin case: Lint and debris interfere with smooth thread flow
- Wrong bobbin type: Always use bobbins designed for your specific machine model
This comprehensive video covers proper bobbin winding and installation techniques that prevent most bobbin-related issues.
Preventing Thread Bunching and Tangles
Thread bunching frustrates sewers more than any other problem. Here’s how to prevent it:
Start Correctly: Hold both thread tails behind the presser foot when beginning to sew. This prevents threads from being pulled down into the needle plate.
Check Upper Tension: Most machines work well with tension between 3-5, but this varies by fabric and thread.
Clean Regularly: Remove lint from the bobbin area and feed dogs. Use a small brush, never compressed air, which can push debris deeper into the machine.
Use Quality Thread: Invest in good thread that matches your machine’s specifications. Different thread weights on top and bottom cause tension problems.
Why is My Thread Looping Underneath?
Thread looping underneath typically indicates upper tension that’s too loose or bobbin tension that’s too tight. Try these solutions:
- Increase upper tension gradually (move dial up one number at a time)
- Rethread completely, ensuring thread sits properly in tension disks
- Check that your bobbin is wound evenly and inserted correctly
- Clean lint from bobbin area
Dealing with Broken Needles
Needle breakage is dangerous and can damage your machine. Common causes include:
Wrong Needle Size: Using a needle too small for heavy fabric or too large for delicate material Pulling Fabric: Never pull fabric through the machine – let the feed dogs do the work Hitting Pins: Remove pins before they reach the needle or place them perpendicular to your seam line Loose Needle: Make sure your needle is properly installed and tightened
When a needle breaks:
- Stop sewing immediately
- Remove broken pieces safely
- Check for damage to throat plate or bobbin area
- Install correct needle type and size
- Test on scrap fabric before continuing
Emergency Troubleshooting: Quick Fixes in 60 Seconds
Use this quick reference when you need instant solutions:
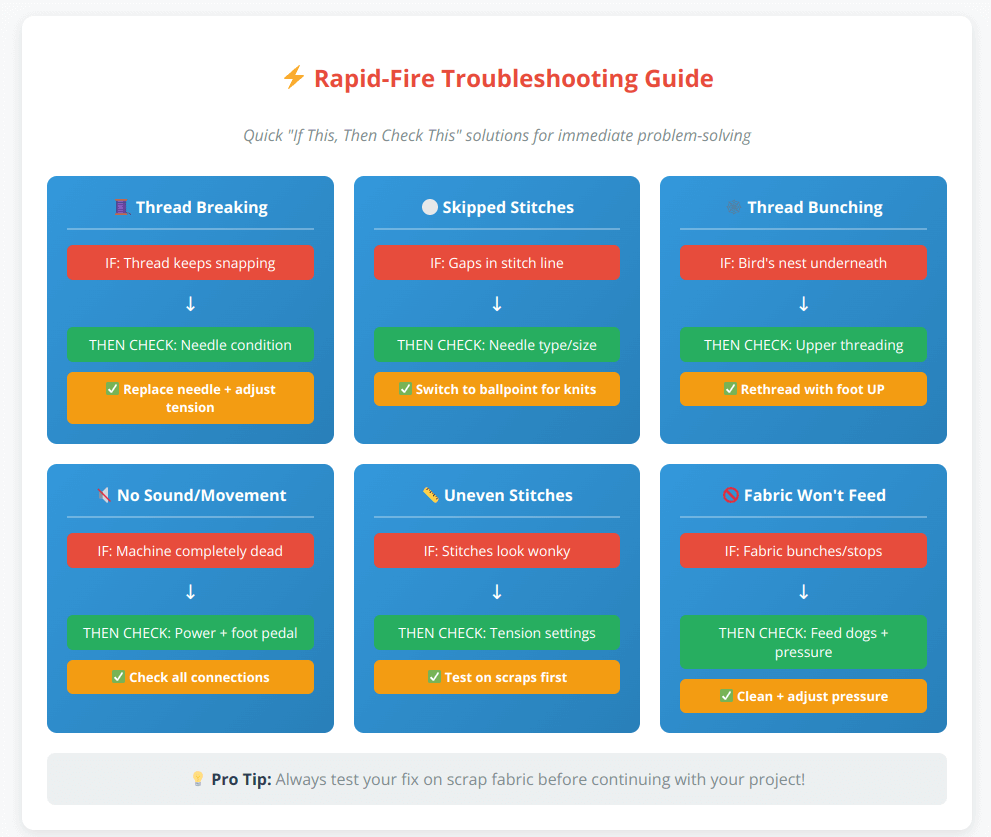
Keep this chart handy at your sewing station for immediate problem-solving.
When your sewing machine suddenly stops working, follow this step-by-step troubleshooting flowchart to quickly identify and fix the problem:
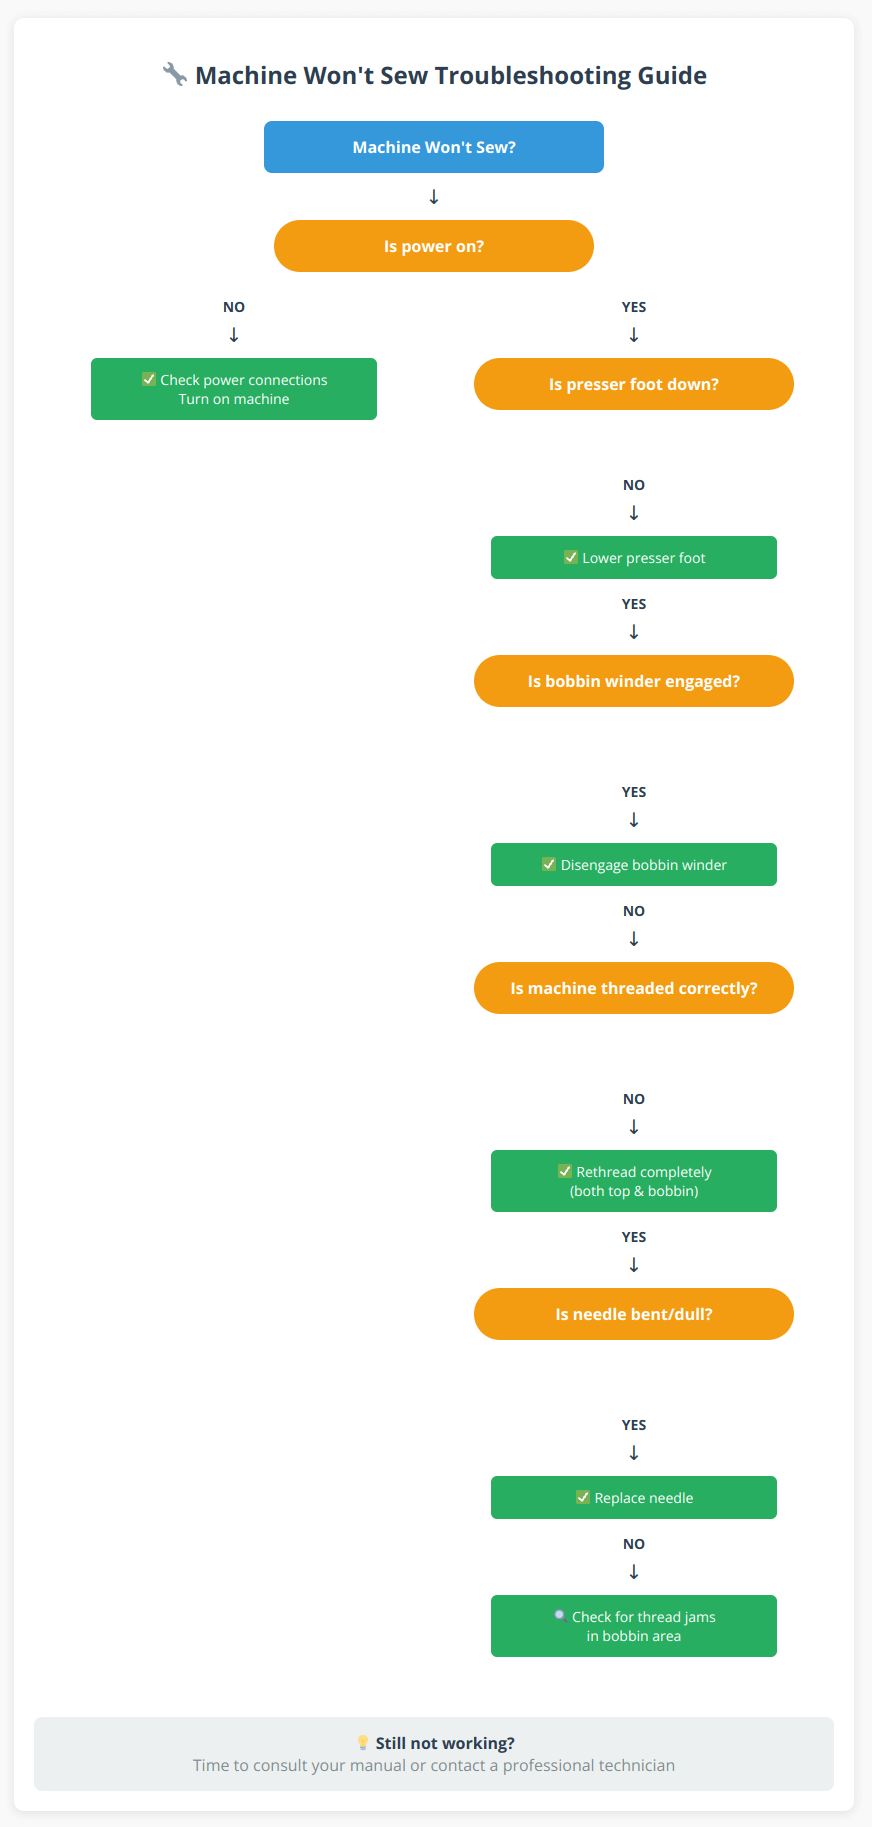
Following this systematic approach solves 95% of “machine won’t sew” problems in under two minutes. If you’ve checked all these items and your machine still won’t sew, the issue likely requires professional attention.
For comprehensive troubleshooting support, use our Interactive Sewing Machine Troubleshooting Checklist to systematically work through common problems. This printable checklist ensures you don’t miss any critical steps when diagnosing issues.
Most Common 5 Problems – 30 Second Solutions
- Skipped Stitches: Change needle, rethread machine
- Thread Breaking: Check thread quality, adjust tension
- Fabric Not Feeding: Check feed dog position, presser foot pressure
- Loose Stitches: Increase upper tension, check threading
- Machine Jamming: Remove thread tangle, clean bobbin area
For quick visual reference, here’s your emergency guide:

These rapid solutions work for most cases, but if problems persist, follow the detailed troubleshooting steps below.
Advanced Machine Issues
Some problems require deeper understanding of how your machine works.
Identifying Mechanical vs. User Error
User Error Signs:
- Problems start after changing thread, needle, or fabric
- Issues resolve after rethreading or cleaning
- Problems happen only with certain techniques
Mechanical Issues:
- Persistent problems despite correct setup
- Unusual noises that don’t stop after cleaning
- Timing problems (needle hitting bobbin case)
- Electronic displays showing error codes
When to Seek Professional Help
Contact a qualified technician when you encounter:
- Timing Issues: When needle and bobbin hook aren’t synchronized
- Motor Problems: Unusual noises, speed inconsistencies, overheating
- Electronic Malfunctions: Error codes, unresponsive buttons
- Persistent Problems: Issues that don’t resolve with basic troubleshooting
Recognize these serious warning signs that require immediate attention:
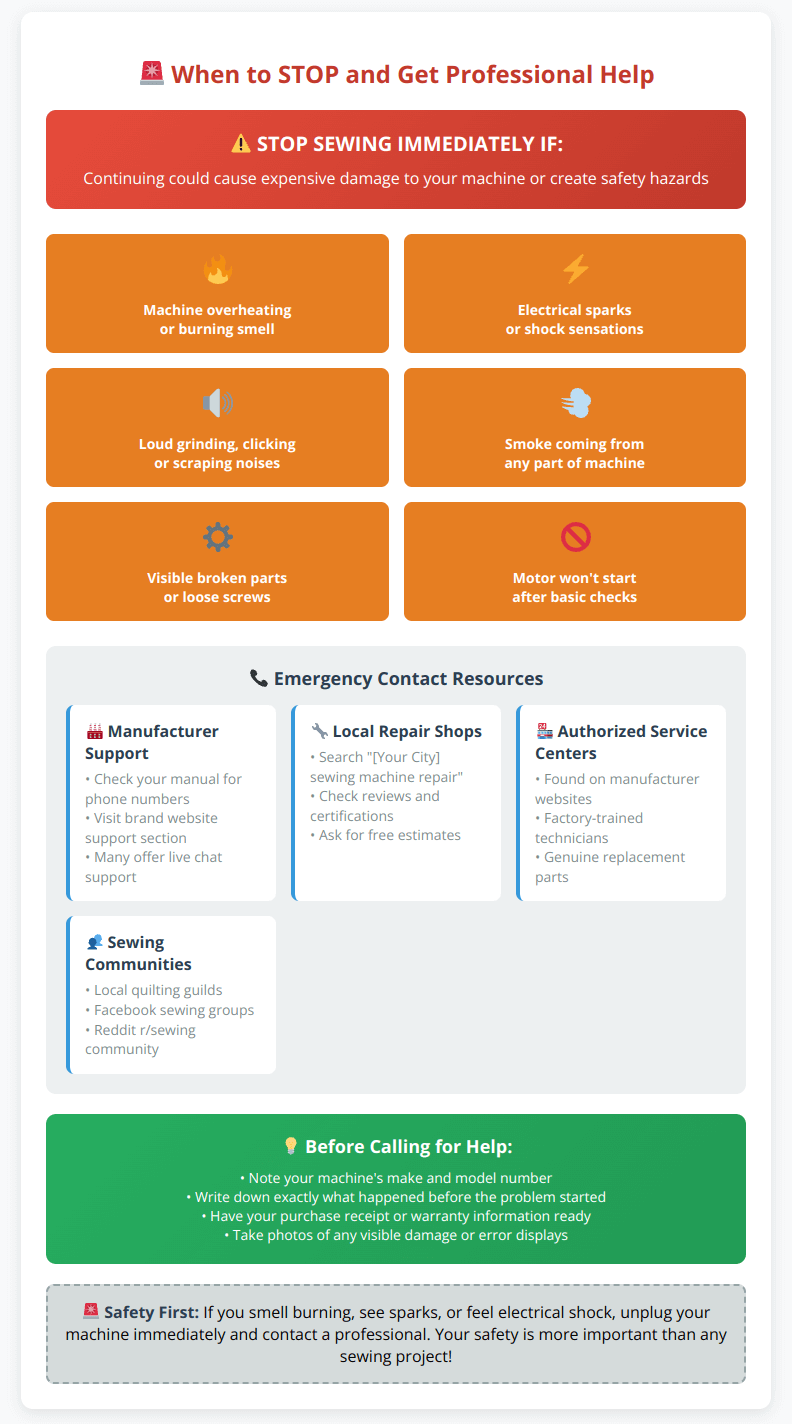
Remember: safety always comes first. When in doubt, unplug and call for help.
Building Your Emergency Contact List
Before problems arise, compile this essential information:
- Your machine’s make, model, and serial number
- Local authorized service center phone numbers
- Your dealer’s contact information (if purchased locally)
- Warranty information and purchase date
- Photos of your machine setup for reference
Keep this information easily accessible in your sewing area.
Finding a Good Technician: Look for factory-trained repair shops, check manufacturer websites for authorized service centers, and ask local quilting groups for recommendations.
When searching for qualified repair services, start with manufacturer-authorized service centers. Companies like Brother maintain directories of certified technicians who receive factory training and use genuine parts. These technicians understand the specific quirks and common issues of each machine model.
Fabric-Specific Solutions
Different fabrics require different approaches to prevent problems.
Why Can’t I Sew Stretchy Fabric?
Stretchy fabrics require special handling:
- Use ballpoint or stretch needles to prevent runs
- Choose appropriate stitches: Zigzag or stretch stitches allow fabric to move
- Don’t pull fabric: Let the machine feed the fabric naturally
- Consider a walking foot for even feeding of multiple layers
Learn more about working with different fabric types in our complete fabric guide.
Sewing Delicate Fabrics
For silk, chiffon, and other delicate materials:
- Use small needles (60/8 or 70/10)
- Place tissue paper underneath while sewing
- Reduce presser foot pressure
- Use shorter stitch length
- Test on scraps first
Heavy Fabric Techniques
When sewing denim, canvas, or upholstery fabric:
- Install heavy-duty needles (100/16 or larger)
- Use a walking foot to prevent layer shifting
- Sew slowly over thick seams
- Consider a hump jumper for very thick areas
For specific denim care and sewing tips, see our denim care guide.
Maintenance and Prevention
Regular maintenance prevents most sewing machine problems.
Daily Maintenance Checklist
Every Time You Sew:
- ✅ Dust exterior and needle area
- ✅ Remove lint from visible areas
- ✅ Check needle condition
- ✅ Keep machine covered when not in use
Weekly Maintenance Tasks
For Regular Users:
- ✅ Clean bobbin area thoroughly
- ✅ Oil moving parts (if required by your model)
- ✅ Check power cord for wear
- ✅ Replace needle after 8-10 hours of use
- ✅ Test tension on scrap fabric
Monthly Deep Cleaning
Comprehensive Care:
- ✅ Remove throat plate and clean feed dogs
- ✅ Deep clean bobbin case and hook area
- ✅ Check presser foot attachment
- ✅ Lubricate according to manual
- ✅ Test all stitch functions
Follow along with this professional maintenance routine to keep your sewing machine running smoothly for years.

Annual Professional Service
Even with good home maintenance, schedule professional service yearly. A technician can:
- Adjust timing and internal mechanisms
- Replace worn parts before they fail
- Update firmware (on computerized machines)
- Perform precision adjustments you can’t do at home
Stay on top of your machine’s care with our Interactive Maintenance Schedule Template. This customizable tracker helps you manage daily, weekly, monthly, and annual maintenance tasks to prevent problems before they start. Print your personalized schedule and keep it at your sewing station.
For detailed maintenance procedures, visit our sewing machine maintenance guide.
Do’s and Don’ts of Sewing
Essential Do’s
Do:
- Read your manual thoroughly
- Use quality thread and needles
- Test stitches on scraps before sewing your project
- Press seams as you go
- Keep your workspace organized
- Replace needles regularly
- Clean your machine frequently
Critical Don’ts
Don’t:
- Pull fabric through the machine
- Sew over pins (place them perpendicular to seam line)
- Use dull needles
- Mix thread weights in top and bobbin
- Force stuck fabric – stop and investigate
- Ignore unusual machine noises
- Skip regular maintenance
What Should You Never Sew Over?
Never sew directly over:
- Pins: Remove them before they reach the needle
- Thick seam intersections: Use a hump jumper or hand wheel
- Metal hardware: Zippers, buckles, or buttons
- Sticky substances: They gum up your machine
Perfecting Your Sewing Technique
How to Sew Perfectly
Perfect sewing comes from consistent technique:
- Prepare properly: Press fabric, cut accurately, mark clearly
- Use correct tools: Right needle, thread, and presser foot for the job
- Maintain consistent speed: Steady, moderate sewing pace
- Guide, don’t pull: Let the machine feed the fabric
- Check frequently: Stop and assess your work regularly
How to Make Sure Your Sewing is Straight
Achieving straight seams requires:
- Use seam guides: Built-in lines on your throat plate
- Mark your fabric: Use washable markers for guidelines
- Focus ahead: Look where you’re going, not at the needle
- Practice regularly: Straight stitching improves with repetition
For more detailed guidance, check our article on how to sew a straight stitch.
How to Sew Neat Seams
Professional-looking seams require attention to detail:
- Maintain consistent seam allowances: Use guides and measure regularly
- Press properly: Press seams open or to one side as pattern directs
- Trim and grade: Remove excess bulk from seam allowances
- Finish edges: Use serging, pinking, or zigzag to prevent fraying
Learn more about seam allowances in our seam allowance troubleshooting guide.
Thread and Tension Problems
Why is the Thread Not Going Through Fabric?
When thread won’t penetrate fabric:
- Check needle sharpness: Dull needles push rather than pierce
- Verify needle size: Too small for the fabric weight
- Examine fabric: Some treatments make fabric difficult to penetrate
- Adjust technique: Slow down and let the machine work
Why is My Thread So Loose When I Sew?
Loose stitches indicate tension problems:
- Increase upper tension gradually
- Check threading path – ensure thread sits in tension disks
- Verify bobbin installation – incorrect insertion affects tension
- Test with different thread – some threads require adjustment
What Tension Should My Sewing Machine Be On?
Most machines work well with tension between 3-5, but optimal settings depend on:
- Fabric weight: Heavier fabrics may need higher tension
- Thread type: Metallic and specialty threads often need adjustment
- Stitch type: Decorative stitches may require different settings
- Machine model: Check your manual for recommendations
Watch this detailed tutorial on how to properly adjust sewing machine tension for different fabrics and threads.

Why Won’t the Thread Stay in When I Sew?
Thread coming out of the needle happens when:
- Needle isn’t high enough: Use hand wheel to raise needle fully before threading
- Thread tail too short: Leave 4-6 inches when threading
- Needle eye damaged: Replace needle if eye is rough or enlarged
- Threading technique: Thread from front to back through needle eye
Feed Dogs and Fabric Movement
What are Feed Dogs on a Sewing Machine?
Feed dogs are the metal teeth under your needle that grip and move fabric forward. They work with the presser foot to control fabric feeding. Problems occur when:
- Feed dogs are lowered (check your settings)
- Lint clogs the teeth
- Presser foot pressure is incorrect
- Feed dogs are worn smooth
When Fabric Won’t Feed Properly
If fabric bunches or doesn’t move:
- Check feed dog position: Make sure they’re raised
- Clean thoroughly: Remove lint from feed dog area
- Adjust pressure: Increase pressure for light fabrics, decrease for heavy
- Verify presser foot: Wrong foot can cause feeding problems
Sewing Room Best Practices
What Not to Do in a Sewing Room
Avoid these common mistakes:
- Poor lighting: Inadequate light causes eye strain and mistakes
- Cluttered workspace: Disorganization leads to accidents and lost supplies
- Improper storage: Needles and pins left loose create safety hazards
- Ignoring ergonomics: Wrong chair height causes back and neck pain
- Skipping breaks: Fatigue leads to mistakes and injury
Is Sewing Good for the Brain?
Sewing provides numerous cognitive benefits:
- Improves focus and concentration
- Enhances problem-solving skills
- Reduces stress and anxiety
- Develops fine motor skills
- Boosts creativity and self-esteem
- Provides sense of accomplishment
Is Sewing a Talent or Skill?
Sewing is primarily a skill that improves with practice, though some people have natural aptitude. Like any craft, it requires:
- Patience to learn proper techniques
- Practice to develop muscle memory
- Attention to detail for quality results
- Problem-solving ability when issues arise
What is the Hardest Thing About Sewing?
The most challenging aspects of sewing include:
- Achieving consistent tension: Takes practice to master
- Working with difficult fabrics: Slippery or stretchy materials require special techniques
- Pattern matching: Stripes and plaids demand precision
- Fitting garments: Requires understanding of body measurements and alterations
- Troubleshooting problems: Diagnosing issues requires experience
The Most Important Rule of Sewing
The golden rule of sewing: Always test first. Whether it’s a new stitch, different fabric, or adjusted tension, always test on scraps before working on your actual project. This simple practice prevents costly mistakes and saves time.
Understanding Machine Stitches and Settings
What is the First Thing You Should Check if Your Machine is Not Sewing Properly?
Always start troubleshooting with these basics:
- Power and connections: Ensure machine is plugged in and turned on
- Threading: Check both upper and bobbin threading paths
- Needle condition: Look for bends, dullness, or improper installation
- Presser foot position: Must be lowered for proper tension
- Bobbin winder: Disengage if accidentally left engaged
Why is it Called Pinking?
“Pinking” refers to cutting fabric edges with pinking shears, creating a zigzag pattern that reduces fraying. The term comes from the flower “pink,” which has naturally serrated petal edges. Pinking is one method of finishing seam allowances.
For comprehensive information about different machine stitches, explore our sewing machine stitches guide.
When Mistakes Happen
When You Make a Mistake in Sewing, What is Essential?
When mistakes occur:
- Stop immediately: Don’t continue and make it worse
- Assess the situation: Determine if it’s fixable or needs undoing
- Use proper tools: Sharp seam ripper for careful removal
- Learn from it: Understand what caused the mistake
- Stay calm: Frustration leads to more mistakes
Does Sewing Have to Be Perfect?
Sewing doesn’t need to be perfect, especially when learning. Focus on:
- Consistent improvement over perfection
- Functional results that serve their purpose
- Personal satisfaction with your progress
- Learning from mistakes rather than avoiding them
Remember that even experienced sewers make mistakes. The difference is they know how to fix them quickly and move forward.
Downloadable Quick Reference
Emergency Troubleshooting Checklist
Print and keep at your sewing station:
When Your Machine Won’t Sew:
- ✅ Check power and turn on machine
- ✅ Lower presser foot
- ✅ Disengage bobbin winder
- ✅ Rethread completely
- ✅ Replace needle
- ✅ Clear any thread jams
When Stitches Look Wrong:
- ✅ Check needle size for fabric
- ✅ Verify thread quality and weight
- ✅ Adjust tension gradually
- ✅ Clean bobbin area
- ✅ Test on scraps
Daily Maintenance:
- ✅ Remove lint from needle area
- ✅ Check needle condition
- ✅ Dust machine exterior
- ✅ Store properly when finished
Conclusion
Mastering your sewing machine transforms frustrating experiences into enjoyable creative sessions. The key to success lies in understanding that most problems have simple solutions rooted in proper setup, maintenance, and technique.
Remember these essential takeaways:
- Prevention is Key: Regular maintenance, quality supplies, and proper technique prevent 90% of common problems. A few minutes of daily care saves hours of troubleshooting later.
- Start with Basics: When problems arise, always check the fundamentals first – threading, needle condition, and tension settings. Most issues stem from these basic elements.
- Invest in Quality: Good thread, appropriate needles, and regular maintenance are far less expensive than frequent repair bills. Quality tools make quality results easier to achieve.
- Practice Patience: Sewing skills develop over time. Each problem you solve builds your troubleshooting abilities and makes future issues easier to handle.
- Know Your Limits: While many problems are DIY-fixable, recognize when professional help is needed. Attempting repairs beyond your skill level can cause expensive damage.
- Keep Learning: Stay curious about your machine’s capabilities. Understanding how it works makes you a better troubleshooter and more confident sewer.
- Build Good Habits: Consistent setup routines, regular cleaning, and proper storage become second nature with practice. These habits prevent most common problems before they start.
The best sewers aren’t those who never encounter problems – they’re the ones who can quickly identify and fix issues without losing momentum. With the knowledge from this guide, you’re well-equipped to handle whatever challenges your sewing machine throws your way.
Whether you’re hemming a pair of pants or creating a complex garment, remember that every expert was once a beginner. Each problem solved, each technique mastered, and each successful project completed builds your confidence and skills.
Take Action with Our Free Sewing Tools: Put this knowledge into practice with our comprehensive sewing machine resources. Access our Troubleshooting Checklist for quick problem-solving, use the Needle-Fabric Chart to match materials perfectly, and download our Maintenance Schedule to keep your machine in peak condition. These interactive tools transform the advice in this guide into actionable, everyday solutions.
Your sewing machine is a powerful creative tool waiting to help you bring your ideas to life. With proper care, understanding, and the troubleshooting knowledge you now possess, you’re ready to tackle any project with confidence. Happy sewing!